For those of us living where there are four distinct seasons, summer is the period of long, warmer days where the skies, fields, lakes and mountains are alive with the busy activities of plants and animals at the peak of their growing year. Most of the animals that have hatched or been born earlier this year will be beginning to fend for themselves, while many plant species will be coming to the end of their flowering period and preparing to produce seed in an effort to ensure their survival and proliferation.
The combination of warmer weather and longer daylight hours makes this the perfect time to get out and about and experience the beauty and complexity of the natural world.
This is the second in our seasonal phenology series where you can explore a carefully chosen collection of ID blogs, books, equipment and events, all designed to help you make the most of a summer outside. Check out our spring blog and don’t forget to look out for our autumn blog in September.
Identification guides:
What you might see:
• Hedgerows and verges are still home to lots of flowering plants, although the frothy drifts of cow parsley are now coming to an end. Honeysuckle can be seen blooming from June, providing a night-time food source for moths such as the Elephant Hawkmoth (Deilephila elpenor).
• Bee orchids (Ophrys apifera) will flower briefly in June and July on dry, chalk and limestone grasslands, while sea cliffs will be adorned with the delicate blush of sea thrift (Armeria maritima) from April to October.
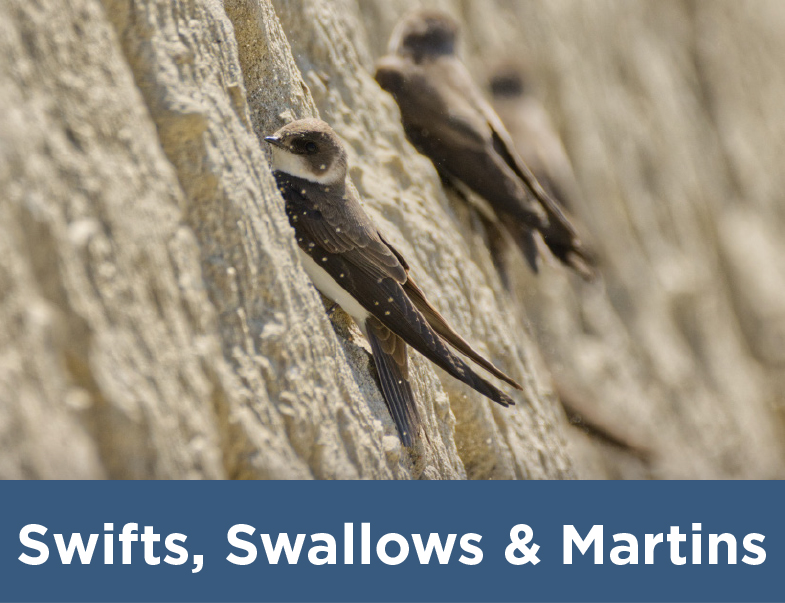
• Auks, such as Razorbills (Alca torda), Guillemot (Uria aalge), Puffins (Fratercula arctica) and Fulmar (Fulmarus glacialis), come to their cliff nests in spring to lay their eggs. They can still be seen (and heard!) throughout the summer as they make frequent trips out to sea to catch food for their young. Further inland, summer visitors such as Redstart (Phoenicurus phoenicurus), Wood Warblers (Phylloscopus sibilatrix) and Pied Flycatchers (Ficedula hypoleuca) are wonderful to catch a glimpse of.
• June to August is an important time for ladybirds. During this period, mated females will lay their eggs which then hatch into larvae and form pupae through a series of four stages, or ‘instars’. Adult ladybirds emerge from the pupae in August.
• Wasps, bumblebees, honeybees and butterflies are all active in the summer and will feed as much as possible while the weather is fine. Small Tortoiseshell (Aglais urticae) and Red Admiral (Vanessa atalanta) butterflies can both be frequently seen around nettles where they like to lay their eggs.
• Frogs and toads spend their days keeping cool in damp and shady areas and are often found in overgrown areas of the garden during the summer. This year’s froglets and toadlets will remain in the water until late summer.
• The summer months are a great time to spot bats hunting for insects during the dusk and dawn hours. Female bats give birth to their young in June and within three weeks these juveniles will be learning to fly themselves. By August the youngsters will no longer need their mother’s milk and will be hunting for their own food.
Field Guide to the Moths of Great Britain and Ireland
This beautifully illustrated and comprehensive field guide shows moths in their natural resting postures. It also includes paintings of different forms, underwings and other details to help with identification.
Britain’s Reptiles and Amphibians: A Guide to the Reptiles and Amphibians of Great Britain, Ireland and the Channel Islands
This detailed guide to the reptiles and amphibians of Britain, Ireland and the Channel Isles is designed to help anyone identify a lizard, snake, turtle, tortoise, terrapin, frog, toad or newt with confidence.
The Wild Flower Key: How to Identify Wild Flowers, Trees and Shrubs in Britain and Ireland
This essential wild flower guide is packed with identification tips and high-quality illustrations, as well as innovative features designed to assist beginners. The text aims to be as useful as possible for those working in conservation and includes a compilation of the latest research on ancient woodland indicator plants.
NHBS Moth Trap
A lightweight and highly portable trap, tested and approved by Butterfly Conservation. This mains-powered trap runs a single 20W blacklight bulb (included) and comes supplied with a 4.5m power lead with UK plug.
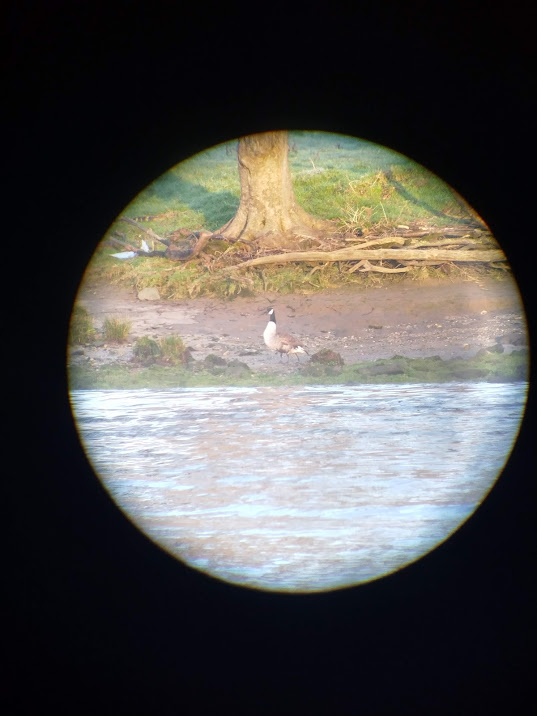
Kite Ursus Binoculars
These affordable binoculars have been designed for everyday use and have a robust housing, great field of view and produce a bright, colour-balanced image.
Magenta Bat 5 Bat Detector
A handheld super-heterodyne bat detector with an illuminated easy-to-read LCD frequency display. This fantastic entry-level detector converts ultrasonic bat calls into a sound that is audible to humans, allowing you to listen to and identify the bats flying around you.
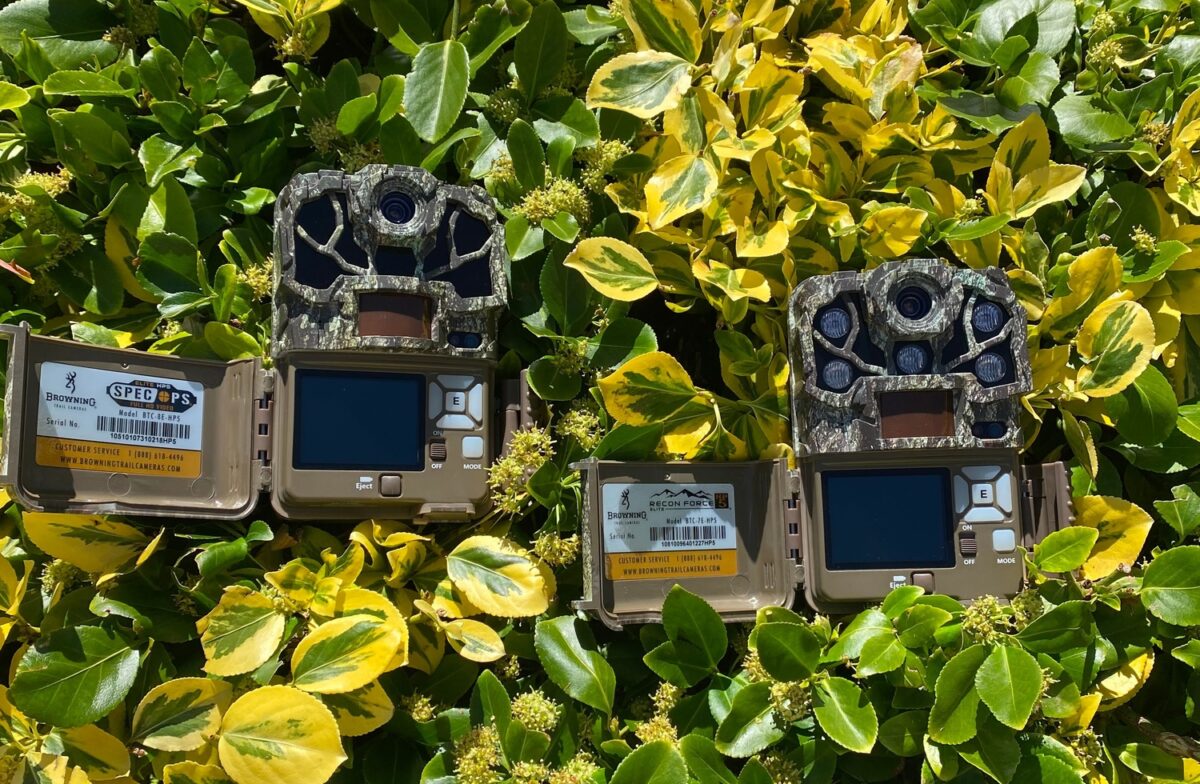
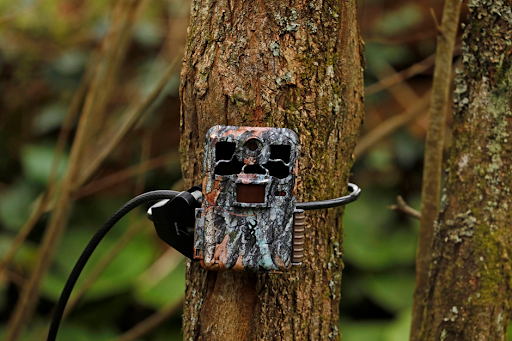
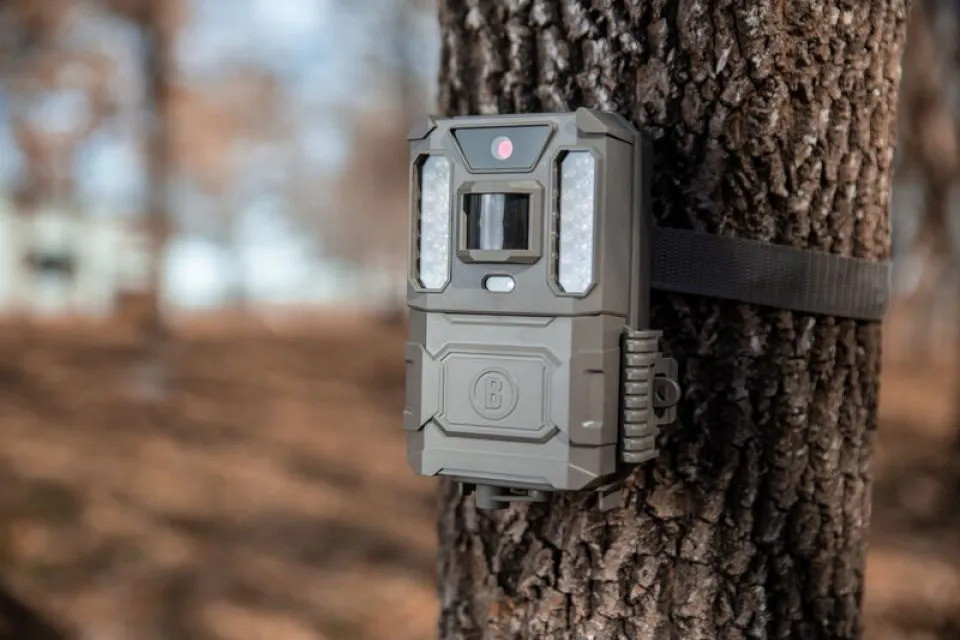
The Browning Spec Ops Elite HP5 and Recon Force Elite HP5 are the 2022 additions to Browning’s highly regarded Spec Ops and Recon Force series, featuring Browning’s Radiant 5 illumination technology. We tested these cameras by setting them up in various habitats across Devon and Sweden over several days and nights in May.
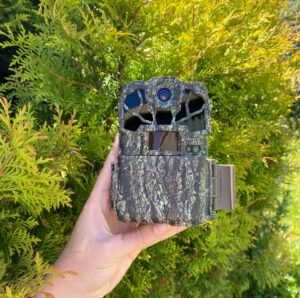
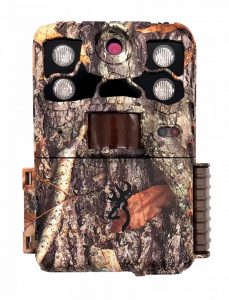
Browning Recon Force Elite HP5
Both trail cameras take 24MP images and record in Full HD (1920 x 1080p), with an adjustable trigger speed of between 0.1 and 0.7 seconds, and a recovery time of 0.5 seconds between images. The footage is recorded in colour during the day, and in black and white during the night or in low-light conditions using the infrared LEDs. As with most high-spec Browning trail cameras, the 5cm colour screen helps when positioning the camera, as you can view the area that will be captured in images and videos, and watch footage from the SD card live in the field without the use of an additional device.
Browning Spec Ops Elite HP5
The display menu is simple to use and the settings are easy to navigate through, enabling you to alter the settings depending on the needs of different target species. The programmable stop/start timer allows you to designate a window of time when the camera will trigger and target the activity periods to match certain species. The adjustable infrared flash can be set to automatically adjust for perfect nighttime photos or be set to Fast Motion (for fast target species), Long Range (open areas or longer focal distance) or Economy (wooded areas or close-up footage) modes in order to provide the best results for the chosen habitat and target species. The smart IR video feature allows daytime footage to continue recording for as long as movement is detected (up to 5 minutes).
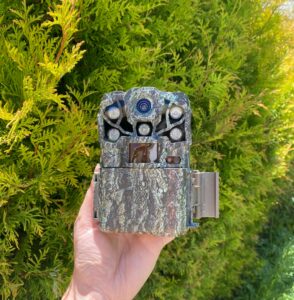
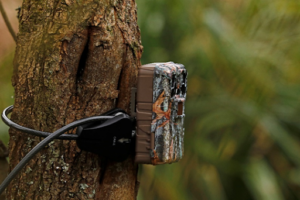
Both trail cameras have a camouflaged case to avoid detection in the field, but the no-glow feature of the Browning Spec Ops Elit HP5 offers further security and is less likely to be spotted in public spaces.
Setting up
The camera is easy to set up with the provided strap but we would recommend securing it with a Python cable lock if you are using either camera in a public area. The cameras were set up in various locations across Devon (videos) and Sweden (images) to record wildlife in a variety of habitats, including an urban garden.
We also performed a capture distance test of 10m, 20m and 30m (please see our video below).
What we found
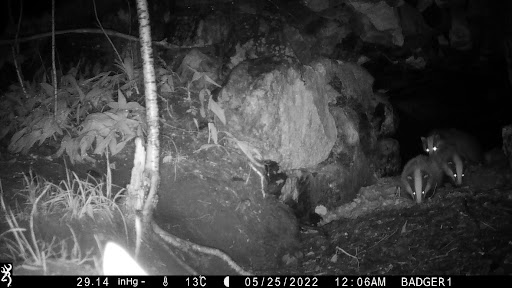
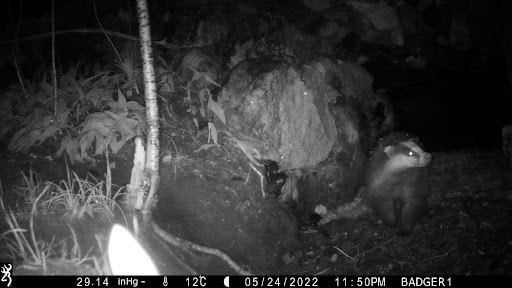
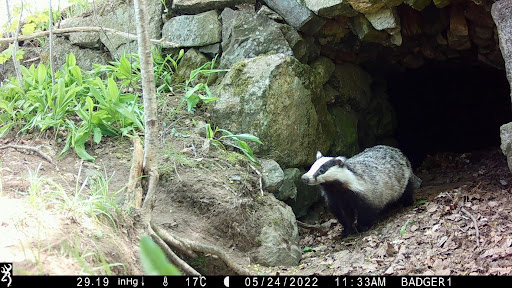
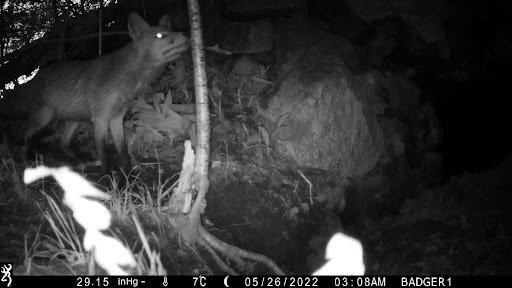
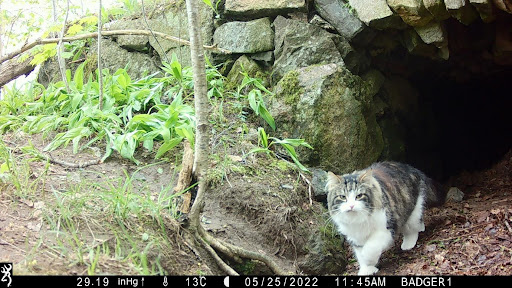
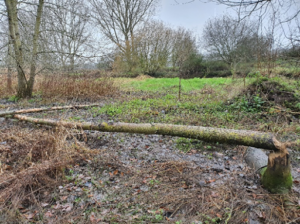
The cameras have very good sensors and performed well at a distance of 30m. They are able to detect species of different sizes, from small wrens to larger sparrowhawks in flight. The cameras were triggered by moving leaves and branches, but were also able to pick up less noticeable movement such as rabbits in low light conditions (as seen in the videos). We did find that if you have the camera set up on a tree that has lower hanging branches in view, the branches can prevent the camera from triggering until the target is closer to the camera. We also found that placing the camera too low attracted the attention of nosy badgers, but by placing the camera slightly higher off the ground (around knee height is recommended), we managed to get wonderful images of a badger family (see images below).
The footage and images taken during the day and night were all crisp, and we found that the camera’s field of view is higher than some other trail camera models. This meant that even with the camera placed on the floor, there was no burnout due to the flash oversaturating images of the ground during night time captures.
The trigger speeds for both cameras are very fast and are an improvement from the earlier Spec Ops and Recon Force models from Browning, ensuring that movement in front of the camera was not missed.
If you are looking for a good, top-end camera with excellent image quality, we would highly recommend either camera, choosing the no-glow Browning Spec Ops Elite HP5 if extra security is needed when deploying the camera in areas accessible to the public.
If you would like help with tips and troubleshooting with trail cameras, please check out our other blogs here.
The Browning Spec Ops Elite HP5 can be found here and the Recon Force Elite HP5 can be found here. Our full range of trail cameras can be found here.
If you have any questions about our range or would like some advice on the right product for you then please contact us via email at customer.services@nhbs.com or phone on 01803 865913.
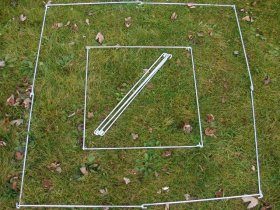
A quadrat is a square frame, usually constructed from wire or plastic-coated wire, although they can be made from any sturdy material. Most commonly they measure 50cm x 50cm (i.e. 0.25m2), and may have further internal divisions to create either 25 squares each measuring 10cm x 10cm or 100 squares measuring 5cm x 5cm. Some frames are also collapsible which allows you to connect several pieces together to create larger sample areas.
What are quadrats used for?
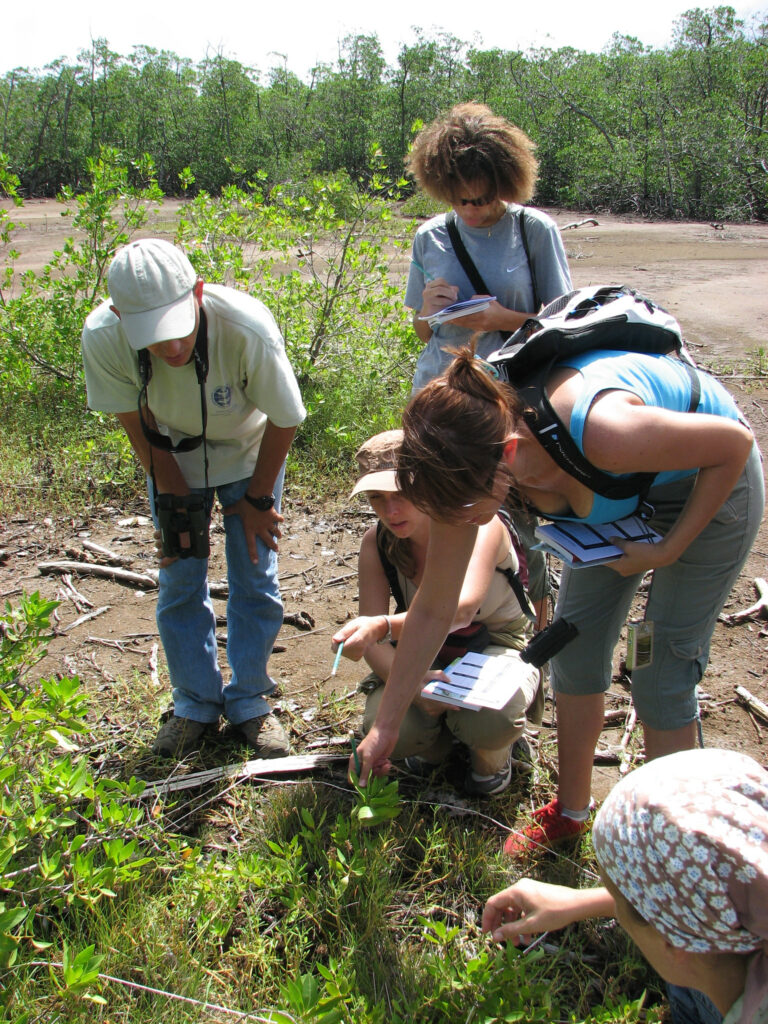
Quadrats are used to survey plants or slow-moving/sedentary animals. They can be used either on land or underwater to gain an estimate of:
total number of an individual (or several) species.
species richness/diversity – the number of different species present in an area.
plant frequency/frequency index – the uniformity of a plant’s distribution within a surveyed area (not a measure of abundance).
percentage cover – useful in situations where it is difficult to identify and count individual plants, such as grasses or mosses.
By deploying several quadrats it is possible to compare any of these factors either spatially (for example in locations with different light or pH levels) or over time, such as at different points throughout the year.
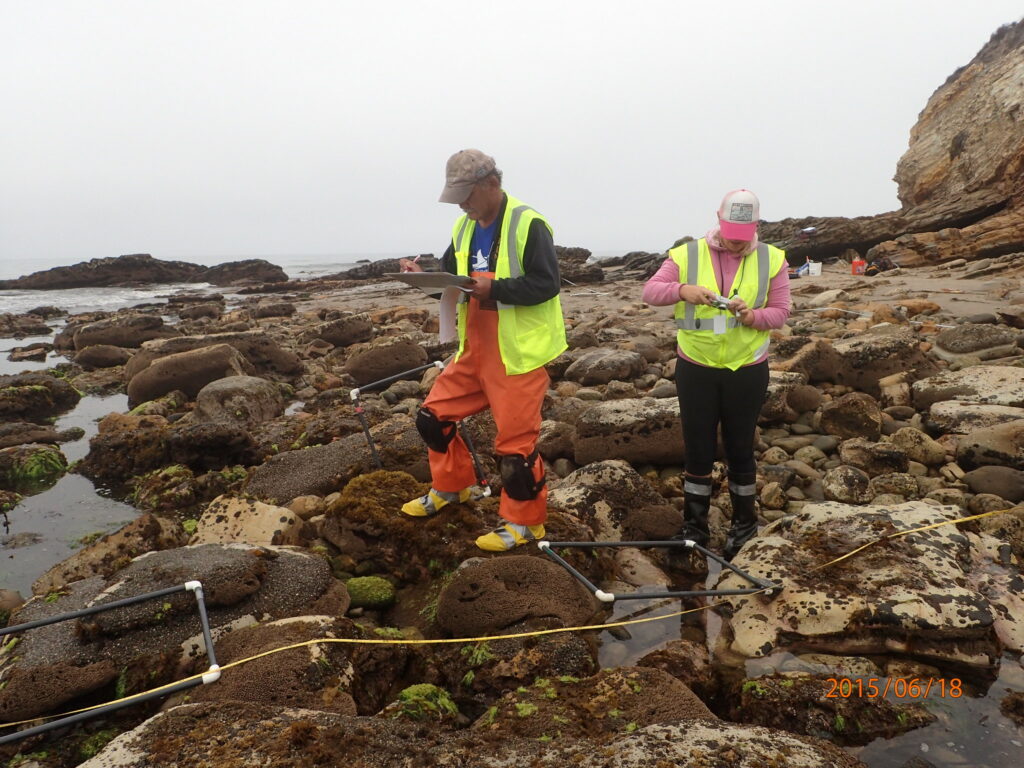
Quadrats being used along an intertidal transect to study rocky shore ecology (b)
How to use a quadrat
Most surveys require that quadrats are placed randomly within the survey site. One way to ensure that placements are truly random is to divide your survey area into quadrat-sized spaces and then use a random number generator to choose x and y coordinates. The quadrat can then be placed in the appropriate position. The number of samples you require will depend largely on the size of your survey site and the amount of time/manpower you have available. A minimum of ten samples should ideally be used.
In some situations, more specific placement of the quadrats is required. For example, when studying the changes in species presence/abundance on a shoreline, you may wish to take samples at regular intervals along a transect up the beach.
Creating a species list
One of the simplest ways of using a quadrat is to create a species list. To do this, the quadrat is placed randomly several times within the target area and the plants present within them are recorded. This will not provide any information on abundance or distribution, but will be a useful guide as to the species that are present at the time of sampling.
Estimating the total number of a species
For plants or animals that are easy to count, it is possible to estimate their total numbers for your survey area. To do this, simply count the number present in a series of quadrat samples then divide the total by the number of samples to get an average count per quadrat. If you know the dimensions of your entire survey site you can then multiply this up to get an estimate of the total number of a species present.
Estimating plant frequency/frequency index
To calculate plant frequency or frequency index, you simply need to note down whether the target species is present or absent within each quadrat sampled. The number of quadrats in which the species was present should be divided by the total number of samples taken and then multiplied by 100 to get the frequency as a percentage. For example, in a survey where 10 samples were taken, dandelions were found in 6 of these. This would give a frequency index of (6/10) x 100 = 60%.
Estimating percentage cover
For species in which it is difficult to count individual plants (e.g. grasses and mosses) it is easier to estimate percentage cover. For this purpose a quadrat with internal divisions is recommended – one with 100 5cm x 5cm squares is particularly useful. Results from several quadrats can then be averaged and scaled up to get an estimate for the entire survey area.
Important things to remember
Quadrat with 25 10cm x 10cm divisions
• The number of samples you take (i.e. the number of times you deploy your quadrat during your survey) will affect the reliability of your results. Sample sizes which are too small are much more likely to be affected by anomalous counts (e.g. localised clusters of individual species). On the other hand, planning for too many samples can create an impractical workload.
• Bear in mind that there will always be observer bias. By their nature, flowering plants are easy to overestimate and low-growing species are more likely to be missed.
• Take care to make sure that your quadrats are randomly placed if your survey design requires this. It is easy to subconsciously place them where there are large numbers of flowers or easy to count species. Using a coordinate-based system will solve this problem.
Quadrats available from NHBS
At NHBS we sell a selection of high-quality quadrats, designed to be strong, long-lasting and durable.
Q1 Quadrat
Made from heavy gauge steel wire with zinc plating, the Q1 Quadrat measures 0.5m x 0.5m and has no divisions.
Q2 Quadrat
The Q2 Quadrat is made from heavy gauge steel wire with a plastic protective coating. The 0.5m x 0.5m frame is subdivided into 25 squares for sampling dense vegetation or species-poor habitats.
Q3 Quadrat
The Q3 Quadrat is made from heavy gauge steel wire with plastic coating. The 0.5m x 0.5m frame is subdivided into 100 squares for calculating percentage cover or making presence/absence recordings.
Q4 Quadrat
The Q4 Quadrat is a strong collapsible quadrat made from four pieces of heavy gauge steel wire with zinc plating. A single Q4 frame will make a 0.5m x 0.5m open frame without divisions, suitable for general vegetation surveys. Additional units can be used together to make a variety of quadrats, e.g.. 1m x 1m or 1m x 0.5m. Being collapsible means it is also ideal for travel.
Photo credits:
(a) U.S. Fish and Wildlife Service Headquarters via Flickr (CC BY 2.0)
(b) USFWS Pacific Southwest Region via Flickr (CC BY 2.0)
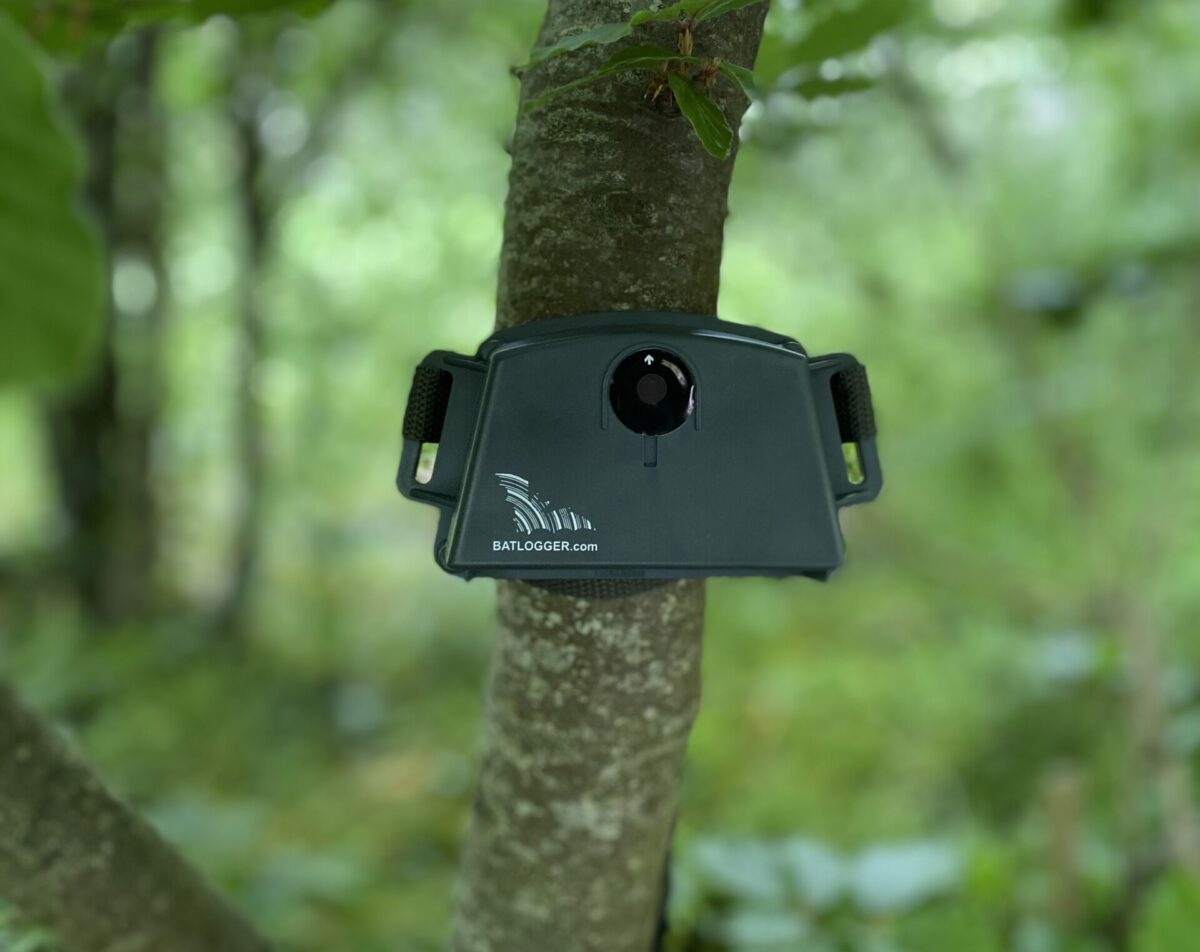
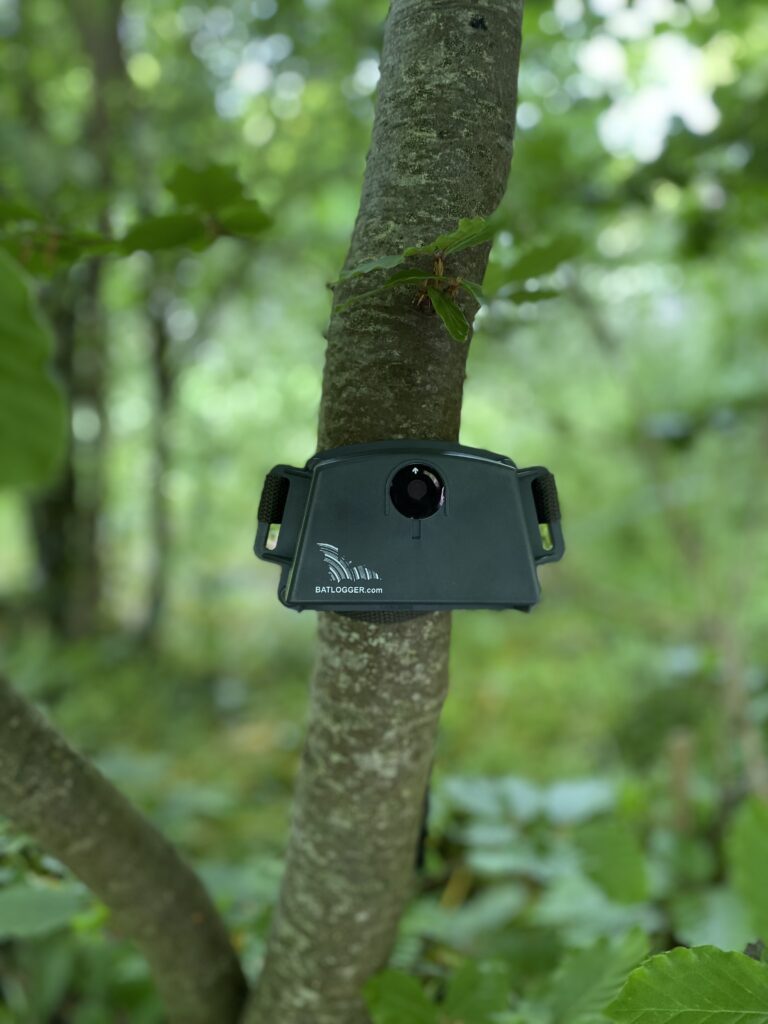
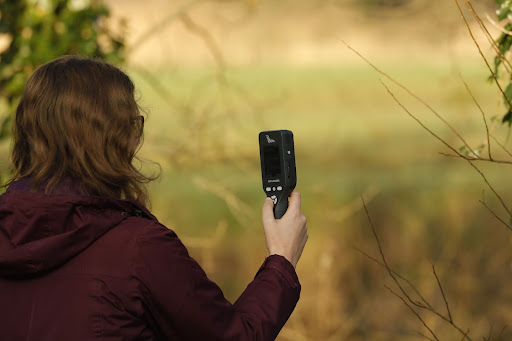
The Batlogger S2 is a compact passive recorder manufactured by Elekon. This all-in-one static bat detector and ultrasonic recorder is designed to be left unattended in the field over several nights to survey and monitor bats. The S2 is operated solely via Bluetooth and the BATLOGGER Control App (available on iOS and Android). It is small, weighing only 138g and measuring 132 x 72 x 35mm, but despite its size, the S2 is robust. It is waterproof and replacement microphones are also available, handy if the original microphone becomes damaged or loses sensitivity.
Elekon has designed the S2 to be easy to use and lightweight, and built to withstand fieldwork conditions. We took the opportunity on a warm evening in mid-May to test the S2’s ability.
How we tested
The S2 was set up in a hedgerow in South Devon, close to a small known roosting site.
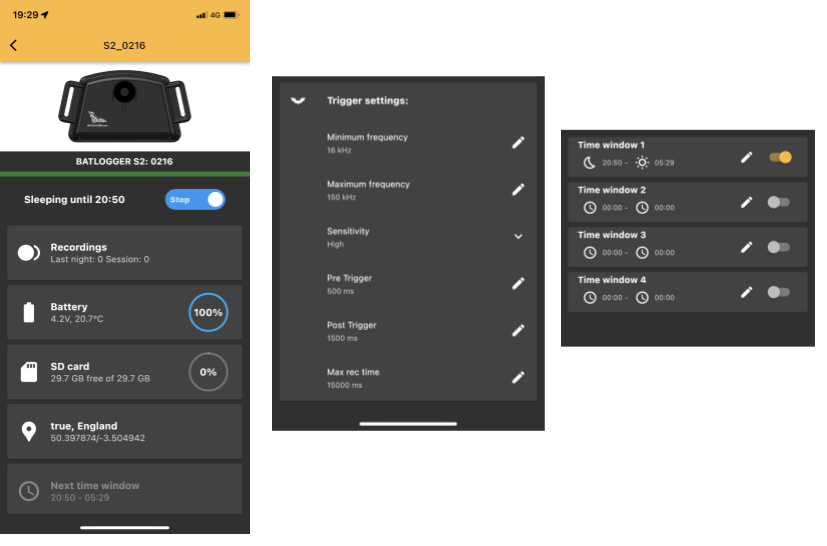
We connected the S2 to the BATLOGGER Control App on an iPhone via Bluetooth. Once connected, the S2 determines the dusk and dawn times using the GPS location from the phone/tablet, and suggests these as automatic trigger times. We selected this automatic time window, but, you can choose and customise your own and set multiple time windows as needed.
The S2 is full spectrum with a range of 10-150kHz and a sample rate of 312.5 kHz. The default sensitivity is balanced, and we adjusted the sensitivity to ‘high’ using the App. This may lead to several unwanted calls in busier environments; however, it also ensures that it is triggered by most types of bat call, including social calls, which can sometimes be missed.
Once collected from the field after one night of deployment, the recordings were downloaded from the S2 to a computer using the USB-C to USB-C cable (if you do not have a USB-C port, you’ll need an adaptor). Helpfully, the S2 is charged using the same USB-C cable – a single charge provides 100 hours of power!
The recordings are stored on an internal microSD card, and the S2 generates two file types: an audio file (.wav) and a recording information file (.xml). The audio files allow you to listen to your recordings through bat call analysis software and the information files store important metadata such as date, location, recording time, and device settings.
What we found
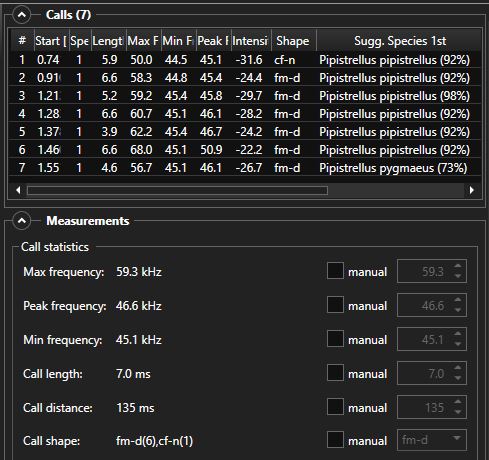
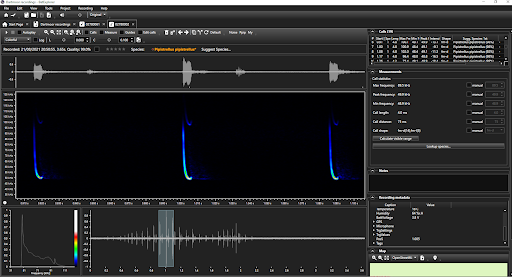
The BATLOGGER Control App shows you the number of sessions recorded – the high sensitivity triggered 192 audio files over one night. We used the BatExplorer software to manage and view the S2 recordings. The software has key features such as automatic bat call detection, making sorting files very easy, and it also provides suggestions for species identification.
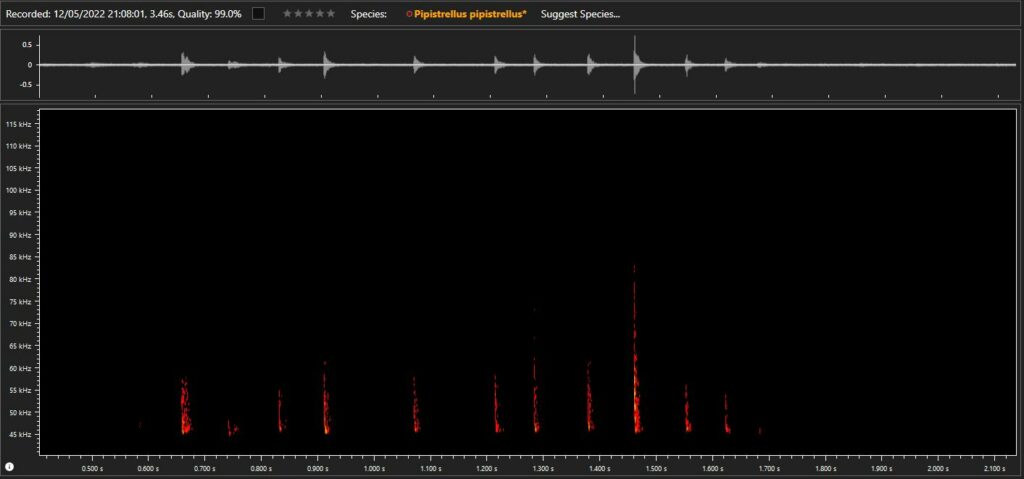
Of the 192 audio files, 40 of these identified the common pipistrelle (Pipistrellus pipistrellus). The default S2 sensitivity is ‘balanced’, this may have led to a smaller number of unwanted files (which recorded sounds other than bats). But we did not want to miss a bat call and the BatExplorer software allows you to quickly filter the unwanted files.
The echolocation frequency for common pipistrelles is approximately 45kHz, and the below images show an example of the spectrogram and call measures from a common pipistrelle recording taken at dusk and the information popout that BatExplorer produces, detailing the automatic analysis that the software carries out.
Below is an audio clip with its accompanying spectrogram of a common pipistrelle taken at dusk. The BatExplorer software allows you to customise the playback and how the spectrogram can be viewed.
Our opinion
The physical design and key features of the S2 makes surveying bats a simple task.
The S2 truly is discrete and lightweight, making it easy to set up in the field, and once deployed the battery life will allow up to 10 (10 hour) consecutive nights of surveying.
The setup through the BATLOGGER Control App is straightforward. The S2 conveniently uses the GPS location on your phone/tablet to determine dusk and dawn which benefits the accuracy of the recording schedules. You can choose your settings at a click of a button, and the instruction manual is clear and accessible for any help needed.
The only limitation we found is that you cannot access the recordings straight from the App. However, transferring the files across to your computer allows you to listen to and analyse the audio files with ease. The BatExplorer software (available on a 30-day free trial) enhances analysis as it allows you to review, manage, and organise your recordings.
The S2 is an impressive bat detector, and it is an ideal choice for professionals and ecological surveyors.
The Elekon Batlogger S2 can be found here. Our full range of passive full spectrum bat detectors can be found here.
If you have any questions about our range or would like some advice on the right product for you then please contact us via email at customer.services@nhbs.com or phone on 01803 865913.
Whether you enjoy watching and learning about the wildlife that visits your garden, capturing footage of secretive wildlife on a holiday, or undertaking research on a rare species, there is no substitute for investing in a trail camera.
Browning Spec Ops Elite HP4
How and where you set up your trail camera has a significant impact on how successful your results will be. In this blog, we cover some key tips on how to best position your camera, choosing the ideal location, and which settings to use in different circumstances. If you are experiencing issues with your camera, check out part one of this series where we discuss the initial steps we advise you to take to help resolve or identify the problem.
Camera Settings
As a rule, it’s always best to become familiar with your camera and its different settings and capabilities by testing it at home before using it out in the field. Familiarising yourself particularly with the detection range, detection angle, the focal distance and the IR flash distance is the best way to help you gauge how far to place the camera from where you hope to see wildlife.
On most modern trail cameras there is the option to adjust the passive infrared sensors (PIR) which, along with motion detection, causes the camera to trigger. For most circumstances, having the sensor sensitivity set to high and the motion detection set to long-range will be the best option to avoid any disappointment from captures of only part of an animal, or missing something altogether.
Browning Spec Ops Elite HP4
If you are focusing on birds or fast-moving mammals, such as mustelids or rodents, then the highest sensitivity setting and the fastest trigger speed (if adjustable), is very important. For larger and often slow-moving mammals, such as deer and ungulates, sometimes a slower trigger speed and reduced sensitivity can be better as the camera will then only trigger once the animal is more centrally positioned in the detection zone.
Some species have quite insulated bodies (hedgehogs for instance, due to their spikes), creating more of a challenge for the camera’s sensors, so again the highest sensor setting would be best for such species.
With high sensor sensitivity comes the increased chance of false triggers as well as high battery and memory usage, which can be exacerbated in windy conditions as moving trees, grass and falling leaves can all trigger the sensors. It is therefore worth choosing locations for your camera with minimal, light vegetation to avoid potential false triggers.
With many trail cameras, there is now the option to set the camera to only trigger during certain times of day. This is particularly helpful if you are targeting certain wildlife that you know to be strictly nocturnal or diurnal. In most other situations though, we would recommend keeping the camera set to trigger on 24 hours, so you don’t miss anything unexpected.
Location
When choosing where to leave your camera, the first consideration will be around security, and ideally, you want to ensure that the location chosen is not visible to the public.
Then, there are two main factors to consider when deciding on a specific location. Firstly, is there a particular species you have in mind, or do you wish to survey or monitor the general wildlife of a site.
Image by Ian Watson-Loyd
If you hope to capture a particular species, then consider its habits and where it is most likely to be spending time within the landscape.
Many mammals have large home ranges but also have routines they regularly follow, even if that means only passing through a certain spot very infrequently, so some patience is usually necessary.
To increase your chances, think about how that species might move through the habitat and which areas they will be most drawn to, for example where there are reliable food resources, sources of water, good resting and denning sites, and existing pathways through vegetation.
It is also worth looking for any evidence that the target species is already present, such as tracks, droppings or feeding signs. These signs may reveal an animal’s movements and highlight an area they are currently frequenting where the camera could be left.
If you are investigating what species are present on a site, focusing on areas with high levels of activity is key. Most mammals will leave signs of their presence in prominent areas that tend to be used by other species too. The scent of one species will often attract the attention of another, particularly if it is a competitor.
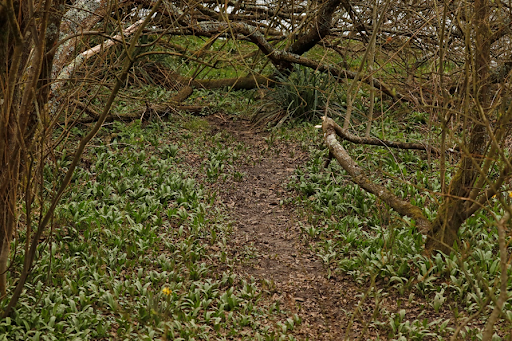
Many terrestrial mammals move through the landscape in a similar way to people; they will often follow linear features and use paths of least resistance to avoid travelling through very dense undergrowth or steep terrain. In forests, most mammals also prefer to use trails and pathways already made by other species or people. This helps to avoid constantly brushing through vegetation, particularly after recent rainfall, when the understory foliage will be wet.
Image by Ian Watson-Loyd
Natural woodland clearings and rides, habitat edges and watercourses are all key areas to focus on, particularly for larger mammals. For smaller species that prefer to keep close to cover, consider old walls, hedges, boulder fields and scree, and fallen trees.
Within these habitats, it is worth looking out for particularly prominent features to set your camera up. Features to look for include natural bridges over water, shallow spots for drinking and bathing, or a conspicuous large tree or boulder that carnivores might use for leaving their scent or droppings when marking their territory.
Therefore, if you find a location with lots of activity, it can be worthwhile continuing to monitor it for a long period, as some species with large territories, such as apex predators and some mesopredators (medium-sized), may only pass by very occasionally.
It can sometimes be a challenge to find something suitable to attach your camera to once you have found a suitable location. APython Mini Cable Lock is the best all-rounder for both security and flexibility when attaching the camera to a tree, post or even rocks. However, there are times when a tripod or tree bracket can be more suitable. Sometimes adding a wedge of wood between the camera and a branch can be a good solution to ensuring the camera is angled straight if all the suitable trees and branches around are tilted.
Lastly, it is best to try to conceal your scent as much as possible during the deployment of your trail camera, as too much human smell could deter some wildlife from the area, so give the camera a clean before and during deployment and consider wearing gloves as you set it up.
Positioning
It is best to avoid facing your camera directly east or west, as this can overexpose images as the sun rises and sets. Sometimes extreme brightness can also cause false triggers as the light and shadows move.
Most trail cameras will have a standard focal distance of around 1.5 to 2 metres, so it is important to allow this much distance between the camera and the area you hope to record activity. For small mammals, a close focus lens can be attached over the front of the camera lens to allow you to take sharp images at a closer range. This works best if you are specifically targeting small mammals such as rodents or shrews within an enclosed space, for example a hole in a wall, log pile or small clearing in dense vegetation where all the activity will be at close range.
Also consider how far away an animal might pass the camera too, particularly when thinking about nocturnal activity and the distance the flash comfortably covers. Although many cameras have impressive detection and flash ranges, the resulting images and videos can still be frustrating if the animal passing is too far away to identify. Factors such as a dense overhead forest canopy, moonlight and cloud cover can also all impact a flash’s results. Ideally, opt for a position where animals will most likely pass around 3–10 metres away.
The detection angle of most trail cameras is around 45° degrees, so it is best that the spot you think most activity will occur should be central within your cameras’ field of view.
It is important to also angle the camera at the correct height for your intended wildlife. If the camera is angled too high or too low, it will miss some species or result in unsatisfactory images of only part of an animal.
A good guideline for many situations is to angle your camera at around adult human knee height to capture small to medium-sized animals at their height rather than looking down on them. Sometimes trail cameras do need to be positioned higher in various circumstances, but try to avoid human head height as this will draw more attention to the camera.
Most high-quality trail cameras now have large screens that allow you to check in real-time what the camera can see as you position it. This is an invaluable tool to ensure your positioning, distance, height and view are just right.
Aquatic Wildlife
Image by Ian Watson-Loyd
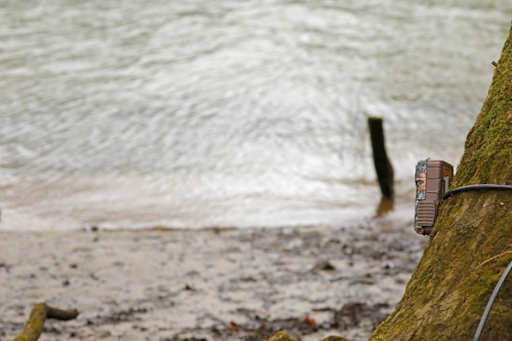
For species that use watercourses, successful camera trapping can be even more challenging. One of the considerations is how to safely and securely position a camera close to or above water. Generally, the best option to avoid any risk to the camera and potential false triggers is to focus on prominent banks, sandbars, culverts, beaches or shallow water edges. With these locations it should be easier to position the camera at a safe distance back from the water while overlooking a spot where aquatic mammals and birds are also more likely to investigate, feed, drink or leave their scent or droppings.
With rivers particularly, it is important to ensure the camera is a little higher off the ground in case of unexpected water level rises, and so sometimes a downward-facing angle is more suitable. For otters, large rocks or fallen trees can be popular spots for scent marking, while a small clearing or mound within dense vegetation or reeds is often favoured by water voles. For beavers, an exposed bank and beach close to a favoured food source is often a good option.
Image by Ian Watson-Loyd
Summary
When thinking about setting up your trail camera, for best results we recommend taking the following into consideration:
The target species, their behaviour and habitat usage
Settings to reflect the above (and testing at home before deploying in the field)
The angle of the camera, taking into account flora, angles of the sun and where the animals are likely to be within the camera’s viewing area
Aiming for your focal species to pass the camera at a distance of 3-10m
Generally positioning the camera at human knee height works well
If you have any questions about our range or would like some advice on the use of your trail camera, please feel free to get in touch with our Wildlife Equipment Specialist team via email at customer.services@nhbs.com.
As spring starts getting into swing, it’s time to begin looking forward to the summer birding season. With the gradual relaxation of international travel rules and things seeming to get safer, many of us are considering birding trips for the first time in years. Whether the venue be the sea cliffs of Anglesey, the wide mud flats of Essex and Suffolk or the dramatic heights of the Pyrenees, having the right kit for the job is at the forefront of every birder’s mind.
Kowa Optics holds an interesting place among birding brands. In the UK, at least, they have seemingly not had the name recognition of other big-brand, high-end optics suppliers until recently, and yet their reputation among serious hobbyists is largely unrivalled. Uniquely, Kowa have pioneered the construction of spotting scope lenses from pure fluorite crystal, a hard-to-work-with material that is peerless in its light dispersing properties. Though this technology comes with a hefty additional price tag, the quality of image that it produces has made waves across the birding sphere.
In addition to their high-end, pure fluorite optics, Kowa offers a range of more entry level equipment for those looking to acquire a quality scope or pair of binoculars at a competitive price. Among their more popular offerings are two compact spotting scopes – the entry level multi-coated TSN-500 series and the high-end, pure fluorite crystal TSN-550 series. The TSN-500 20x-40x range is a veteran of the birding market, having been around in one form or another for years now, but are updated fairly regularly in keeping with new technological advances. Compact, robust, and with a great reputation, they have a strong appeal for travelling birders and outdoor sportspeople. We were thrilled to get our hands on the Kowa TSN-501 – the angled model in the range – to see how it performs.
First Impressions
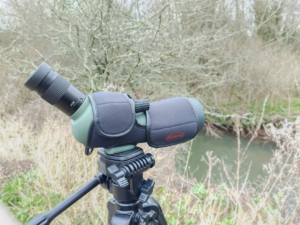
When the box is opened, the first thing you notice about the TSN-501 is how truly compact it is. Somehow, promotional images just don’t do it justice. At less than 25cm long and weighing in at just 400g, portability certainly won’t be an issue. There was much oohing in the NHBS office when it was unboxed.
The plastic casing is good quality and feels pleasant in the hand. The neoprene cover that can be purchased separately is well worth it too, providing that little bit of extra protection that will allow you to carry the TSN-501 around with confidence.
The lens caps are secure, though they don’t have the provision to be attached to the body when not in place. The focus wheel is placed comfortably so that the user can turn it while steadying the scope with their palm. It’s beautifully smooth, with no discernible kickback and minimal resistance. The image can be magnified between 20x and 40x by rotating the eyepiece – this was quite stiff on the model tested, but while this could be frustrating it does ensure that the zoom doesn’t shift during use. There are no click-stops, as is fairly usual among spotting scopes, but two white markers indicate when the magnification is at 25x and 35x respectively.
The extendable eyecup is made from softer rubber and is comfortable on the eye. It is also fine enough that it is possible to use a phone or similar device to take photographs through the lens at a pinch. This can be made easier with Kowa’s extensive range of digiscoping accessories.
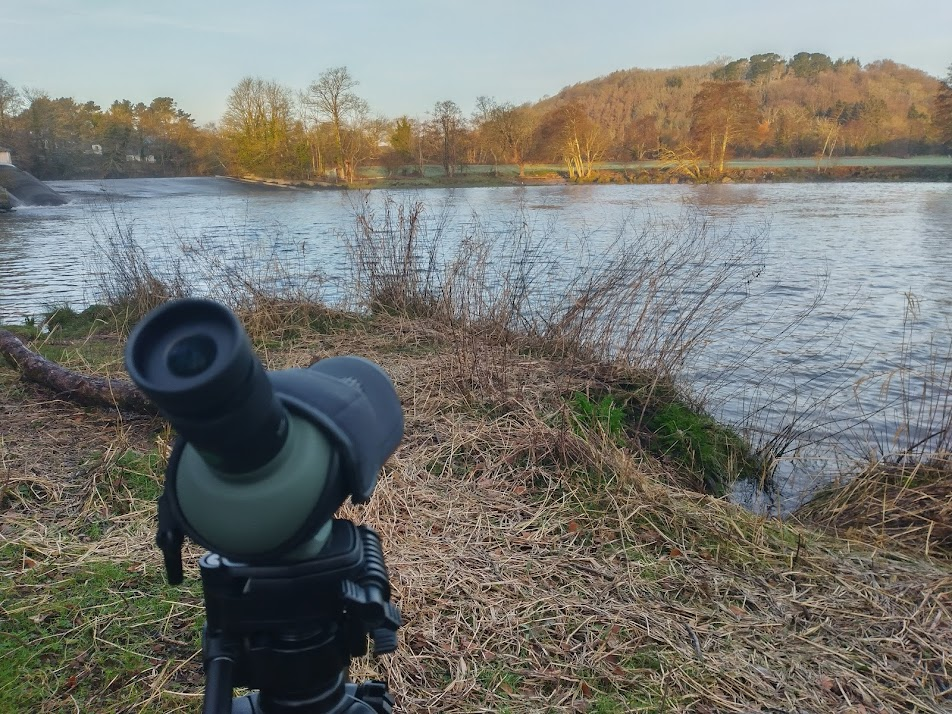
How We Tested
One rather cold day in March we took the Kowa TSN-501 angled scope down to the River Dart that runs alongside NHBS’s offices in Devon. Alongside some casual birding while we had the chance, we set up a more formal test of its capabilities, with natural markers chosen at intervals to see how the optics perform at different ranges. We also made sure to note how performance differed when the objects viewed were backed by the bright sky, reflective water and darker ground. Effects such as chromatic aberration – the fringing of a dark object with a faint halo of colour – can be particularly pronounced against bright backgrounds, so it was important to test the unit in a range of conditions.
We used a Velbon CX 444 tripod – a rather heavy model that felt like overkill for such a light scope! Still, it attached painlessly and securely, thanks to Kowa’s universal tripod mount, and helped offset any shaking that the wind might have caused.
What We Found
The Kowa TSN-501 performed well for us, providing a consistently clear, bright and fairly aberration-free viewing experience across all conditions tested. Unavoidably, it does have a small field of view, especially when zoomed in to 40x, so it’s best used in conjunction with a pair of binoculars.
That said, the quality of the image really can’t be overstated for a scope of this price. I found it to be easily comparable with full-size scopes of a similar price and probably rivalling those of higher price brackets too. It doesn’t quite measure up to the quality of ED (extra-low dispersal) glass but is about as good an image as you’ll find in non-ED optics. The colours are well represented, and the image is clear and bright with excellent contrast. You’d struggle to follow a bird in flight, and there is noticeable distortion around the periphery of the image, but for observing stationary or slower moving subjects, it makes an ideal tool. I had no trouble following mergansers as they moved across the surface of the water, or wagtails hopping across the weir. During the trial, I wondered whether it might especially suit ornithological surveyors or other professionals who need to identify species rather than make detailed observations at the highest image quality possible.
It is waterproofed and nitrogen-filled, so regular use in adverse conditions shouldn’t be an issue, and its compact nature makes it ideal for carrying in a kit bag. As stated earlier, it really makes a difference to have the neoprene case, providing an extra level of protection when travelling over rougher ground.
Our opinion
The Kowa TSN-501 is a really quite remarkable little piece of kit. For a reasonably priced, compact travel scope, it provides a clear, bright image, despite the small lens aperture. Although it struggles at long range and in conditions where a wide field of view is necessary, it represents an excellent choice for the travelling birder on a budget.
It’s easy to see why Kowa have built such a reputation among birders. Above all else, the little TSN-501 represents impressive value for the money spent. Plenty of much larger scopes for the same price or higher would struggle to offer the same image quality, and few compact scopes come anywhere close. It will never be a substitute for a good-quality, full-sized spotting scope with ED optics, but among non-ED optics, it stands head-and-shoulders above the crowd. If you are looking for something reasonably priced to put in hand luggage, transport in the glove compartment during a long trip or just to offer a bit more power than a pair of binoculars while remaining portable, there aren’t many better choices out there.
Kowa TSN-501 can be found here. Our full range of spotting and field scopes can be found here.
If you have any questions about our range or would like some advice on the right product for you then please contact us via email at customer.services@nhbs.com or phone on 01803 865913.
Trail cameras are a widely popular solution to monitoring elusive or nocturnal wildlife for both professionals and wildlife enthusiasts alike.
Modern trail cameras tend to be very reliable and are designed to be highly user-friendly. However, there are a few things we would suggest to ensure your camera performs to the best of its ability. These are the initial steps we advise to take if you are experiencing issues with your camera, and these can often resolve or at least identify the problem. For tips on how and where to set up your trail camera, check out part 2 of this series.
Batteries
Try a set of new batteries
Most minor troubles with trail cameras are due to the batteries not providing enough power. This can be down to the type of batteries being used or simply that they are getting low and need replacing. If you are experiencing black night-time images, short night-time videos, or no night-time captures are being taken at all then the first thing to check should be your batteries.
Battery meters on trail cameras are not always accurate, so we suggest checking your batteries with a tester/voltage meter prior to use if possible. This is particularly important for professional usage.
Choose Lithium batteries if at all possible
We, and many trail camera manufacturers, highly recommend Lithium batteries as the best option for performance. The Energizer Ultimate Lithium are particularly well thought of, and as such are included in our Starter Bundles (see individual product pages).
Lithium batteries have a significantly longer lifespan than most other types e.g. alkaline and rechargeable NiMH, while also performing more reliably for a number of reasons that are explained below.
Trail cameras generally require 1.5 volts (V) from each AA battery to perform at their full potential. When the voltage begins to drop you may start experiencing issues such as those mentioned above. One of the main benefits of Lithium batteries is that they maintain their voltage until the end of their usable lifespan when it then rapidly drops off. In contrast, Alkaline batteries experience a pretty consistent voltage loss throughout their lifespan, meaning they can drop below 1.5V rather quickly after deployment.
Unfortunately, we do not recommend rechargeable AA batteries (NiMH). At only 1.2V, rechargeable batteries are unlikely to power the camera reliably or for long. If rechargeable batteries are still the preferred option, it is important that the batteries offer at least 2500mAh. Some camera models have been designed to work more effectively with rechargeable batteries, for example the Recon Force Elite HP4, however the performance is still unlikely to be comparable to use with Lithium batteries.
Be prepared for batteries to die more quickly in cold weather
During colder winter months, you should expect your batteries to discharge more rapidly and the battery life to therefore be reduced. At lower temperatures the chemical reactions accruing in the battery are slowed down, diminishing its power.
Alkaline batteries are particularly troublesome in this regard as they contain a water-based electrolyte, which means they seriously struggle as temperatures approach freezing. Again, Lithium batteries are the superior choice and can withstand significantly colder conditions while still performing fantastically, albeit slightly diminished in comparison to use in more mild conditions.
SD cards
SD (Secure Digital) cards are available in a wide variety of sizes and speeds. Generally speaking, we find a 32GB, class 10 SD card a very suitable choice, and this is what is included in our trail camera Starter Bundles. It is worth reading the manual of your chosen trail camera to check for any compatibility requirements or maximum size capacities.
Format your SD card
Formatting your SD card is an important step when starting with a new camera, or if experiencing SD error alerts on your camera. It is important to be aware that formatting your card will erase all data, so any important videos or images should be transferred elsewhere beforehand.
There are two options for formatting your SD card: using a computer with an SD card reader or via the trail camera itself. When using a computer, simply look for the SD card in your file explorer/file finder, right-click and select ‘Format’. The majority of trail cameras also provide an in-built option to format your SD card via the settings menu. For the brands we offer, the menu options are likely to appear under the following titles (or similar):
Browning – ‘Delete all’
Bushnell and Spypoint – ‘Format’
Check your SD card is not locked
A common error message seen with trail cameras is ‘missing SD card’. If an SD card is inserted in the camera but the error message is showing nonetheless, it is worth checking if the card is ‘locked’.
Modern SD cards include a small plastic lock switch (seen on the left side of the image) that allows the user to prevent any data being written or images deleted from the card. Simply slide the switch into the unlock position and check if the error message disappears when you re-insert the card.
Settings
Return the camera to the default settings
When a trail camera is not behaving as it should or how the user would like, we would recommend resetting the camera to the original factory settings. This can be easily done through the menu on the trail camera and is likely to be named ‘default settings’, ‘default’, or similar.
Reformat your SD card (and check it is not locked!)
Reset your camera to its default settings
If you have any questions about our range or would like some advice on the use of your trail camera, please feel free to get in touch with our Wildlife Equipment Specialist team via email at customer.services@nhbs.com.
February marks the approach of the busy spring survey season and is the perfect time to take stock and make sure you have everything you need for your upcoming fieldwork.
To avoid disrupting any survey work later on in the year, we recommend that you take the time now to inspect all technical equipment for any faults. This will allow you to organise any necessary repairs in plenty of time.
We also suggest organising and ordering any equipment you may still require ahead of time, including accessories such as SD cards and batteries.
To help you get equipped for your surveys, we have compiled a helpful list of the key upcoming surveys that are due to begin in the next few months, together with any essential equipment that they require.
February
Badger bait surveying is best undertaken from late February to late April. Use a peanut and syrup mix with different colour badger bait marking pellets for each sett.
February is also a key time to survey bat hibernation roosts. We stock all of the main passive bat detectors currently on the market, as well as a comprehensive range of endoscopes.
March
Reptile felts or corrugated refugia for the survey of reptiles should be put out a few weeks before surveys start to allow them to ‘bed down’. Refugia inspections tend to begin in March or April depending on weather conditions.
Newt surveys start in mid-March and continue through to June. We offer newt bottle-traps as either whole or pre-cut bottles. Bamboo canes that are used to hold the bottle-traps in place are available to purchase separately.
eDNA surveys for Great Crested Newts have a relatively short survey window between 15th April and 30th June. We recommend organising and booking your dates and kits in advance.
The Song Meter 2 range of passive bat recorders from Wildlife Acoustics
Please note that some of the species mentioned above are protected by law in the UK. Any survey work on protected species must be undertaken by a licenced ecologist. Different levels of licence are required for different survey and mitigation methods. For more information, please visit: https://www.gov.uk/guidance/wildlife-licences.
If you have any queries you can contact our customer services team on 01803 865913 or via email at customer.services@nhbs.com.
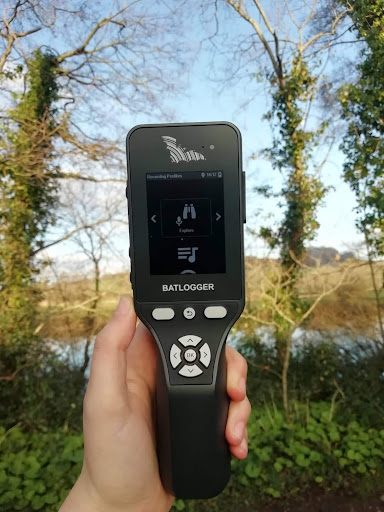
The Elekon Batlogger M2 is a sophisticated bat detector, designed for use in active transect surveys and bat walks. The detector is ergonomically designed and compact in its build. Unlike the Batlogger M, the replaceable microphone is set back within the casing, reducing the chance of breakages if accidentally dropped.
It is an easy-to-use detector, able to record ultrasonic calls over a wide range of 10-192Hz, retaining details of the harmonic structure and amplitude of the original bat call.
This detector also includes features for real-time heterodyne monitoring scheduled recording and several preset recording modes for typical survey types, including ‘Explore’, ‘Transect’ and ‘Passive’. There is also an option to create your own presets, with all settings accessible directly on the Batlogger M2.
The recordings can be easily and quickly managed and analysed using the free BatExplorer Software for Windows. This software also includes computer-aided species identification.
How we tested
In August 2021, we tested the Batlogger M2 on Dartmoor in South Devon at dusk. We chose an area with both open moorland and woodland to monitor the dusk emergence of several bat species. Using the ‘Explore’ recording mode, the device was set to real-time heterodyne monitoring, with the trigger settings selected to 45Hz.
The recordings were stored on a 16GB MicroSD card, output via WAV and XML. The files can be easily transferred to your computer with the included cables (a USB-C to USB-C cable and a USB-C to USB-A adapter) however, we simply used an SD card reader to access and transfer our recordings.
Elekon’s ‘BatExplorer Lite’ software was used to visualise and analyse our recordings.
What we found
At only 222g, this device is lightweight, therefore it was not a hindrance when hiking to the site. It was easy to hold and operate in low light, which is important as it will often be used in conjunction with other equipment while undertaking surveys. However, the buttons do not light up or glow in the dark, therefore it is important to familiarise yourself with the setup beforehand.
Our survey used the ‘Explore’ recording mode however, we looked briefly at the other preset modes and felt they would be very useful if carrying out these types of surveys. In particular, the ‘Transect’ mode allows you to pre-program the detector with your own GPS survey route, which will then display directions to keep you on path.
Setting up our recording session was quick and easy. When triggered, the detector automatically recorded the calls in full-spectrum, therefore no further operation was required. Each recording logs the GPS location, temperature, humidity and brightness at the time of recording, so there is no need to bring separate equipment for these parameters. The device also has an integrated voice microphone to enable you to take time-stamped voice notes while surveying, which allows for more accurate note-taking than writing in the dark.
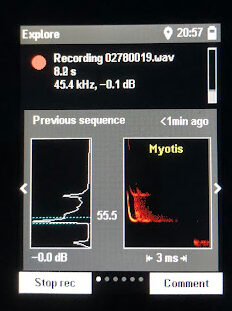
The screen display was bright and easy to view in the dark. The main screen shows the current recording time and frequency, as well as amplitude and harmonic structure of the previous bat call, the time since the last sequence and the species suggestion for that recording. The other recorded information can be accessed by pressing the left and right buttons to switch screen displays, allowing for an uncluttered screen and fewer distractions.
We tested the detector’s audio output with both earphones and through the built-in speakers (includes an adjustable volume). Both had clear audio with little background noise.
We recorded multiple calls including over 60 calls during one 30 minute survey. We were impressed with the quality of the recordings and the lack of ambient noise assisted in the identification of calls. It is worth noting that the M2 uses a SiSonic microphone, whereas the older Batlogger M uses an FG Knowles microphone, so experienced Batlogger M users may notice a slight difference in their recordings.
Automatic species identification was not always to species level, with some recordings having no suggested species. Those that were suggested, however, appeared mostly accurate when we analysed the recordings via the BatExplorer software.
Our opinion
The Batlogger M2 by Elekon is a very easy-to-use and accessible detector. The preset recording modes are useful for almost all circumstances and allow quick survey set up without the need to trawl through complicated settings – particularly helpful for newer ecologists. The only limitation we found was the lack of visual aids for the buttons in the dark, however, this can be easily overcome by familiarisation and repeated use.
It is clear from the design of the M2 that Elekon has acted on feedback from the Batlogger M and have created an intuitive detector with a robust build, perfect for any survey needs.
The Elekon Batlogger M2 can be found here. Our full range of active bat detectors can be found here.
If you have any questions about our range or would like some advice on the right product for you then please contact us via email at customer.services@nhbs.com or phone on 01803 865913.
Welcome to our annual round-up of the books and equipment we have enjoyed reading and using this year, all chosen by members of the NHBS team. Here are our staff picks for 2021!
Released earlier this year, the Song Meter Micro produces high-quality soundscape recordings at a significantly lower price point than standard acoustic recorders. The Micro opens the door to keen naturalists, like myself, to begin exploring the world of bioacoustics. This spring, we recorded our local dawn chorus (highly recommended!) and found it incredibly easy to set up using the free app on our own smartphone. Of particular use was the preset recording schedules, one of which uses your location and time zone to target recording around sunset and sunrise. The ease of use and beautifully clear recordings make the Micro a clear choice for my 2021 staff pick. Gemma – Senior Wildlife Equipment Specialist
Officially abandoned places are often still very much inhabited by people on the fringes of society, as well as being reclaimed by nature. Islands of Abandonment is a highly enjoyable read about places, people and nature; part travelogue, part anthropology and part natural history, it reminded me strongly of The World Without Us. Cal Flyn writes engagingly, intelligently, and with compassion. I enjoyed reading this in hardback when it was first published, and the paperback is due to be released soon. Anneli – Head of Finance and Operations
Being able to record the presence and often secret behaviour of the more elusive wildlife on my local patch with a trail camera is thoroughly rewarding. At the start of the year, Browning launched their latest trail camera, the impressively well-designed Recon Force Elite HP4. After seeing the stunning quality of video it captures in 1920 x 1080 FHD, it has become one of my firm favourites and I am excited to get it out into a wider range of habitats. Just ten years ago, having a trail camera that could record in this quality and also offer so many practical features and settings would have been prohibitively expensive, so I feel the Recon Force really does offer excellent value. Ian – Wildlife Equipment Specialist
Beyond a few academic textbooks and technical monographs, the deep evolutionary history of mammals has remained largely hidden in the academic literature. Beasts Before Us unleashes their story most spectacularly and engagingly. This beautifully written debut marks Panciroli as a noteworthy new popular science author. Leon – Catalogue Editor
I have a Defender Metal Seed Feeder in my garden and absolutely love it. The ports and perches are all made of metal meaning that the local squirrel isn’t able to chew and wreck the feeder! Everything is easy to disassemble and reassemble, making cleaning the entire feeder a breeze. Paying a little bit extra for a metal bird feeder was definitely well worth it for the quality and longevity. Antonia – Wildlife Equipment Manager
A Trillion Trees is my choice for this year’s staff picks as it’s an optimistic take on the future of the world’s forests, championing the role of trees in the fight against climate change and in people’s daily lives. This book celebrates trees, exploring their importance, the history of our relationship with forests and the future role they may have in an emerging community-centred approach to the land. Hana – Ecology Content Writer/Editor
Kite Optics have a great reputation for their entry- and mid-level optics. I’ve had my 8×32 Falcos for a few months now, and I’m absolutely loving them. The ED glass provides a bright, crystal-clear image even in lower light, while the smaller size keeps them portable. In most lights very little chromatic aberration is visible. I’ve had great fun seeing some of the winter migrants that are currently in residence around the UK’s coasts. A great choice for any birder looking for quality optics at a good price. Josh – Wildlife Equipment Specialist
Handmade in our workshop here in Devon, the NHBS Moth trap is my 2021 staff pick. Constructed from lightweight plastic panels covered with white nylon and weighing in at 2kg, the trap is portable, easy to assemble, and convenient to store. The sturdy 4.5m mains power lead runs a single 20W Blacklight bulb and the white fabric sides help to reflect UV light ensuring good attraction rates. I’ve always been a fan of the standard skinner shape which allows you to easily lay egg boxes along the bottom, whilst the upper panels help to retain the catch. At an attractive price point, this trap is ideal for beginners or anyone looking for a convenient trap for their garden. Johnny – Senior Wildlife Equipment Specialist
Although it’s a product we’ve sold for a long time, my staff pick is the Advanced Bug Hunting Kit. This year I fell back in love with bug hunting in my local area. While not being able to travel far but having the freedom to explore my surrounding countryside, bug hunting helped transport me to a whole other world, the vast and fascinating world of insects! This kit has all you need to get you started. While being suitable for use with children for family fun, it also includes the Collins Complete Guide to British Insects and Super Fine Pointed Forceps to accommodate a more delicate, detailed look into what you have captured. Beth – Wildlife Equipment Specialist


 • Bee orchids (Ophrys apifera) will flower briefly in June and July on dry, chalk and limestone grasslands, while sea cliffs will be adorned with the delicate blush of sea thrift (Armeria maritima) from April to October.
 • June to August is an important time for ladybirds. During this period, mated females will lay their eggs which then hatch into larvae and form pupae through a series of four stages, or ‘instars’. Adult ladybirds emerge from the pupae in August.
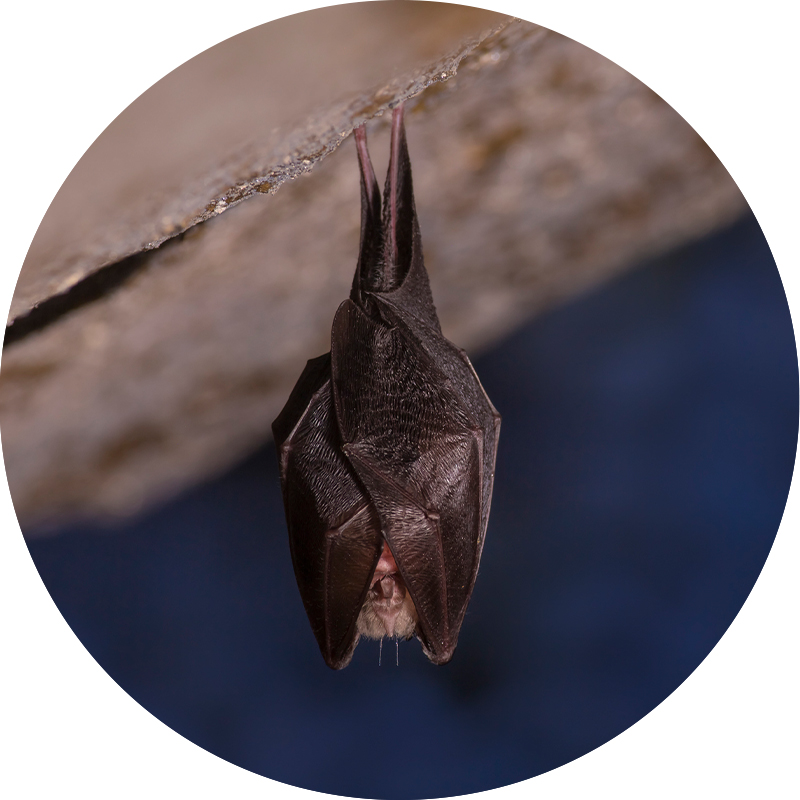 • The summer months are a great time to spot bats hunting for insects during the dusk and dawn hours. Female bats give birth to their young in June and within three weeks these juveniles will be learning to fly themselves. By August the youngsters will no longer need their mother’s milk and will be hunting for their own food.


 Britain’s Reptiles and Amphibians: A Guide to the Reptiles and Amphibians of Great Britain, Ireland and the Channel Islands
 The Wild Flower Key: How to Identify Wild Flowers, Trees and Shrubs in Britain and Ireland
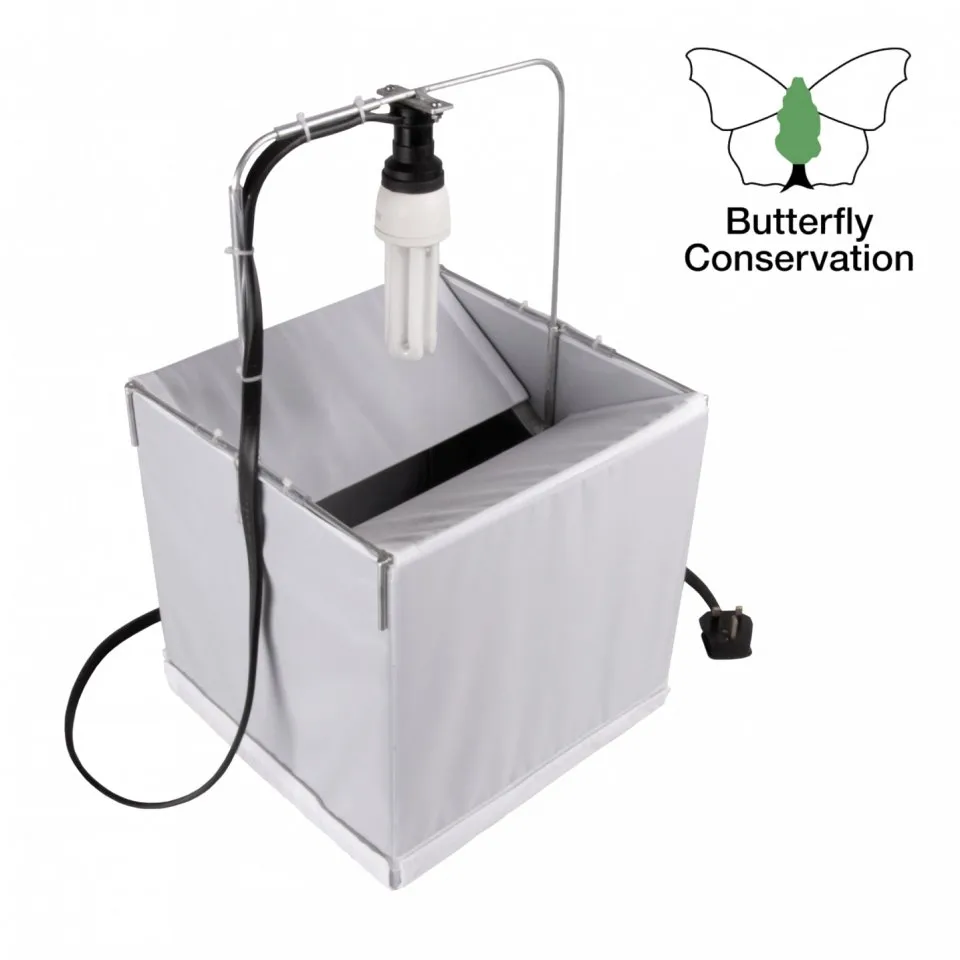 NHBS Moth Trap
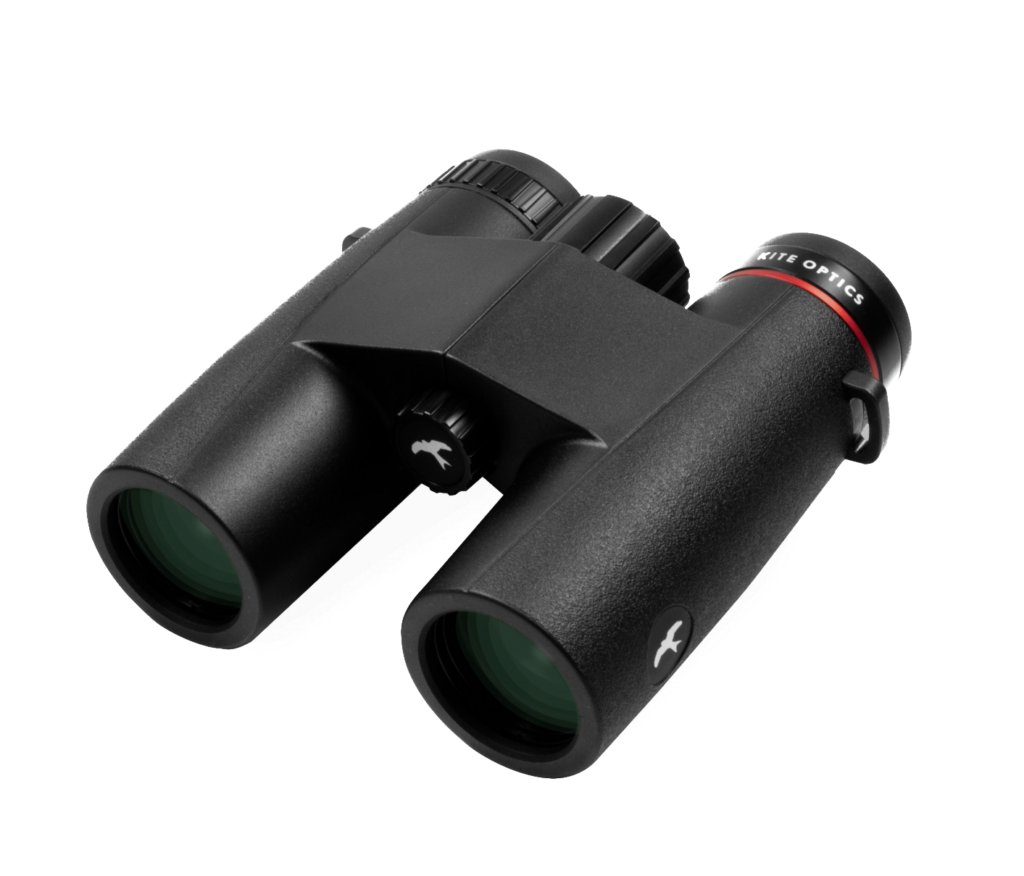 Kite Ursus Binoculars
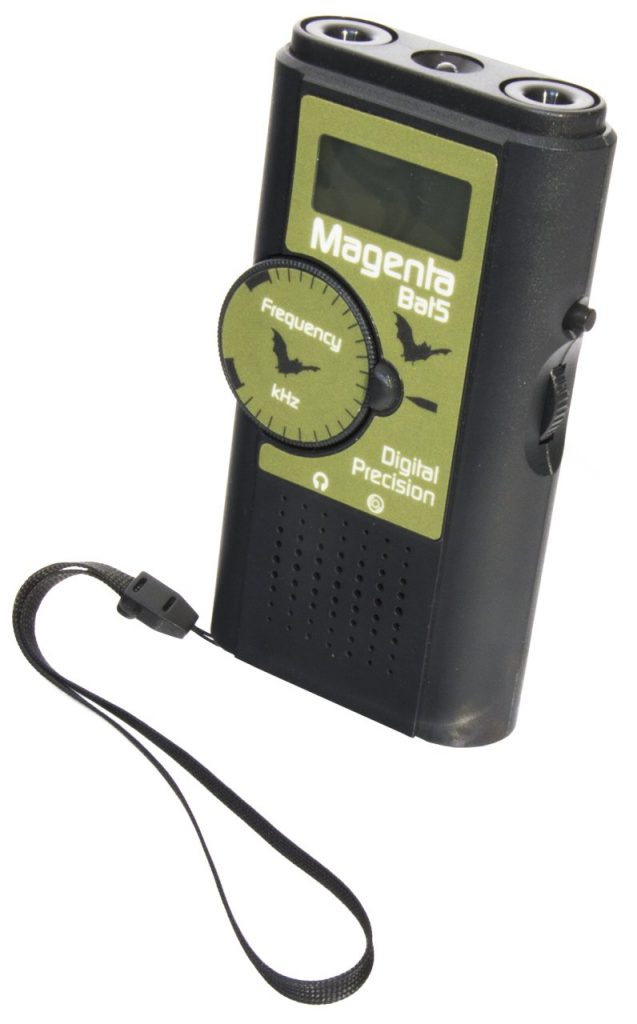 Magenta Bat 5 Bat Detector


 Advanced Bug Hunting Kit