
Whether you enjoy watching and learning about the wildlife that visits your garden, capturing footage of secretive wildlife on a holiday, or undertaking research on a rare species, there is no substitute for investing in a trail camera.
How and where you set up your trail camera has a significant impact on how successful your results will be. In this blog, we cover some key tips on how to best position your camera, choosing the ideal location, and which settings to use in different circumstances. If you are experiencing issues with your camera, check out part one of this series where we discuss the initial steps we advise you to take to help resolve or identify the problem.
Camera Settings
As a rule, it’s always best to become familiar with your camera and its different settings and capabilities by testing it at home before using it out in the field. Familiarising yourself particularly with the detection range, detection angle, the focal distance and the IR flash distance is the best way to help you gauge how far to place the camera from where you hope to see wildlife.
On most modern trail cameras there is the option to adjust the passive infrared sensors (PIR) which, along with motion detection, causes the camera to trigger. For most circumstances, having the sensor sensitivity set to high and the motion detection set to long-range will be the best option to avoid any disappointment from captures of only part of an animal, or missing something altogether.
If you are focusing on birds or fast-moving mammals, such as mustelids or rodents, then the highest sensitivity setting and the fastest trigger speed (if adjustable), is very important. For larger and often slow-moving mammals, such as deer and ungulates, sometimes a slower trigger speed and reduced sensitivity can be better as the camera will then only trigger once the animal is more centrally positioned in the detection zone.
Some species have quite insulated bodies (hedgehogs for instance, due to their spikes), creating more of a challenge for the camera’s sensors, so again the highest sensor setting would be best for such species.
With high sensor sensitivity comes the increased chance of false triggers as well as high battery and memory usage, which can be exacerbated in windy conditions as moving trees, grass and falling leaves can all trigger the sensors. It is therefore worth choosing locations for your camera with minimal, light vegetation to avoid potential false triggers.
With many trail cameras, there is now the option to set the camera to only trigger during certain times of day. This is particularly helpful if you are targeting certain wildlife that you know to be strictly nocturnal or diurnal. In most other situations though, we would recommend keeping the camera set to trigger on 24 hours, so you don’t miss anything unexpected.
Location
When choosing where to leave your camera, the first consideration will be around security, and ideally, you want to ensure that the location chosen is not visible to the public.
Then, there are two main factors to consider when deciding on a specific location. Firstly, is there a particular species you have in mind, or do you wish to survey or monitor the general wildlife of a site.
If you hope to capture a particular species, then consider its habits and where it is most likely to be spending time within the landscape.
Many mammals have large home ranges but also have routines they regularly follow, even if that means only passing through a certain spot very infrequently, so some patience is usually necessary.
To increase your chances, think about how that species might move through the habitat and which areas they will be most drawn to, for example where there are reliable food resources, sources of water, good resting and denning sites, and existing pathways through vegetation.
It is also worth looking for any evidence that the target species is already present, such as tracks, droppings or feeding signs. These signs may reveal an animal’s movements and highlight an area they are currently frequenting where the camera could be left.
If you are investigating what species are present on a site, focusing on areas with high levels of activity is key. Most mammals will leave signs of their presence in prominent areas that tend to be used by other species too. The scent of one species will often attract the attention of another, particularly if it is a competitor.
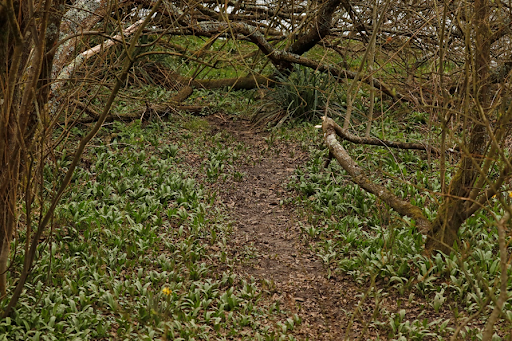
Many terrestrial mammals move through the landscape in a similar way to people; they will often follow linear features and use paths of least resistance to avoid travelling through very dense undergrowth or steep terrain. In forests, most mammals also prefer to use trails and pathways already made by other species or people. This helps to avoid constantly brushing through vegetation, particularly after recent rainfall, when the understory foliage will be wet.
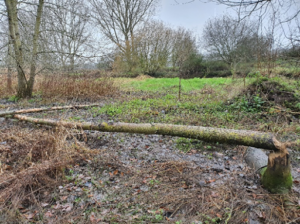
Natural woodland clearings and rides, habitat edges and watercourses are all key areas to focus on, particularly for larger mammals. For smaller species that prefer to keep close to cover, consider old walls, hedges, boulder fields and scree, and fallen trees.
Within these habitats, it is worth looking out for particularly prominent features to set your camera up. Features to look for include natural bridges over water, shallow spots for drinking and bathing, or a conspicuous large tree or boulder that carnivores might use for leaving their scent or droppings when marking their territory.
Therefore, if you find a location with lots of activity, it can be worthwhile continuing to monitor it for a long period, as some species with large territories, such as apex predators and some mesopredators (medium-sized), may only pass by very occasionally.
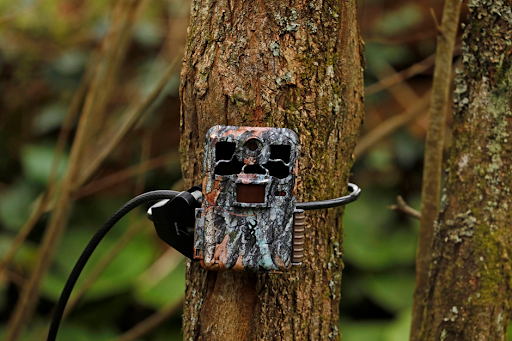
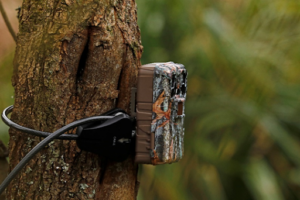
It can sometimes be a challenge to find something suitable to attach your camera to once you have found a suitable location. A Python Mini Cable Lock is the best all-rounder for both security and flexibility when attaching the camera to a tree, post or even rocks. However, there are times when a tripod or tree bracket can be more suitable. Sometimes adding a wedge of wood between the camera and a branch can be a good solution to ensuring the camera is angled straight if all the suitable trees and branches around are tilted.
Lastly, it is best to try to conceal your scent as much as possible during the deployment of your trail camera, as too much human smell could deter some wildlife from the area, so give the camera a clean before and during deployment and consider wearing gloves as you set it up.
Positioning
It is best to avoid facing your camera directly east or west, as this can overexpose images as the sun rises and sets. Sometimes extreme brightness can also cause false triggers as the light and shadows move.
Most trail cameras will have a standard focal distance of around 1.5 to 2 metres, so it is important to allow this much distance between the camera and the area you hope to record activity. For small mammals, a close focus lens can be attached over the front of the camera lens to allow you to take sharp images at a closer range. This works best if you are specifically targeting small mammals such as rodents or shrews within an enclosed space, for example a hole in a wall, log pile or small clearing in dense vegetation where all the activity will be at close range.
Also consider how far away an animal might pass the camera too, particularly when thinking about nocturnal activity and the distance the flash comfortably covers. Although many cameras have impressive detection and flash ranges, the resulting images and videos can still be frustrating if the animal passing is too far away to identify. Factors such as a dense overhead forest canopy, moonlight and cloud cover can also all impact a flash’s results. Ideally, opt for a position where animals will most likely pass around 3–10 metres away.
The detection angle of most trail cameras is around 45° degrees, so it is best that the spot you think most activity will occur should be central within your cameras’ field of view.
It is important to also angle the camera at the correct height for your intended wildlife. If the camera is angled too high or too low, it will miss some species or result in unsatisfactory images of only part of an animal.
A good guideline for many situations is to angle your camera at around adult human knee height to capture small to medium-sized animals at their height rather than looking down on them. Sometimes trail cameras do need to be positioned higher in various circumstances, but try to avoid human head height as this will draw more attention to the camera.
Most high-quality trail cameras now have large screens that allow you to check in real-time what the camera can see as you position it. This is an invaluable tool to ensure your positioning, distance, height and view are just right.
Aquatic Wildlife
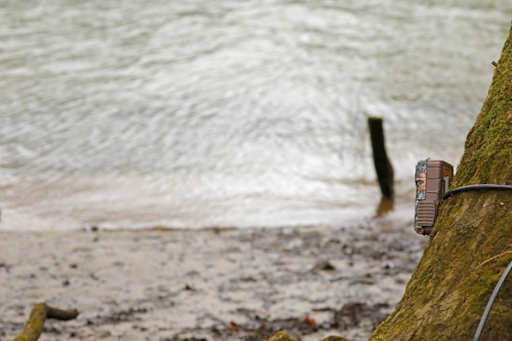
For species that use watercourses, successful camera trapping can be even more challenging. One of the considerations is how to safely and securely position a camera close to or above water. Generally, the best option to avoid any risk to the camera and potential false triggers is to focus on prominent banks, sandbars, culverts, beaches or shallow water edges. With these locations it should be easier to position the camera at a safe distance back from the water while overlooking a spot where aquatic mammals and birds are also more likely to investigate, feed, drink or leave their scent or droppings.
With rivers particularly, it is important to ensure the camera is a little higher off the ground in case of unexpected water level rises, and so sometimes a downward-facing angle is more suitable. For otters, large rocks or fallen trees can be popular spots for scent marking, while a small clearing or mound within dense vegetation or reeds is often favoured by water voles. For beavers, an exposed bank and beach close to a favoured food source is often a good option.

Summary
When thinking about setting up your trail camera, for best results we recommend taking the following into consideration:
- The target species, their behaviour and habitat usage
- Settings to reflect the above (and testing at home before deploying in the field)
- The angle of the camera, taking into account flora, angles of the sun and where the animals are likely to be within the camera’s viewing area
- Aiming for your focal species to pass the camera at a distance of 3-10m
- Generally positioning the camera at human knee height works well
If you have any questions about our range or would like some advice on the use of your trail camera, please feel free to get in touch with our Wildlife Equipment Specialist team via email at customer.services@nhbs.com.