Merlin Sheldrake is a biologist and a writer with a background in plant sciences, microbiology and ecology. He received a Ph.D. in tropical ecology from Cambridge University for his work on underground fungal networks in tropical forests in Panama.
Merlin’s just published book, Entangled Life explores the incredible world of fungi and how it has shaped and continues to influence the world we live in
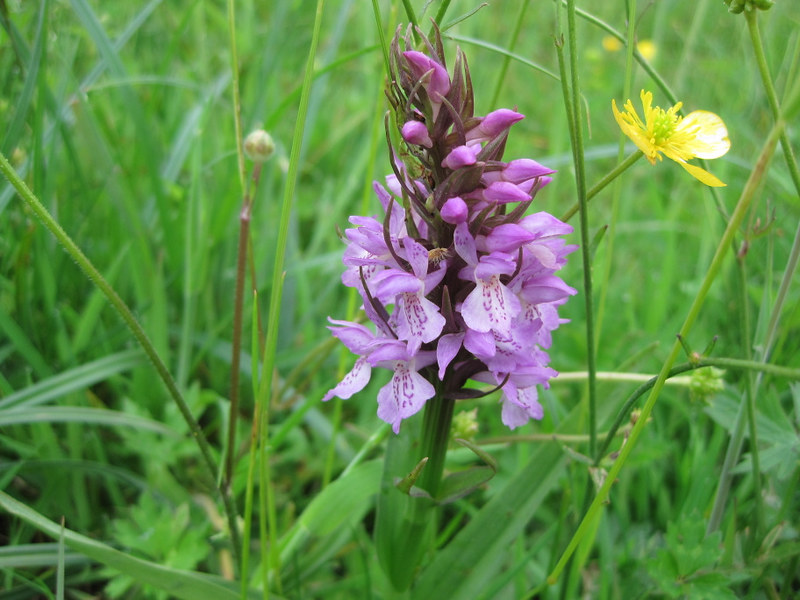
Merlin Sheldrake and truffle
Merlin kindly agreed to answer our questions about his book and these incredible organisms.
Could you tell us a little about your background?
As an undergraduate I studied plant and microbial sciences. I then moved over into the humanities for my masters degree in the history and philosophy of science, where I focused on the history of Amazonian ethnobotany – the study of the relationships between humans and plants. I then shifted back into the sciences for my PhD, conducting research into the ecology of mycorrhizal fungi in tropical forests in Panama. There’s a strange disciplinary barrier between the sciences and the humanities which I’ve long found frustrating – and artificial – and for much of my education I’ve tried to find the places where it is less well-maintained and has become more porous.
Where did the motivation for this book come from?
Mycorrhizal fungi form symbiotic relationships with plants and can link plants together in shared networks sometimes known as the ‘wood wide web’. These fungi allowed the ancestors of plants to move out of freshwater and onto land, some 500 million years ago, and without them the planet would be unrecognisable. At school I had been taught to think of plants as autonomous individuals, but they turned out to be the product of a complex tangle of relationships: mycorrhizal fungi are a more ancient part of planthood than wood, leaves, flowers, or even roots. What we call plants are really algae that have evolved to farm fungi, and fungi that have evolved to farm algae – and this ancient relationship lies at the base of the food chains that sustain nearly all life on land. The more I studied these organisms and their intimate relationships, the more I realised that thinking about fungi makes the world look different. Entangled Life arose from this enquiry, and my sense of vertigo at the realisation that we’re only just beginning to understand this mind-bending kingdom of life.
Fungi appear to make decisions but has no ‘mind’ in the way we would understand. How can you best explain how ‘mycelial minds’ make sense of their environment?
Mushrooms are only the fruiting bodies of fungi: for the most part fungi live their lives as branching, fusing networks of tubular cells known as mycelium. Mycelial co-ordination is difficult to understand because there is no centre of control. If we cut off our head or stop our heart, we’re finished. A mycelial network has no head and no brain. Fungi, like plants, are decentralised organisms. Control is dispersed: mycelial co-ordination takes place both everywhere at once and nowhere in particular. These networks can sprawl over tens or even hundreds of metres and are subject to an unceasing flood of sensory information. And somehow, without a brain, fungi are able to integrate these many data streams, make decisions, and determine suitable courses of action. How they coordinate themselves remains a puzzle. There are a few options. Some researchers suggest that mycelial networks might transmit developmental cues using changes in pressure or flow – because mycelium is a continuous hydraulic network like a car’s braking system, a sudden change in pressure in one part could, in principle, be felt rapidly everywhere else. Some have observed that metabolic activity – such as the accumulation and release of compounds within hyphal compartments – can take place in regular pulses that could help to synchronise behaviour across a network. Others have found that the mycelium of some fungal species is electrically excitable and conducts spikes of electrical activity along hyphae, analogous to the electrical impulses in animal nerve cells, which could allow different parts of a network to stay in touch with themselves.
A common or shared mycorrhizal network seems to be a model for all ecology, yet outside of a few specialists is relatively under-researched and tends to be plant-centrist; why do you think is that is the case?
If you show someone a picture of a forest containing a jaguar and ask people to describe the image, most would describe the jaguar and say nothing about the bustle of plant life that makes up most of the scene. Our tendency to overlook plants in favour of animals has been termed ‘plant-blindness’. I think a similar phenomenon – fungus-blindness – sometimes plays out when we think about shared mycorrhizal networks. Plants are larger and easier for us to see and so our attention is naturally drawn to them. Plants are also more familiar units of life, which makes it easier for us to tell stories featuring them. Fungal networks are intuitively and conceptually slippery, and more difficult for us to make sense of.
Mycroremediation; the use of fungi to restore the biological health of soil has long been understood, but rarely used in large-scale applications. Do you think that will change in the future?
I hope so! Fungi are metabolic wizards with astonishing talents for breaking down stubborn substances, from lignin, wood’s toughest component, to rock, crude oil, polyurethane plastics and the explosive TNT. Despite its promise, however, mycoremediation is no simple fix. Just because a given fungal strain behaves in a certain way in a dish doesn’t mean it will do the same thing when introduced to the rumpus of a contaminated ecosystem. Fungi have needs – such as oxygen or additional food sources – that must be taken into account. Moreover, decomposition takes place in stages, achieved by a succession of fungi and bacteria, each able to pick up where the previous ones left off. It is naive to imagine that a lab-trained fungal strain will be able to hustle effectively in a new environment and remediate a site by itself. Some of the most promising applications of mycoremediation under development involve redirecting our waste streams so that material can be processed in fungal facilities before it hits the landfill. These approaches strike me as the most promising because they involve a larger scale re-evaluation of our dysfunctional philosophy of waste. By building systems in which fungi intercept pollutants before they spill into the environment we can start to deal with the causes of pollution rather than just the symptoms.
Some radical mycologists declare that ‘fungi can save the world!’ How credible do you think some of their claims are?
Fungi have been shaping the planet and its biospheres for over a billion years and will no doubt continue to do so. And there are certainly many ways that we might partner with fungi to help us to adapt to life on a damaged planet. As in any field that holds great promise there’s hype and some big claims floating around, some more credible than others. Then again, we don’t know nearly enough about fungi as we should. Their lives are endlessly surprising, and even many of their well-established behaviours and characteristics can seem incredible at first hearing.
Entangled Life has taken years of research and investigation. Allowing for a well-earned rest, have you any future projects you can tell us about?
I have plenty of studies to write up, and a number of research questions I’m exploring. I have yet to emerge from this tangled enquiry and don’t imagine that I will any time soon. Fungi have received a tiny fraction of the attention given to animals or plants and there are wide open questions whichever way one looks.
Entangled Life: How Fungi Make Our Worlds, Change Our Minds and Shape Our Futures
By: Merlin Sheldrake
Hardback | September 2020
An immersive trip into the largely unknown world of fungi, showing just how otherworldly and amazing this neglected group of organisms is.
Entomologist Erica McAlister is the senior curator for Diptera at the Natural History Museum, London. In 2017, she authored the very successful book The Secret Life of Flies which looked at their diverse lifestyles. Now she returns with The Inside out of Flies, which is a great popular science book marvelling at their anatomy.
We took the opportunity to ask her some questions about why flies matter to us all.
First off, tell us a little bit about how you got started. Why study flies? Having read your book now, I agree that they are fascinating and beautiful, but presumably, you did not know this when you started?
I have always been interested in nature, but I was more fascinated by the smaller creatures – the ones everyone else seemed to ignore. Insects were an obvious choice and I combined my love for them with my love of ecology from the beginning. Although I had worked with ants and beetles, it was the flies that properly tickled my fancy as they were the most diverse in life cycles and ecological function, and so the most interesting. They got everywhere, they did everything and they were wonderful to observe. I have a liking for all things natural – from decomposing dung heaps to parasitic lifestyles – both of which involve the fabulous flies.
You are quite involved in public outreach, speaking on radio programmes and giving public talks. Most people regard flies with a certain amount of disgust. Do you find it is easy to change people’s perceptions?
Generally, yes. Most people just think about one or two examples of the thousands of species of flies such as the nuisance fliers or the transmitters of disease. So when I tell them about the hoverflies, the bee flies, the chocolate pollinators, the forensic detectives, the scuba divers and so on, that opens up a whole new world to most people, and when I go on to talk about their gardens being alive with these beneficial creatures, you can see a change in many folks. Flies are animals and are essential for many ecosystems – it is odd that many naturalists seem to want to forget this!
After two decades of researching them, has your own attitude towards them changed?
Nope. In fact, I feel that I have got worse in my obsession with them as I realise that I have so much to learn and not enough time. Initially I was fascinated by their ecology, then their looks, then their behaviour, but there is also their genetics, their mechanics and many more other areas that we need to explore and understand. The more I have read and studied the more I realise that we have still so much to learn.
Your 2017 book The Secret Life of Flies was very well received. The design of your new book The Inside Out of Flies suggests it is a companion to the first book. Why write a second book?
Because there is so much more to write about them. We have thousands of books about mammals and there are just over 6100 of them. There are more flies in the UK than that and living in more extreme environments – the flies have adapted to all sorts of weird and wonderful habitats with a whole range of morphological changes to help them not just cope but thrive. The first book focused on their feeding ecology, this one is about their morphology, but there is still much, much more that I have left out from both of these subjects (I get emails all the time telling me so!)
You mention many people seem to think adult flies lack brains, this misconception being fuelled by watching them fly into windows again and again. This may seem like a very mundane question but why, indeed, do they do this?
This is a common question – but the answer is not really known. Firstly, the glass could be disorientating the flies as it blocks out UV-B which are used by the flies to help them navigate. The actual glass may be perceived as something different to them – they would realise that it was some form of wall due to the change in air currents, but we don’t know as yet what and presumably it could be multiple factors. There are many footprints of previous insects that have crawled across that pane and maybe there are hints about food sources (flies taste with their feet) that further distracts them. There is still so much about these creatures that we don’t know.
As you go through each body segment of a fly’s body in this book, you show that there is astounding variation in traits, and you back this up with some fantastic photography. One striking example was of a soldier fly species, Platyna hastata, whose abdomen is almost as wide as it is long, you affectionately call them fat-bottomed flies. Is this another example of sexual selection run rampant?
In flies – there are so many examples of extreme sexual selection and I discuss this throughout the book – from eyestalks to flags on their abdomen to hidden internal modifications. One of my favourites is the fly Drosophila bifurcata that has sperm that is 5.8 cm long and the actual adult male is but a few millimetres!
You explain how insect taxonomists use morphological details such as the position and numbers of hairs on their body to define species. I have not been involved in this sort of work myself, but I have always wondered, how stable are such characters? And on how many samples do you base your decisions before you decide they are robust and useful traits? Is there a risk of over-inflating species count because of variation in traits?
Ahhh there is the dilemma that many a taxonomist has faced – is it a true species??? The NHM collection has many thousands of species but often the specimen that the species was described from is the only specimen that anyone has of that species! Only time will tell if it is a true species. However, many of these characters are very stable with many of the bristle arrangements having been around for thousands of years. There is a risk of over-inflating species but then again there is a risk of under-inflating – and taxonomists fall into two groups – the splitters or the lumpers depending upon what they feel are important characters. What we do know for certain is that the sexually derived characters – the genital structures change at a faster rate and so this is why we appear to be obsessed with such things!
There are some fantastic examples in this book of the applied aspects coming out of dipterology as a field of study, with forensic entomology and miniature robotics being good examples. What are some of the most exciting applied developments that you think will make a splash in the near future?
Oh, what a question! I feel that we are on the cusp of many exciting developments – especially in aeronautics and medicine. Personally, I am loving the development of smart needles – the idea of bending these around sensitive structures is incredible and so very useful. But as technology develops so does our ability to look at these creatures and try to mimic their millennia-old adaptations.
I imagine some aspects of entomology rely on decades- and centuries-old methods from when the field got started. Simultaneously, like most academic disciplines, the field has benefited from technological advances. How have new technologies changed how you work and the sorts of questions you ask?
Yes, absolutely. I can ask so much more from the specimens in the collection at the Natural History Museum now, even though the flies may have been dead for hundreds of years. I can image them inside and out and in doing so I can see what pollen is in their guts or around their mouthparts; I can analyse their DNA and see how the populations developed or when insecticide resistance developed; and I can transfer all of this information around the world in seconds – no longer is research hindered by physical distance or financial constraints as much as it once was. And on a general level, I and many others have the resources of millions of people making observations and taking photos which massively adds to our knowledge. New technologies have made scientists out of all of us.
One of the more remarkable and little-appreciated things you draw attention to is that flies are an important group of pollinators worldwide. There has been much public concern regarding bees, pollination, and the future of our crops. Do we have reason to be concerned about the ecological function provided by pollinating flies?
We need to care about flies as much as all of the other insects that are more commonly talked about. Not only are the adults amazing pollinators but the larvae of many of these species are also carrying out key ecological roles such as predation or decomposition. And often it is only the flies that are the pollinators, especially in the more extreme habitats or crops. If you don’t look after the flies, you will find the world bereft of many food products that everyone loves such as chocolate.
Lastly, has the pandemic influenced your work and that of those around you?
I would say yes. Hopefully, more people have realised how important the natural world is. I have spent the last couple of moths answering questions and identifying flies that folks would not have spent time observing before, and I have seen appreciation grow in all things fly. I think we have realised that we need to work more in balance with our environment and so the work that I, and millions of other entomologists undertake, is now seen with a new appreciation – we are not just going around looking at pretty flies, but are trying to help understand our climate and the impact the changes are having on it, our food security, and the impact of disease and vectors to name but a few examples.
Oxford University Press are NHBS’s Publisher of the Month for September.
Founded in the mid-17th Century, Oxford University Press (OUP) have published some of the most influential environmental books. Nearly 400 years later, OUP continue to release important works as the largest university press in the world.
Oxford University Press, highlights and forthcoming in 2020
We have great prices on selected bestselling professional and academic titles from OUP until 31st September and have showcased our top ten below:
Handbook of the Marine Fauna of North-West Europe
Edited by: Peter Joseph Hayward and John S Ryland
Paperback| Feb 2017| £42.99£52.99
Authoritative guide to the accurate identification of the common components of the inshore benthic invertebrates of the British Isles and adjacent European coasts.
Essential Ornithology
By: Graham Scott
Paperback | September 2020| £27.99£34.99
This concise introduction to ornithology returns in a second edition, highlighting new developments in the avian fossil record, urban ecology, and climate change.
The Biology of Soil: A Community and Ecosystem Approach
By: Richard D Bardgett
Paperback | September 2005| £34.99£43.99
Part of the excellent Biology of Habitats Series which provides information on the habitat, its biodiversity and the types of organisms present
The Sensory Ecology of Birds
By: Graham R Martin
Paperback | Feb 2017| £33.99£36.99
Ranges widely across species, environments, and behaviours to present a synthesis that challenges previous assumptions about the information that controls the behaviour of birds.
Biology and Conservation of Musteloids
Edited by: David W Macdonald and Christopher Newman
Paperback | Oct 2017| £37.99£47.49
Suitable for graduate level students as well as professional researchers in musteloid and carnivore ecology and conservation biology.
Wildlife Conservation on Farmland (2-Volume Set)
Edited by: David W Macdonald and Ruth E Feber
Hardback | July 2015| £85.99£107.50
Examines the most important challenges facing farmers, conservationists, and policy makers, using examples of real-life, linked studies from a farmed landscape
The Agricultural Revolution in Prehistory: Why Did Foragers Become Farmers?
By: Graeme Barker
Paperback | Jan 2009 | £44.99£54.99
Addresses one of the most debated and least understood revolutions in the history of our species, the change from hunting and gathering to farming.
Bumblebees: Behaviour, Ecology, and Conservation
By: Dave Goulson
Paperback | Sept 2009 | £39.99£50.99
An excellent review of bumble bee biology and behaviour by leading bumblebee biologist, Dave Goulson
Birds in the Ancient World: Winged Words By: Jeremy Mynott
Paperback | April 2020 | £13.99£16.99
The many different roles birds played in culture: as indicators of weather; for hunting, eating and medicine; as pets and entertainments; and as omens and intermediaries between the gods and humankind.
Who We Are and How We Got Here: Ancient DNA and the New Science of the Human Past By: David Reich
Paperback | Feb 2019 | £8.99£10.99 Ancient DNA is rewriting most of what we thought we knew about human history. David Reich explains what the genetics is telling us about ourselves and our complex and often surprising ancestry.
The Gratis Books Scheme
One of our most rewarding collaborations with OUP has been the Gratis Books Scheme. Since 1999, with support and assistance from the British Ecological Society, this scheme has been sending free copies of books to conservationists in developing countries who would otherwise be unable to obtain them.
Iolo Williams was born and brought up in mid Wales. After gaining an ecology degree he worked for the RSPB for almost 15 years as Species Officer for Wales. In the late 1990s Iolo left the Society to work full-time in the media, presenting in both Welsh and English. He co-presented Springwatch 2020 and is a tireless campaigner for wildlife and conservation.
We caught up with Iolo and asked him a few questions on: lockdown, rewilding, Brexit and the future for nature.
Wales has a variety of landscapes and environments; do you have a favourite habitat?
With Chris Packham in the Cairngorms
I was born and brought up in mid-Wales and grew up in a small village called Llanwddyn (Lake Vyrnwy), which was a fantastic area with a mixture of habitats. But, where I am happiest really is up on the high ground: up on the mountains, up on the moorland, enjoying not just the solitude and the scenery, but some of the amazing wildlife, such as: black grouse, merlin and hen harrier. You have also got sundews, butterworts, and bog asphodel; all amazing and well adapted to these harsh conditions. So that’s where I’m happiest really – when I want a day by myself, away from everyone, that’s where I head for.
Do you think ecotourism and nature capital have a role to play in wildlife conservation?
Iolo with two rare Welsh clearwing moths
I think ecotourism is absolutely vital for the future survival of our wildlife and our habitats, and ourselves too. It’s only when we educate people, it’s only when people see what’s out there, it’s only then that people grow to appreciate it and will then fight to ensure that it survives for their children and for future generations. So, I do believe it’s a vital part of conservation and education.
But of course ecotourism does involve travel, which is a dilemma. I travel a lot less than I used to and off-set it as much as I can, but I learned a lesson whilst visiting Chitwan National Park in Nepal and lamenting my carbon footprint involved to get there. The head ranger heard me and said, ‘Listen, if you didn’t come here, there wouldn’t be a national park. The government wants the wood, wants to log these trees you see here. It wants to drain this wetland to grow cash crops. But it’s only because of the money you bring in that we are able to protect and enhance this national park: the Indian one-horned rhino, the Asiatic elephant, the tigers and all the other wildlife that’s here.’ So, it is a dilemma, but to stop that overnight would be disastrous for wildlife worldwide.
The pros, do out-weigh the cons – as long as we are sensible about it; we need to stop needless travel, we need to utilise public transport wherever we can, and in a rural area like mid Wales it’s often not even possible – more often than not I have to take the car. A change must come from individuals, but more than anything the change has got to come from government – we need a better public transport system.
Ecotourism can also provide sustainable jobs. I’ve just come back from Mull; the eagles bring in a huge amount of capital every year. Mull would probably grind to a halt without ecotourism. Yes, you have agriculture there and farming, but by far the biggest employer in Mull is green tourism. People come to Mull to see eagles, to see otters, to see minke whales, basking sharks, and all of these charismatic species. Morally, we shouldn’t have to put the economic argument forward, we should be looking after wildlife for its own sake. But when you are dealing with developers and ministers, you have to put the economic argument forward.
Are you a supporter of rewilding and do you think it is a sustainable use of land?
Hen harrier chick in the nest
I am in principle, but say ‘rewilding’ to a lot of people and they say, “ah, they’re going to bring back wolves and bears, and I don’t want wolves and bears. My children will be mauled” etc. While that’s not true it’s also not true that’s what rewilding is all about. It’s really about the restoration of habitats, it is about what Isabella Tree and her husband have done at Knepp, which works fantastically well. Places like the Cambrian Mountains have fantastic wildlife like pine martens, goshawks, red squirrels etc, but vast areas of the Cambrian Mountains are a green desert. So, the potential for rewilding; just a few trees, maybe restoring the lost peat bogs etc. is vast and the knock-on effects for capturing carbon and preventing flooding all makes so much sense. But of course, the people in power want to make more money for themselves and their acquaintances and a lot of them don’t want to consider embracing this approach.
Does Brexit and the end of the Common Agricultural Policy (CAP) present any opportunities?
Firstly, I voted against Brexit, I think it will be an unmitigated disaster. It was the tabloid papers stirring the pot of xenophobia that prevented the real issues being properly discussed. Most of the farmers around me here voted for Brexit because they were fed up with what they saw as European bureaucracy. Of course, now the reality is biting, many farmers I speak to now wish they hadn’t, especially now as their MP has voted to allow cheap, low standard foods from the US into the country. Despite what we sometimes read, the food standards in the UK are very high and to lower those standards is stabbing farmers in the back.
However, in the long-term Brexit can offer an opportunity. If we had a better government in power, I would be optimistic about those opportunities because there is no doubt the CAP has been a most destructive policy from an environmental point of view. It really should have been reformed at least twenty years ago and now is an opportunity to do that, but with the current government’s track record with the environment makes me believe not much will change. We are up against a very powerful agricultural lobby. The big fertiliser companies, the big pesticide companies, the big machinery companies all of these are a massively powerful lobby and this government will listen to their argument not the environmentalist’s.
Has lockdown presented people with an opportunity to connect with nature?
I hear people saying how wildlife benefitted hugely from lockdown, and I think temporarily it did. One simple example is far fewer hedgehogs killed on the roads, of course now lockdown is eased I’m seeing dead hedgehogs on the roads all over again. Also, roadside verges not being mown or mowed late had a knock-on effect that was huge!! Flowers, bees, butterflies all in abundance. Some councils have seen this, taken note, and said – okay fantastic, we are going to reduce mowing from now-on. Others have carried on mowing and mowing, which is an absolutely dreadful policy for wildlife. Lockdown has really tested people, especially from a mental health point of view, but during lockdown the birds, flowers and butterflies have brought so much joy to families. Nature has been there for us through this traumatic time and we must remember that when these restrictions are over.
The one long term benefit I’m hoping lockdown will have is that a seed has been planted in a lot of youngsters and adults where they will think: remember last year when we walked this lane and there was all those flowers and we saw that lovely white and orange butterfly, let’s go and see if it’s all there again. So, hopefully for many people that seed has been planted.
Discover Iolo’s favourite ‘Wild Places’ in these two titles from Seren Books
This comprehensive, clearly illustrated field guide, looks at all 815 bird species of Malaysia and Singapore. The main identifying features of each species are described and key facts cover size, voice, range and status and habitat. Distribution maps provide a view of where the birds can be found. The book also includes information on taxonomy and nomenclature, the breeding cycle, migration, conservation and key bird-watching sites of the region. This guide is essential for any naturalist interested in this region of the world.
Recording and observing such a rich diversity of birds, with over 800 species of birds including endemics in abundance is a huge undertaking. How does such a daunting project come to fruition? We asked contributors: Lim Kim Seng, Yong Ding Li and Lim Kim Chuah to answer some questions about themselves and the creation of A Field Guide to the Birds of Malaysia & Singapore
Can you tell us a little bit about your backgrounds within ornithology and conservation?
Lim Kim Seng
Kim Seng– I started birding when I was about ten years old. I grew up in a family farm in Sembawang, in the northern countryside of Singapore. Together with my four other brothers, we explored the streams, hills and swamps and grew to love nature. One day, I saw a large kingfisher with a brown head, bright red beak and blue wings. It was my first Stork-billed Kingfisher and I was hooked. I was able to identify it through a book that I found in our National Library Natural History Section. Five years on, I joined the then Malayan Nature Society (now Nature Society (Singapore)) as a student member and just four years later, I led my first official society birdwatching outing at Rifle Range Road, together with my other birding brother Kim Chuah. With the help of other dedicated members, I learned a lot and was able to play my part in nature conservation, documentation, research and outreach, and have been an active member since then.
Yong Ding Li
Ding Li – I have been birdwatching since my primary school days, after finding what I later discovered, to be Magpie Robins near my home in Kuala Lumpur. Subsequent visits to the mangroves of Kuala Selangor introduced me to the colourful world of birdwatching. Through various research projects, I have professionally studied birds in diverse settings ranging from Malaysian rainforests and the mountain forests of Sulawesi (Indonesia), to Australian woodlands. I now work full-time for BirdLife International, coordinating projects on bird conservation in Southeast Asia.
Lim Kim Chuah
Kim Chuah – I grew up in a farm in rural Singapore in the ’60s and the surrounding woodlands and marshes were my playground. During my many sojourns into the wilderness, I started to notice some of the birds that lived around me – White-breasted Waterhen, Yellow-vented Bulbul, Common Tailorbird etc. That’s how I became interested in birds and it became my life-long passion. I’ve been volunteering in the Bird Group of the Nature Society (Singapore) since I was an undergrad. I participated in many of the birdwatching activities organized by the Bird Group including regular bird census and bird surveys. The data we collect helps towards a better understanding of birdlife in Singapore and is useful in building our case for better protection of habitats in Singapore.
How long has this project been in the making?
Kim Seng – My friend Dana Gardner, the illustrator of this book, got me interested in doing another book. We had successfully collaborated on a first field guide to the birds of Singapore in 1997 and were keen to work together again. Dana had a friend who was a publisher and we decided to a do a single volume field guide to the birds of the whole of Malaysia, since none existed. This was in 2010. Unfortunately, our publisher pulled out not long after that and we were left stranded. Luckily, through my fellow collaborators – Kim Chuah and Ding Li – we managed to get John Beaufoy interested in our project. A contract was signed in 2016 and as they say, the rest is history!
What was the biggest challenge in creating this field guide?
Kim Seng – Each of us had different ideas on how to do the book and also other personal commitments. We as the writers also had to contend with differences in writing styles. Luckily, we decided to stick with a standard format, came up with a list of who was writing what chapters and what bird families and managed to more or less stick to our deadlines. Another challenge was the impressive work done by our illustrator. He had to do illustrations of all 829 species all by himself. To ensure accuracy, he would send us completed plates for comment, and we duly responded if changes were needed. Not an easy task, as we were based in Singapore and he, in the USA.
What features do you hope will make your field guide stand out from any others?
Kim Seng – This book is compact and contains all the necessary information you need to identify any bird species you see in the listed countries. The text is crisp and the illustrations accurate and there is also a detailed site and habitat guide to get birders to the most interesting places quickly and see those fascinating birds, based on the authors’ many years in the field.
Have the travel restriction due to COVID – 19 presented any threats or opportunities for the avifauna of Malaysia and Singapore?
Kim Seng – Well, COVID-19 has placed tremendous restrictions on travel in both Malaysia and Singapore. You could bird in certain areas but only with social distancing and other safe practices in place. Initially, we could only look at the birds from our balconies or backyards but this was an opportunity for some of us to study some of the neglected urban birds and understand a little better. I actually published two blogs based on my observations of urban birds from my balcony! In the last couple of months, restrictions have been eased and we are allowed to go birding in our favourite birding places, but I’m still waiting for the day when I can travel freely and bird in Malaysia again.
Do you think eco-tourism is beneficial to conservation?
Kim Seng – Definitely. I believe ecotourism brings a lot of attention to the tremendous beauty and biodiversity of the natural habitats in both countries. It also brings revenue and employment opportunities to the local community who in turn will help to protect these wonderful places for a long time to come.
What in your view are the best reasons to visit Malaysia and Singapore if you are a birdwatcher or an ornithologist?
Kim Seng – Three reasons – good birds, good food and good company. All three are never in short supply in these two amazingly friendly countries. The people are generally very friendly and the variety of local food is really incredible. Of course, the fascinating diversity of birds, with over 800 species of birds and Bornean, Peninsular and Sunda endemics in abundance are dreams to savour for birdwatchers and ornithologists alike.
Are you working on any other projects you can tell us about?
Kim Seng – I am currently working at putting up an adult learner’s module or course on “Birdwatching for Beginners”. It’s something I had worked on in the past and I want to continue my work in getting people of all ages interested in birdwatching as I believe it is a healthy and useful pastime. It should be fun as there are outdoor trips as well.
Ding Li – I am currently working with a team of designers to develop a board game on the migratory bird species of Asia. Such a concept to promote bird conservation has not been done in this region, so I am quite excited to see the final project materialise. I am also working with a team of international researchers to review the state of all of Asia’s migratory birds. If all goes well, this will be published in early 2021, and will bring together lots of new insights from all over the region and how migratory birds can be better conserved.
Kim Chuah – I am currently organising the 36th Singapore Bird Race. It will be interesting to see how we can organise the race during this pandemic. We will use the social media and available digital tools to make the race as exciting as in previous years. I am also working on action plans to better protect and conserve the critically endangered Straw-headed Bulbul in Singapore.
A Field Guide to the Birds of Malaysia & Singapore
By: Lim Kim Seng, Yong Ding Li, Lim Kim Chuah, Dana Gardner(Illustrator)
Paperback | August 2020| £19.99£24.99
A fully comprehensive field guide to the 815 bird species of Malaysia and Singapore. Published by: John Beaufoy Publishing
All prices correct at the time of this article’s publication.
Completely weatherproof and able to run for months on a single set of batteries, trail cameras are now commonly used for wildlife surveys or studying animal behaviour, and are becoming a vital tool for conservation all around the world. They are also incredibly popular with naturalists who are interested in finding out what the wildlife is up to on their local patch.
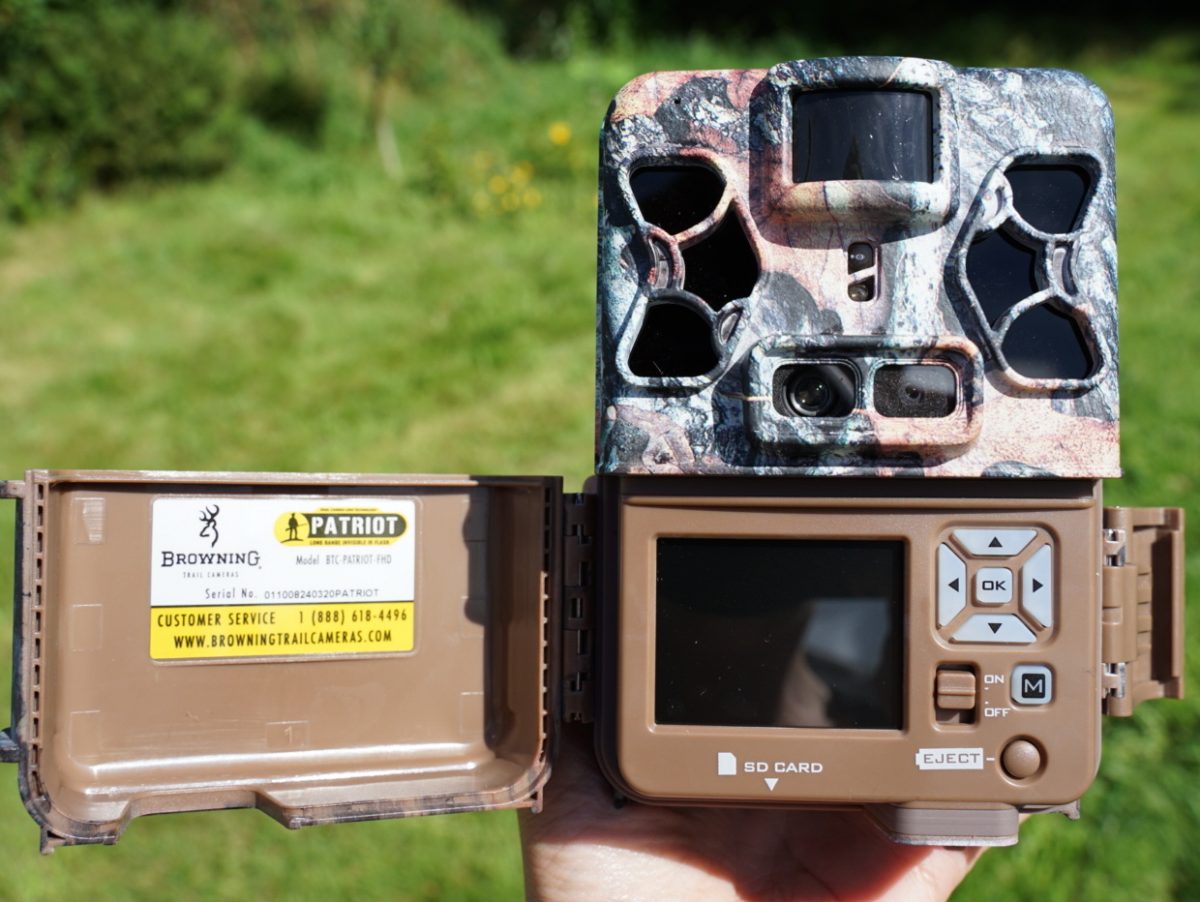
The Browning Patriot, released this year, is one of Browning’s top of the range cameras. Along with excellent resolution image and video capture (24MP images, 1920x1080p video), the Patriot features Browning’s unique dual-lens technology. This means that a separate lens and sensor system are used for daytime and night time capture, allowing you to capture excellent quality footage whatever the time of day. No-glow LEDs, which are completely invisible to both humans and other animals, are used to illuminate your subject at night up to a distance of 34m. A colour viewing screen, adjustable steel tree bracket and host of advanced camera settings all add to the Patriot’s appeal.
How we tested
We loaded the Patriot with a full set of AA batteries and a 32GB SD card then set the time and date. The camera mode was set to ‘Trail’ which means that it would record still images whenever the motion sensor was triggered by movement. The capture delay (ie the time between images being taken) was set at 5s and the image quality 24MP. Multi-shot mode was set to off (ie the camera would only take a single image per trigger) and the capture timer was set to 12.00am for both the ON and OFF times, meaning that the camera would be active 24 hours a day.
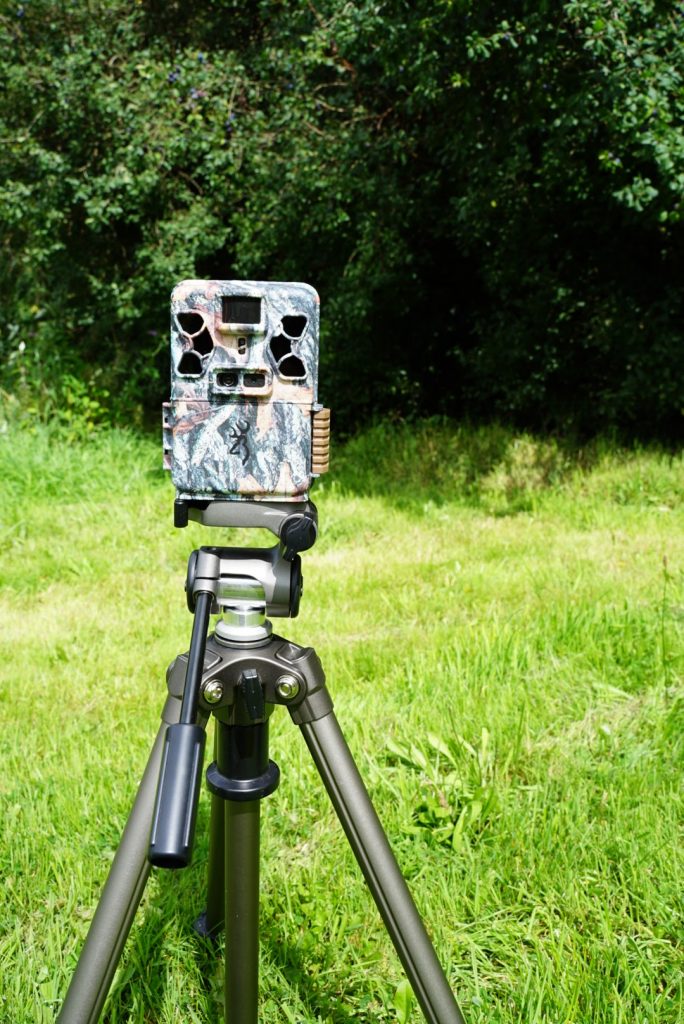
Our initial test took place in a back garden with the camera mounted on a tripod approximately 3m away from a baited tree stump. Ensuring that the camera was angled correctly was very easy, as the background of the main viewing screen shows a live image from the camera. We also conducted a motion trigger test by selecting ‘MOTION TRIGGER’ and then waving a hand above the stump to check that the light on the front of the camera was activated.
For the second field test the camera was placed in a ride that was cut into an area of wetland where there have been frequent otter sightings. Once again the camera was mounted on a tripod but this time the camera was set to record video (high resolution, length 20s, capture delay 5s).
In the third and final test, the camera was sited in an area that had both moving water and vegetation within the motion detection range. This was to provide us with some idea of the camera’s sensitivity and to see whether it would be repeatedly triggered by this motion. The camera was set to record video with the same settings as used previously.
What we found
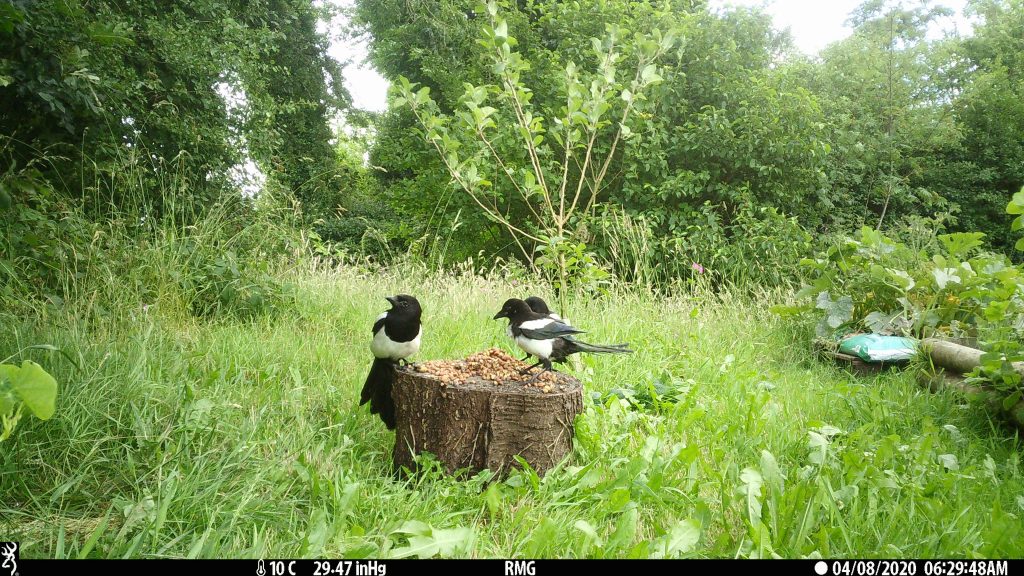
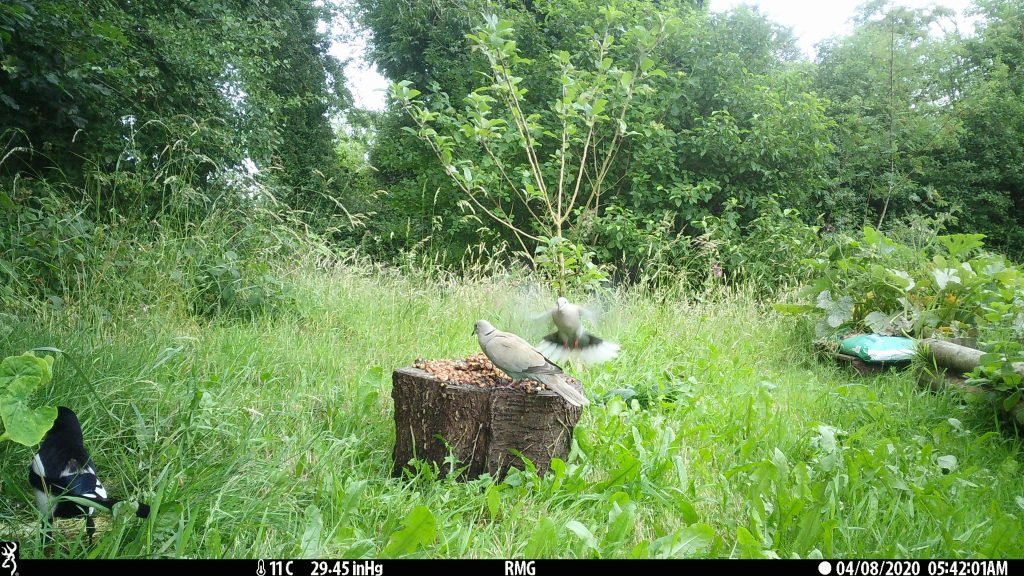
When sited in the garden, the camera took lots of pictures of birds that were attracted to the bait. The camera triggered reliably and the quality of the images, including the colour reproduction, was good. We were particularly impressed that the images below – although taken first thing in the morning, pointing directly into the sun – were not over-exposed.
Unfortunately, when we retrieved the camera from the second field test, a number of cows had broken into the area from a neighbouring field and knocked over the camera. The footage of the cows, however (despite not being what we had hoped to capture!), was good quality.
In the final test we were pleased to observe that the camera had triggered only with the arrival of the local birds, and we did not have to sift through 100s of videos of empty scenery. The audio recorded with the clip featured below was also very true-to-life.
Our opinion
Although the second, and potentially most interesting, part of our field test was prematurely curtailed, this exercise gave us a good chance to familiarise ourselves with the Browning Patriot and to see the camera in use. First up – the manual. Clearly written and lacking any unnecessary waffle, the manual made setting up the camera incredibly straightforward. In fact, this parsimony also extends to the camera itself – while there are enough options to give you plenty of control over the footage collected, there aren’t so many that it becomes overwhelming.
The front-opening design means that it is really easy to alter the settings even when your camera is strapped in place. Similarly, the bottom-loading battery tray and easily accessible SD card slot mean that these can both be changed quickly in the field without moving the camera. The steel bracket on the rear of the camera means that, when strapped to a tree or post, it grips the surface, making it more stable. For our tests, we attached the camera to a tripod which allowed us lots of control over the camera angle and height. However, as we found out, it also makes it much more susceptible to being knocked over. For locations where security is an issue, a groove in the case that runs beneath the bracket allows it to be secured with a cable lock – one with a maximum diameter of 8mm would be required.
As previously mentioned, being able to view a live image from the camera during setup, along with the motion trigger function, means that you can be sure that your camera is angled correctly. (It’s really important to remember to turn off the motion trigger function before you leave the trail camera, however, as it will stay in this mode until it is turned off manually). The sensitivity of the camera appeared to be set very cleverly, as it was triggered reliably by the movement of birds and other animals, but we experienced very few empty shots or videos, which suggests that the movement of water or vegetation were not affecting the motion sensor.
The only minor limitation we found with this camera is that the Patriot doesn’t have a hybrid mode which means that you have to choose between capturing still images or videos. (Many cameras give you the option to record both and will capture a number of images first before then switching to video record).
Overall we were very impressed with the Browning Patriot and would wholeheartedly recommend it for professional or personal use. The images and videos were good quality, the camera was easy to set up and position and the price (currently under £200) is very competitive. We’re eager to continue using this camera and still have high hopes for getting some footage of our elusive otters. Check back soon to find out if we’re successful!
The Browning Patriot is available through the NHBS website and is also available as a starter bundle which includes 8 x Lithium AA batteries and a 32GB SD card.
To view our full range of trail cameras, visit www.nhbs.com. If you have any questions on wildlife recording or would like some advice on the microphone for you then please contact us via email at customer.services@nhbs.com or phone on 01803 865913
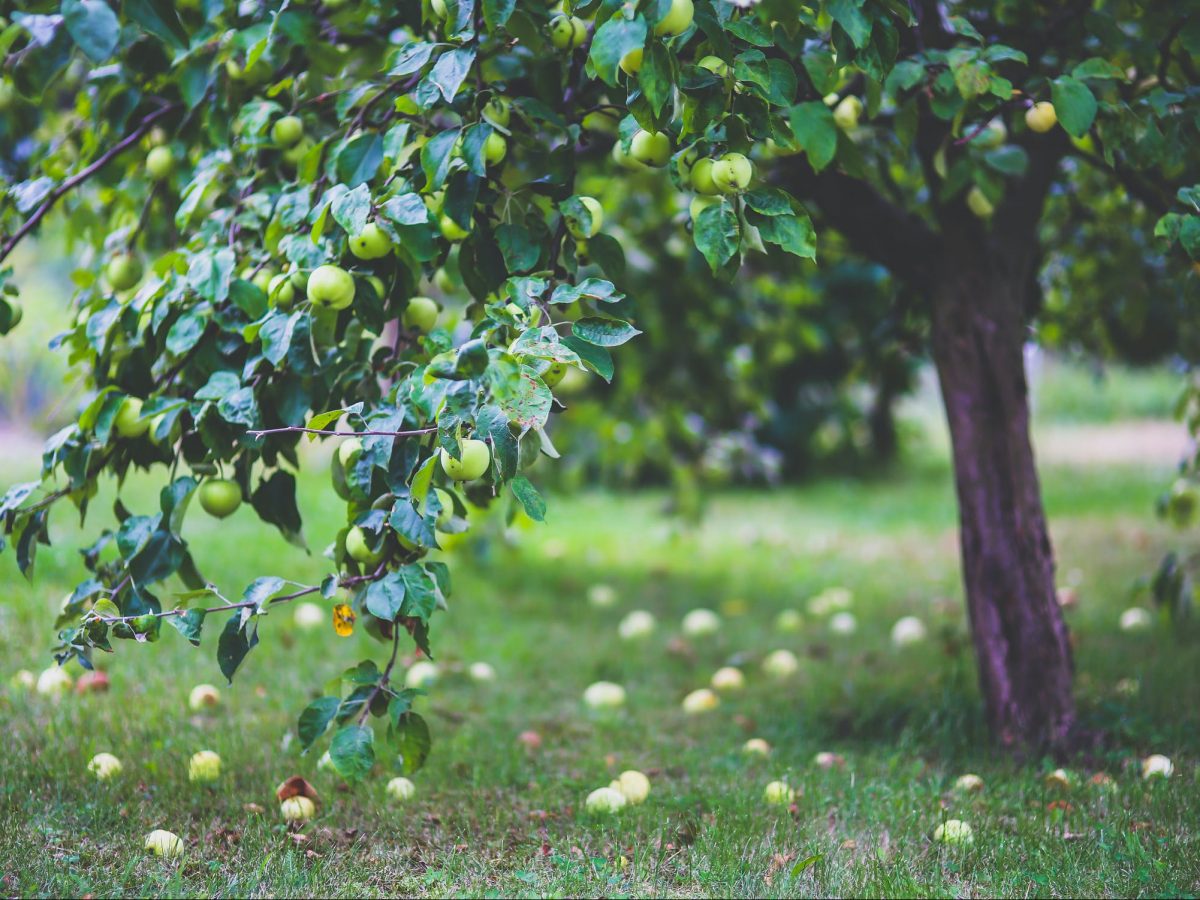
The orchard has been a traditional component of the British landscape for many centuries. However, subsidies have led to the destruction of older traditional orchards to make way for more intensive farming and now only a fraction remain.
The value of these orchards for wildlife has long been underestimated. Ben Macdonald and Nick Gates spent years visiting a traditional orchard across all seasons observing its imperilled and overlooked abundance of life.
Ben and Nick have taken time to answer our questions about their book and this remarkably fertile habitat.
Could you tell us a little about your backgrounds?
Nick Gates
Nick Gates (NG): I grew up in West Sussex, and could usually be found building a dam across a stream or out catching grasshoppers and slow worms on the Ashdown Forest somewhere. I ended up reading Natural Sciences at Cambridge and, similar to Ben, have now found myself making wildlife documentaries. But I adore spending time in the field, and am forever looking for new areas to explore, new behaviours to interpret and new species to learn about.
Benedict McDonald
Benedict Macdonald (BM): I grew up north of Bristol, and my fascination with nature began with raising butterflies at school, which then took me onto my great passion for birds. I took a different route to Nick, studying English at Oxford to improve my journalistic skills before moving into the natural history film industry. The love of birds remains – and it was indeed the search for breeding lesser-spotted woodpeckers for the BTO’s Bird Atlas that, one magical morning, led me to the Orchard.
Where did the motivation for this book come from? Are Orchards a subject that you have been wanting to write about for some time?
NG: The project actually started as a photographic record, nest-box project and field diary. We certainly didn’t envisage when first visiting the orchard that one day we’d be able to convert our passion for it into a book. As the years went by, and we uncovered more of the orchard’s stories each season, we realised we had built up a library of magical stories about this special place – and the book idea was born.
You divided the book into chapters by each month; was this something you planned all along and why did month-by-month fit the narrative of the orchard so well?
BM: As any pair of naturalists will tell you, the skills you have are similar but often complimentary. In January, for example, much of the expertise lies in tracking small mammals around the orchard, and reading prints etched in the snow – one of Nick’s favourite past-times. May is all about birdsong and concealed nests, and spoke deeply to my own love of birds. But make no mistake – every month is special in the orchard. The players are always on the move.
NG: Having spent six years visiting the orchard across all seasons, it was clear that its stories were deeply rooted around the lifecycles of the apple and perry pear trees – which themselves have a very defined year. Once the book idea became a reality, it seemed the most natural way to introduce our audience to the orchard world. As Ben and I both often travel abroad on our respective filming trips, it also worked really well when dividing the chapter structure, as we each had unique experiences from certain months that we wanted to share.
The neighbouring orchard is run intensively and very differently to the orchard you studied; what would you say are the practical advantages of being less intensive?
NG: The major benefit appears to be maintenance. Spraying an orchard many times a season requires expensive inputs in machinery, as well as the manual labour required to continually prune each tree to a very defined shape to make the spraying as efficient as possible. In an unsprayed orchard, many different age classes of trees can thrive alongside each other. If an elderly tree is lost to a storm, it is easy to leave some of the deadwood and replace it nearby with a new young specimen. But the biggest benefit is that with an intact food chain, your costly pesticide inputs are replaced with spotted flycatchers and redstarts, which arrive for free each year and willingly hoover up all manner of insects that enjoy nibbling fruit trees!
BM: The summer migrants are critical to the success of the orchard – but the residents play an invaluable role. Throughout the winter, various species of tits, finches and woodpeckers, especially lesser-spotted, are all rooting out potentially harmful insects from the bark of the orchard’s trees. And as Nick puts it, treecreepers act as tree ‘dentists’, removing lots of tiny insects that could eventually end up reducing the lifespan of the trees.
The orchard you observed rewarded you with plenty of surprising stories and scenarios. Was there one single episode that stood out for you?
BM: For me, it was when we finally solved the mystery of the goshawk’s larder. Our generation has grown up with the idea that goshawks are limited to big woods and often those dark, silent plantations. The idea a goshawk could be hunting our orchard didn’t even occur to us at first, even after we found pheasant after pheasant neatly plucked. It was only when the pair decided to display right overhead one March that, like an Agatha Christie novel, it all came together.
NG: I have been out in the field looking for interesting stories in the natural world for as long as I can remember, so it is always rewarding coming across something unexpected. The best thing about the orchard, is that this just seems to happen so regularly! But if I had to single out one, I’d say my biggest surprise was the day I excitedly returned to photograph the coal tit family nesting in a pear tree, only to find the entrance to their nest firmly blocked with a rather unfortunate wood mouse. Having most likely scoffed the nest contents, it couldn’t fit back through the hole it had entered through. It was one of the most extraordinarily bizarre things I’ve yet chanced upon in the natural world.
Do you think a separation from the EU’s Common Agricultural Policy (CAP) can create any opportunities for wildlife and biodiversity?
NG: Yes. The CAP model has ample opportunity for reform, and I hope that this is reflected in whatever system is adopted post Brexit. A model that rewards land owners for improving the biodiversity on their land is long overdue, as is a system that recognises carbon capture. There are certainly massive opportunities for British biodiversity – it is now up to those in positions of decision making to ensure they chose the correct advisers to inform these new policies.
BM: The Common Agricultural Policy has paid for enormous destruction of the countryside, and even models such as orchards that should be profitable to farmers – not just wildlife. In my view, we actually need a specific orchard subsidy. It seems mad that we can continue to pay for sheep grazing to denude hillsides and accelerate the flow of water off the hills, yet we cannot pay our farmers to grow apples. But this subsidy has to happen soon: orchards are vanishing fast.
Installing a wildlife pond is often sited as being the best way to add biodiversity to a garden; for those lucky enough to have the space, would you recommend planting an orchard for a similar reason?
NG: Absolutely. With something like a pond, you tend to see the rewards within just a few months of installing it, as the first newts and dragonflies arrive to breed in the new water source. Whilst fruit trees can take a few years to start blossoming and become increasingly valuable for your local wildlife, they mature incredibly quickly relative to most other tree species. Apples and pears are usually producing blossom and a crop in five to seven years, and by 40 years of age are well on their way to becoming an ‘ancient orchard’. Also, fruit trees, particularly those grafted to dwarf rootstock, don’t actually need a lot of room – and considering it only takes half a dozen trees to be called an orchard – most public green spaces could host a small wildlife orchard that would be of great help to local biodiversity.
After a well-earned rest, are there any plans or works-in-progress that you can tell us about?
NG: Ben and I have a few ideas for co-authored projects in the future but our next respective titles will both be individually written. I am currently working on a book about an urban wildlife garden…watch this space!
BM: As I approach the end of writing my third book, Cornerstones – for Bloomsbury (published January 2022), I have to be honest that a writing break is in order. Both writing and publicity are fantastic to be involved in but they do take a lot of time. Perhaps I can put my feet up and read Nick’s wildlife gardening book!
Ben Macdonald and Nick Gates spent years visiting a traditional orchard across all seasons observing its imperilled and overlooked abundance of life. If we can favour traditional methods and harvesting, the benefit will not only be for wildlife but for people too.
All prices correct at the time of this article’s publication.
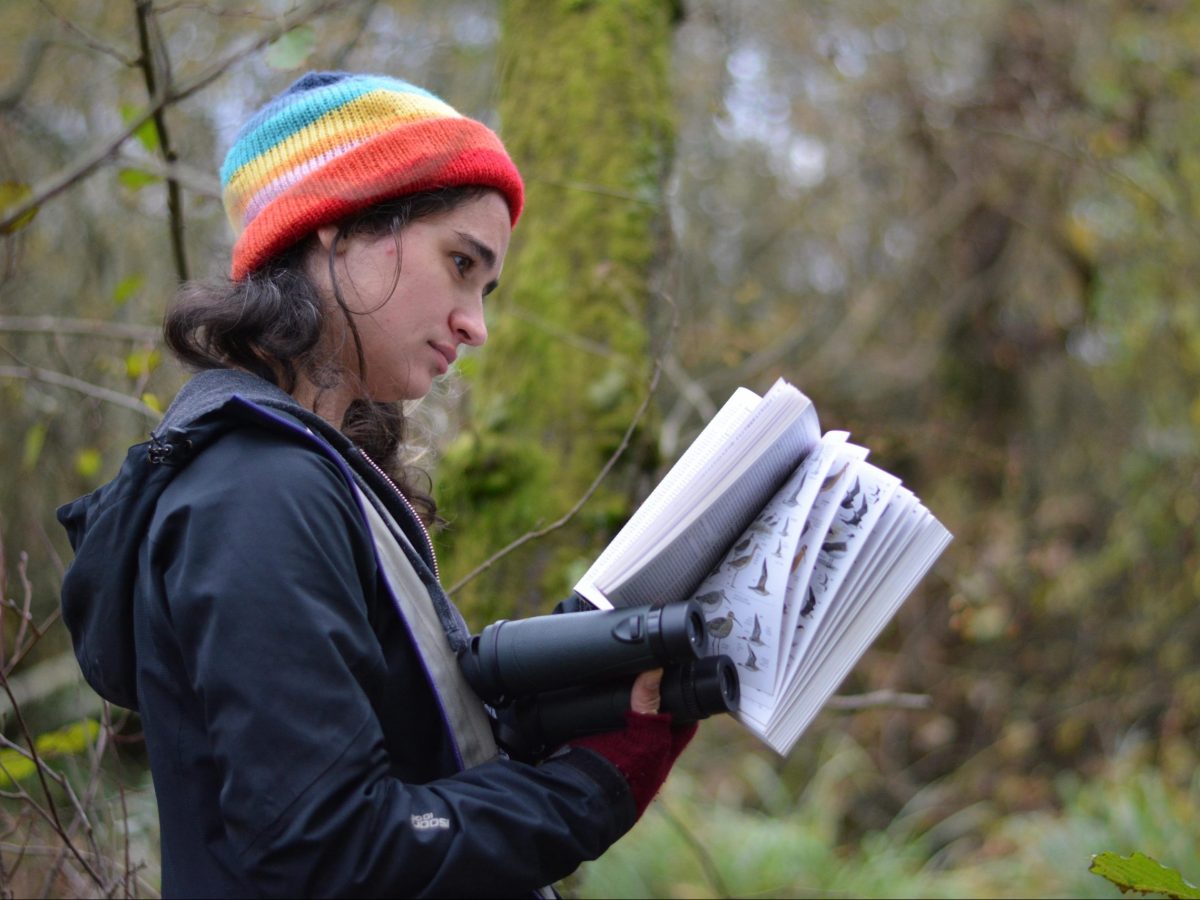
During lockdown and social isolation, many of us appreciated how important nature is to our happiness and wellbeing. It also gave us an opportunity to connect with local wildlife and develop or brush up on our identification and field skills.
While a good field guide is invaluable for this, there are also a huge number of really useful online resources available to help with identifying wild plants and animals. In this article we have listed a few of our favourites, covering plants, butterflies and moths, amphibians, birds, mammals and invertebrates.
We have also included links to ongoing citizen science projects for each; if you’re regularly taking note of the species you find then why not contribute this information to an organisation that can use the data to monitor biodiversity and inform conservation decisions.
At the end of the article you will find a couple of apps that can be used to record, identify and share your general wildlife findings.
Makaques UK/Irish Flora Key – A new interactive key to the flora of the British Isles, this in-depth database includes information on 3221 native and introduced species.
Citizen Science Projects
BSBI New Year Plant Hunt – Start the year with a plant hunt, and help the BSBI to study how our wild and naturalised plants are responding to changes in autumn and winter weather patterns.
National Plant Monitoring Scheme – This habitat-based plant monitoring scheme provides robust and much-needed data on changes in our wild plants and their habitats.
UK Butterflies Identification – Includes an extensive database of butterfly photographs, including those of immature life stages.
Butterfly Conservation’s Identify a Moth – Search the database using criteria such as location, size, colour and markings or search using an A-Z list of species names.
UKMoths – A comprehensive database of 2261 moth species found in the British Isles.
National Moth Recording Scheme – Covering over 900 species of macro-moth, this scheme hopes to benefit nature conservation, public understanding and ecological research.
Big Butterfly Count – this annual, UK-wide survey aims to assess the health of our environment simply by counting the amount and type of butterflies (and some day-flying moths) we see.
ARG UK Identification Guides – Download a helpful range of ID guides covering amphibians and reptiles, including guides to eggs and larvae to improve your field skills.
Amphibian and Reptile Record Pool – The Record Pool allows users to submit UK herpetofauna sightings and makes the data available, locally and nationally, for conservation purposes.
RSPB Identify a Bird – This bird identifier lists 406 species of UK birds and allows you to search the database using a combination of physical and behavioural characteristics.
Xeno-canto – A comprehensive database of bird sounds from all over the world.
Chirp! Bird Songs UK & Europe – This app will help you to identify and learn bird songs. (Available for iPad and iPhone only).
Citizen Science Projects
RSPB Big Garden Birdwatch – Take part in the world’s largest wildlife survey and help the RSPB to find out how our garden birds are doing. Takes place annually in January.
BTO Volunteer Surveys – On this webpage you will find a list of current BTO surveys, schemes and projects, available to suit a wide range of field skills and expertise.
PTES Water Vole Monitoring Programme – Survey a regular site or report a one-off sighting of a water vole and help protect the UK’s fastest declining mammal.
Buglife Surveys – Get involved in one of Buglife’s projects, including surveying for the Northern February red stonefly and recording invasive species found in pot plants.
UK Glow Worm Survey – Submit your glow worm sightings using this online form.
PTES Great Stag Hunt – Help guide future conservation action for stag beetles by recording your sightings.
Riverfly Partnership Projects – Find out more about all of the Riverfly Partnership’s ongoing monitoring projects. Options are available for a range of skill and experience levels.
Apps
iSpot – Created in collaboration with the Open University and the OpenScience Laboratory, iSpot is a community-based app that allows you to record and share your wildlife sightings and get feedback from other users regarding any identification queries that you might have.
iRecord – This app enables you to get involved with biological recording by contributing your species sightings along with GPS acquired coordinates, descriptions and other information. Data is then made available to National Recording Schemes, Local Record Centres and Vice County Recorders (VCRs) to help with nature conservation, planning, research and education.
iNaturalist – This site and its two apps (iNaturalist and Seek) helps you identify the plants and animals around you, while also connecting you with a community of naturalists, citizen scientists and biologists to help map and share observations of biodiversity across the world.
CIEEM’s summer conference this year discussed the urgent need to address the interlinked climate emergency and biodiversity crisis for the sake of the planet, the species and habitats it supports and for future generations. Due to lockdown and social distancing restrictions, the conference took place online, with speakers and participants attending from their homes via Zoom.
Wildlife Equipment Administrator Claire Graham attended the conference and has summarised her experience of the event and the talks below.
Logging into Zoom to take part in my first online conference, I couldn’t help but wonder if this is going to be the future of large events for a while… But, given the topic of the CIEEM conference ‘Climate and Biodiversity Crises: Professional Approaches and Practical Actions’, maybe there are positives to this! Certainly, creating a way to hold important conferences, without the need for everyone to have to travel (often long distances by plane or car) has its upsides.
So, with everyone speaking and listening from home, the day began with an introduction from Max Wade, the president of CIEEM. Following a quick mention of the unusual circumstances being dealt with by everyone this year and a reference to the growing importance of issues such as climate change and biodiversity loss, it was time for the first talk.
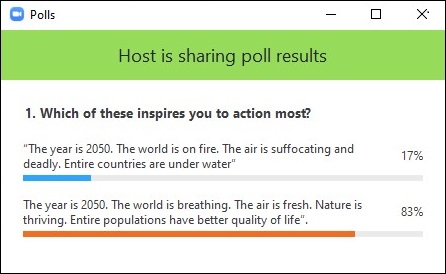
Diana Pound from Dialogue Matters opened with the keynote presentation: ‘Seize this Moment and Get Fresh Momentum’. She took us straight into a positive and inspiring talk, encouraging people to shift from an attitude of fear and doubt to one of optimism and hope. Diana asked us to highlight strengths instead of problems in conversations and dialogue, as a more effective way of motivating people to change, rather than focusing on everything that is being done wrong. Diana stated that the world is starting to wake up and a recent survey showed that 97% of those surveyed thought climate change was serious and 70% thought it was very serious. It also showed that 77% of people believe we should make as many lifestyle changes to stop climate change as we are doing to stop Covid-19. Overall, we were reminded to remain hopeful and be inspired to action; a quick poll demonstrated the power of this.
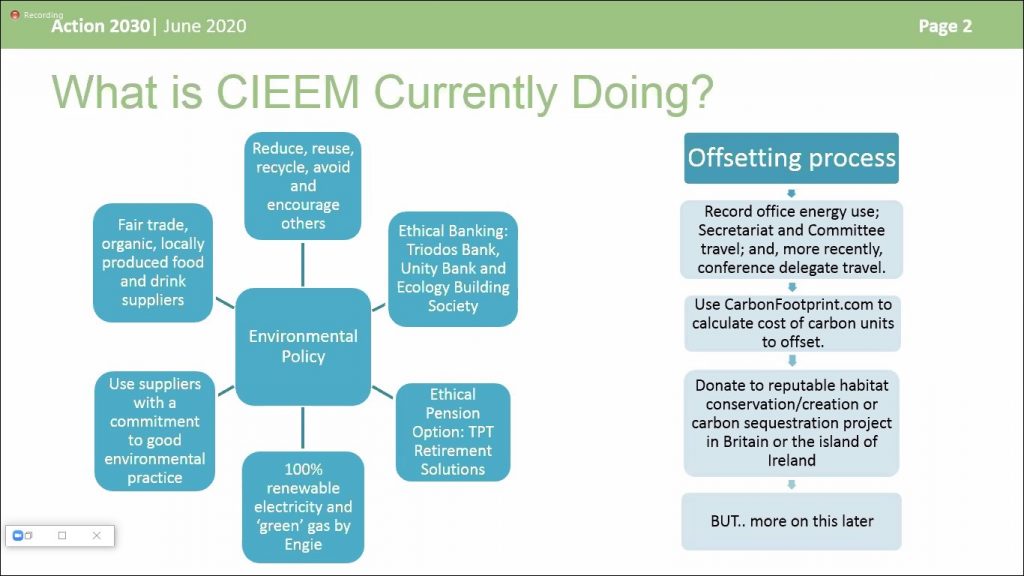
This led us into the next talk by John Box (from the CIEEM Action 2030 group) which discussed the actions that CIEEM are taking to deal with the interlinked climate emergency and biodiversity crisis. He provided lots of advice about offsetting carbon emissions and explained that CIEEM aim to achieve net zero carbon emissions in all its activities by 2030. John also emphasised the importance of environmental organisations sharing knowledge and building relationships.
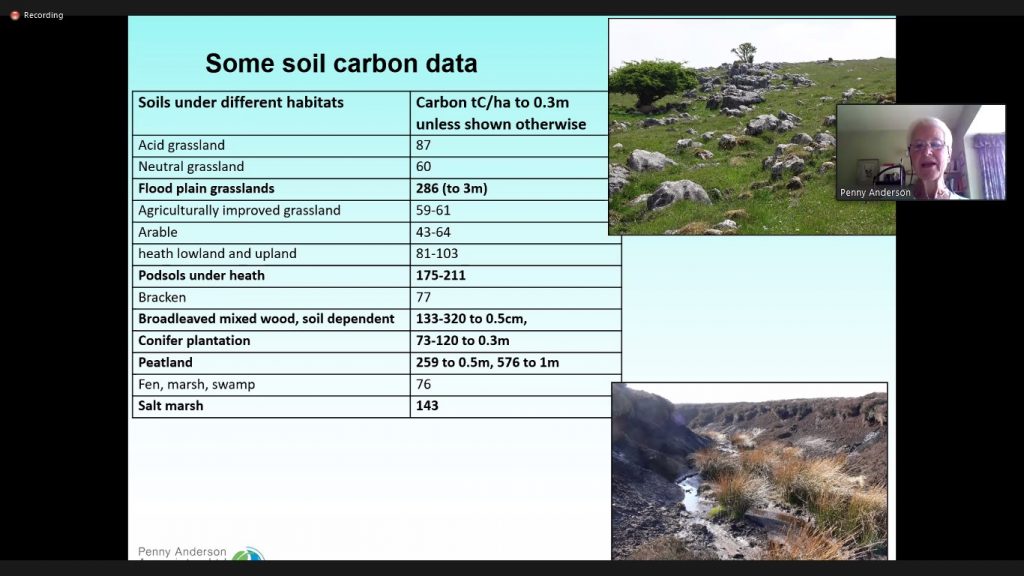
Penny Anderson (a member of the Action 2030 group and Ecological Restoration and Habitat Creation SIG) followed with a talk about ‘Habitats and Carbon, Storage and Sequestration’. She explained that, to meet the latest 2050 net zero target, the Committee on Climate Change have recommended tree planting, peatland restoration and green infrastructure. Penny explained that around half of emissions from human activity are absorbed by land and oceans and the rest in the atmosphere. Surprisingly, there is globally 3-5 times more carbon in soils than in vegetation and 2-3 times more than in the atmosphere. All semi-natural habitats hold more carbon than arable or improved grassland and these types of habitats are also better for biodiversity. Therefore, we need to concentrate on diversity within habitats and not just think about trees; there is a simultaneous need to protect remaining habitats and minimise losses in soil while also undertaking habitat creation or restoration.
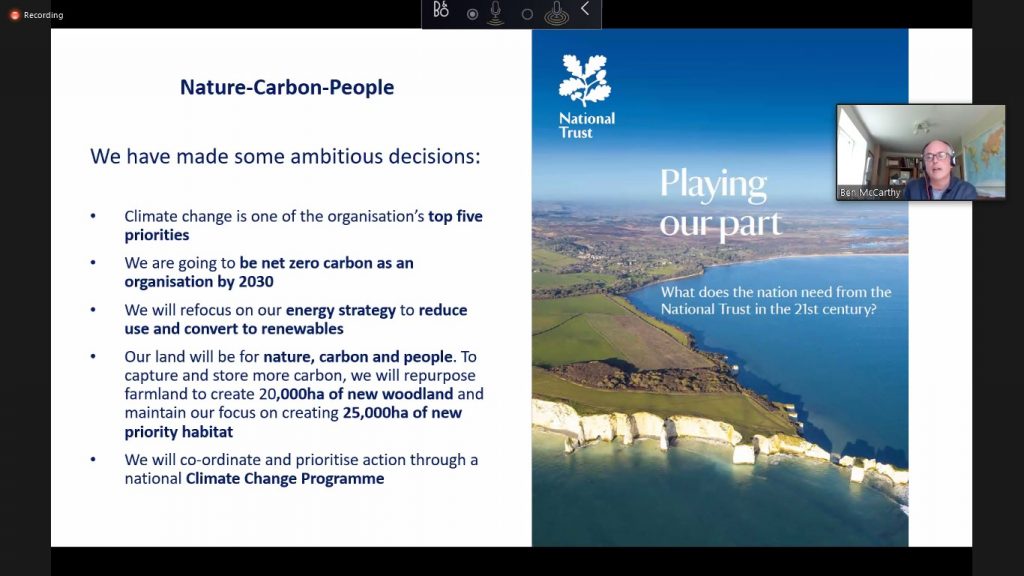
The next talk was by Ben McCarthy, the Head of Nature Conservation and Restoration Ecology with the National Trust. He explained the role the National Trust are going to play in the climate change and biodiversity crises, as well as the challenges they face as the largest land-owning NGO in Europe. Ben explained the organisations plan to repurpose farmland and create 20,000ha of new woodland and 25,000ha of new priority habitat, including restoring peatlands – a big challenge, but one they are determined to achieve! The National Trust recognise the significance of their land which is home to 44% of UK species including 737 that are threatened with extinction. Half of their properties have priority habitats that are highly sensitive.
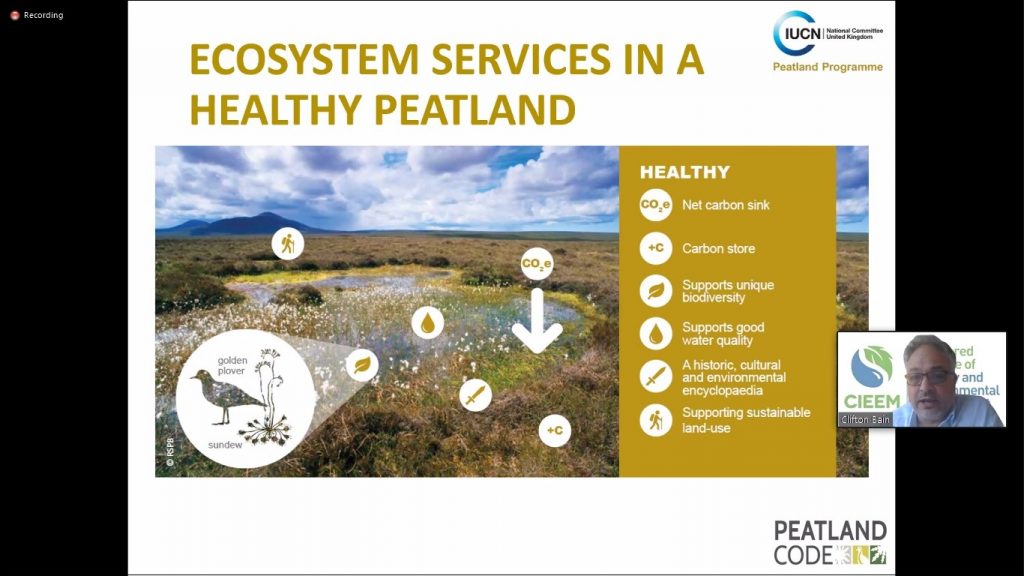
Continuing on the subject of peatland restoration, the next talk was by Clifton Bain from the IUCN Peatland Project Programme. His talk on ‘The Peatland Code: Business Funding and Environmental Assessment’ discussed the importance of peatlands and their many benefits and gave an overview of the Peatland Code. The Peatland Code is a voluntary certification standard that helps to gain funding for peatland restoration projects by giving assurance to buyers; they fund the projects in exchange for climate benefits and mitigation. He compared the ecosystem services in healthy vs damaged peatland and discussed how damaged peatlands emit carbon rather than acting as a carbon sink. He also mentioned the loss of unique biodiversity that comes with damaged peatlands.
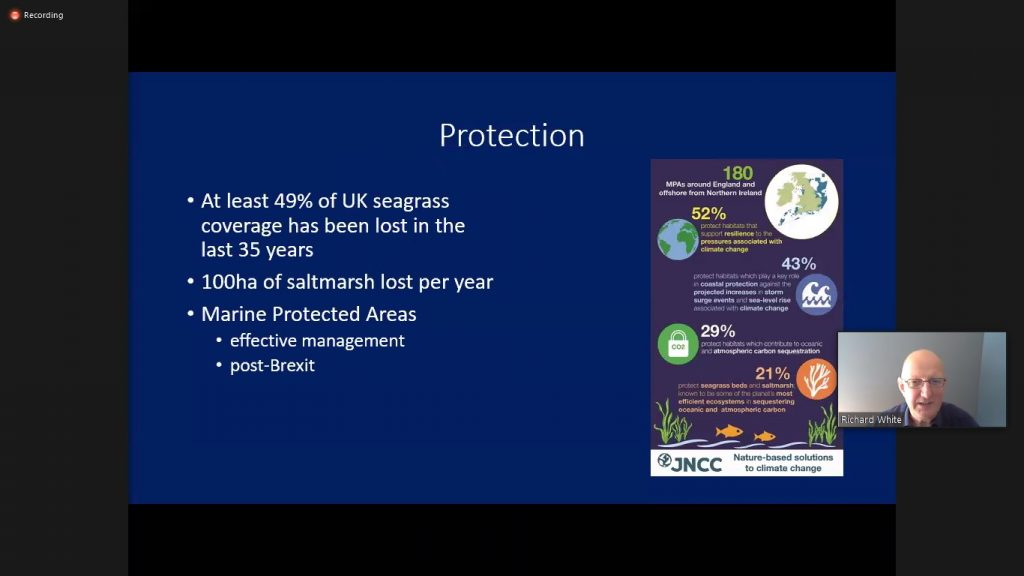
After lunch we jumped back into the next talk with Richard White from NatureBureau with his fascinating talk ‘Blue Carbon – The Sea, the Coast, and the Climate Crises’. Richard discussed ocean warming and acidification, sea level rise, shifting species distribution and methods of mitigation. He reviewed the role that ocean and coastal ecosystems have in the carbon cycle and the link between protecting and restoring marine biodiversity and mitigating our carbon emissions. Seagrass beds and saltmarshes act as globally significant carbon stores but only 21% of these habitats are currently protected by our Marine Protected Areas (MPAs). There is a need to work to protect these habitats and support restoration projects.
Richard Lindsay from East London University continued with more information about the importance of peatlands with his talk ‘Peatland Restoration and Carbon: Sphagnum, Carbon and Timescales’. He advised that, despite many peatlands and blanket bogs being damaged and emitting carbon, restoration projects can sometimes be challenged as successful carbon mitigation due to them being thought of as slow-growing systems. However, Richard discussed the use of adding Sphagnum to peat restorations due to it being a significant carbon sink and advised that it can be grown rapidly in optimum conditions.
The next talk was David Holland from Salix on ‘Soft Engineering Approaches to River, Wetland & Swale Projects’. He talked about the high carbon cost and negative ecological impacts of traditional hard engineering techniques and discussed low carbon solutions that can be used instead. Using natural materials and processes, rather than materials such as concrete, rock or metal, generates less waste, needs less future maintenance and improves the water quality and habitat, as well as providing vegetation that will continue to absorb carbon and benefit the environment.
The closing talk of the day was by Lee Dudley, Head of Environmental Carbon with the Woodland Trust and focused on ‘Carbon and Woodland Creation’. He explained that the Woodland Trust aim to conserve, restore and re-establish trees; their vision is a UK that is rich in native woods and trees for wildlife and people. The fact that woodland creation is now being recognised as a cost-effective method of climate change mitigation enables the potential for more woodland creation projects. Lee also discussed the importance of matching the right species to the right sites for the best outcomes and reminded us that it is not just about trees, but about the whole environment.
The day was wrapped up with a quick conclusion from David Parker from CIEEM. He thanked the speakers for all their extremely important and interesting talks and with that the event was over. My first experience of an online conference was positive all round; the talks were fantastic, and everyone enjoyed them from the comfort of their own homes with few technical difficulties. Hopefully the next conference can be attended in person but, if not, this experience has demonstrated there are definitely ways to keep talking and learning about these important issues.
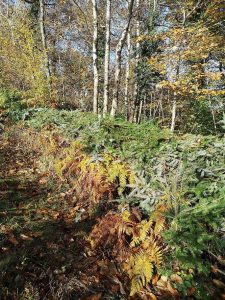
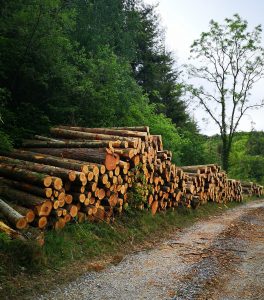
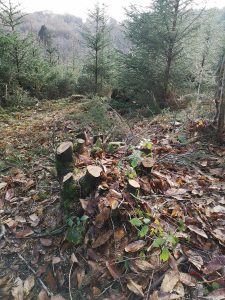
In 2018 , while still running a taxi business, an opportunity arose to purchase a few acres of local woodland on the edge of Dartmoor in Devon. Completed within a matter of weeks, Steve and Tamara Davey became proud custodians of their very own woodland!
When they discovered an impressive range of wildlife on their woodland site, they decided that the management of the area would be based on the continued provision of habitat for certain species, including seven recorded bat species, the visiting Nightjar and Woodcock.
We caught up with Steve to ask him about how they are supporting nature through their project Woodland Wildlife.
Can you tell me a little about your backgrounds.
Both Tamara and myself had childhood holidays in the Scottish Highlands as children, and there is no better place to develop an affinity with nature. It’s a place that holds a permanent residency within our hearts, those childhood memories imprinted on our futures. Mine were on the West Coast of Scotland opposite the Isle Of Skye. We used to stay in these old caravans that leaked and were powered by calor gas. The smell of the matches and gas appliances echoes those memories for me. The area was only a few miles up the coast from where Gavin Maxwell wrote his best-selling book Ring of Bright Water. As a family we spent a lot of time down at Sandaig ( in the book it was Camusfearna), Gavin’s books were really the only ones I read due to my interest in nature and love for Scotland. Above his hearth he had inscribed in Latin the words “non fatuum huc persecutus ignem” meaning, “it is no will o the wisp that I have followed here.” This phrase is very apt and resonates with our Woodland Wildlife project.
Aside from Scotland both Tamara’s and my childhoods involved getting out in nature with family walks, especially on Dartmoor. Also, similar to the book and film Kes, aged twelve I had a female kestrel to look after. My father converted the garden shed, and I remember rushing home from school every day. We looked after a tawny owl for a while too. Myself and our son also volunteered at a local bird of prey centre – these memories, and the knowledge you gain from an early age all lie dormant until the right opportunity presents itself later in life.
What motivated you to embark on the Woodland Wildlife project?
From the Spring of 2018 we made regular trips to the woodland because we couldn’t keep away and used to come up with loads of excuses to the selling agent on why we were visiting so often. We completed the purchase at the end of the summer. During the first twelve months we were staggered by the volume and diversity of the wildlife within our little plot and it was this that spurred us into creating Woodland Wildlife. I couldn’t believe that the domain woodlandwildlife.co.uk was available so I snapped it up. I then asked the web company that had recently rebuilt my taxi website to work on a website for Woodland Wildlife. They came up with the current logo which I really liked however the squirrel was grey and so I asked them to change it to red as that signified hope to me! At that point the future focus was more on the development of guided visits. In August last year we set up the Facebook page and that is seeing a steady increase of followers. We post on there most days and this time of year we may be posting up to eight times in one day, purely because of the observations – we are always finding new species to photograph. Through the winter months the posts are more project focused as that is the time of the year when most of the manual work is done.
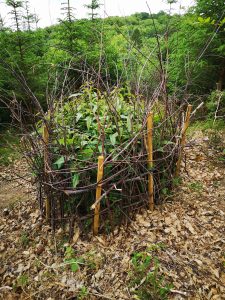
Coppiced sweet chestnut protected from surrounding deer damageFelled young sitka used as dead hedging around boundary line
What has been the biggest challenge in returning the woodland back to nature?
The nature was already there, nothing has needed returning as far as we are aware. But with small sized plots sensitive management is vital, for instance; if you don’t manage that important grassy ride, over time succession will take hold and that habitat (in our case) would be overrun with bramble and bracken, therefore the grasses would die off and displacement of species will happen. Our grassy rides are alive with insect life and as far as we are concerned these areas are a priority within our plot. When you see how small an area our grassy rides are and you see how many species they are supporting such as: leaf hoppers, beetles, bees, hoverflies, moths, grasshoppers, crickets, butterflies you can then understand how vitally important these small areas are. I would say our biggest challenge is still ahead of us. In 2012 the main plot was clear felled and in 2013 the holding company planted over 2000 young sitka spruce trees. These are now over eight years old and growing rapidly in amongst the birch, sweet chestnut, beech and a few other species. Being on an easterly facing slope (after all it is Devon) we are giving careful consideration to future extraction of timber and to what extent the damage would be. We are mindful not to ruin everything that we have done over the years. so the plan will be (in conjunction with the Forestry Commission) to convert over to native woodland. We will still retain some sitka for the goldcrests and siskins, but these will be in the area towards the top of the plot, whereby future extraction damage will be minimal.
Sitka are awful trees to work on as they are very prickly to handle. Even though they are only young it’s incredibly hard work felling them and dragging them around to produce dead hedging. Our adjoining plot is a mature stand of Douglas fir of 3.5 acres and that has recently been thinned. The remaining stems will grow on for a further 5 to 10 years, with the extra light they will grow in girth and not height. We have tagged a random 30 stems and will monitor their growth rate annually. This is one commercial aspect to our project, we plan to nurture a healthy self seeded understory within this stand and re plant where necessary in the future when it’s felled.
Was there a particular plant or animal that you wished to see return to the woodland?
Yes, the nightjar, they are in the area this season which is great, last summer they were on our plot and we regularly saw two of them. Having your own woodland is one thing but having nightjar in your woodland is a priceless dream. We spent many summer evenings there watching them, calling them in with a recording of their call (yes that works). On a couple of occasions early in the nightjar season, June I think, they landed in front of us on a tubex shelter, attracted to anything white due to the males having white markings on their wing and tails. Our sleepy dogs got their attention and flew in to check us out. The video is on the website, it’s not brilliant as it was recorded on my phone, but a wonderful experience nonetheless. We observed them through to the end of July and on each occasion the sightings consisted of a brief checking us out and churring away like they do. A truly amazing bird that due to its nocturnal habits has not been an easy species to study. They like young plantations up to approximately ten years of age as after that the canopy has closed in. They also like birch and sweet chestnut, both of which we have in abundance. We are coppicing the sweet chestnut which will give a more diverse structure to the woodland and also has many benefits to other wildlife as well as giving longevity to the tree itself. The nightjars arrive in May and have normally disappeared by the end of August and sometimes into September. Once the young have fledged they will migrate. Our thinning works of the Douglas fir overran into May and we are certain that that level of disturbance (the sound and vibration of over 200 mature fir being felled) made them look elsewhere for a suitable nest site for this season. High hopes for next year!
In what ways can you draw an income from the project and how do you ensure that those ways are sustainable?
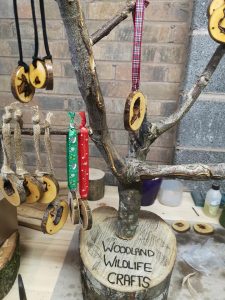
Part of the plot is mature Douglas fir, so over the years there will be an income from the felling of those but there also comes obligation and costs to re-plant. This area is 3.5 acres and we are hoping that at least 20% of that area will self-seed and will therefore not need re-planting. After 14 years of running a taxi company we have decided to pass it on to someone else as we want to concentrate on our woodland which will also involve craft sales. We plan to sell at an occasional local market, selling wooden products such as pendants, necklaces, key rings, hand made cards, Christmas decorations and fairy houses. All of the wood used will be from the bi product of our habitat work and therefore very sustainable. We are not skilled wood turners, I would describe our woody crafts as rustic. We also hope to offer guided visits for small groups of people who either want to immerse themselves into an incredibly diverse 8 acre plot of woodland that doesn’t have any public access( that’s called forest bathing nowadays), or groups and individuals that would like to visit to look at our management practises, it could also be for specialist groups to study bats, birds, butterflies etc. Although the craft sales will be necessary we do hope that the tours can be a success too as we will have great pleasure in sharing this unique place in South Devon.
Woodland Wildlife crafts to be sold on-site or at craft marketsSustainable felling and logging of Douglas fir
What would you say has been the project’s biggest success story so far?
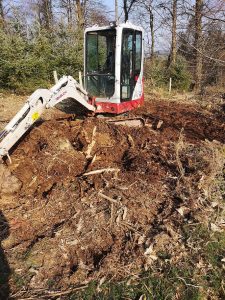
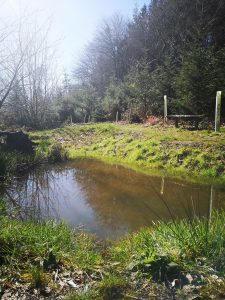
This has to be the three small wildlife ponds created in the spring of last year. Our philosophy has always been that our work creates a biodiversity gain. The ponds are a totally new feature to the wood and therefore a totally new habitat with the nearest water course being in the bottom of the valley.
The ponds are host to pond skaters, diving beetles, water boatmen, frogs, toads and a few species of dragonfly. The mosquito larvae they produce is a food source for the seven recorded species of bats that we have there. The frogspawn and toadspawn this year was amazing. This is boosting the sites biodiversity and that feels great. The Devon Wildlife Trust’s, Batworks Grant, helped with the costs of the ponds which was very welcome indeed, because so far we have funded all the costs ourselves. The top pond was also designed with a very shallow gradient at one end so that any feeding nightjar can swoop in and get a drink on the wing.
Creating the pond by removing old stumps from a previous timber crop.The pond getting established early in 2020
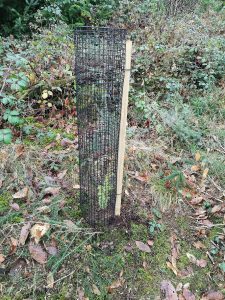
The other success is our plantings, since Nov 2018 we have planted over 400 additional trees, shrubs and hedging. From scots pine to broad leaved privet, all-in-all over 20 new species have been planted. The hedging area consists of field maple, hazel, dog rose, dog wood, crab apple, blackthorn and hawthorn, and is growing well, albeit slowly. Once mature this will provide an incredible food source and habitat for many species. We also sought advice from a consultant ecologist on behalf of Butterfly Conservation, they recommended planting broad leaved privet, wild privet and alder buckthorn all of which will provide a valuable food source for many species of butterflies, insects and moths. The alder buckthorn being the food plant for the brimstone butterfly caterpillar.
Young Juniper planted and meshed around to protect from rabbit and deer grazingCoppiced Sweet Chestnut, stems cut on an angle to prevent water from rotting them
Can you offer any advice to anybody wanting to undertake a similar project?
There is a misconception that when you purchase some woodland in the UK that you are legally bound to manage your plot, but this is not the case. Currently you can do as much or as little as you want, there are legalities regarding volume of timber that you are allowed to cut down, and rightly so. Personally speaking I think there should be some sort of stewardship course involved with any woodland purchase, but generally speaking people who buy woodland do have the environments best interests at heart. Neither myself nor Tamara are formally qualified in land management or woodland management, but what we do have in bucket loads is the passion, and when it is your passion you absorb information like a sponge. If you are interested in purchasing some woodland please make sure you do a lot of reading up first, SWOG ( small woodland owners group) is a great resource. Think about things like how far are you willing to travel to get to your woodland, our journey takes 25 minutes but I know of some owners who live a couple of hours away and then that restricts those little journeys when you just want to go there for an hour or two. Think about public access and rights of way, access, species of trees on site, how neglected the woodland is because that may dictate how much physical work maybe required. I know owners that have a couple of acres of plantation and therefore their management work is negligible. Think about orientation, diversity and age of species and the potential value of the timber there. Getting a flat site is not easy and virtually impossible in Devon, some come with streams etc. You would need to appoint a solicitor as the conveyancing is similar to house buying but much more straight forward.
We would say to anyone interested in purchasing some woodland to definitely do it, it is an amazing thing to do, yes we can buy fancy cars and gadgets and go on expensive holidays but owning your own little piece of nature is a priceless thing to do. It’s more like guardianship than ownership, but you will have a lot of control over the future of that plot.
Love nature, it will never fail you.
Do you have any long-term plans for the future of Woodland Wildlife?
Well where do we start here? If money was no object we would like to deer fence large parts of our woodland to allow natural regeneration to occur unhindered. But money is an object so we will improvise and mitigate the grazing as much as possible. Luckily we are not overrun with roe deer but there are a few around. The damage they do to new growth is staggering.
Over time we would like to see part of our main plot restored back to its natural former state which was wooded heath. Around 1800 the wider woodland was mapped as a Down which would correspond with our small patches of heather and large amounts of gorse and bracken. Dry lowland heathland is a scarce habitat these days and we would like to re-nature that habitat along with keeping the coppiced sweet chestnut, birch and beech. The plan will be for the main plot to remain an open woodland with pockets of heath and grassy rides. We will keep some sitka on the higher parts of the plot.
This winter will involve widening the lower part of the North to South ride which is quite overgrown, creating a ride that will traverse the contours from the West to East ride. This will involve the felling of a lot more young sitka but it will kick start the project of connecting up some of our micro habitats. We are keen to provide a suitable site for the migrating nightjar and the wintering woodcock and this will involve a lot of physical work. Any major works such as this needs careful consideration for the future resilience of the woodland. All of our plantings have been carefully selected with the future in mind for example, the scots pine (although slow growing) is a fantastic tree that supports a large amount of wildlife plus once established will cope well with periods of dry weather. We have also planted some juniper and these trees will also cope admirably in dryer conditions and therefore the challenges of climate change. The naturalised species such as birch, beech, gorse, heather, bramble and bracken will naturally cope with dryer summers.
With regards to Woodland Wildlife as a business, we hope that the occasional small group or individual will continue to visit to experience this magnificent site. We aim to continue with the craft sales into the future. We aim to continue to document our species and our works. The emphasis will be on small groups as we are keen to prevent compaction of soils.
To find out more about Steve and Tamara’s fascinating project you can follow them on facebook and visit their website
Further Reading on managing woodlands for wildlife and people.
Managing Your Woodland for Wildlife
By: David Blakesley, Peter Buckley and Tharada Blakesley
Paperback| May 2016| £12.99
From conserving deadwood to putting up bat boxes: this book will appeal to small woodland owners wishing to improve woodland for wildlife.
Woodland Creation for Wildlife and People in a Changing Climate: Principles and Practice
By: David Blakesley and Peter Buckley
Paperback | July 2010| £5.99£24.95
This book presents a comprehensive and richly-illustrated guide to the principles and practice of woodland creation for wildlife and people.
A Journey in Landscape Restoration: Carrifran Wildwood and Beyond
Edited by: Philip Ashmole and Myrtle Ashmole
Paperback | June 2020| £16.99£18.99
An inspirational account of the rewilding of Carrifran Wildwood, showing what can happen when locals take charge of landscape restoration.
The Wood: The Life and Times of Cockshutt Wood
By: John Lewis-Stempel
Paperback | March 2019| £9.99
A lyrical diary of four years spent managing three and half acres of mixed woodland in south west Herefordshire.
All prices correct at the time of this article’s publication.

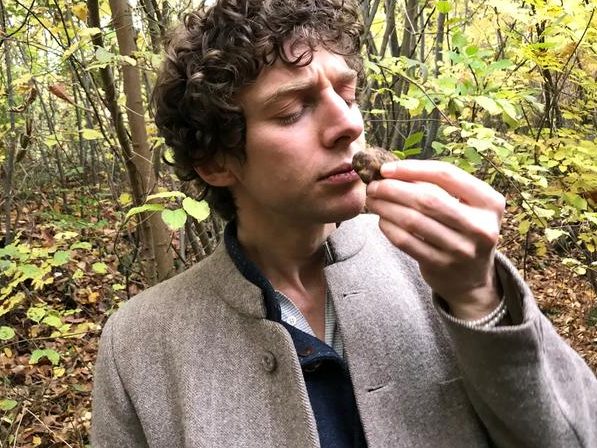
 Merlin Sheldrake is a biologist and a writer with a background in plant sciences, microbiology and ecology. He received a Ph.D. in tropical ecology from Cambridge University for his work on underground fungal networks in tropical forests in Panama.
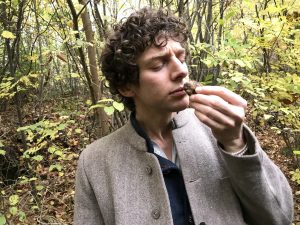
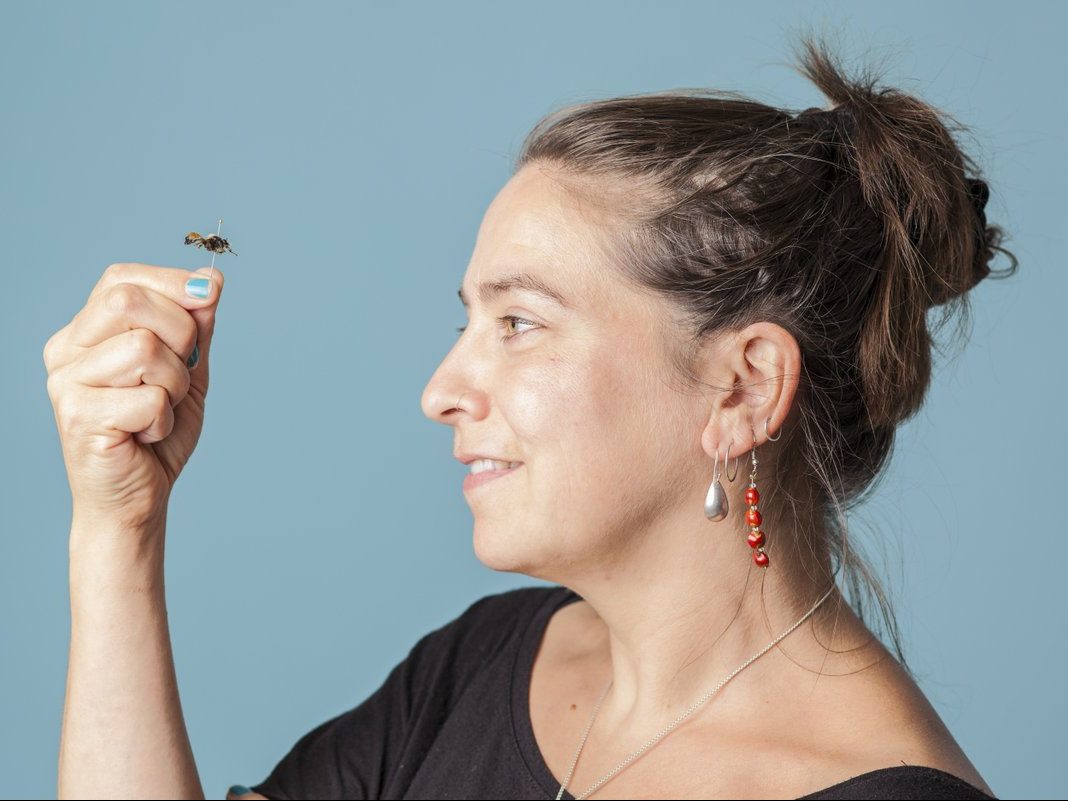

 After two decades of researching them, has your own attitude towards them changed?
 You mention many people seem to think adult flies lack brains, this misconception being fuelled by watching them fly into windows again and again. This may seem like a very mundane question but why, indeed, do they do this?
 You explain how insect taxonomists use morphological details such as the position and numbers of hairs on their body to define species. I have not been involved in this sort of work myself, but I have always wondered, how stable are such characters? And on how many samples do you base your decisions before you decide they are robust and useful traits? Is there a risk of over-inflating species count because of variation in traits?
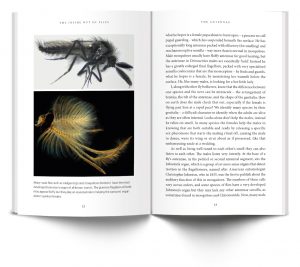


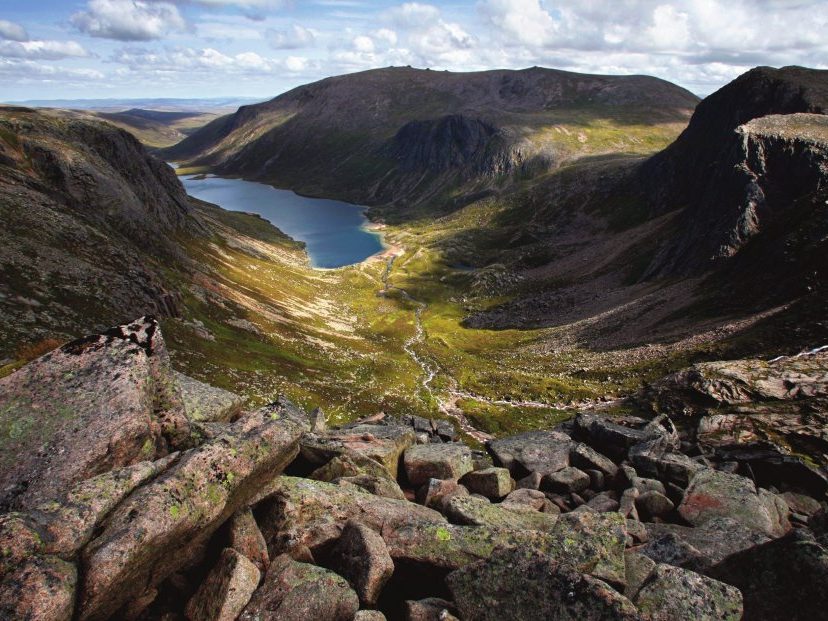

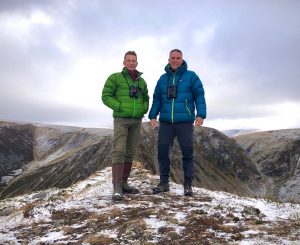
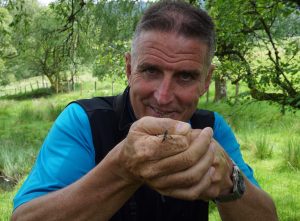
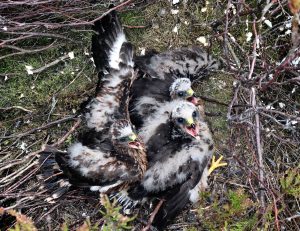


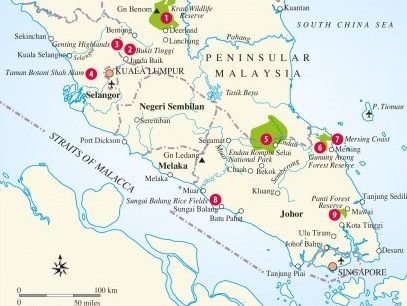
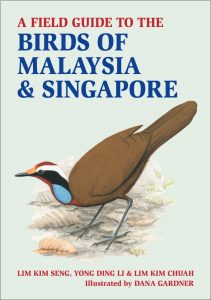

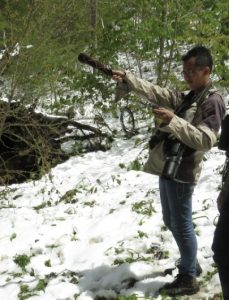

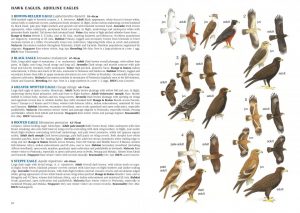 Kim Seng – My friend Dana Gardner, the illustrator of this book, got me interested in doing another book. We had successfully collaborated on a first field guide to the birds of Singapore in 1997 and were keen to work together again. Dana had a friend who was a publisher and we decided to a do a single volume field guide to the birds of the whole of Malaysia, since none existed. This was in 2010. Unfortunately, our publisher pulled out not long after that and we were left stranded. Luckily, through my fellow collaborators – Kim Chuah and Ding Li – we managed to get John Beaufoy interested in our project. A contract was signed in 2016 and as they say, the rest is history!
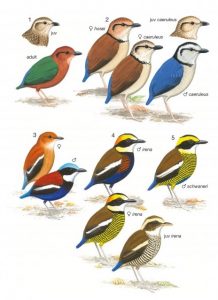 Kim Seng – Each of us had different ideas on how to do the book and also other personal commitments. We as the writers also had to contend with differences in writing styles. Luckily, we decided to stick with a standard format, came up with a list of who was writing what chapters and what bird families and managed to more or less stick to our deadlines. Another challenge was the impressive work done by our illustrator. He had to do illustrations of all 829 species all by himself. To ensure accuracy, he would send us completed plates for comment, and we duly responded if changes were needed. Not an easy task, as we were based in Singapore and he, in the USA.
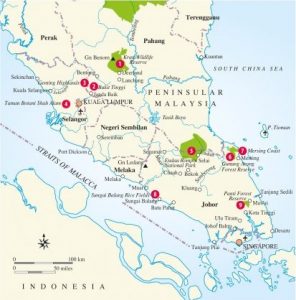 Kim Seng – Well, COVID-19 has placed tremendous restrictions on travel in both Malaysia and Singapore. You could bird in certain areas but only with social distancing and other safe practices in place. Initially, we could only look at the birds from our balconies or backyards but this was an opportunity for some of us to study some of the neglected urban birds and understand a little better. I actually published two blogs based on my observations of urban birds from my balcony! In the last couple of months, restrictions have been eased and we are allowed to go birding in our favourite birding places, but I’m still waiting for the day when I can travel freely and bird in Malaysia again.
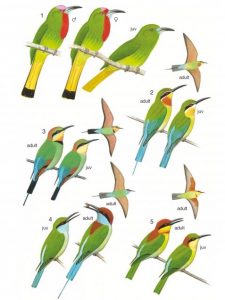 Kim Seng – Three reasons – good birds, good food and good company. All three are never in short supply in these two amazingly friendly countries. The people are generally very friendly and the variety of local food is really incredible. Of course, the fascinating diversity of birds, with over 800 species of birds and Bornean, Peninsular and Sunda endemics in abundance are dreams to savour for birdwatchers and ornithologists alike.