Author Interview with Penny Metal: Insectinside

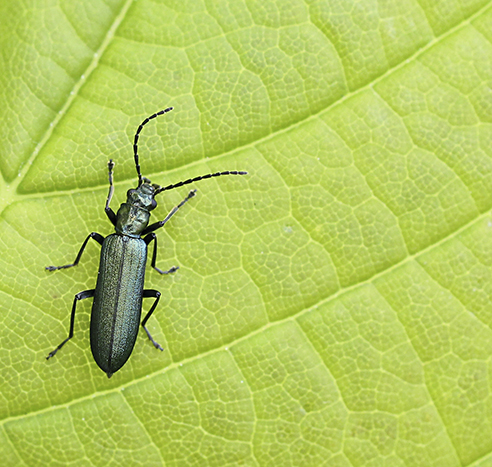
As recently featured on BBC’s Springwatch, Insectinside is a fantastic book featuring hundreds of species of insect that have all been found in Warwick Gardens in Peckham by author, Penny Metal.

With Penny’s incredible photographs and often humorous social commentary, Insectinside is an inspiring look at the diversity you can find just beyond your doorstep, as well as the vital importance of our natural spaces.

Can you tell us about your background and how you came to write this book?

I have a background in graphic design and often work in the area of nature conservation. This means I get to see what projects are happening etc. I work from home and decided to spend my lunch breaks in my local park photographing and surveying insects. I learned about the insects, watched them and counted the sheer number of species, and realised that no one else had actually surveyed a small urban park extensively. The book came about as I wanted to show people what was living in the bushes and to put Peckham on the entomological map!
Insectinside is written from the unique perspective of the insects that dwell in Peckham Park. What inspired you to write this way, rather than in a more traditional prose?
I wanted to try a different way of presenting information that would ‘hook’ people and short stories were the way to go. A lot of people don’t like insects and comparing their lives to ours not only elevates them, it gives the reader another perspective on how wonderful they are, and you can add a bit of humour alongside topics which are happening at the time (gentrification, Brexit etc). I find them fun to write, and am often inspired by how an insect looks or acts and what is going on in the news and try and link the two together. It is a good way to introduce some of the lesser known insects. My strategy appears to have worked!

Do you have any favourite species that you would like to tell us about?

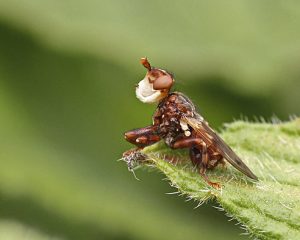
I am a big fan of wasps, especially parasitic wasps. My favourite is the Gasteruption jaculator and watching her squeeze herself into the tiniest beetle holes where the scissor bees nest to lay her eggs is a sight to behold.

Recreational places like parks might not always be considered for their conservation potential. What can you tell us about the significance of parkland in the UK?

I think parks have been overlooked as areas of conservation. They can be large places and they have to work hard – recreation, dog spaces, playgrounds, sports spaces, neat formal areas for aesthetics etc, lighting, and usually open 24 hours – but there is no reason why we can’t include habitats for our wildlife. A simple solution would be to leave areas un-mowed to grow wild. In the parks of my local area in London, large swathes of grasses and flowers have been left to mature and people have been really receptive to it. I think we are finally moving away from the Victorian ideal of neat and tidy!
With an ever-growing population in the UK, parklands are becoming increasingly busier. What do you think we need to do to protect our natural spaces?

Tell people to stop destroying them, and to take their rubbish home! Luckily there is more awareness now about the importance of our natural spaces, though there is a way to go yet to get everyone on board. Personally, I would like for our natural spaces to be so integrated into our lives that we can drop names like ‘nature reserve’ and just appreciate nature for what it is.

The book has a great many beautiful insect photographs, taken by yourself. Do you have any advice for aspiring macro-photographers?

Keep a sharp eye and a steady hand! Watch them to see how they move – for instance dragonflies tend to return to their perch a couple of times before they fly away for good.  And a sunny day with clouds is the best time to photograph flying insects as they stop and have a rest when the sun is hidden.

Insectinside
By: Penny Metal
Paperback | Due in stock soon |  £19.99


All prices correct at the time of this article’s publication.


NHBS In the Field – Telescopic Wi-Fi Video Endoscope

Telescopic Wi-Fi Video Endoscope

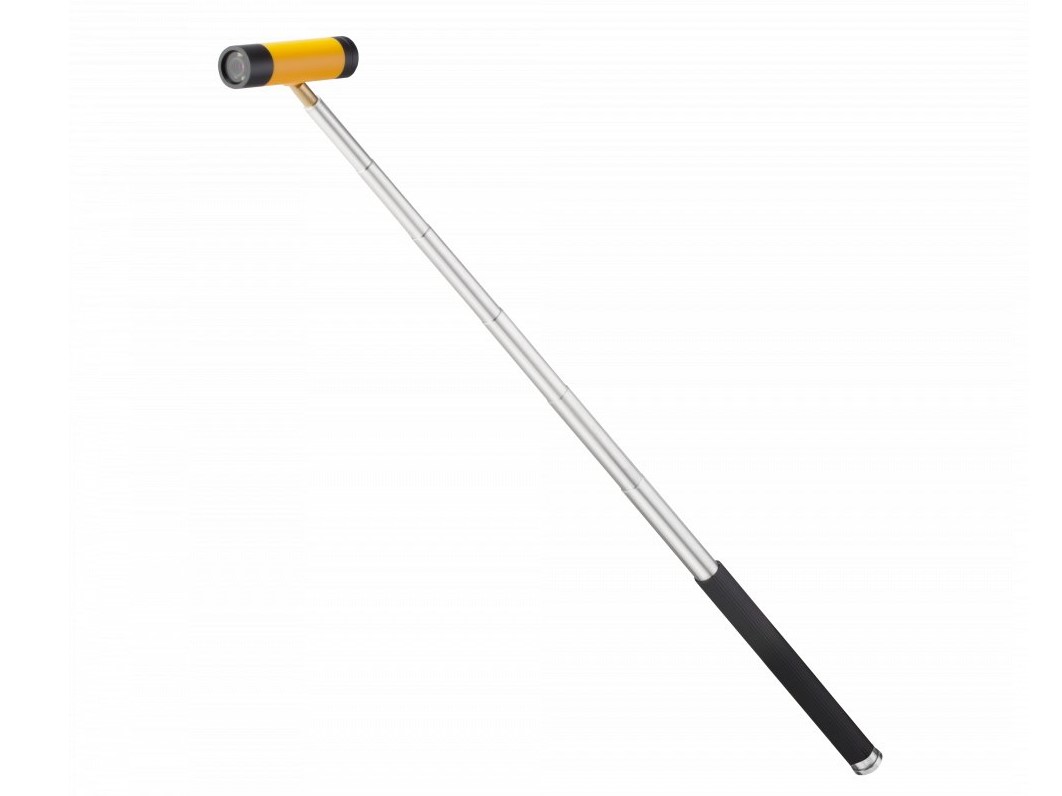
The Telescopic Wi-Fi Video Endoscope is the latest addition to our range of video endoscopes and is manufactured by the company behind the ever-popular Explorer Premium Endoscope. An endoscope is a fantastic piece of kit for any practicing ecologist, allowing you to inspect hard to reach or inaccessible locations. Typical examples of where endoscopes are used include checking burrows, bird nests and bat roosts, where direct visual access may be limited.

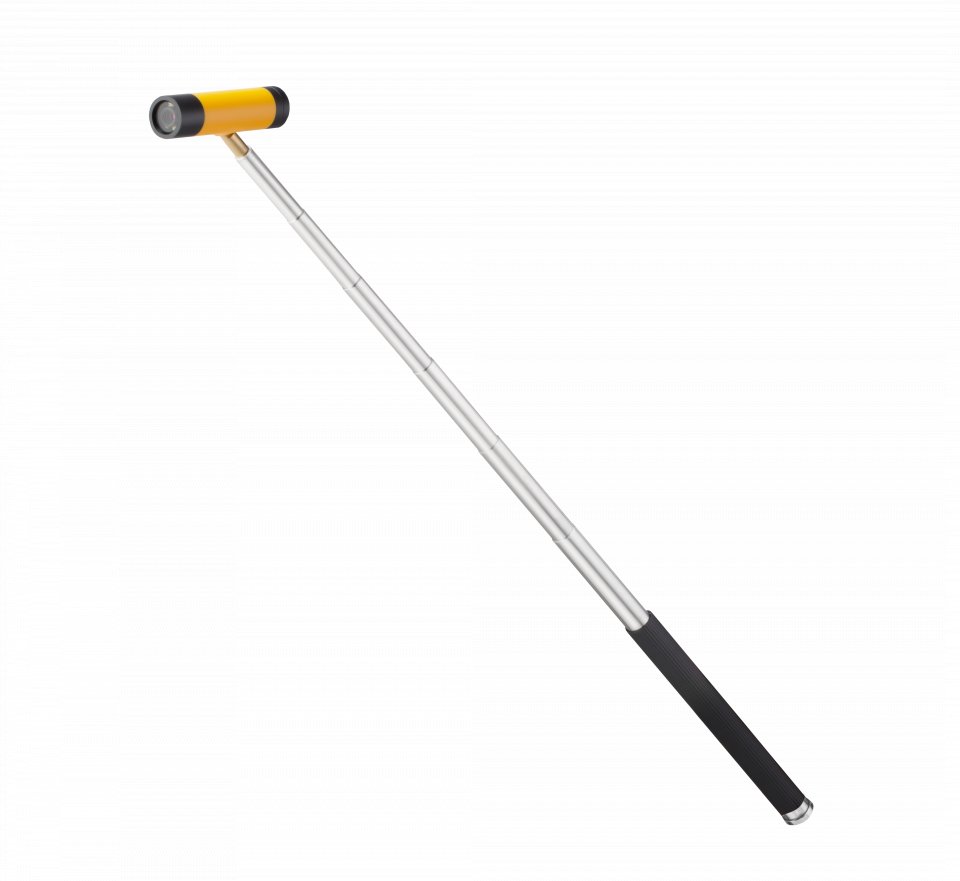
This model features quite a few changes in comparison to its predecessors. Although the camera is labelled as an endoscope, it is really a hybrid between a pole mounted camera and a traditional endoscope. All electrical and optical components of the camera are neatly contained in a cylindrical module measuring just 8cm x 2cm (excluding fixing points) which is quickly and easily mounted onto the included telescopic handle. The camera also comes with a 14cm long flexible arm, which can be connected between the camera and the handle to help when manoeuvring in awkward spaces. As the name suggests, the camera transmits footage over Wi-Fi and allows the operator to view a live feed wirelessly on a smartphone or tablet.

We tested this camera in several locations, including a few typical bat and bird boxes to gauge its overall suitability for different applications.

How we tested

In March 2021 we took a Telescopic Wi-Fi Video Endoscope out into the woods surrounding NHBS and simply attempted manoeuvring the camera into a few awkward and hard to reach locations; such as high up in ivy covered ash trees and over the edges of some of the more unstable riverbanks. Our aim was to try and gauge its effectiveness in extending a surveyor’s reach. We also tried using the camera to inspect several empty bird/bat boxes to see how it would measure up against a traditional endoscope in these situations. Additionally, we captured several images using the camera’s free to use ‘Smartcam Wi-Fi’ app.

It is important to note that it is an offence to disturb nesting Schedule 1 bird species and any bat roost without an appropriate license, hence we only inspected boxes we knew to be empty.

The fully assembled camera is incredibly lightweight, weighing little over a few hundred grams, and it comes with a semi-rigid compact carry case that we were able to fit easily into a rucksack.

The camera is powered by a built-in Lithium-ion battery. We charged the camera, using the included USB-C to USB-A cable, for approximately 70 minutes as indicated by the manual supplied with the camera. On a full charge the camera can operate for a total of 90 minutes which was more than sufficient for our needs.

What we found

Connecting the camera to a phone was quite simple. Once we had downloaded the Smartcam-Wi-Fi app, all we had to do was turn on the camera module and connect to its Wi-Fi signal on our phone. It is helpfully called ‘SmartCam-XXXX’ so it is easy to identify. The app has several controls for the camera, including LED brightness, freeze (holds the image displayed until turned off), capture image and start/stop recording. The adjustable LEDs were a very handy feature and allowed us to maintain the optimum light settings when using it outdoors or inside a nest box. One frustration we had with the app was that it lacks an option to rotate the video feed, meaning that it is often necessary to rotate your phone to maintain the correct orientation. Because of this it would be worth investigating whether there are alternative apps more suitable for using with the camera.

Inspecting an empty bird box

Despite the limitations with the app, we were very pleased with the picture quality of the camera. Certainly, the 720p resolution is noticeably better when compared to an older style Explorer Pro endoscope, which has a slightly lower video resolution of 420p. When fully extended you do have to be careful in holding the camera steady as the image clarity can suffer a bit from camera shake. A nice feature of the camera is that it is waterproof to an IP67 standard, meaning we were able to submerge it briefly to inspect areas of the local river. One thing to note here is that while it was fine operating underwater, the Wi-Fi signal was severely reduced, and it was not able to maintain a stable connection for very long.

Image taken using the Smartcam Wi-Fi app while submerged in the River Dart

Other than when using the camera underwater, the Wi-Fi signal from the camera was very reliable. When testing the camera indoors we were able to maintain a high-quality live feed at a distance of around 15m with a clear line of sight. Certainly, in the field this was somewhat reduced by obstructions, but we found that the signal was still sufficiently strong with a distance of at least 10m between the camera and our smartphone.

The extended reach of 1m was useful, however we felt in most cases a surveyor would benefit from a greater total extendable length. The supplied handle does feature a thread at its base, meaning it would be possible to attach an additional handle to increase the overall reach. We found the flexi arm provided with the camera was sufficiently strong and allowed us to quickly adjust the camera angle or manoeuvre the camera into an awkward area when using it out in the field.

Investigating thick ivy with the endoscope at full extension

When attempting to use the camera with our nest boxes, we found that for boxes designed to suit larger birds (Barn Owls, Tawny Owls, Kestrels etc) the camera was easy to use and the benefits to workers looking to inspect these boxes were clear. However, its usefulness in inspecting bat boxes and garden bird boxes was more limited. The narrow crevice entrances of most bat boxes are simply too small for the camera to access, and a traditional endoscope style camera tube would be more appropriate in these instances. The 20cm diameter camera body could fit through the entrance holes of most bird boxes; however, it was not always possible to angle the camera as required and still fit it through the entrance hole of the box, meaning that the base of the box was not always visible.

Our opinion

Overall we found that, while the Telescopic Wi-Fi Video Endoscope is not always as effective as a more traditional style endoscope and the associated app is limited by certain design flaws, its affordable price, ease of use and versatility make it a great piece of kit for more general ecological surveying.


The Telescopic Wi-Fi Video Endoscope is available on the NHBS website.
To view the full range of endoscopes, along with other survey equipment, visit nhbs.com. If you have any questions or would like some advice on choosing the right product then please contact us via email at customer.services@nhbs.com or phone on 01803 865913.

NHBS In the Field – Bushnell Prime Trail Camera

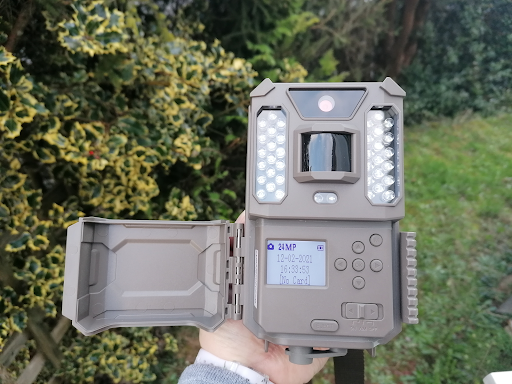
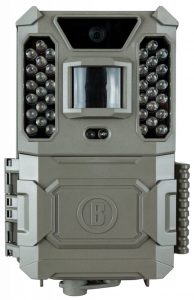
Bushnell is a renowned brand amongst trail cameras having been used and trusted by specialists and naturalists for decades. The Bushnell Prime is a new camera at the lower price end of the Bushnell range, however boasts good specifications and is great value for money.

How we tested

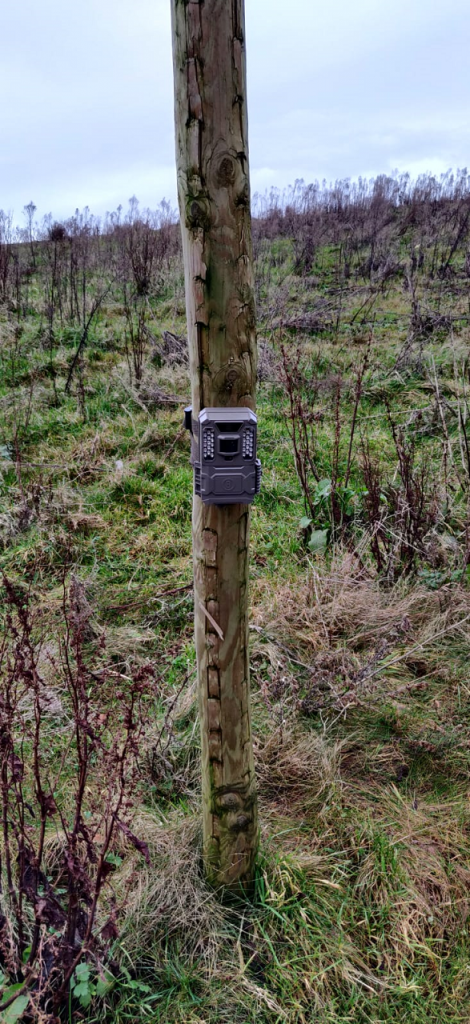
We placed the camera attached to a wooden post that was facing a known deer track on some scrubby land facing into hedgerows, using the included buckle strap. If you were worried about security, a cable lock such as a Python Mini Lock is compatible and can be threaded through the specific lock hole.

For the first set up we tested the Bushnell Prime trail camera by taking photographs with the following settings:

Mode: Camera
Interval: 5s
Additional set: on
Image Size: 24Mp
Capture Number: 1 photo
Video Size: 1280×720 at 30fps
Video Lengths: 10s
Sensor level: Normal
Field Scan: Off
Flash Mode: Auto
Video Sound: On
Time Stamp: On
Camera Mode: 24hrs

Upon checking the camera footage we realised we had angled the camera too high given the sloping ground. However, we were still surprised at the lack of photographs despite the poor angle. We decided to increase the sensitivity of the sensor from Normal to High and placed the camera lower down on the post (the Prime user manual recommends placing the camera at a height of 1-1.5m but take into consideration your surroundings and target species).

We also decided to put some cut up apples out in front of the camera, that way we would know if there had been any animals feeding that had been missed by the trigger. This new position proved successful so we kept the camera in that position for subsequent tests. For each test session the camera was left for at least 2 days and nights.

After successfully capturing some photos, we changed the settings to record video (Mode: Video) with the above settings but keeping the sensor on High.

What we found

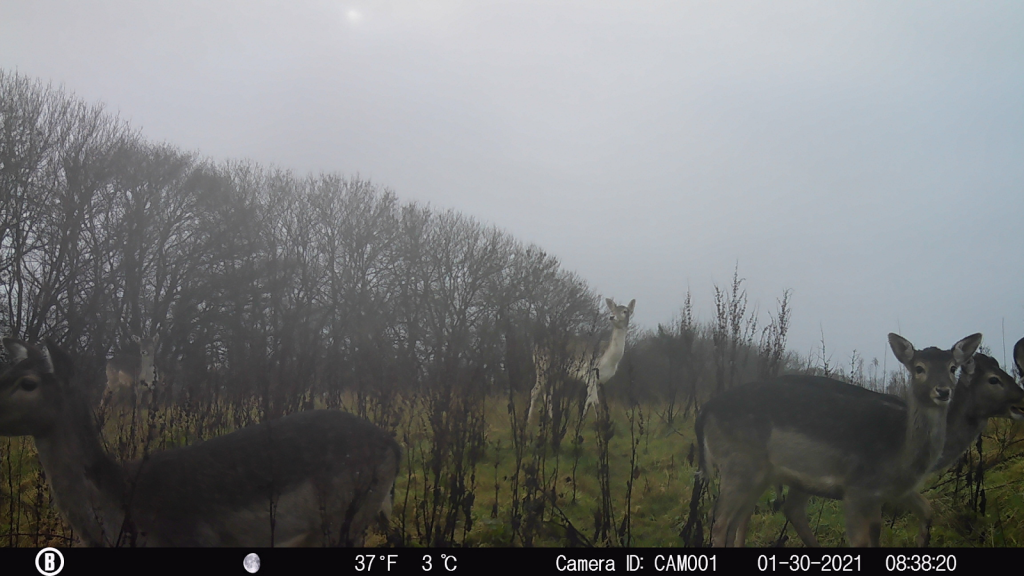
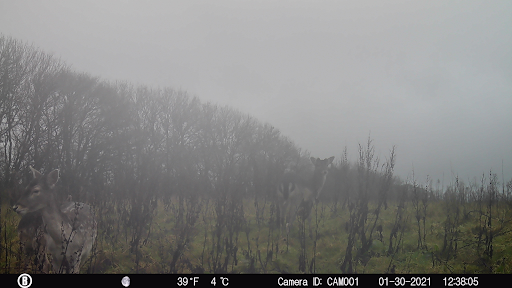
The weather was not good when the camera was set to take photos, and when raining and foggy the photos did look a little hazy as seen in the below images but are still certainly clear enough to identify fauna. It is worth noting that where the camera was situated does often get engulfed in clouds.

However, when there was no cloud bank, even on a dull day the photos were bright and crisp as you can see in the below photos. We were particularly impressed by the close focus as many trail cameras are not designed with close focus in mind and the Bushnell Prime trail camera’s manual recommends that your target monitoring area be no closer than 3m to the camera. Although the bait was put further than 3m away, the animals certainly ventured closer to the camera.
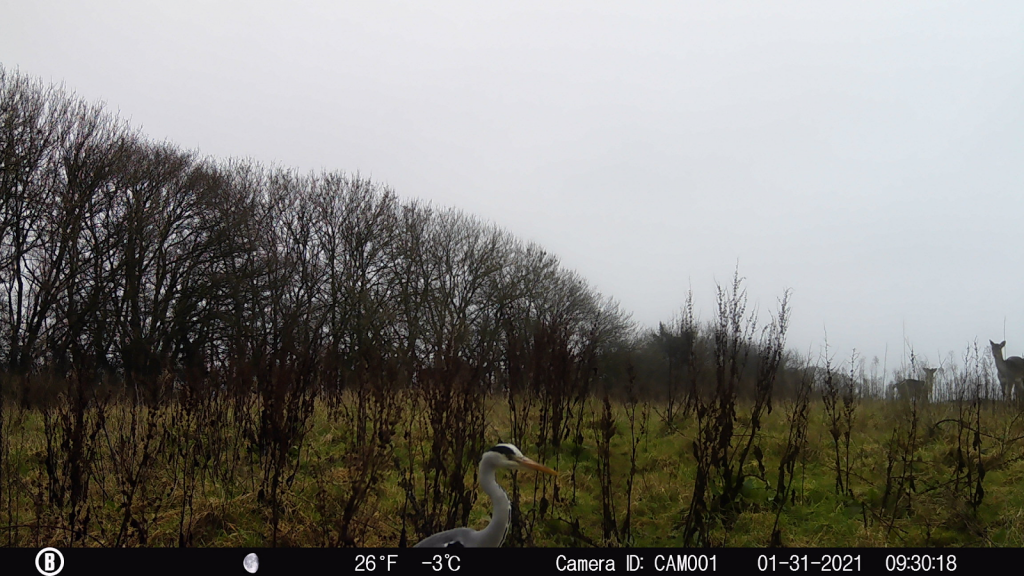
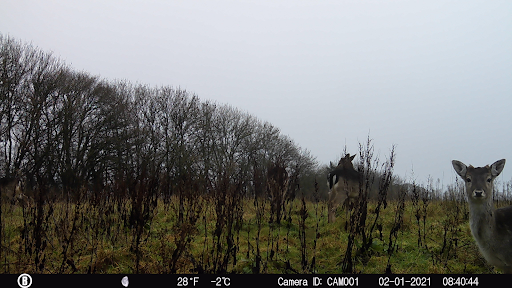
That being said, my preferred photos from the Bushnell Prime trail camera come from dusk and dawn, when the camera is still using the IR flash but there is some natural light illuminating the subject, as seen below.
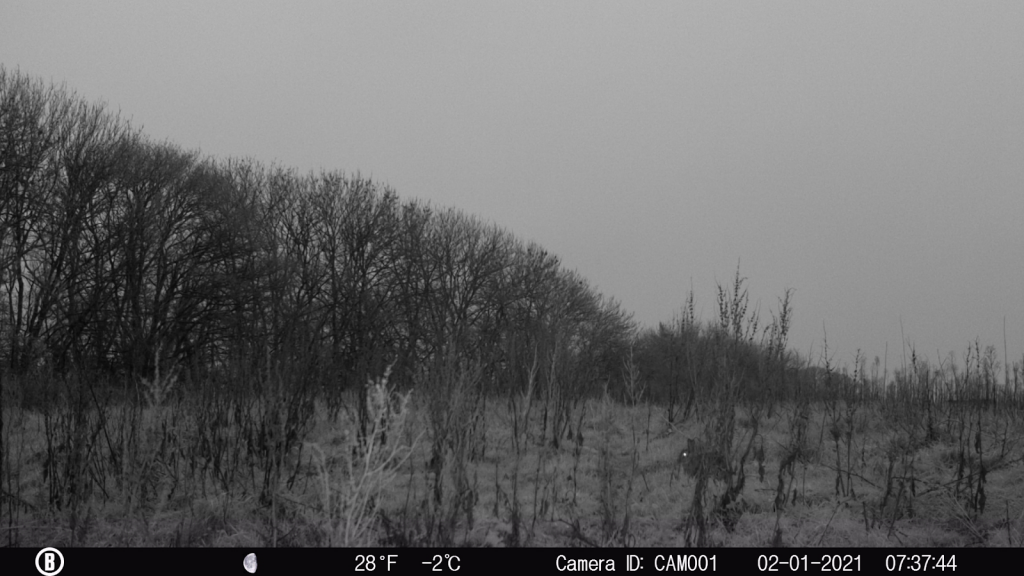
For our video testing we had slightly better weather though it was still not bright. We again found that the dawn lighting gave the best footage. We were impressed with the quick trigger speed for footage of a rabbit running across the field of view, not having made it halfway before the video started recording. It was clear from the video footage that the deer did notice the glow from the IR flash on the camera but this did not seem to stop them (or any other animals) from frequenting the area. The audio captured was also good, and bird song was picked up in many videos even with howling wind at times. You can see a few of the many video clips we caught in the compilation below.
For all the footage captured, we were pleased that we did not have any false triggers despite having the camera on the highest sensitivity level, meaning we did not have to trawl through lots of empty scenery photos but we did get lots of positive captures. During our testing sessions the majority of the fauna seen were large deer that you would expect the trigger to pick up but rabbits, foxes and birds were also captured low in the grass showing that the smaller fauna would also trigger the camera sensor.

Our opinion

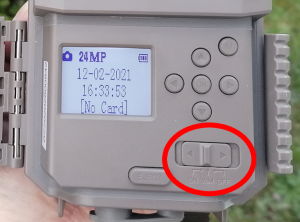
The manual is well laid out and easy to follow, explaining each of the setting options. However, this camera is designed to show 3 basic menu settings (Set Clock/Mode/Interval) so that if you do not want to change any of the more complex settings they are not visible to confuse you. If you would like to fine tune the settings further (as we did) you simply choose to put on the “Additional Set” options which makes the full range of settings visible. This is a great feature for those who don’t need or want to get too technical. You can even simply change the mode (camera or video) by pressing the up arrow without even having to enter into the main menu.

The menu on the camera is easy to work through. It is noteworthy that the manual does mention not to switch between On and Aim (set up mode) modes on the power switch but to always go from On straight to Off (bypassing Aim) as going from On to Aim can cause the camera to freeze. If this does occur it is easily remedied by turning the camera Off then back to Aim mode.

We did miss not having an aiming screen when setting up the camera. However, as we were just using the camera for casual viewing it did not cause any significant issues, especially as the trail camera has an aim and motion test where a red light will flash to let you know that the sensor is being triggered (note this red light does not light up when the camera is in On mode) so we felt confident that we would catch any passing animals even if we could not see what the image area would be.

The bracket on the rear of the camera means that, when strapped to a tree or post, it grips the surface well, making it more stable. It also has a ¼-20 tripod mounting connection.

The bottom loading battery tray makes replacing the batteries in the field easier than old Bushnell models. It has a click mechanism that stops the tray falling out when ejected. This is a great feature to prevent dropping batteries but can be a little stiff to release the battery tray completely.

A potential downside is the lack of a hybrid mode meaning the Bushnell Prime trail camera can take either video or still images, but not both at the same time. However, for naturalists this shouldn’t pose much of a problem. The Bushnell Prime trail camera has other useful settings such as two programmable fieldscans (time lapse) modes.

In general we found that the video captures seemed of better quality than the images, though both were good quality, especially taking in consideration the price point. We started the testing with 6 new lithium batteries and after 2 weeks of constant use in the field, and during cold weather, there was no sign of significant battery depletion.

The Bushnell Prime trail camera provides a great starter trail camera for naturalist or general fieldwork, covering all the basics (and more if wanted), with the price point (currently under £140) lending well to having multiple cameras deployed at once.


The Bushnell Prime is available on the NHBS website and is also available as a starter bundle which includes 8 x Lithium AA batteries and a 32GB SD card.
To view the full range of Bushnell cameras, along with other ranges of trail cameras, visit www.nhbs.com. If you have any questions on camera trapping or would like some advice on the best camera for you then please contact us via email at customer.services@nhbs.com or phone on 01803 865913.

NHBS In the Field – Dino-Lite WF4915ZT Wireless Microscope Kit

Within the last 15 years the availability and quality of USB digital stereo microscopes has vastly improved, and these fantastic devices are now regularly used by naturalists and hobbyists looking to view the hidden details of the natural world.

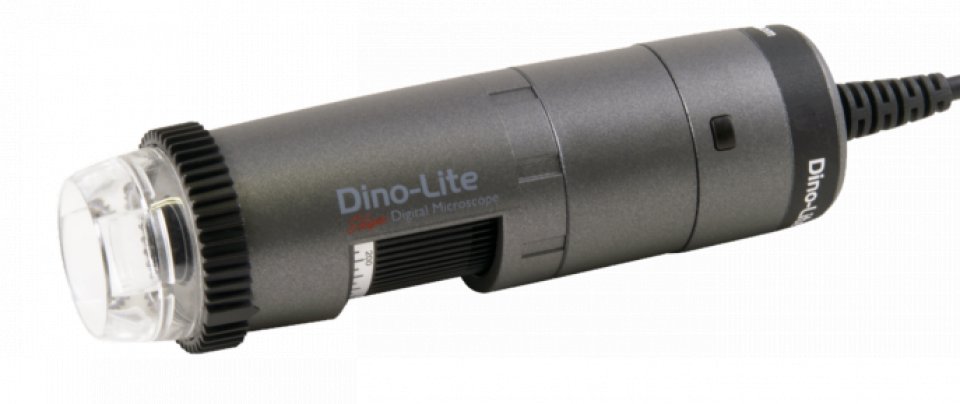
Dino-Lite are a well-known manufacturer of USB microscopes. Their range comprises basic models for those new to the field of microscopy, alongside cutting-edge models that produce stunningly detailed high-quality images and have additional features such as wireless video streaming.

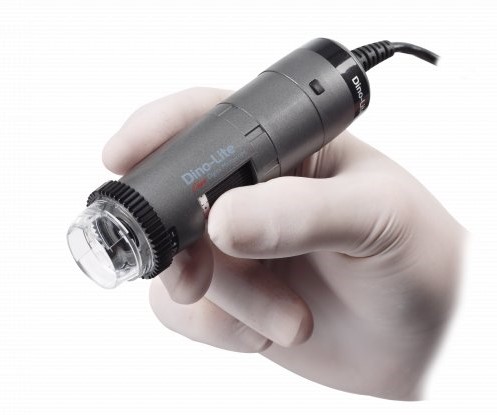
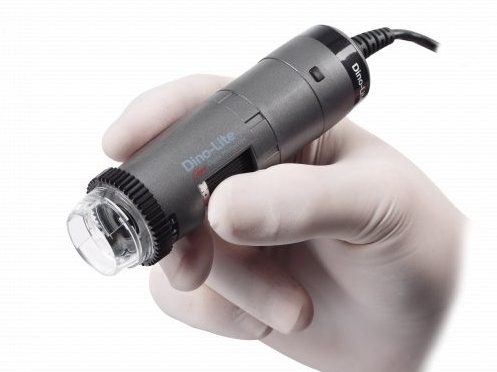
We recently tested the Dino-Lite WF4915ZT Wireless Microscope Kit. This kit is from Dino-Lite’s professional range and it includes an AF4915ZT microscope and a WF-20 wireless adapter. The AF4915ZT is a dynamic microscope and has a number of features which are not available on more basic models. These include: Extended Depth of Field (EDOF), which helps achieve greater overall focus on surfaces with varying heights; Enhanced Dynamic Range (EDR), which helps when viewing objects with large variations in brightness; Flexible LED Control, which allows you to turn on/off pairs of LED lights to achieve the best possible illumination; and Automatic Magnification Reading, which allows the DinoCapture software to automatically register and display the current magnification.

Our aim was to see how easy and intuitive the device was to setup and use, and to explore the benefits offered by its advanced features and wireless functionality.

How We Tested

First we installed the included DinoCapture 2.0 software onto our computer. All DinoLite USB microscopes come supplied with this program loaded onto a CD-ROM, however it is also available online as a digital download. We tested the microscope using DinoCapture 2.0 on a desktop computer, however, you can also use this microscope wirelessly on either a smartphone or a tablet via the free DinoCapture app.

The WF-20 module was charged overnight and then connected to the AF4915ZT. The WF-20 was easy to attach, as the wired end piece of the AF4915ZT has two release buttons which, when pressed simultaneously, allowed us to gently remove this module and then connect the WF-20. When powered on, the WF-20 appears as a wireless network on any nearby Wi-Fi devices. Once connected to this network we were able to view a live feed from the microscope on DinoCapture.

We used the microscope to view a number of plant and insect samples.

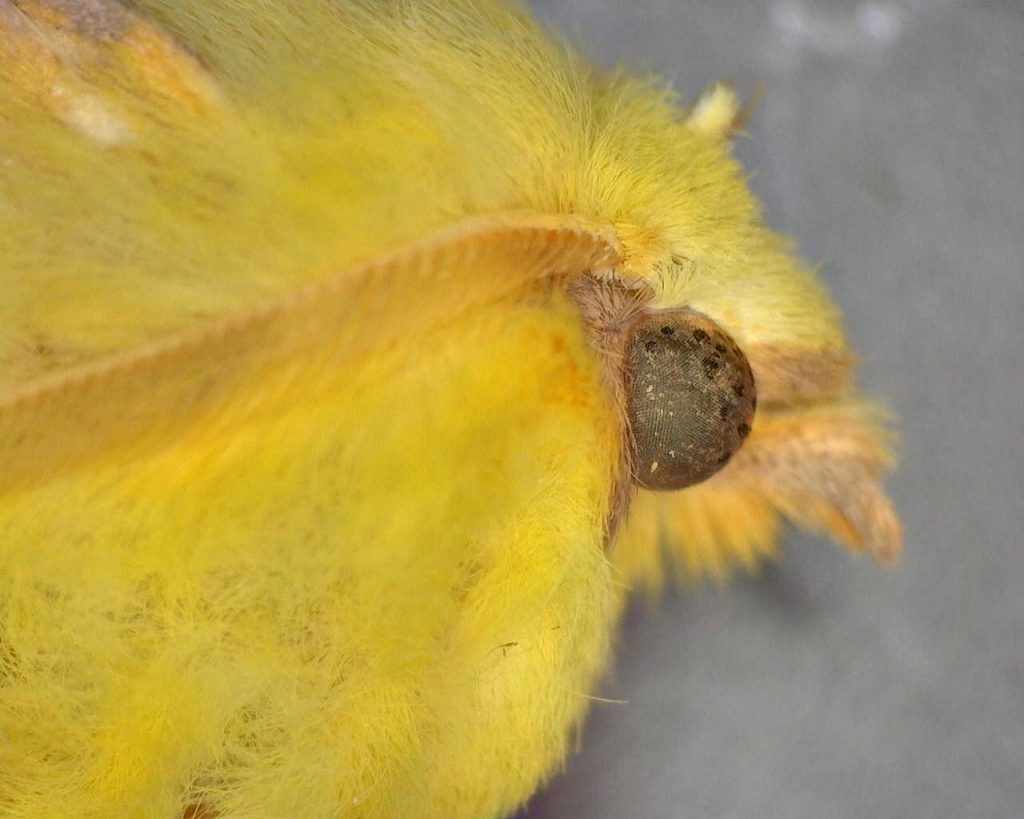
Moth eye – viewed with Extended Dynamic Range
What We Found

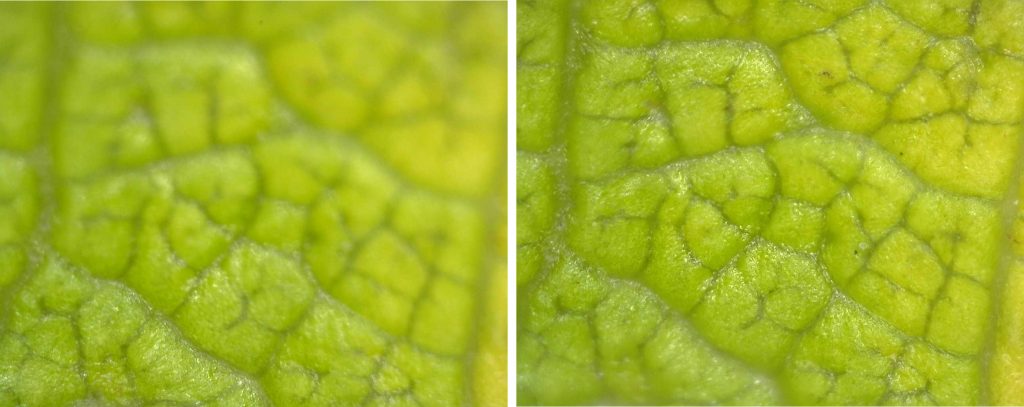
The 1.3MP resolution is certainly a big improvement over some of the more basic models. Using the microscope at some of the higher magnifications is hugely rewarding, as you are granted some fantastic views of the minute details that are otherwise easily missed. The advanced features (as listed in the introduction to this review) may not be entirely noticeable to those new to digital microscopy, however, compared to older and more economical models they make operating this microscope far simpler. Previously, one would struggle at times to deal with structures having varying levels of brightness (particularly common with iridescent insects for example), and have little control outside of the overall LED brightness to try and address this. However, with the great LED controls and EDR the overall image can be brought closer together and previously obscured features become visible in much greater detail.

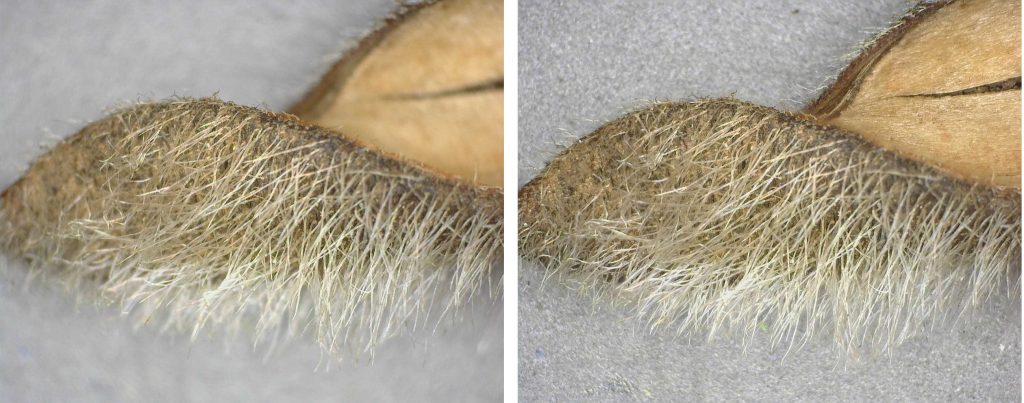
The EDOF is also a really helpful tool, especially at lower magnifications and on specimens with a variable structural height (which in our case was an acorn cup and a seed pod). Despite the differing heights, the microscope was able to keep most of the specimen in focus. Both the EDR and EDOF take around five seconds to process, meaning you can view the results and adapt your settings quickly to achieve the best image possible.

Manoeuvring the microscope freehand was relatively easy as it only has a few buttons on its main body, so there wasn’t any accidental mis-clicking. The focus ring is also light enough that it can be manipulated using only the middle and index fingers. Trying to keep the microscope steady and operate the DinoCapture software at the same time was rather difficult, especially at higher magnifications, and so when taking any images I opted to use the device with a stand (specifically the Dino-Lite RK06A). This allowed me to configure the microscope into the perfect position and then operate the computer without fear of losing that positioning.

When used in its wireless configuration we did find that occasionally there were moments of lag on the live feed. While these were only minor interruptions, it was certainly something that had to be considered when making any adjustments to the magnification and focus.

Leaf: (a) Normal mode, (b) with Extended Dynamic Range
Seed pod: (a) Normal mode, (b) with Extended Depth of Field
Acorn: (a) Normal mode, (b) with Extended Dynamic Range, (c) with Extended Depth Of Field
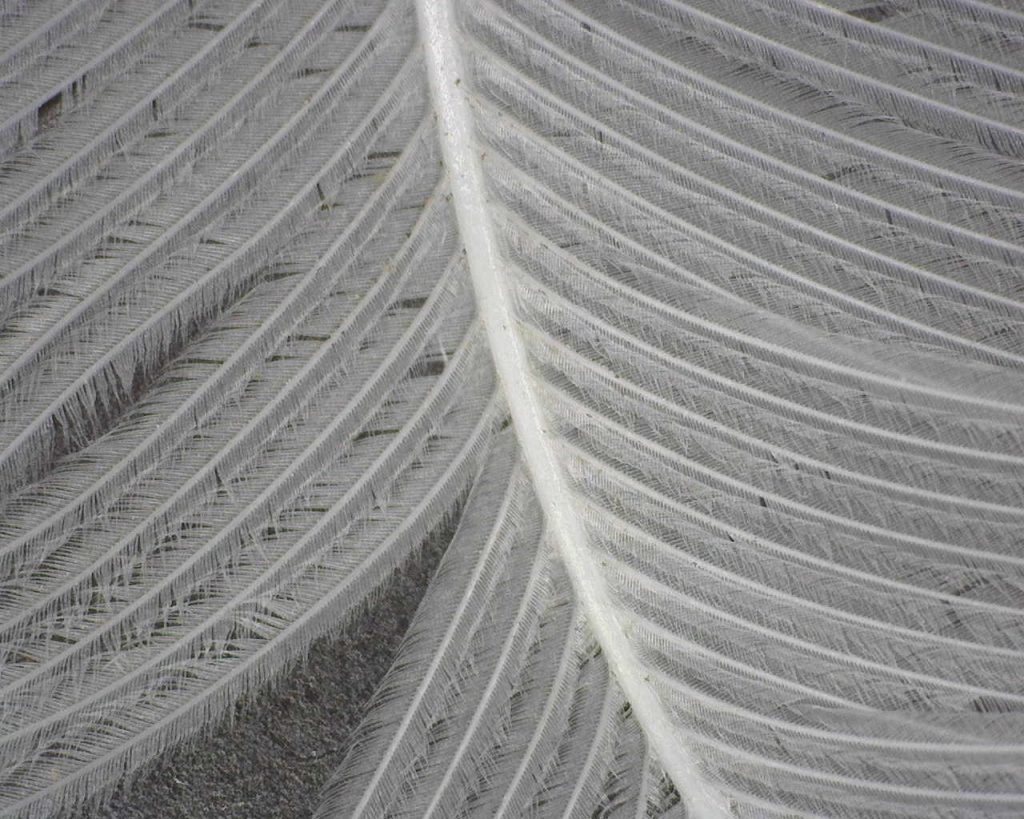
Feather
Our Opinion

Although we only used the WF4915ZT on a few select samples, it offered us a great opportunity to learn how to operate this advanced USB microscope. Thankfully the literature provided with the microscope was clear and easy to follow, and within 15 minutes of opening the box I was able to install the software and connect to the device in both its wireless and wired configurations. The image quality and the benefits offered by its advanced settings were also hugely impressive, particularly the EDOF, which really stands out as a key feature for this microscope.

While the wireless functionality of this microscope was a very interesting feature of the WF4915ZT, in practice it is not necessarily universally valuable. In the study of Natural History for example, most microscopy happens at a desk on pre-prepared specimens and as such you do not need the greater manoeuvrability that a wireless microscope offers. In other trades, however, these digital microscopes are used to inspect large objects (e.g. automobile manufacture) and in these situations a lack of trailing wires would be of huge benefit for the operator. In a situation where the operator does not have access to a computer/laptop, the Wi-Fi module allows you to connect to the microscope using a tablet or a smartphone, which is especially useful if you are planning to use it in the field.

In summary, we would highly recommend the WF4915ZT for any hobbyist or professional looking for a high quality and portable USB microscope. The AF4915ZT would be an excellent (and more economical) alternative for those who are unlikely to use the device away from a desk.


The Dino-Lite WF4915ZT is available through the NHBS website.

To view our full range of USB microscopes, visit www.nhbs.com. If you have any questions about microscopy or would like some advice on the right product for you then please contact us via email at customer.services@nhbs.com or phone on 01803 865913.

NHBS In the Field – Browning Patriot Trail Camera

Browning Patriot Trail Camera

Completely weatherproof and able to run for months on a single set of batteries, trail cameras are now commonly used for wildlife surveys or studying animal behaviour, and are becoming a vital tool for conservation all around the world. They are also incredibly popular with naturalists who are interested in finding out what the wildlife is up to on their local patch.

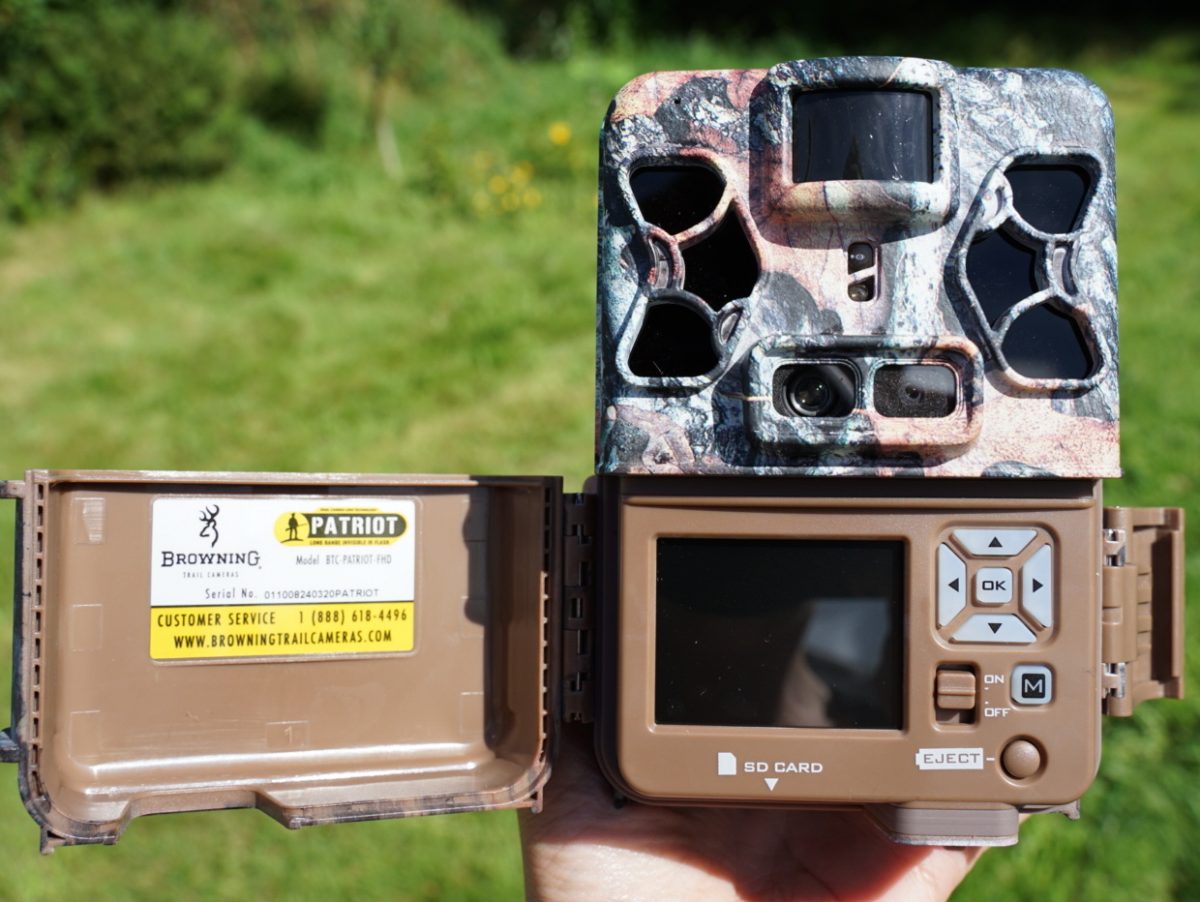
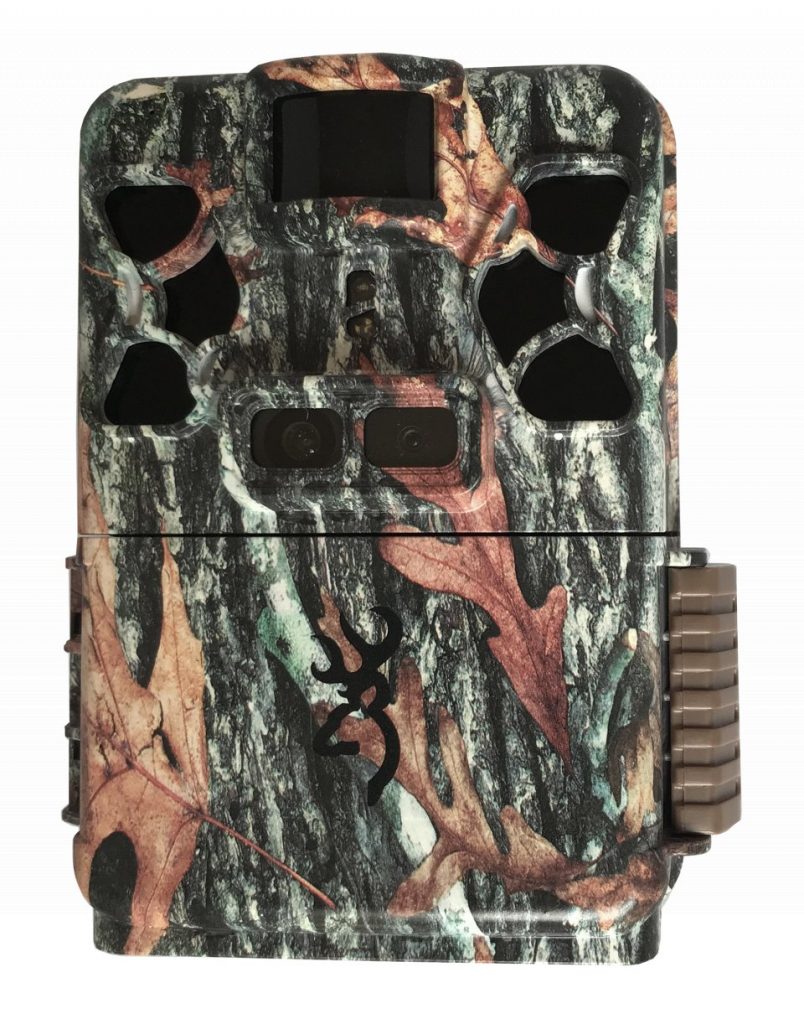
The Browning Patriot, released this year, is one of Browning’s top of the range cameras. Along with excellent resolution image and video capture (24MP images, 1920x1080p video), the Patriot features Browning’s unique dual-lens technology. This means that a separate lens and sensor system are used for daytime and night time capture, allowing you to capture excellent quality footage whatever the time of day. No-glow LEDs, which are completely invisible to both humans and other animals, are used to illuminate your subject at night up to a distance of 34m. A colour viewing screen, adjustable steel tree bracket and host of advanced camera settings all add to the Patriot’s appeal.

How we tested

We loaded the Patriot with a full set of AA batteries and a 32GB SD card then set the time and date. The camera mode was set to ‘Trail’ which means that it would record still images whenever the motion sensor was triggered by movement. The capture delay (ie the time between images being taken) was set at 5s and the image quality 24MP. Multi-shot mode was set to off (ie the camera would only take a single image per trigger) and the capture timer was set to 12.00am for both the ON and OFF times, meaning that the camera would be active 24 hours a day.

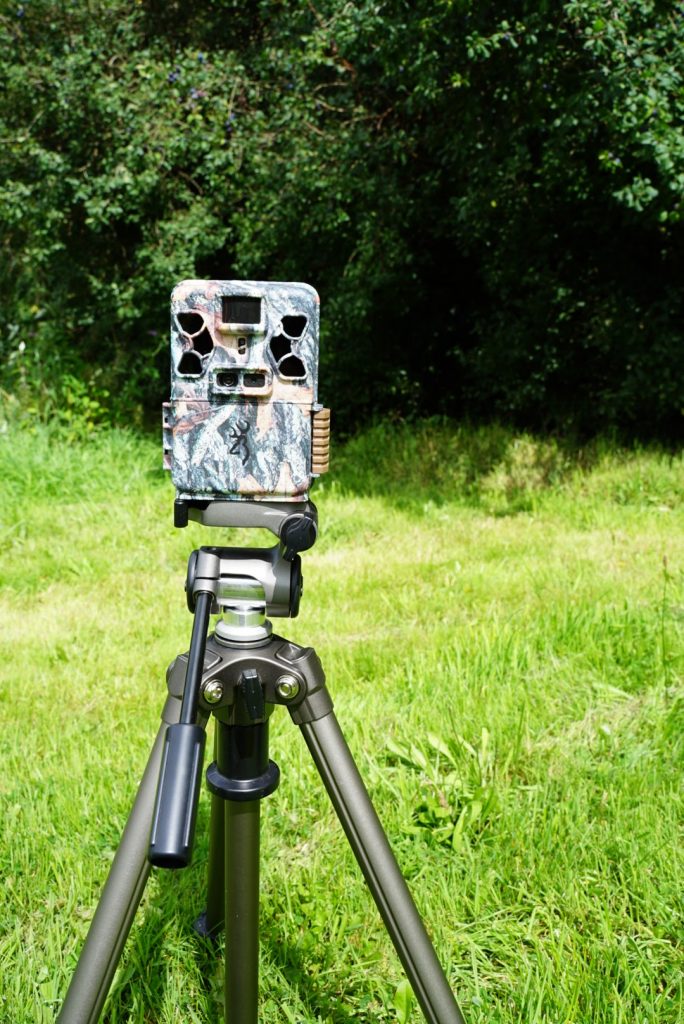
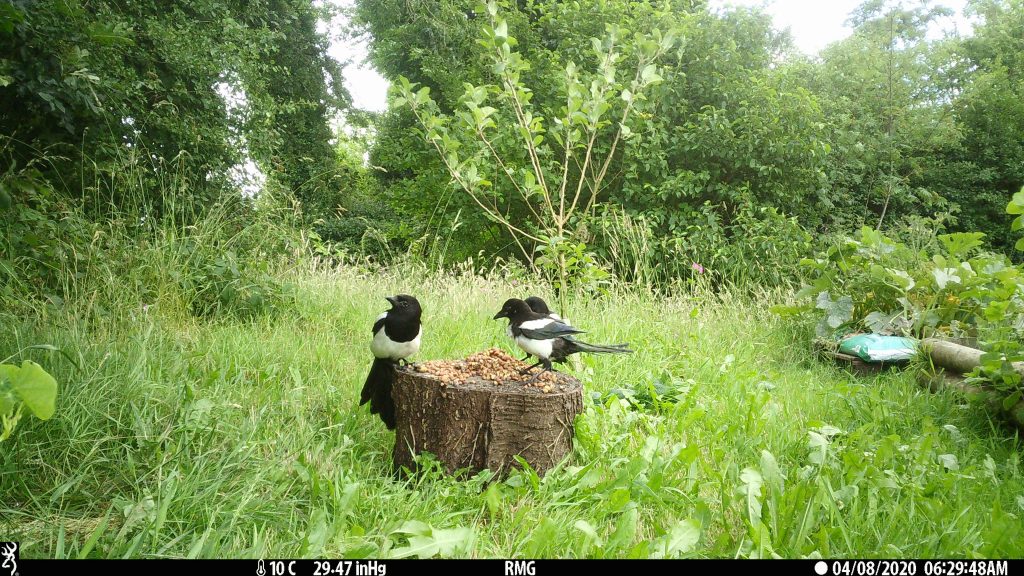
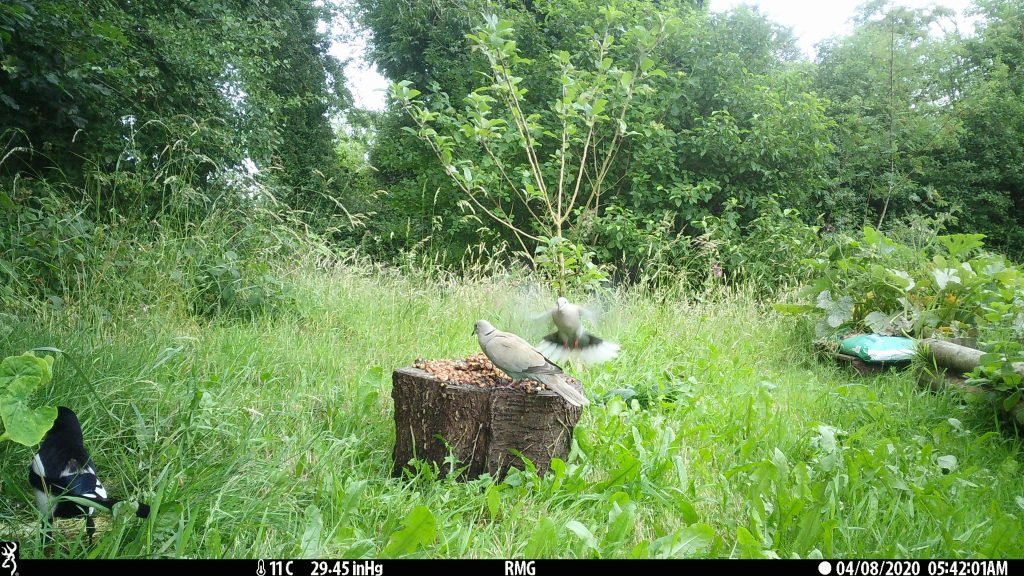
Our initial test took place in a back garden with the camera mounted on a tripod approximately 3m away from a baited tree stump. Ensuring that the camera was angled correctly was very easy, as the background of the main viewing screen shows a live image from the camera. We also conducted a motion trigger test by selecting ‘MOTION TRIGGER’ and then waving a hand above the stump to check that the light on the front of the camera was activated.

For the second field test the camera was placed in a ride that was cut into an area of wetland where there have been frequent otter sightings. Once again the camera was mounted on a tripod but this time the camera was set to record video (high resolution, length 20s, capture delay 5s).

In the third and final test, the camera was sited in an area that had both moving water and vegetation within the motion detection range. This was to provide us with some idea of the camera’s sensitivity and to see whether it would be repeatedly triggered by this motion. The camera was set to record video with the same settings as used previously.

What we found

When sited in the garden, the camera took lots of pictures of birds that were attracted to the bait. The camera triggered reliably and the quality of the images, including the colour reproduction, was good. We were particularly impressed that the images below – although taken first thing in the morning, pointing directly into the sun – were not over-exposed.

Unfortunately, when we retrieved the camera from the second field test, a number of cows had broken into the area from a neighbouring field and knocked over the camera. The footage of the cows, however (despite not being what we had hoped to capture!), was good quality.

In the final test we were pleased to observe that the camera had triggered only with the arrival of the local birds, and we did not have to sift through 100s of videos of empty scenery. The audio recorded with the clip featured below was also very true-to-life.

Our opinion

Although the second, and potentially most interesting, part of our field test was prematurely curtailed, this exercise gave us a good chance to familiarise ourselves with the Browning Patriot and to see the camera in use. First up – the manual. Clearly written and lacking any unnecessary waffle, the manual made setting up the camera incredibly straightforward. In fact, this parsimony also extends to the camera itself – while there are enough options to give you plenty of control over the footage collected, there aren’t so many that it becomes overwhelming.

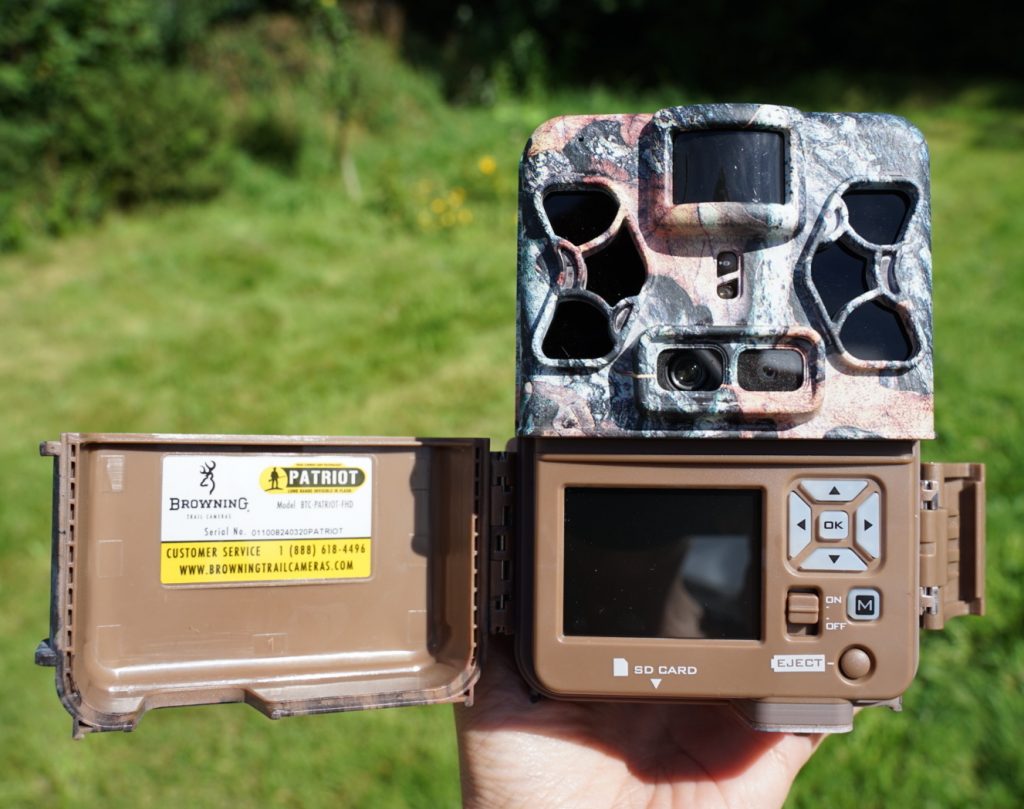
The front-opening design means that it is really easy to alter the settings even when your camera is strapped in place. Similarly, the bottom-loading battery tray and easily accessible SD card slot mean that these can both be changed quickly in the field without moving the camera. The steel bracket on the rear of the camera means that, when strapped to a tree or post, it grips the surface, making it more stable. For our tests, we attached the camera to a tripod which allowed us lots of control over the camera angle and height. However, as we found out, it also makes it much more susceptible to being knocked over. For locations where security is an issue, a groove in the case that runs beneath the bracket allows it to be secured with a cable lock – one with a maximum diameter of 8mm would be required.

As previously mentioned, being able to view a live image from the camera during setup, along with the motion trigger function, means that you can be sure that your camera is angled correctly. (It’s really important to remember to turn off the motion trigger function before you leave the trail camera, however, as it will stay in this mode until it is turned off manually). The sensitivity of the camera appeared to be set very cleverly, as it was triggered reliably by the movement of birds and other animals, but we experienced very few empty shots or videos, which suggests that the movement of water or vegetation were not affecting the motion sensor.

The only minor limitation we found with this camera is that the Patriot doesn’t have a hybrid mode which means that you have to choose between capturing still images or videos. (Many cameras give you the option to record both and will capture a number of images first before then switching to video record).

Overall we were very impressed with the Browning Patriot and would wholeheartedly recommend it for professional or personal use. The images and videos were good quality, the camera was easy to set up and position and the price (currently under £200) is very competitive. We’re eager to continue using this camera and still have high hopes for getting some footage of our elusive otters. Check back soon to find out if we’re successful!


The Browning Patriot is available through the NHBS website and is also available as a starter bundle which includes 8 x Lithium AA batteries and a 32GB SD card.

To view our full range of trail cameras, visit www.nhbs.com. If you have any questions on wildlife recording or would like some advice on the microphone for you then please contact us via email at customer.services@nhbs.com or phone on 01803 865913

30 Days Wild – Our local wildlife photos

Image by O Haines

Throughout June, thousands of people will be taking part in The Wildlife Trusts’ 30 Days Wild. Designed to improve our health and wellbeing, as well as being good for the planet, this annual challenge tasks us to do one wild thing a day for the whole month. Sign up on the Wildlife Trusts website and receive a free downloadable pack of goodies to help you plan your activities.

Here at NHBS we rarely need an excuse to get outside for a spot of wildlife watching. And as lots of us are currently working from home, we’ve been enjoying the opportunity to take stock of the nature that’s much closer to where we live. We’ve also been sharing our wildlife photos, all taken in gardens or on local walks. Scroll down for some of our favourites from the past month.

Why not let us know in the comments about what activities you get up to in June – we’d also love to see some of your photos!

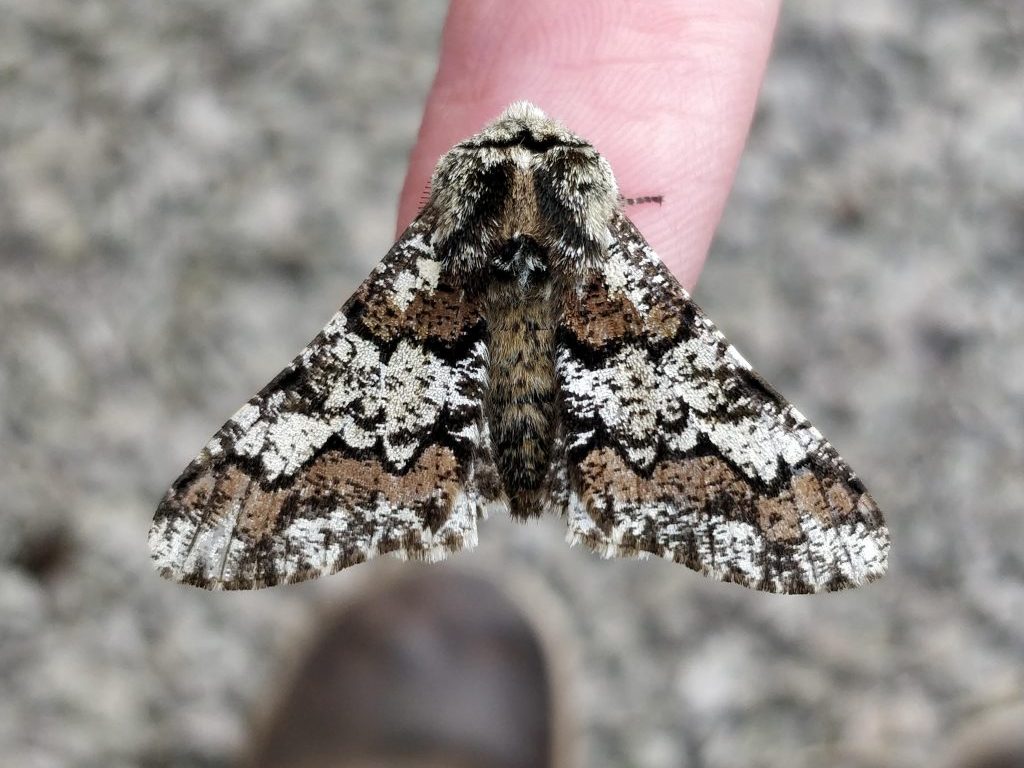
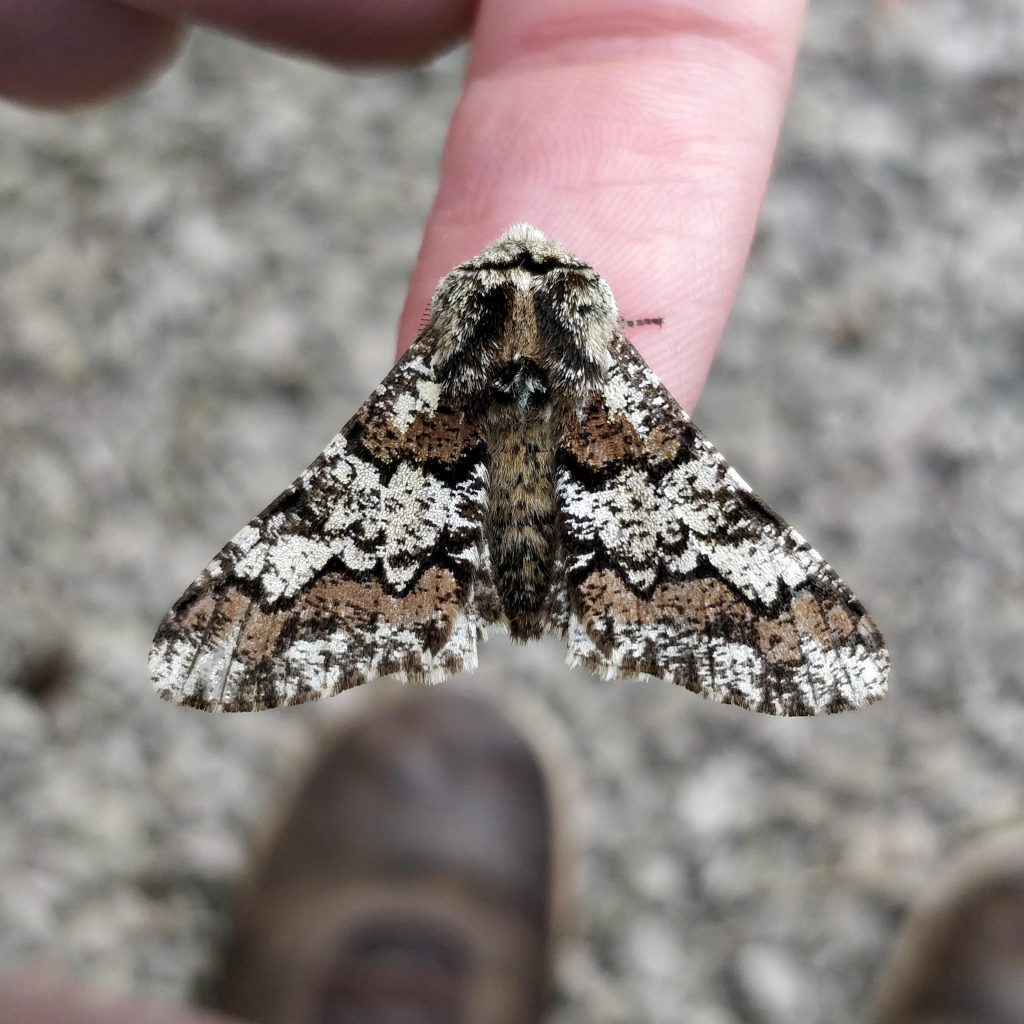
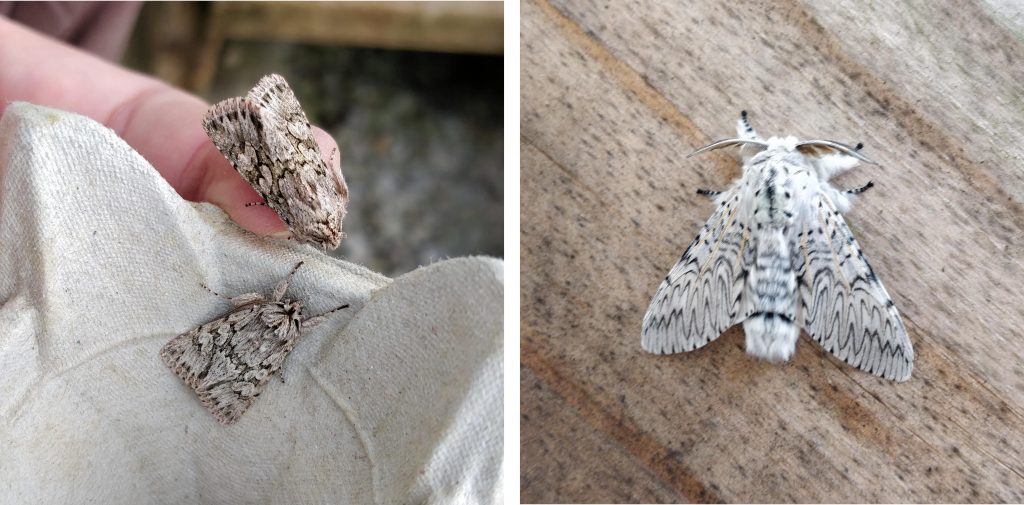
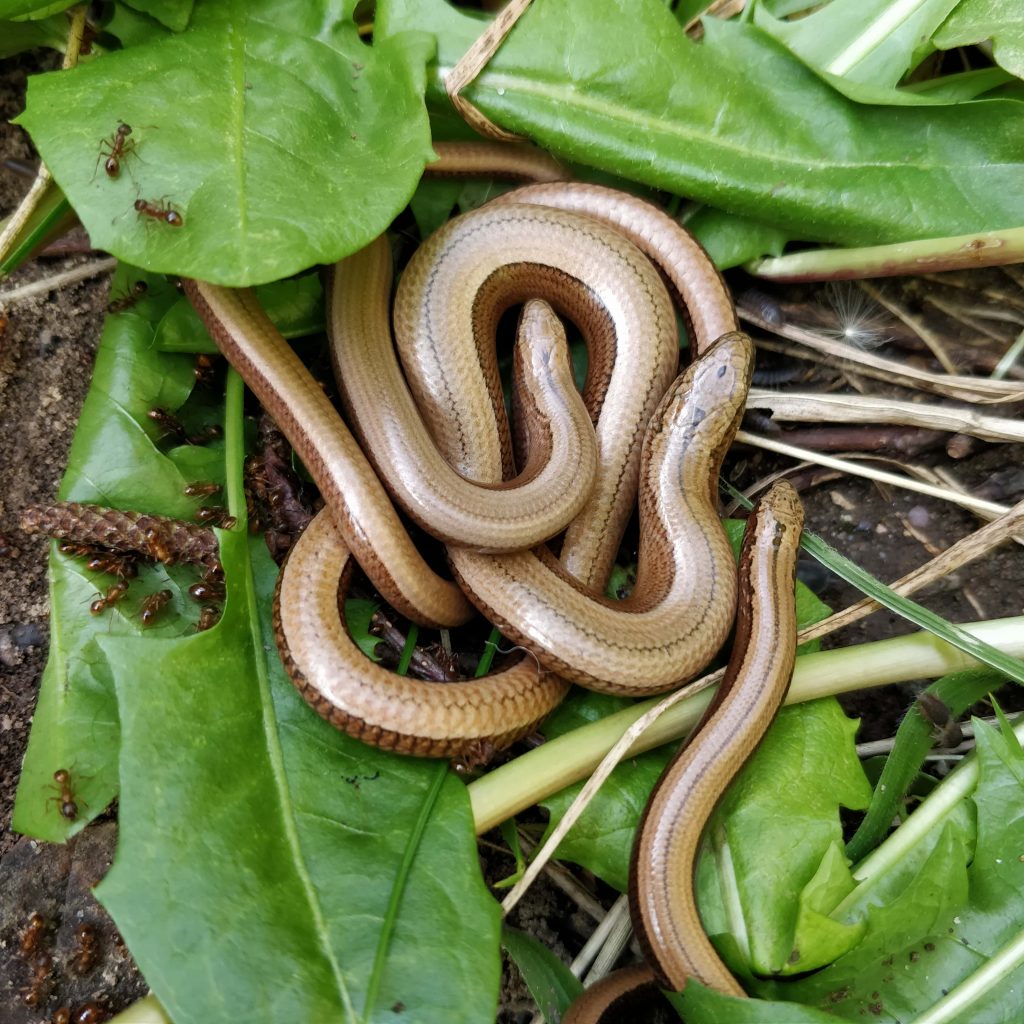
Oli has been busy in the garden with his moth trap – a recent catch included this oak beauty, a couple of early greys and a stunning puss moth. A felt refuge tile also attracted a lovely group of slow worms.

Oak beauty – Image by O Haines
Early grey and puss moths – Image by O Haines
Slow worms – Image by O Haines

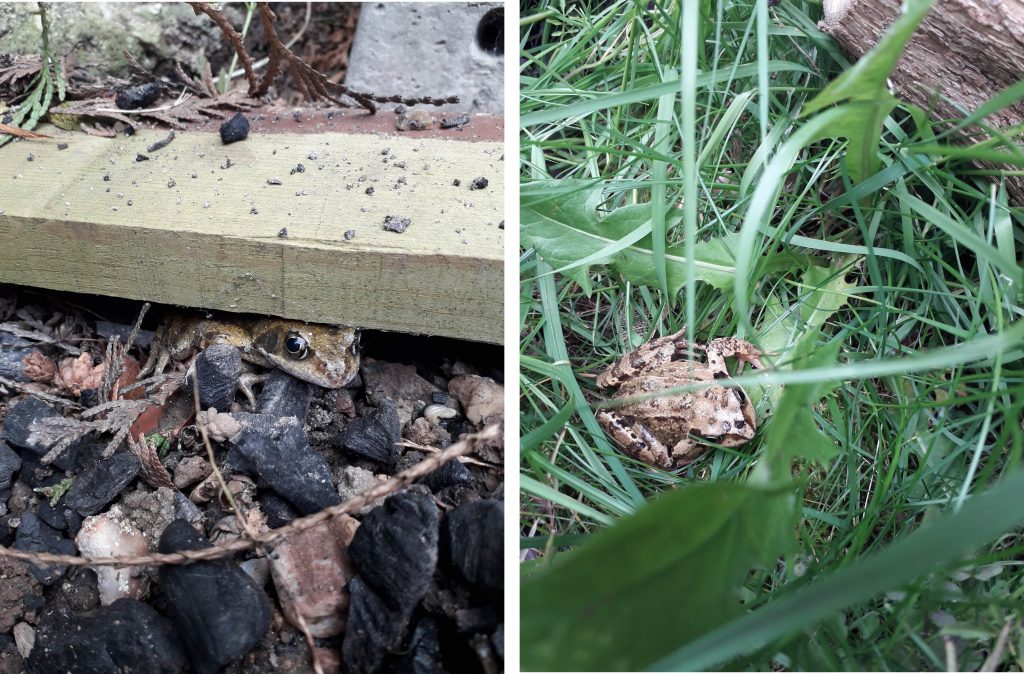
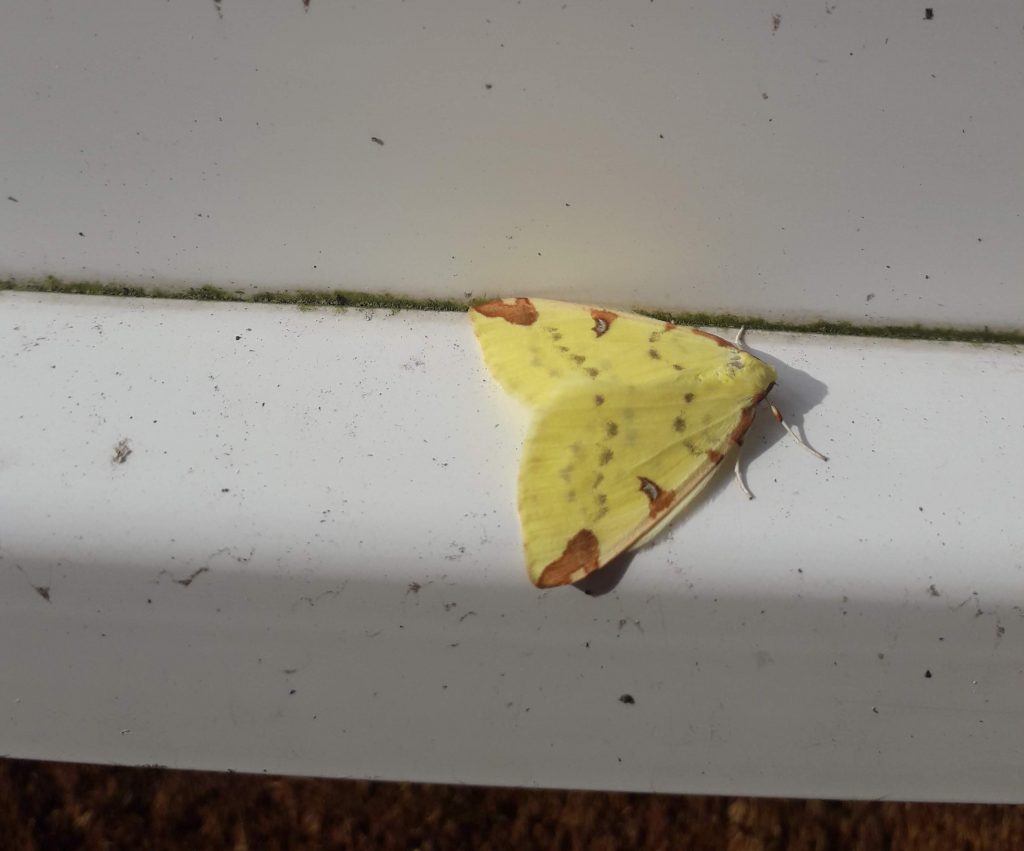
While dismantling an old shed in her garden, Natt discovered this cheeky creature. She also captured an image of a vibrant brimstone moth.

Common frog – Image by N Mawson
Brimstone moth – Image by N Mawson

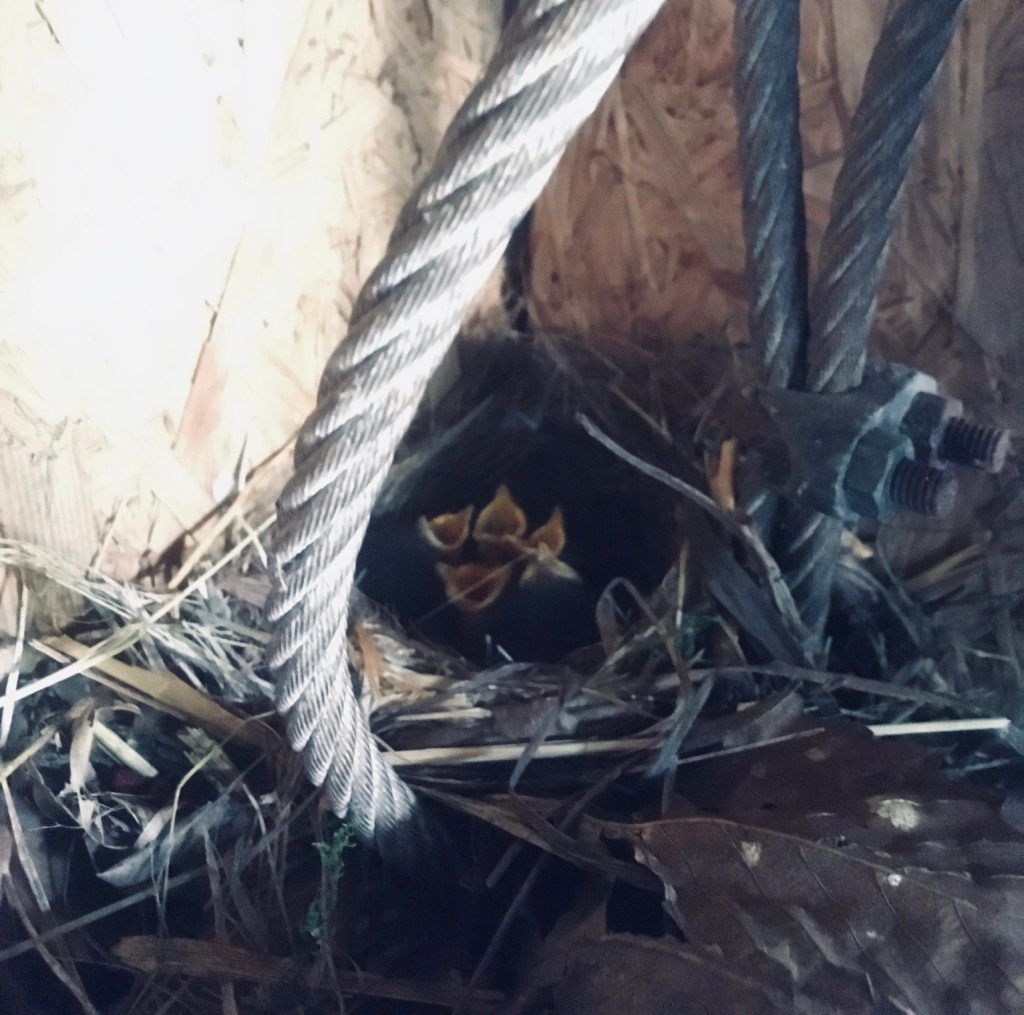
Toby came across this group of hungry mouths in his stables.

Chicks – Images by T Drew

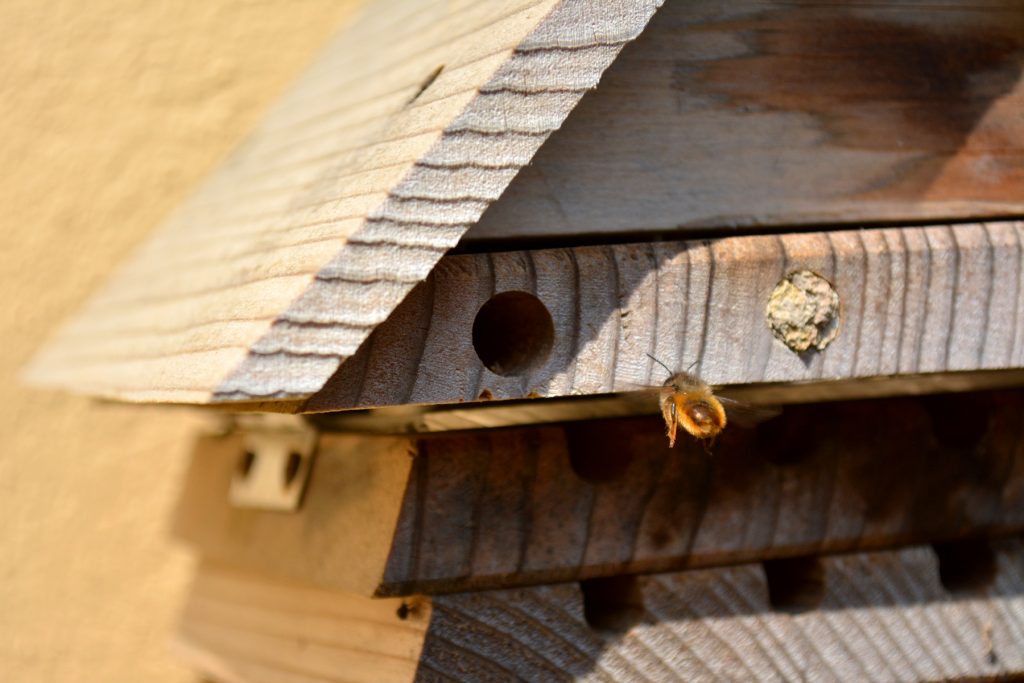
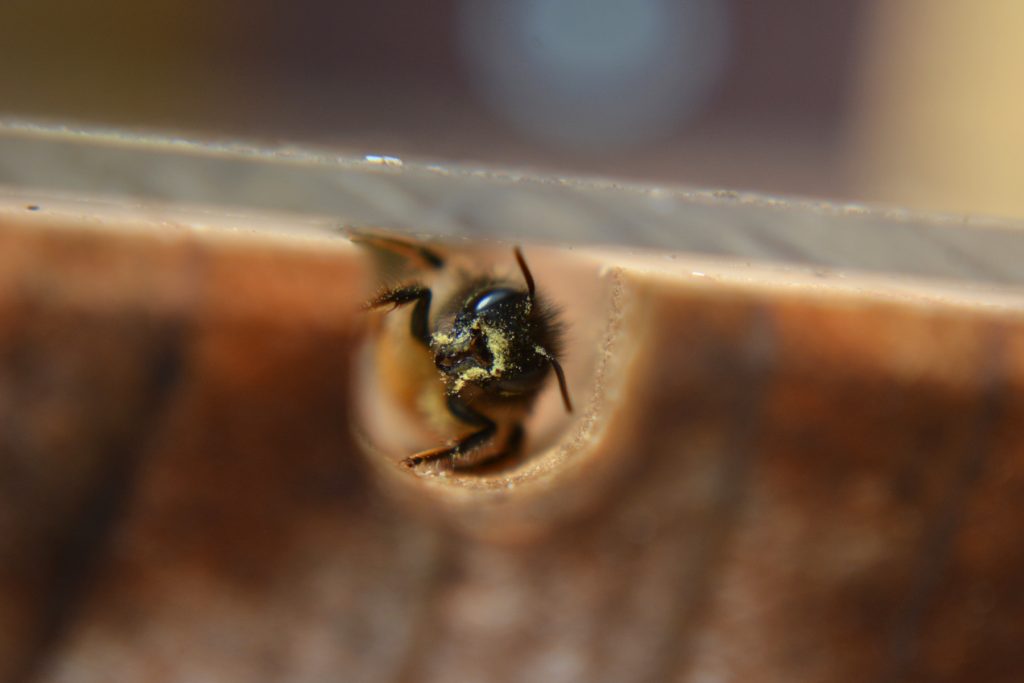
Phil was excited to see that his solitary beehive had attracted some inhabitants.

Solitary bee – Images by P Horswell

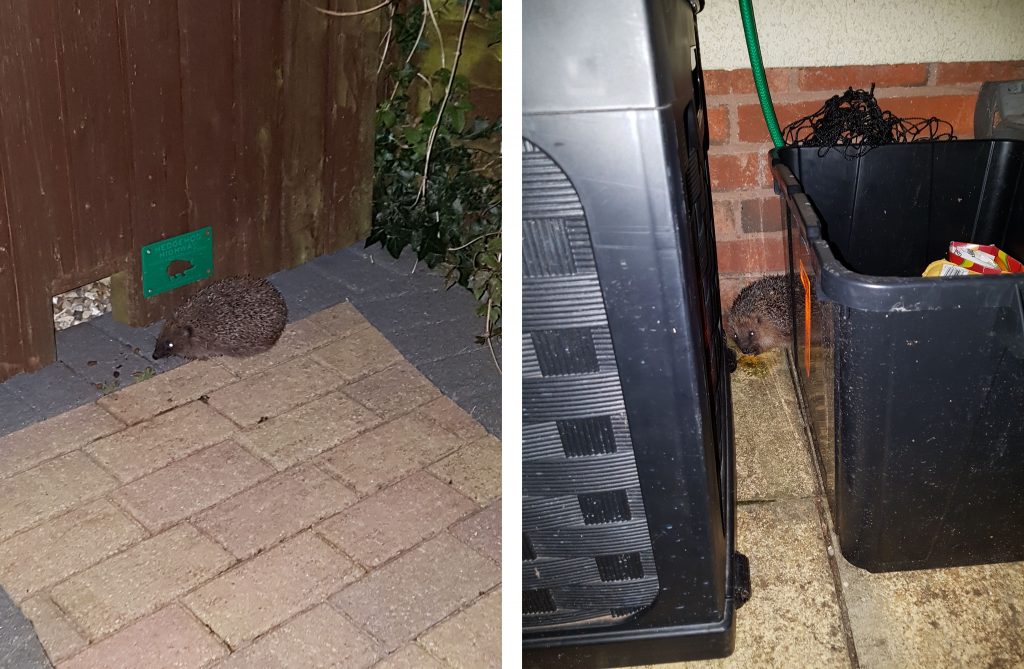
After creating a hole in his fence to help hedgehogs move from garden to garden, Paul was rewarded with this welcome visitor. (With drastic reductions in road traffic, hedgehogs are one of the species that are expected to be benefiting from the lockdown!)

Hedgehog – Image by P Williams

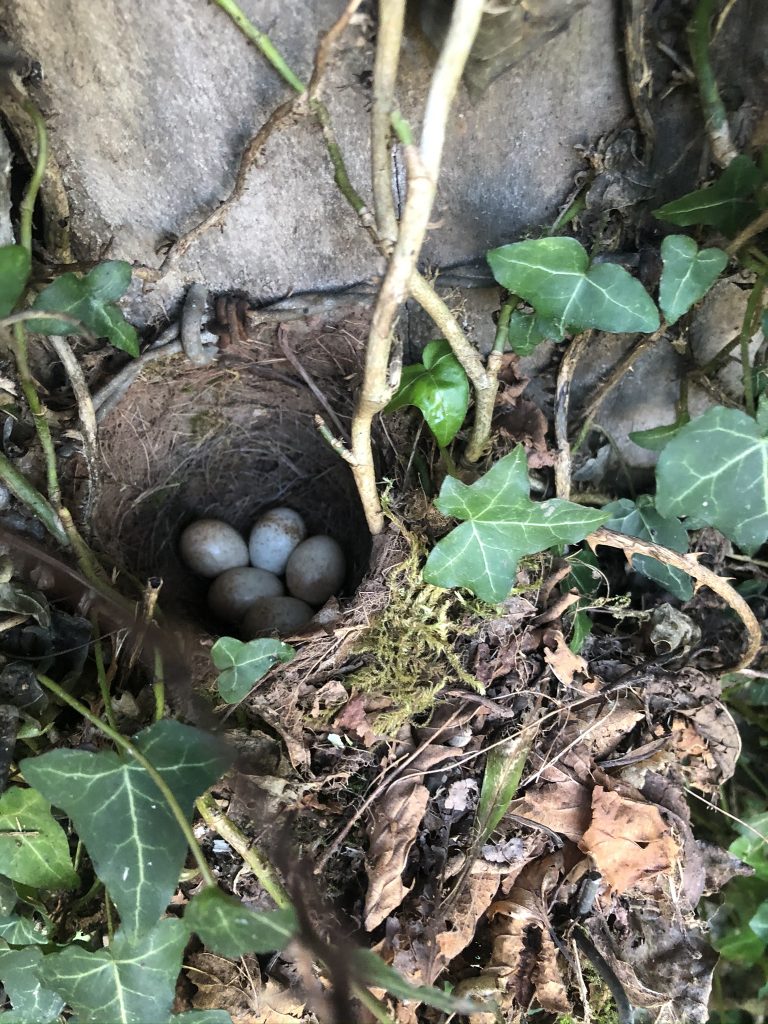
Chris discovered this nest, packed with eggs.

Robin’s nest – Image by C Cooper

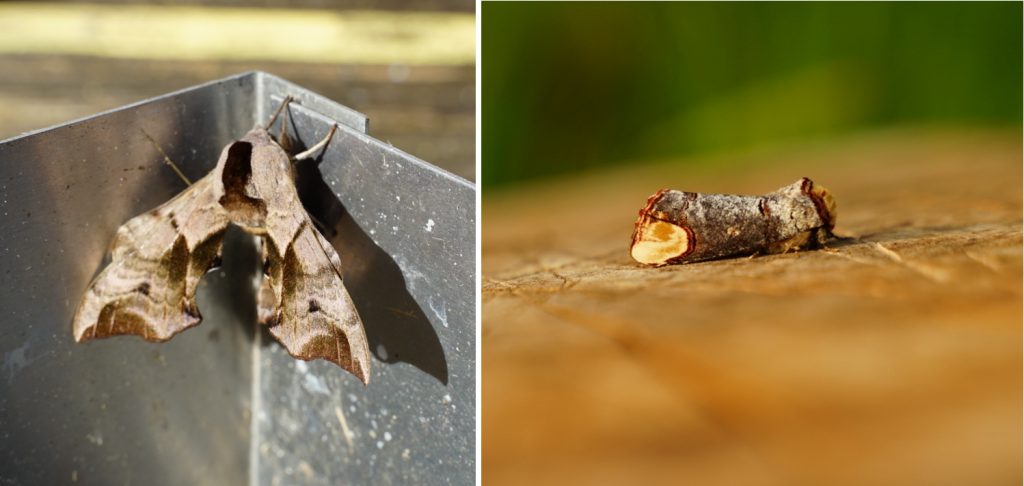
Luanne caught some great moths in her garden in north Wales – including this eyed hawk moth and buff tip.

Eyed hawk moth and buff tip – Images by L Wilkes

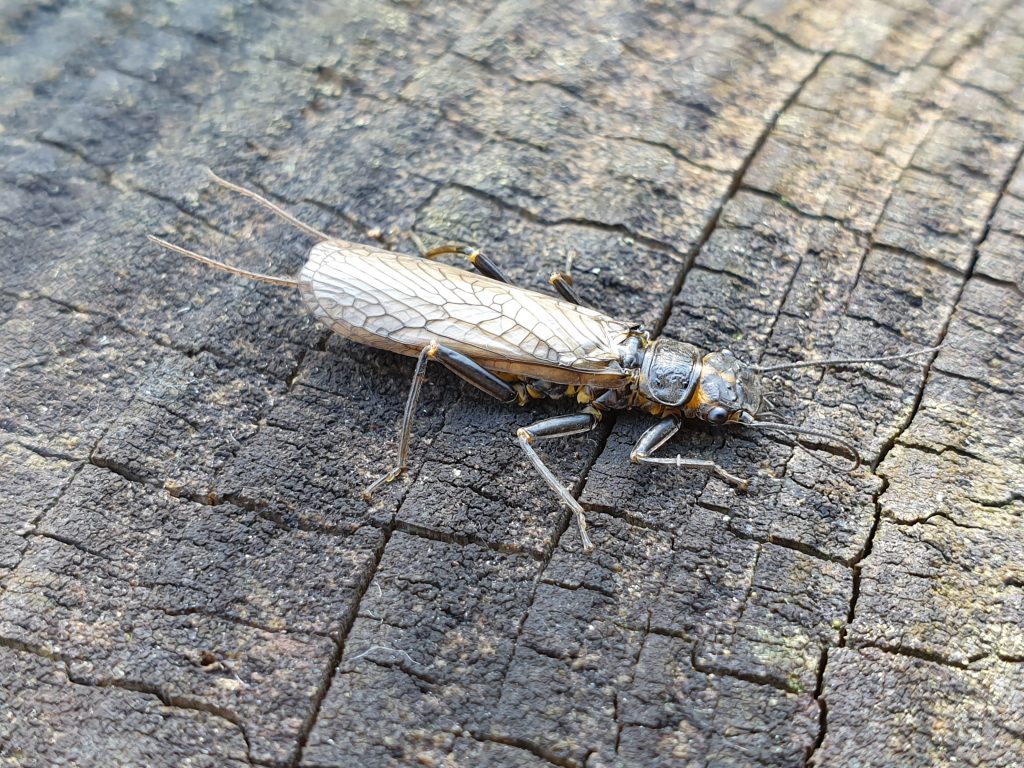
Tabea took this lovely picture of a stonefly while on a local walk.

Stonefly – Image by T Troya

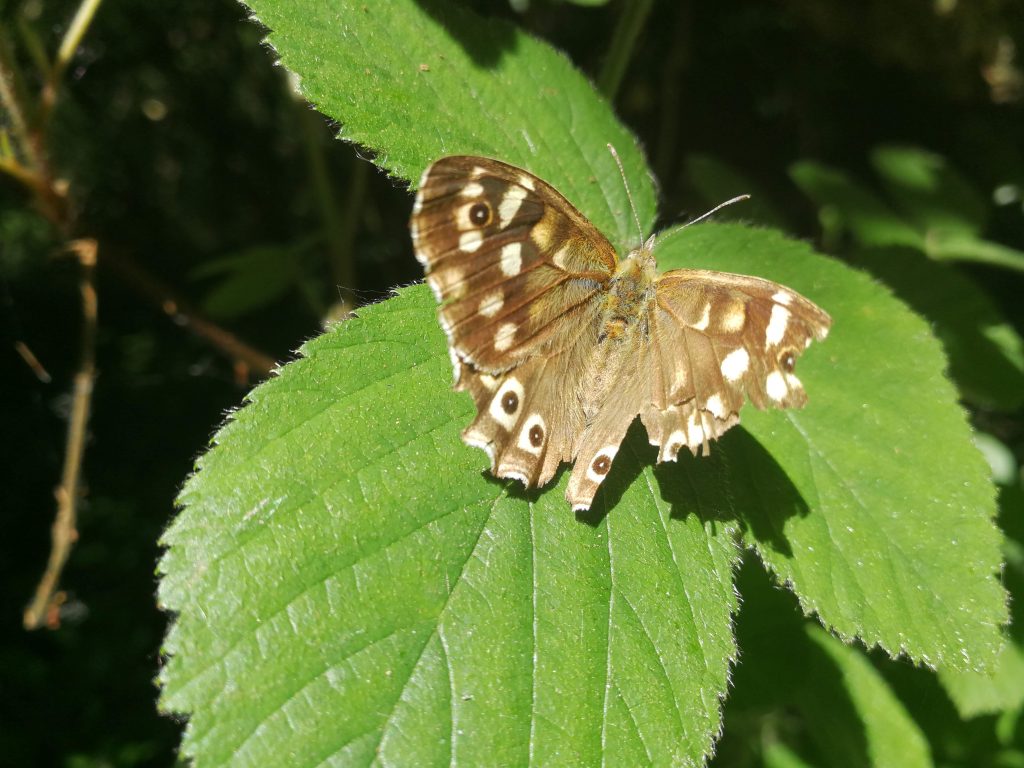
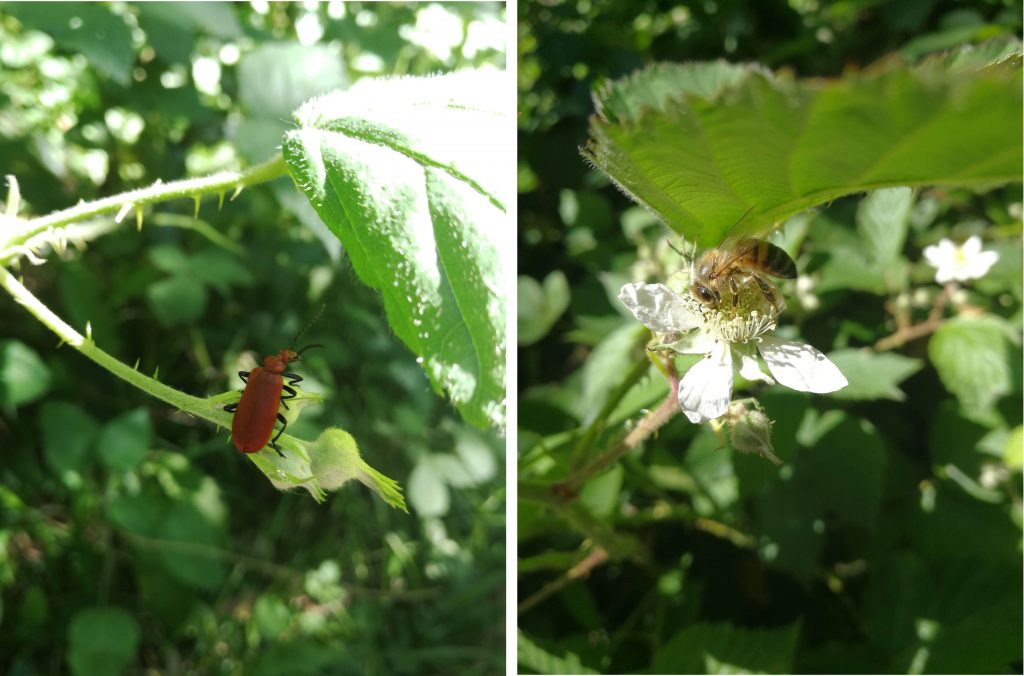
Angeline captured some great images of insects enjoying the local flora.

Images by A Rietveld

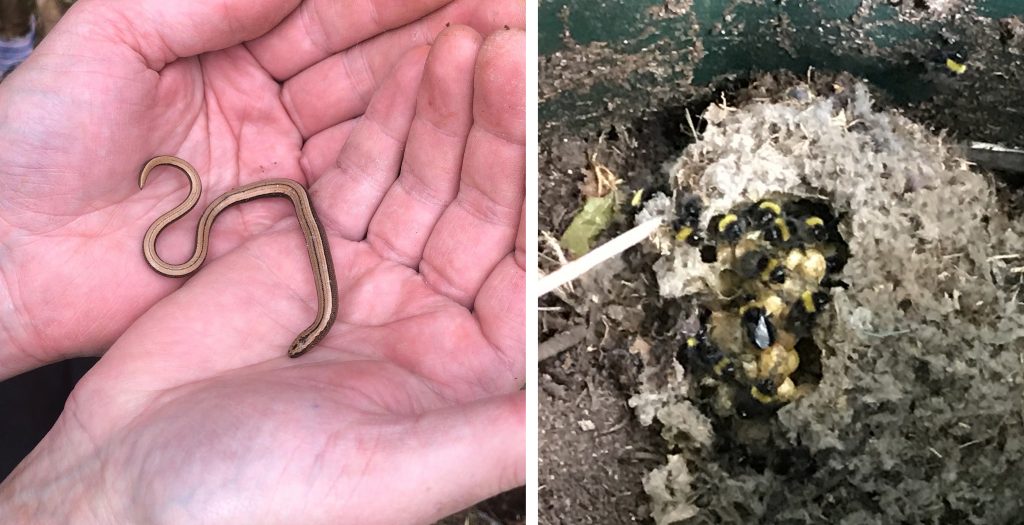
Nigel found this tiny slow worm in his garden and also discovered a bumblebee nest in his compost bin.

Slow worm and bumblebee images by N Jones

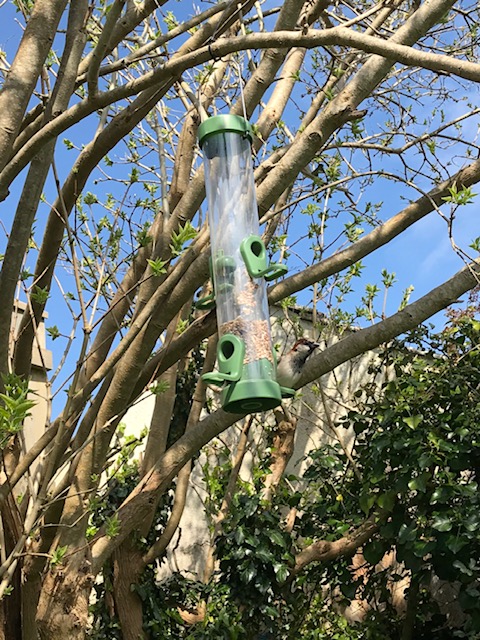
While working from home, Elle has been enjoying watching the birds visiting her collection of feeders.

Sparrow on feeder – Image by E Mason

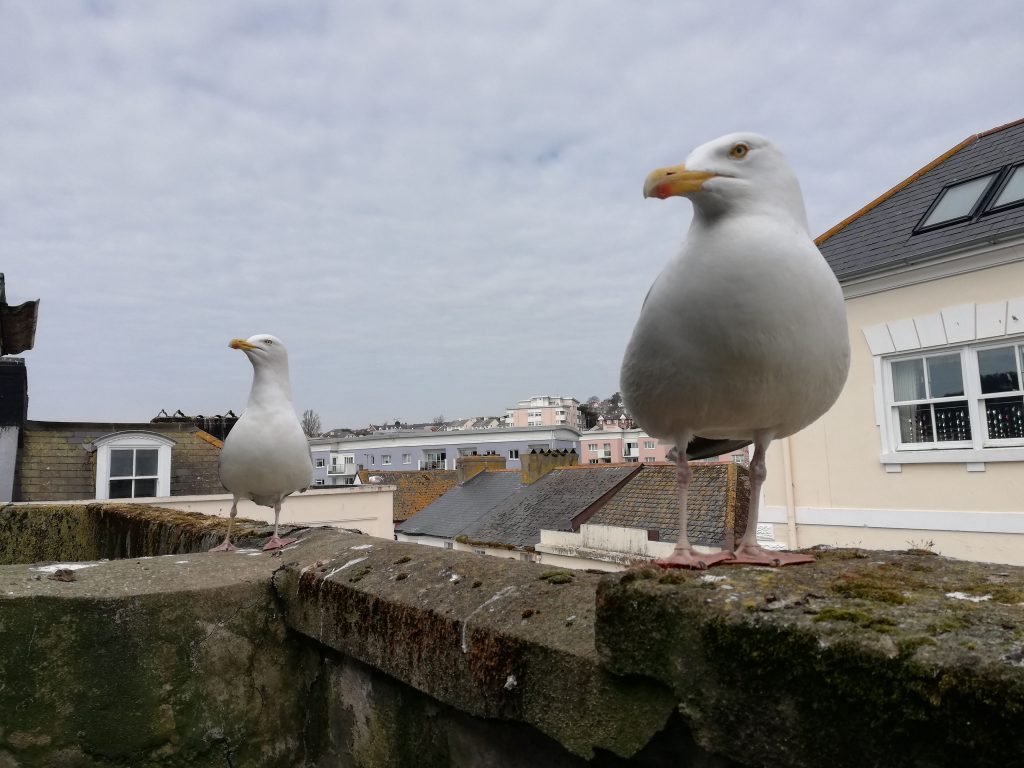
Finally, Guy captured this charismatic shot of some of the frequent visitors to his local rooftop.

Gulls – Image by G Freeman

Have you spotted anything exciting in the garden or while on walks this spring? If so, we’d love to hear about it and to see your photos!


NHBS In the Field – Video Endoscope

Video Endoscope

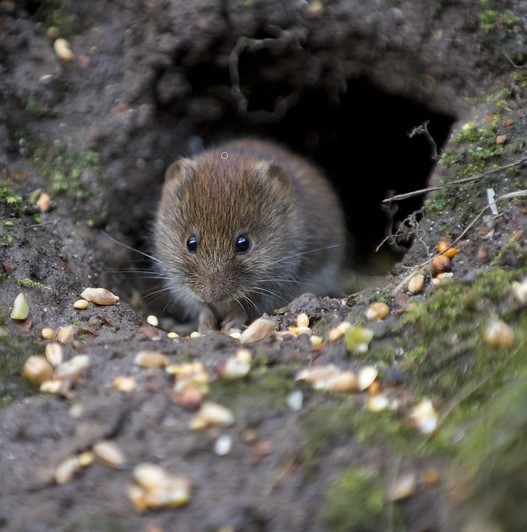
Bank Vole (Myodes glareolus) – Photo: Claire Spelling (www.flickr.com)

An endoscope (or more correctly a borescope) is an optical device with an eyepiece or display at one end and an objective lens or camera at the other end, linked by an optical or electrical cable that relays the images. They have a broad range of applications, from medical investigations to drain inspections and are fantastically useful for ecologists as they give visibility of inaccessible places such as mammal burrows and bat roosts (for licensed bat workers only). They have the added advantage of minimising disturbance by being less intrusive than visual inspections and many handheld units can now capture still images and video footage for a permanent record.

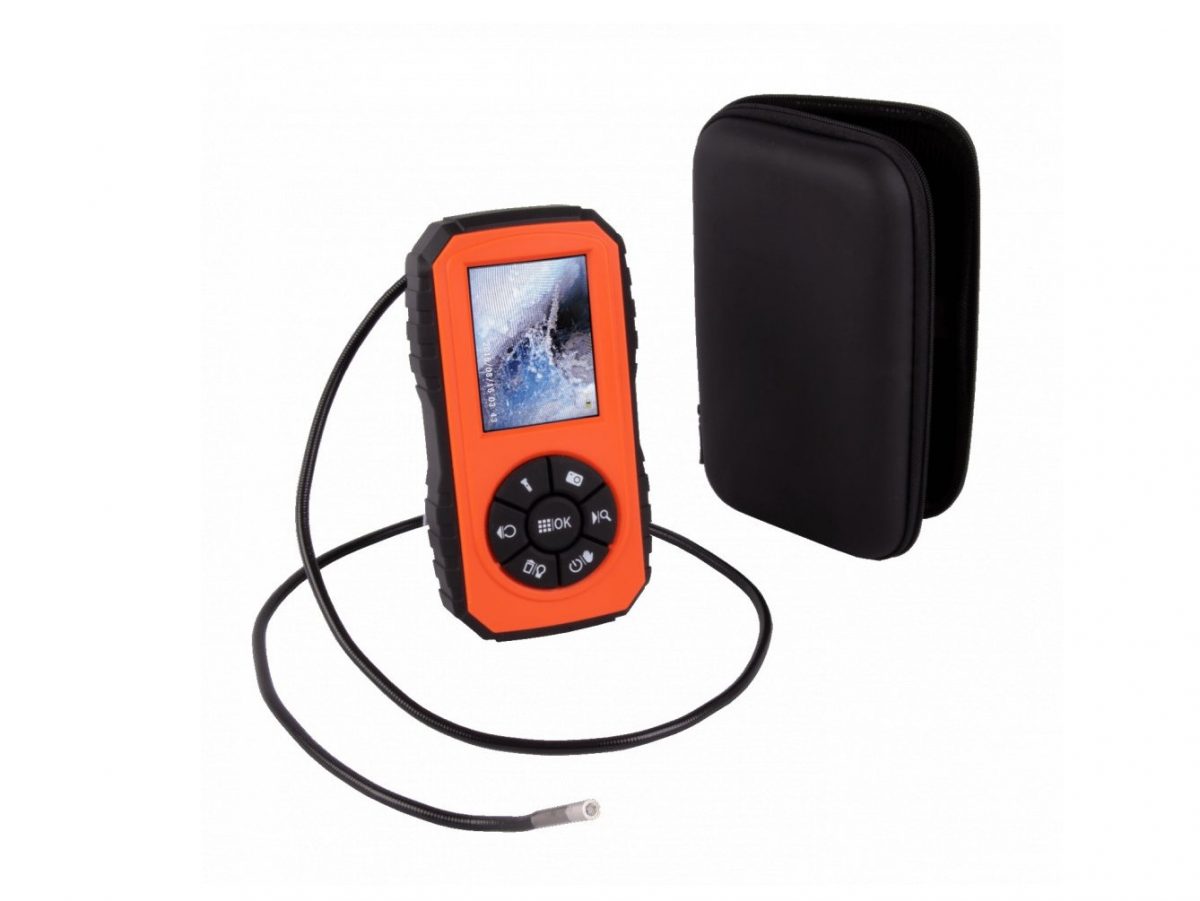
Video Endoscope

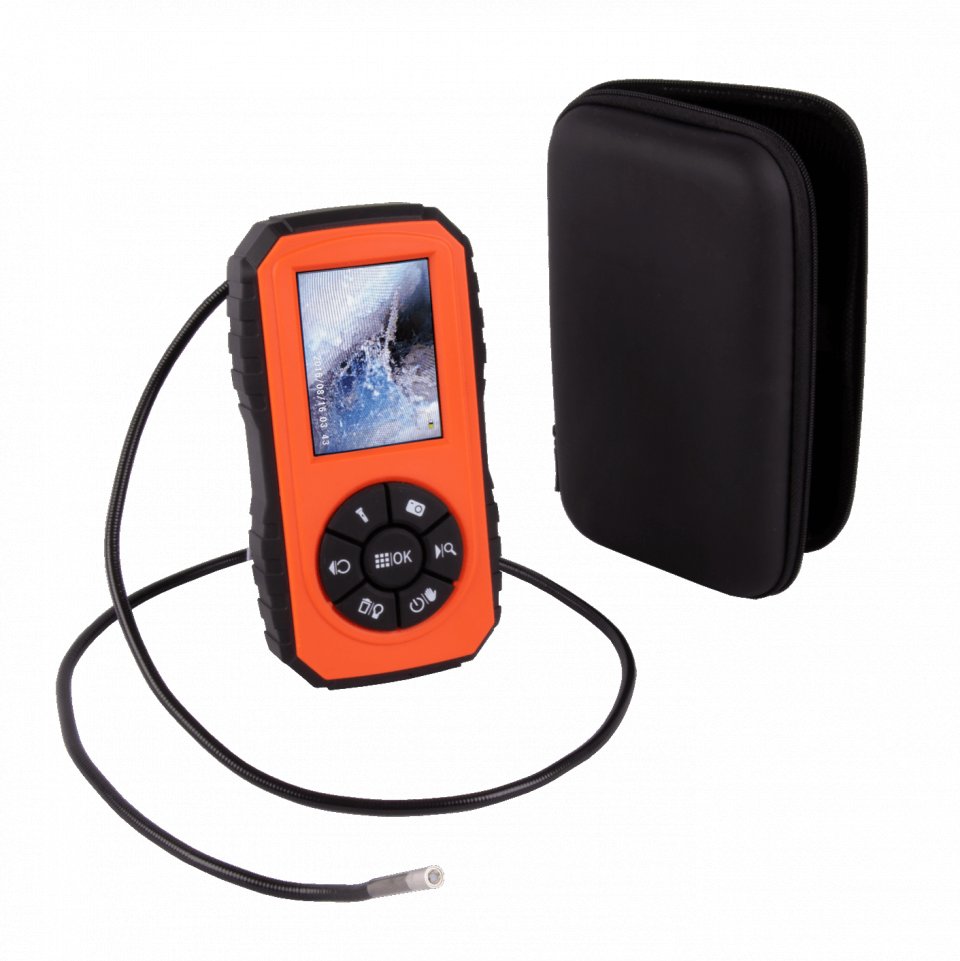
The innovative Video Endoscope is a pocket-sized inspection camera that is ideal for examining crevices, cavities, burrows and nests. It is very ergonomic with a clear, user friendly interface and durable design. The semi-flexible 1m camera tube neatly coils into a cleverly designed groove at the back of the device and it has a protective carry case, making it very portable. The 3″ screen has an HD resolution with 720P and the camera has six LEDs with adjustable brightness control and digital 2x zoom, to ensure the picture is clear. This endoscope records still images and video on to a MicroSD card and is powered by 4 x AA batteries. We took the endoscope out to field test it in a pond to look for tadpoles and to examine nests in nest boxes.

How We Tested

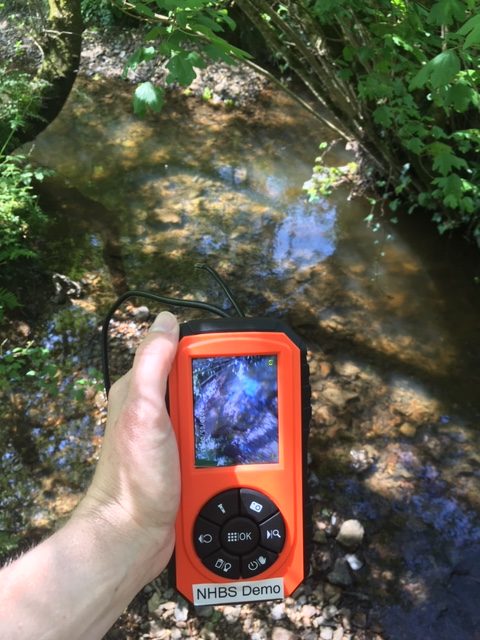
The Video Endoscope camera is IP67 water resistant so we wanted to test its performance when recording underwater. It also has adjustable LED brightness so we wanted to test it in dark conditions. We chose a pond on a farm in West Dorset known to have some tadpoles and selected some nest boxes in a nearby area to examine for nesting activity. We used a 16GB microSD card and 4 x new AA alkaline batteries.
What We Found

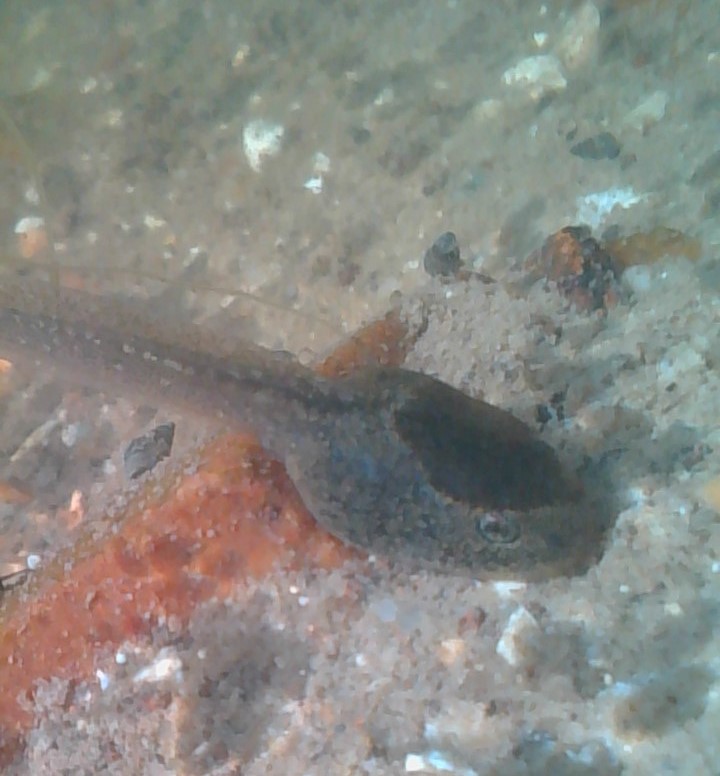
Tadpole – image captured by Video Endoscope

The Video Endoscope was really easy to set up and use. The controls are clear and the menus are simple to navigate. It was simple to switch between photo and video mode and to control the LED brightness and zoom. This meant that our attention was focused on capturing the best possible footage in the field. The images and videos we recorded underwater were clear and sharp, in spite of the debris in the pond and we got some good footage of tadpoles.

It is quite difficult to control the full length of the cable as it is flexible, so we found it was necessary for the observer to be stood quite still. This was particularly evident when trying to use the endoscope in nest boxes. This is shown by the difference between the two videos below – in the first one you can just glimpse some eggs but we didn’t manage to count them properly and it was hard to capture them in subsequent videos.


However for checking quickly in a nest box to see if it was occupied it performed excellently. The adjustable LED brightness was particularly useful when checking the nest boxes and looking under rocks.

We edited the videos using Microsoft Video Editor, which meant that we could flip the image when it was recorded upside down, as it is quite difficult to keep the image the right way up when the camera cable is fully extended. The endoscope does have an image flip function, which is very handy when you have the camera positioned well but the image is inverted.

Our Opinion

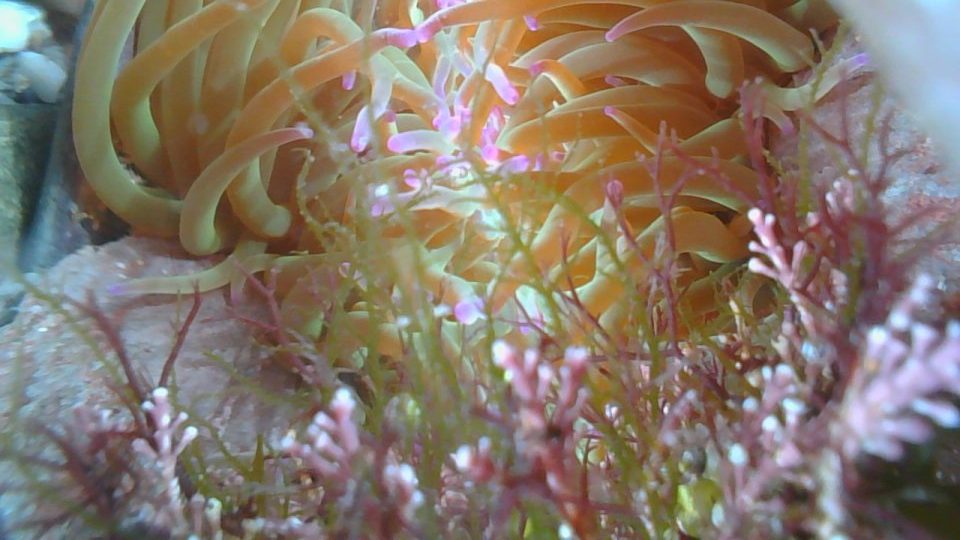
Snakelocks anemone (Anemonia viridis) – photo captured by Video Endoscope

The Video Endoscope is a fantastic, versatile piece of field equipment that could be useful in many different survey scenarios. It is particularly impressive when used underwater as the photos we took in a rockpool survey last year demonstrate. It is very portable because the cable coils neatly into the body of the endoscope and the controls are simple to use. The quality of the still images and the video footage are fantastic, and the adjustable LEDs mean that you can get decent images from quite dark spaces. For more information, or to purchase a Video Endoscope, please visit our website or contact us.


NHBS: In The Field – IP Nest Box Camera

IP Nest Box Camera

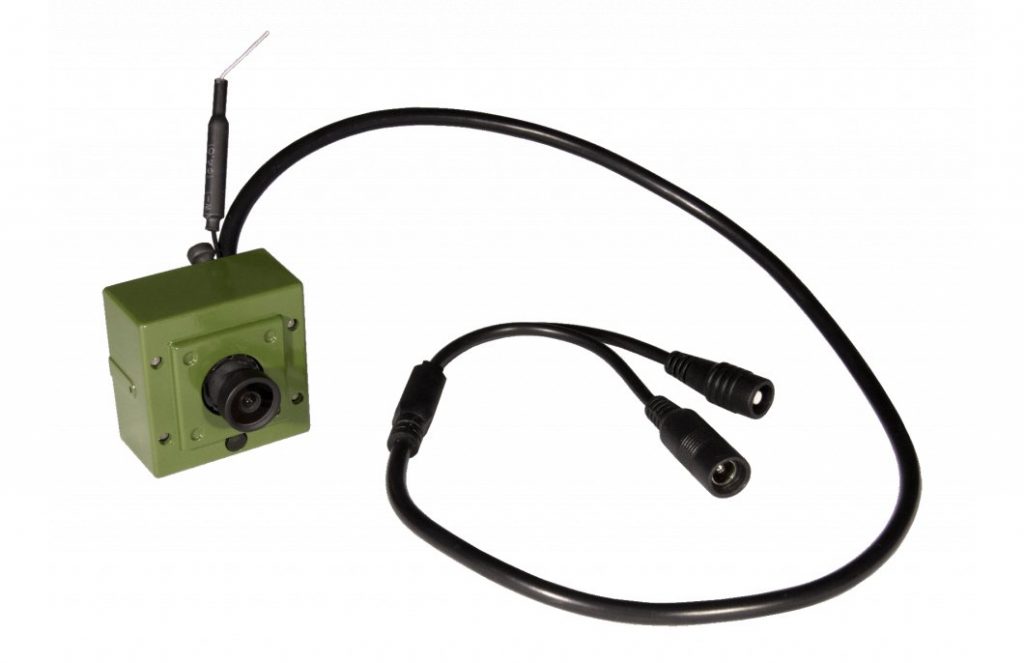
Providing a nest box for birds is one of the easiest ways that you can help wildlife in your garden or compensate for lost nesting sites as a result of development. Adding a nest box camera gives you a unique insight into the fascinating processes of nest building, egg laying, incubation and chick rearing. The IP Nest Box Camera is the ideal camera to use if you wish to live stream footage from the camera on to a PC, smartphone, tablet or to a website. The high definition camera provides 1920 x 1080p colour footage during the day and black and white footage at night and the high quality video makes it perfect for enthusiasts and researchers alike. We decided to test the IP Nest Box Camera to examine how easy it was to set up and use.

IP Nest Box Camera


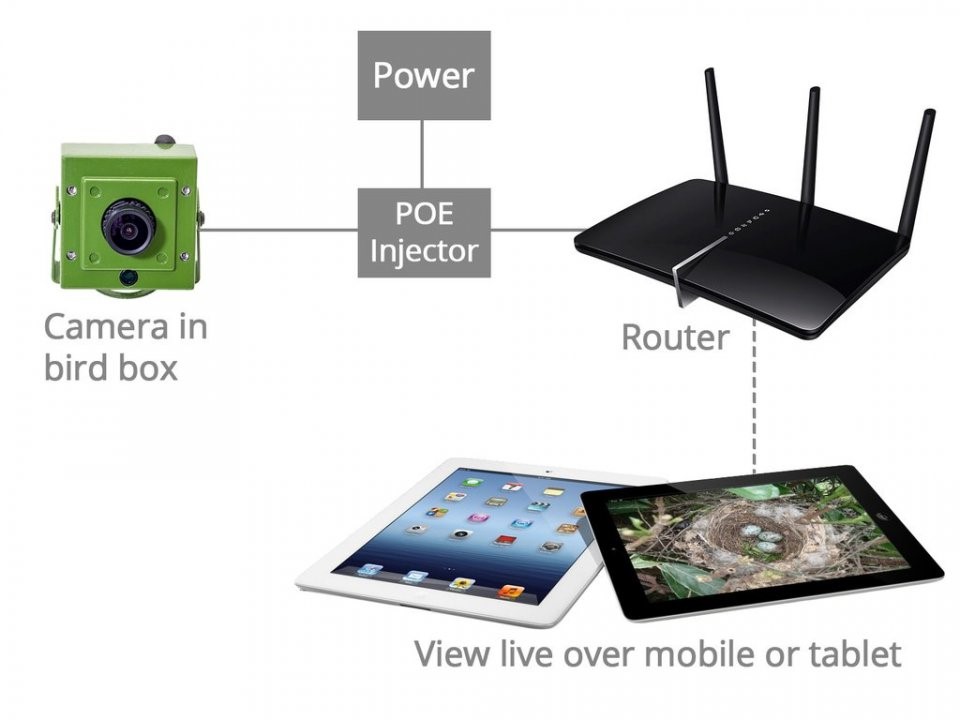
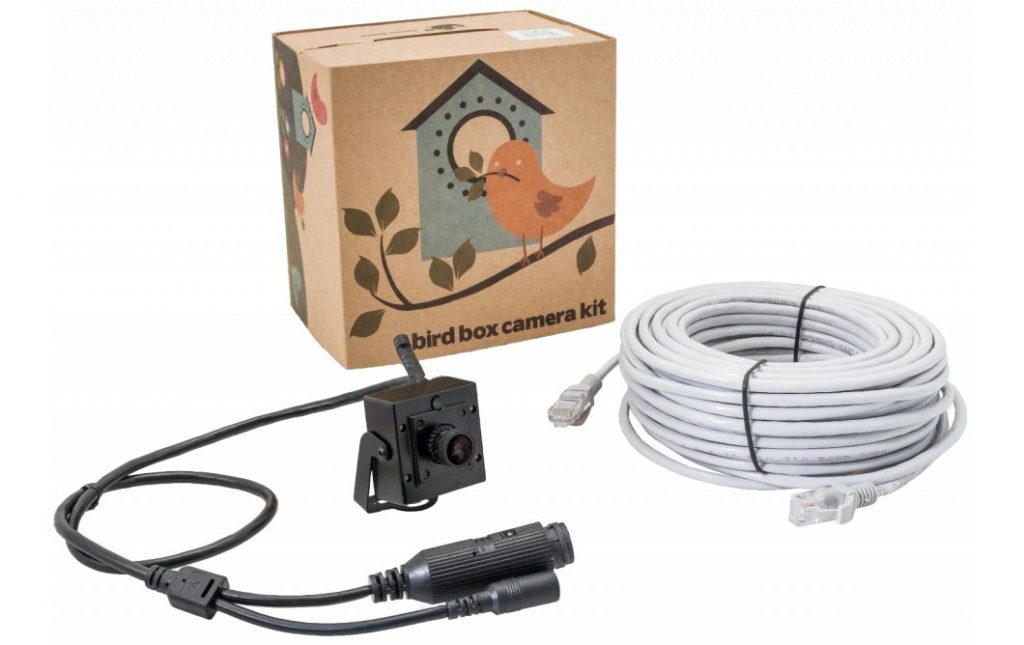
The small camera plugs directly into your router or network switch via a 20m Cat6 ethernet cable with waterproof connector. Following setup on your PC or via an app on your mobile device, live streaming can begin. We tested only PC viewing and recording. If viewing on a PC, most camera access software will allow both motion detection and scheduled recording.

There are many nest box cameras available that will cover a wide range of requirements, and our blog post on Watching Wildlife – How to choose the right Nest Box Camera can help you decide between the different options.

Setting Up

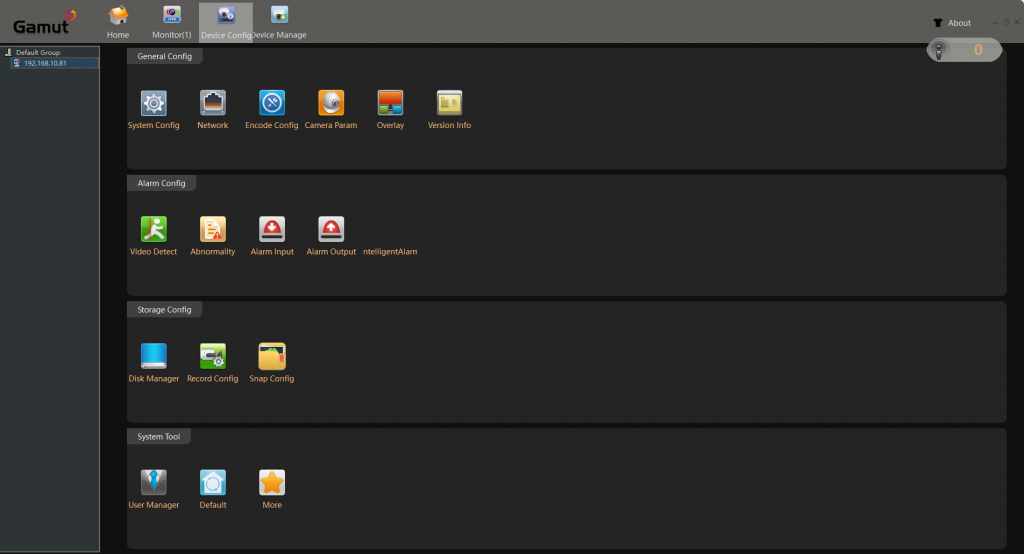
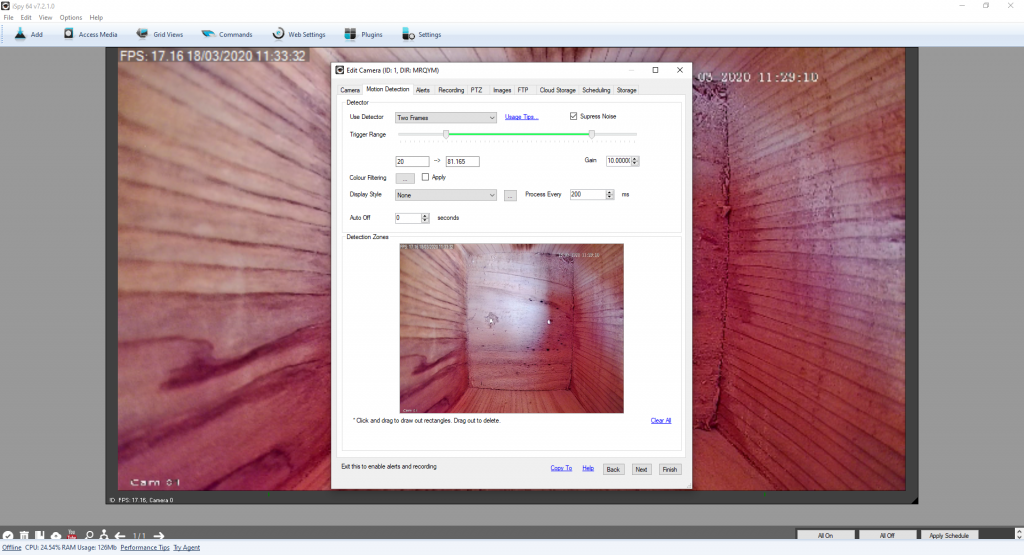
Before you install the camera in the nest box it is a good idea to wire it all up and check everything is working. We followed the Green Feathers Quick Start Guide instructions to connect the Cat6 cable between the camera and the PoE injector and between the injector and the router / switch, and then connected the injector to a power supply using the supplied adapter. We downloaded three camera access software programs to trial, Gamut CMS5, iSpy (both as recommended by Green Feathers) and Anycam.iO.

IP Nest Box Camera Setup

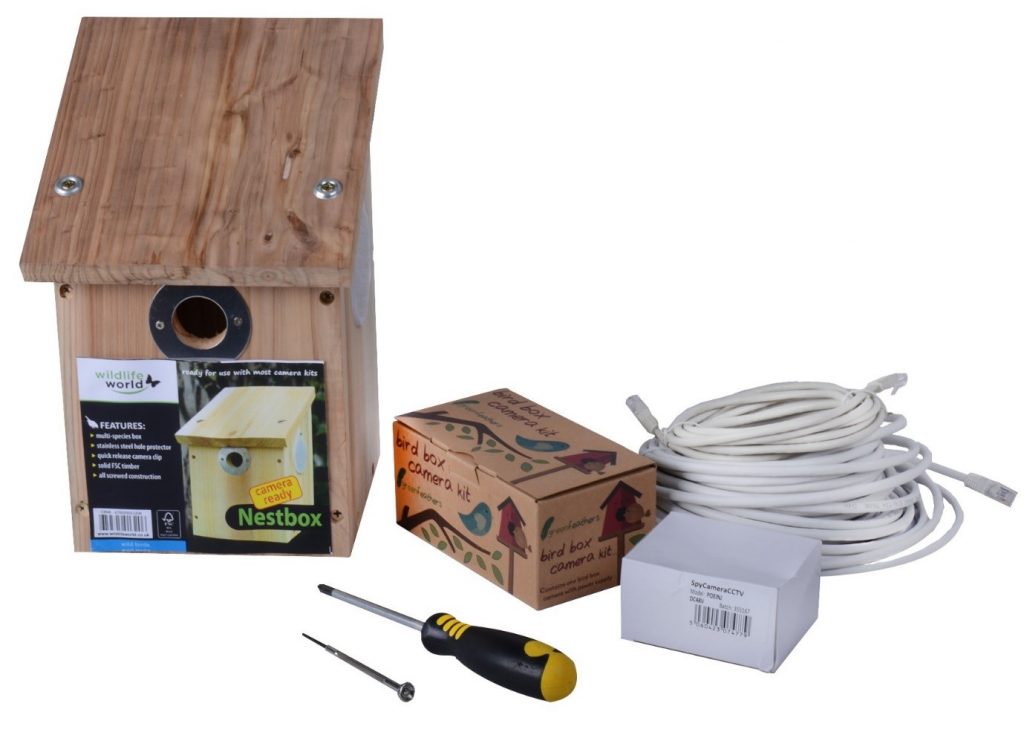
We installed the camera in our Camera Ready Nest Box and found that the easiest way of installing the camera into the box lid was to attach the camera bracket to the lid first and then to attach the camera to its bracket afterwards. It is best to have the camera pointing directly downwards and not angled.

After the box was installed in position, we connected everything up and downloaded software to connect to the camera. We have tried three software programs, all of which are free to download, although additional features may require payment.
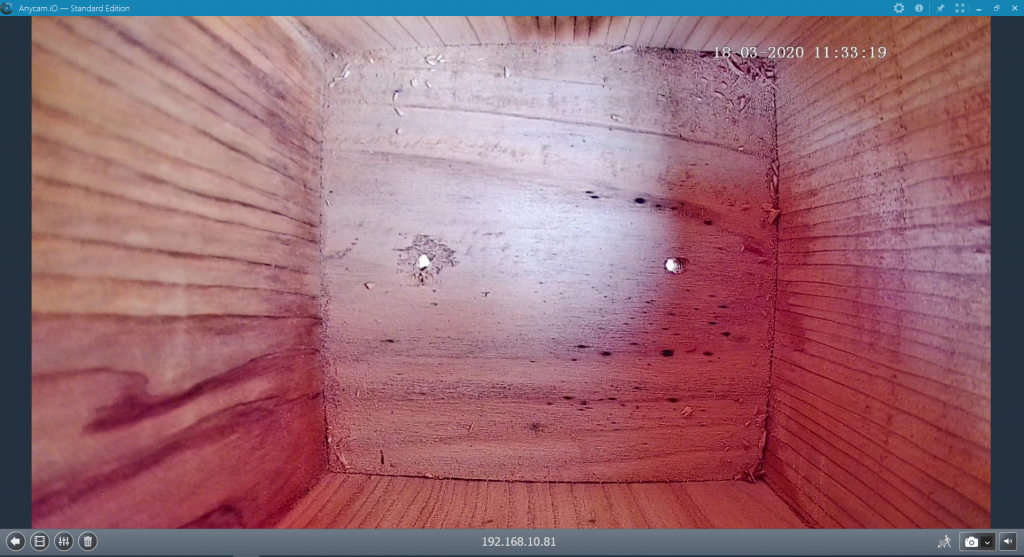
Anycam.iO
iSpy
Gamut CMS5 – link to download

What We Found

The camera was really easy to connect up and access across the network. The main software we used to configure the camera was the Gamut CMS5 software and we followed the supplier instructions for how to add an HD IP camera to the Gamut software. There are many configuration options and we updated the time and date on the camera and added it to the software without any problems

We discovered a difficulty with the Gamut software, however, in that you cannot record to a subdirectory, you either need to record to an empty storage device that is mounted on its own drive or a partitioned and empty C:/ drive. For this reason we also tried the iSpy software, following the supplier instructions for how to configure an HD IP camera to record to a Windows PC. This was a very easy process and we managed to get the software to record with motion detection with no difficulties.

We also tested recording on the Anycam.iO software, which was very easy to install and set up. Recording and taking snapshots images are easy but you have to pay extra to get the motion detection function.

The Anycam.iO software was by far the easiest to use, with a really simple interface and really good resolution images and video. It is immediately obvious how to take a snapshot photo and how to record manually and if you pay the extra for the motion detection it is really easy to configure. One thing we did find is that you have to be careful with the ‘Archive’ setting on the Recording menu because it limits how much footage it will store unless it is set to ‘Unlimited’.

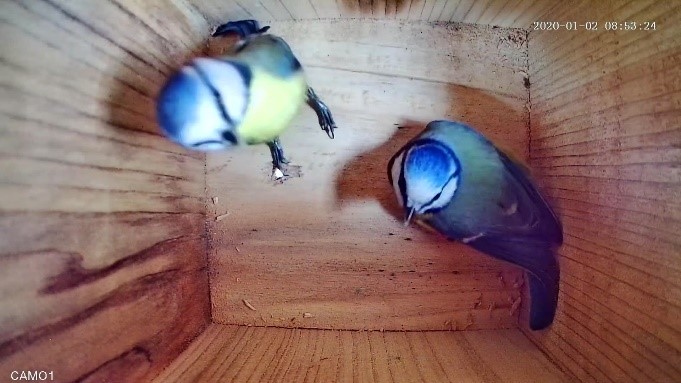
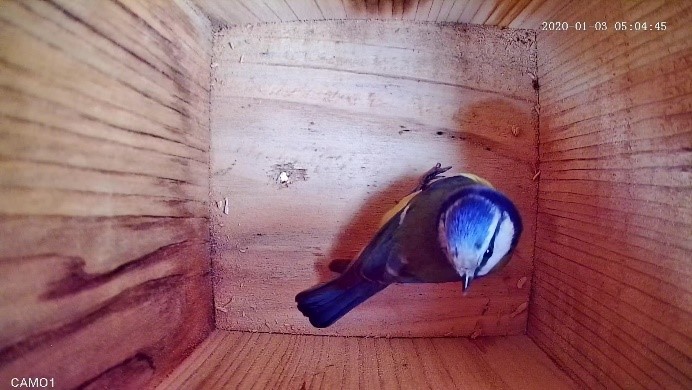
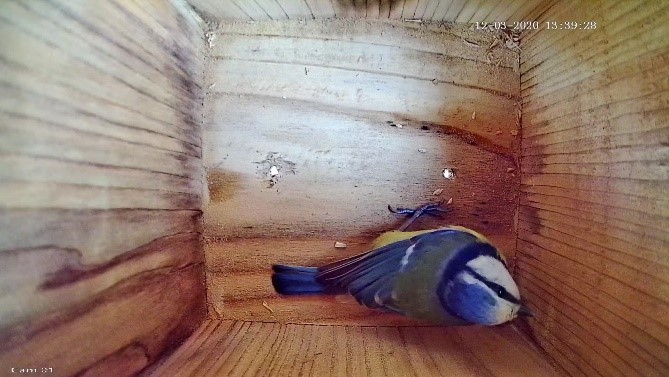
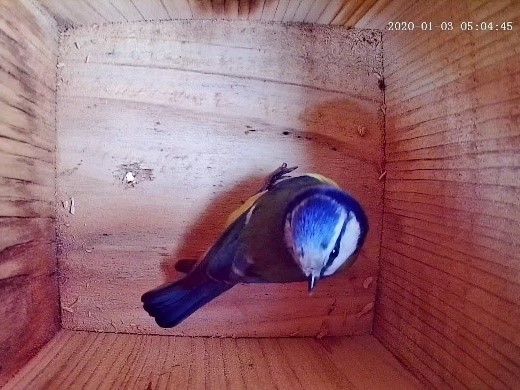
The images below were all taken with the Anycam.iO software and you can see the quality of the colour and resolution.

We captured some fantastic video footage of the blue tits first visiting the nest box and then a later video where the female is making her own nest box modifications. The quality of the later recording does seem to have deteriorated, which shows the difference when the light quality coming into the box is poor.

The iSpy software had many more configuration options than the Anycam.iO software but the recorded footage seemed not to be as high quality. The interface would suit a more professional user as there are many more settings that can be altered.

Our Opinion

We highly recommend purchasing the IP Nest Box Camera if you have the facility to connect a camera directly into a network. The footage is really high quality, with excellent resolution still images, and the camera provides a reliable continuous live stream. There are a number of different software options to suit a range of users and the camera can be used to capture still images and video with motion detection. We are hoping that our blue tit visitors begin bringing in nesting material soon and we can post updates on nest building. The IP Nest Box Camera is available to buy from the NHBS website. For any advice on purchasing this or other nest box cameras, please do not hesitate to contact our team of Wildlife Equipment Specialists on 01803 865913 or equipment@nhbs.com.

Installing nest box cameras at NHBS

Now is the time of year when many bird species are starting to defend territories more noisily and to look for suitable nest sites. To coincide with National Nest Box Week (14th to 21st February), we have been busy selecting our favourite nest boxes, updating our advisory blog posts on where to site nest boxes and how to put them up, and installing our own nest box cameras at our warehouse in Devon.

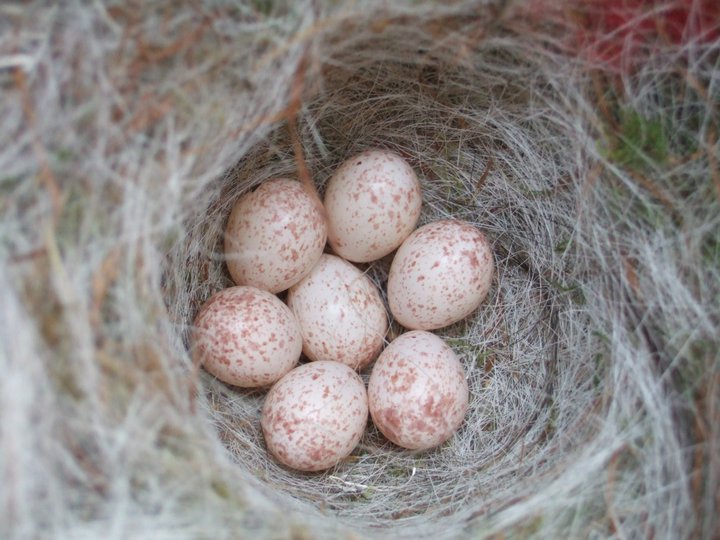
Great tit eggs – Photo: S. Webber

At this time of year, the birds will currently be exploring nest sites and should start bringing nesting material into the boxes in the next couple of weeks. 

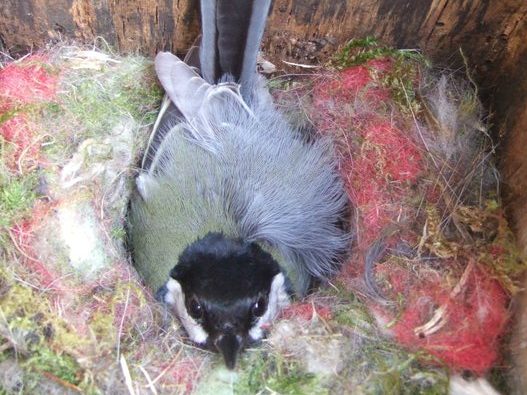
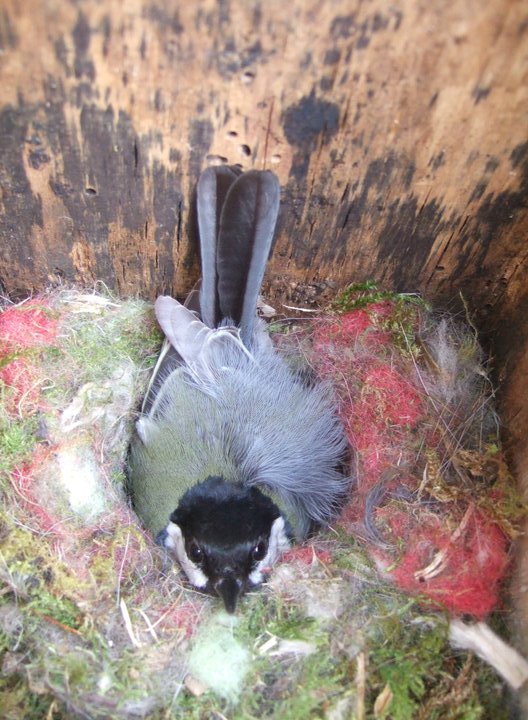
Incubating great tit female – Photo: S. Webber

Given that it has been a mild winter, the breeding season should start earlier this year, but we still would not expect the first eggs to appear until April. This means that there is still time to get a nest box up in your garden to provide much needed nesting space for birds. You could even consider enjoying this amazing spring spectacle up close with a nest box camera.


Choosing the nest boxes and cameras

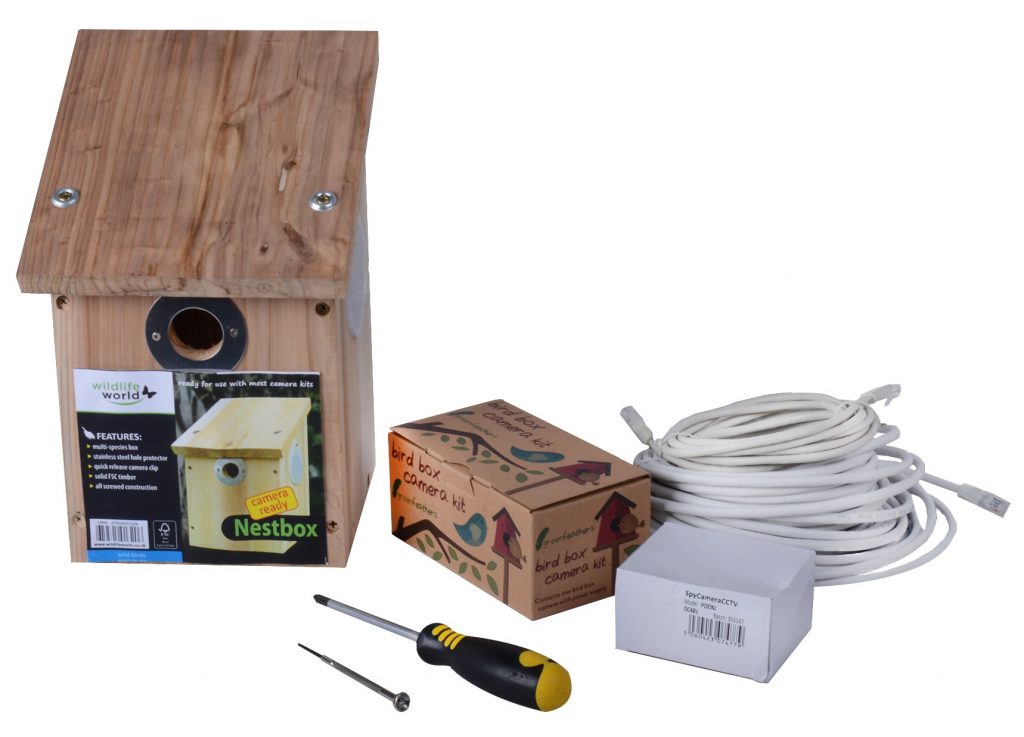
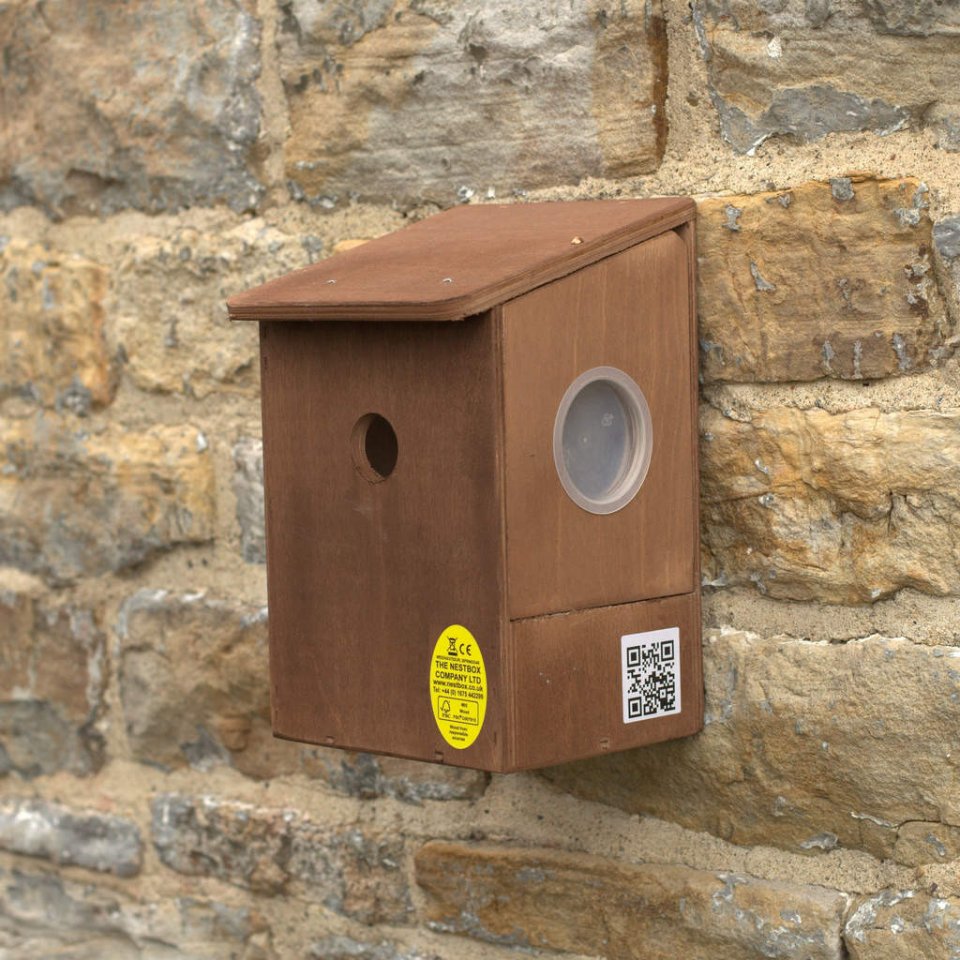
We chose two of our Camera Ready Nest Boxes because they have a perspex panel in the side to let in extra light, which gives better daytime images in colour, and a camera clip on the lid. We then selected two of our most popular cameras, the WiFi Nest Box Camera, which can stream footage directly to a smartphone or tablet, and the IP Nest Box Camera, which can provide a live stream to a website. There are many options available when it comes to selecting a nest box camera, and our blog post on Watching Wildlife – How to choose the right Nest Box Camera can help you decide between the different options.

The Camera Ready Nest Box and IP Nest Box Camera

How to install the camera in the nest box

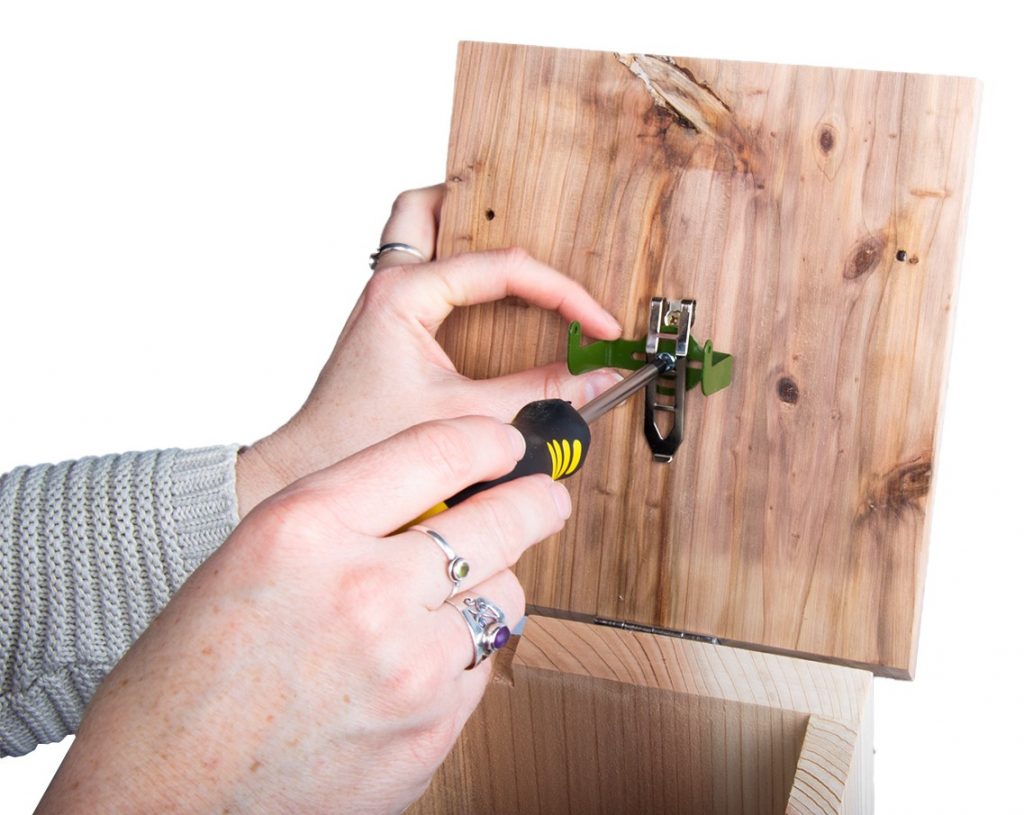
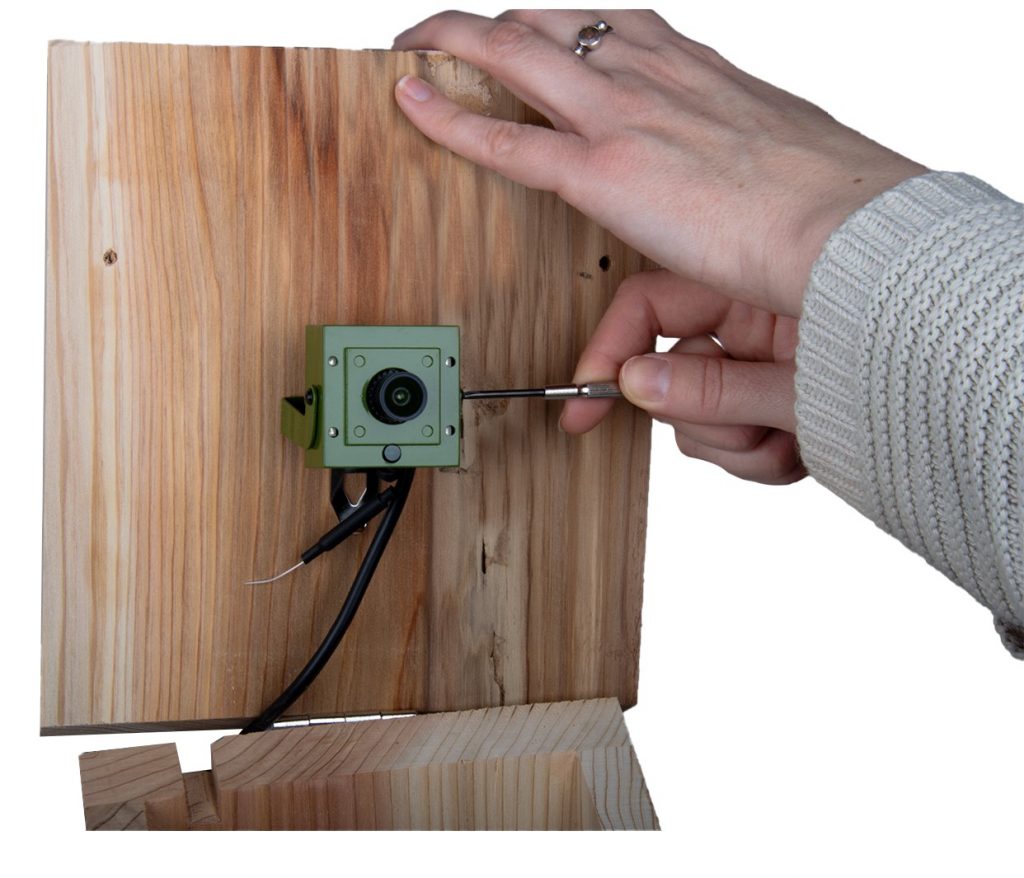
The procedure for attaching the camera to the lid was the same for the WiFi and IP cameras. We found that the easiest way of installing the camera into the box lid was to attach the camera bracket to the lid first and then to attach the camera to its bracket afterwards. We unscrewed the camera clip with a large Phillips screwdriver, slid the camera bracket underneath the clip on the inside of the lid and then tightened the clip screw back up again. 

Unscrewing the camera clip and attaching the bracket

Then we attached the camera onto its bracket using a very small Phillips screwdriver. 

Attaching the WiFi camera to its bracket

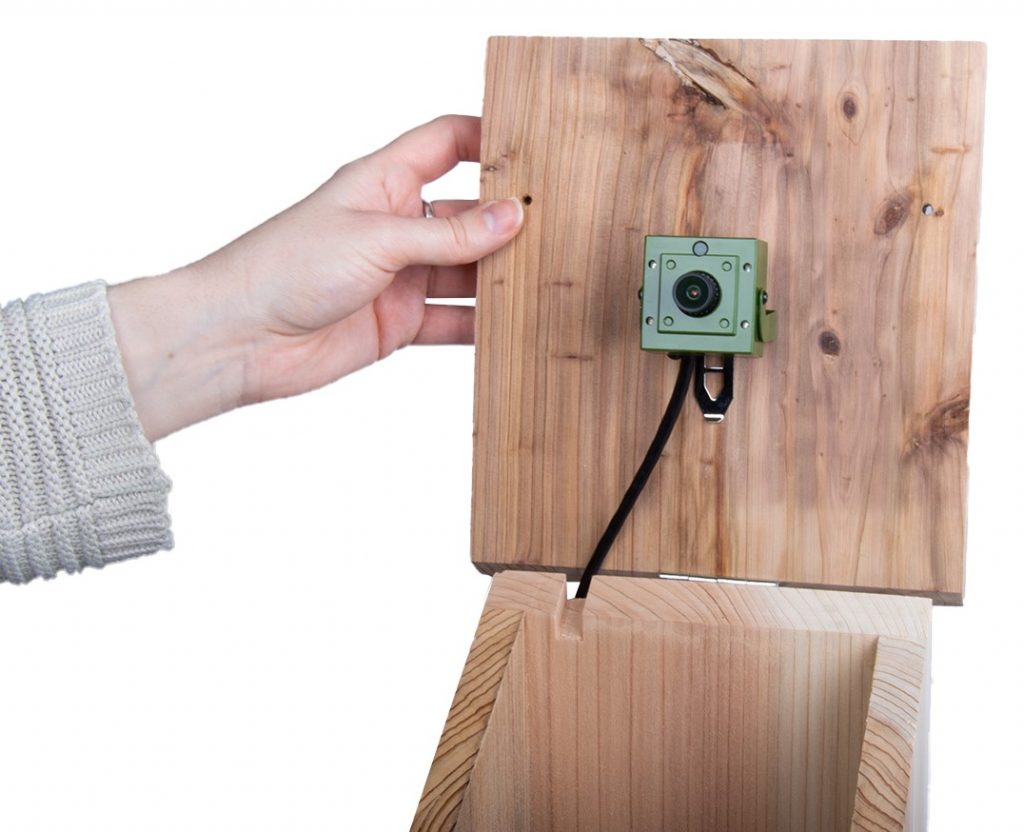
With the WiFi camera we found that it was best to point the aerial downwards because our nest box roof was sloping. You can check the angle of the camera through the perspex panel on the side – it is best to have it pointing directly downwards and not angled. Ensure that the camera cable is running out of the notch on the back of the box so that the lid fits down snugly.

IP Nest Box Camera in position

Putting up the nest boxes

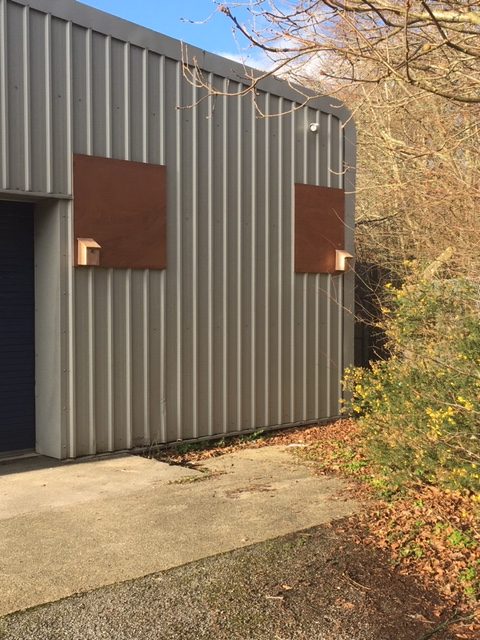
We sited the nest boxes on the eastern side of the building close to the tree cover along the river. To maximise the chances of occupation, it is advisable to site boxes for cavity nesting birds such as blue and great tits away from prevailing winds, and with a direct flight path to some tree cover. We attached them securely to the wall, approximately 2m off the ground – this is high enough to prevent interference but close enough to reach for monitoring and maintenance. We have put them as far apart as possible from each other and out of the sight of our bird feeder around the corner. We think that it may be unlikely that tit species would nest that closely to each other but if the boxes are occupied by house sparrows then these two boxes could form the start of a colony.

Connecting up the cameras

The IP Nest Box Camera connects via Ethernet cable directly into a router, hub or switch and then you need to choose software to allow you to access the camera feed and live stream to a website. We are currently trialling Anycam.iO. If there is no WiFi network, the WiFi camera can be used as a standalone WiFi source that you connect to directly with your smartphone or tablet. Alternatively you can tether the WiFi camera to your existing WiFi network and access it as a node on the network. The WiFi camera is viewed via an app on your smartphone or tablet and we are currently trialling ICSee Pro.

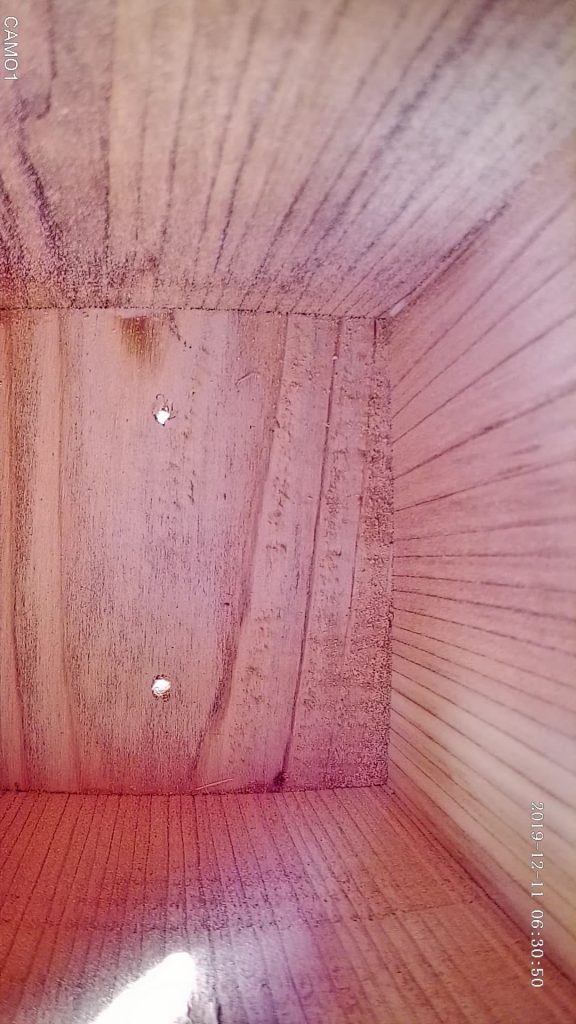
The current view in the IP camera nest box


Now we just have to wait and hope that the local birds decide that these are desirable nesting sites! For further advice on nest boxes and cameras, please do not hesitate to contact our team of Wildlife Equipment Specialists.


Recommended reading


Nestboxes
Your Complete Guide
£10.95


A Field Guide to Monitoring Nests
£24.99


Nests, Eggs & Incubation
£23.99  £40.99


The Blue Tit
£49.99


Recommended Products

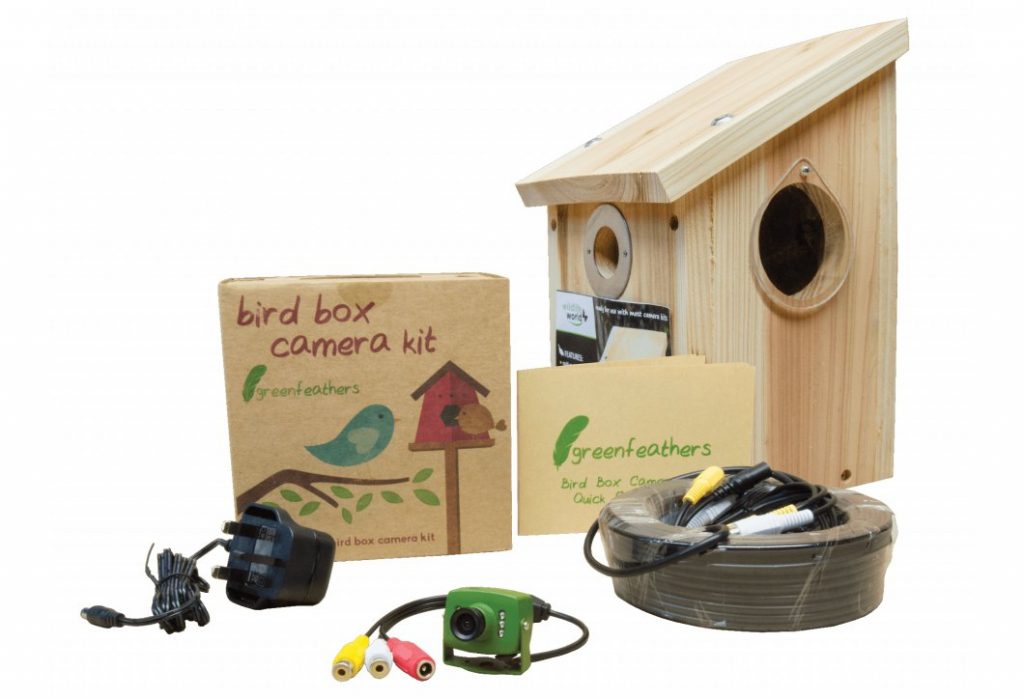
Nest Box Camera Kit
From £58.99


WiFi Nest Box Camera
£109.00  £129.00


IP Nest Box Camera
£100.00


Side Opening Nest Box
£29.95

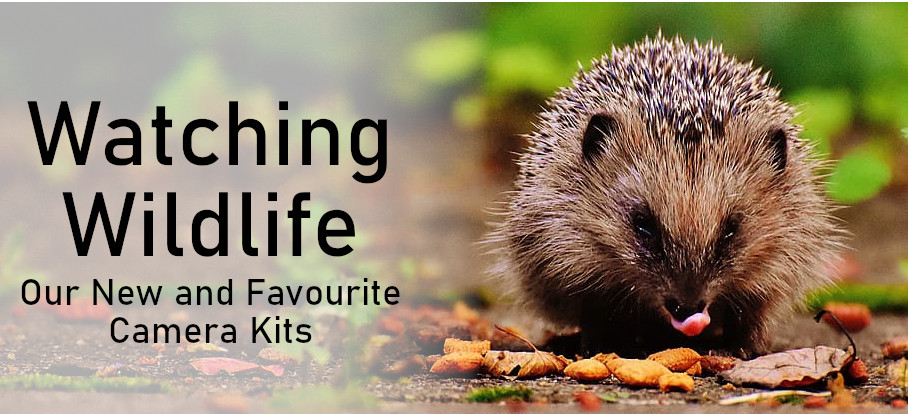
Watching Wildlife – Our New and Favourite Camera Kits

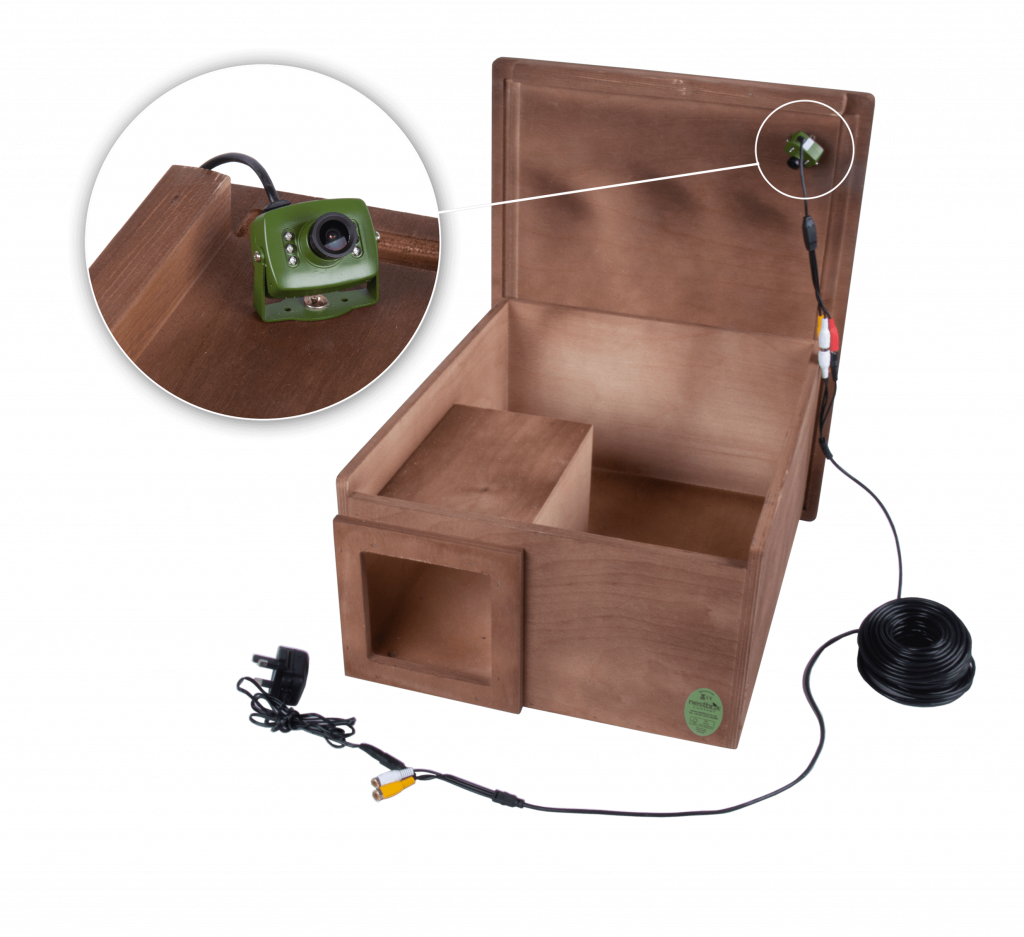
The Hedgehog camera kit

Our brand new Hedgehog Camera Kit includes a high-quality wooden hedgehog nest box, designed and tested by the Hedgehog Preservation Society. It also includes a tiny camera that can easily be screwed to the roof or side of the box with no modifications required. The camera then transmits footage from inside the hedgehog box to your TV or smartphone (3 versions are available) for you to view your hedgehogs from the comfort of your home. With the use of a USB Capture device (sold separately), you can also view footage on your computer/laptop and set the camera to record with motion detection, meaning you won’t miss a thing overnight.

If you already have a wooden hedgehog nest box and would like to attach a camera to it, please feel free to contact us for advice on 01803 865913 or at customer.services@nhbs.com.

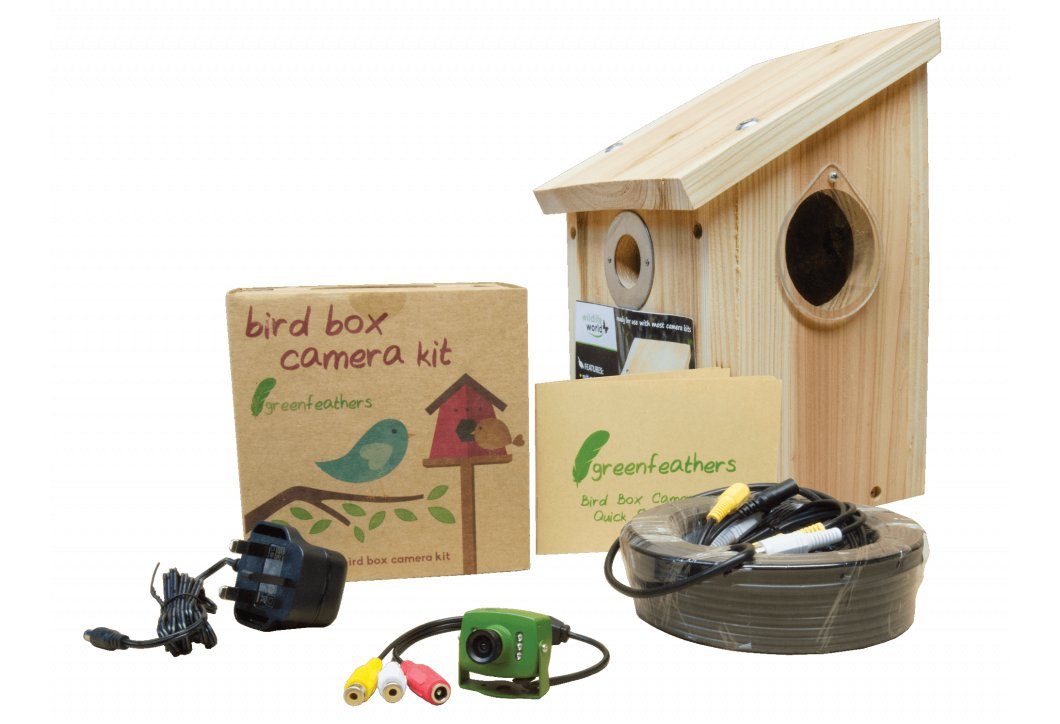
Nest Box Camera Kit – Wired Camera

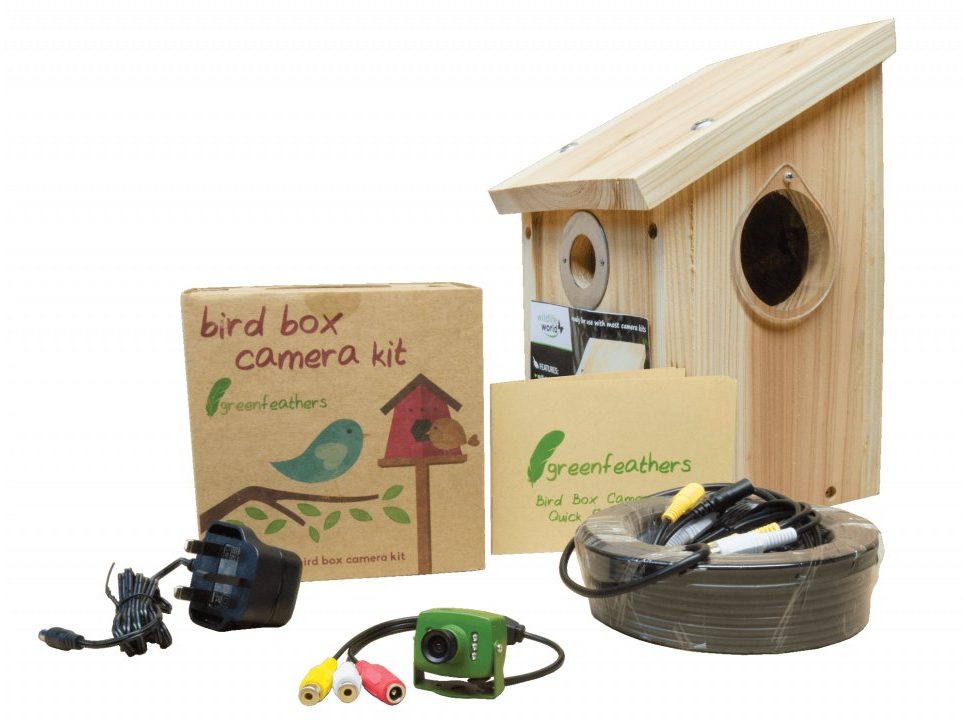
The Wired Nest Box Camera kit is a great choice if you haven’t used a nest box camera before. The kit comes with everything you need to get started, including a camera-ready nestbox. A wired camera produces reliable footage and is easy to set up following the step-by-step instructions.


IP Nest Box Camera

For those who have used nest box cameras before, or want more from their camera, an IP nest box camera is a good next step. With a bit of setup, you can livestream the footage from this camera to anywhere in the world.


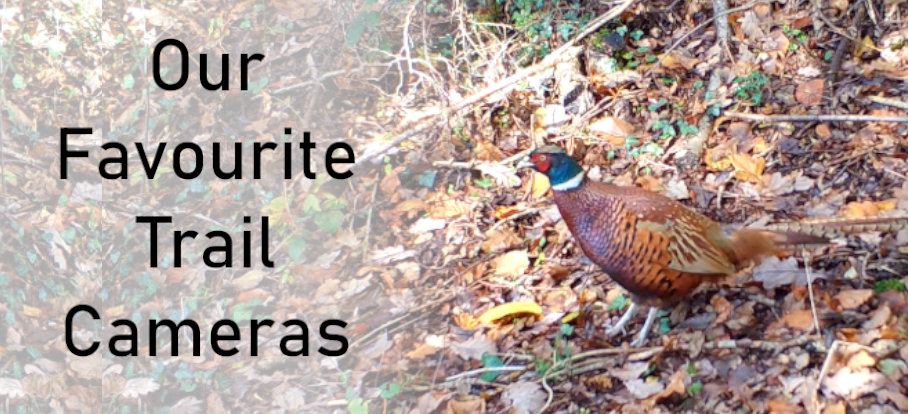
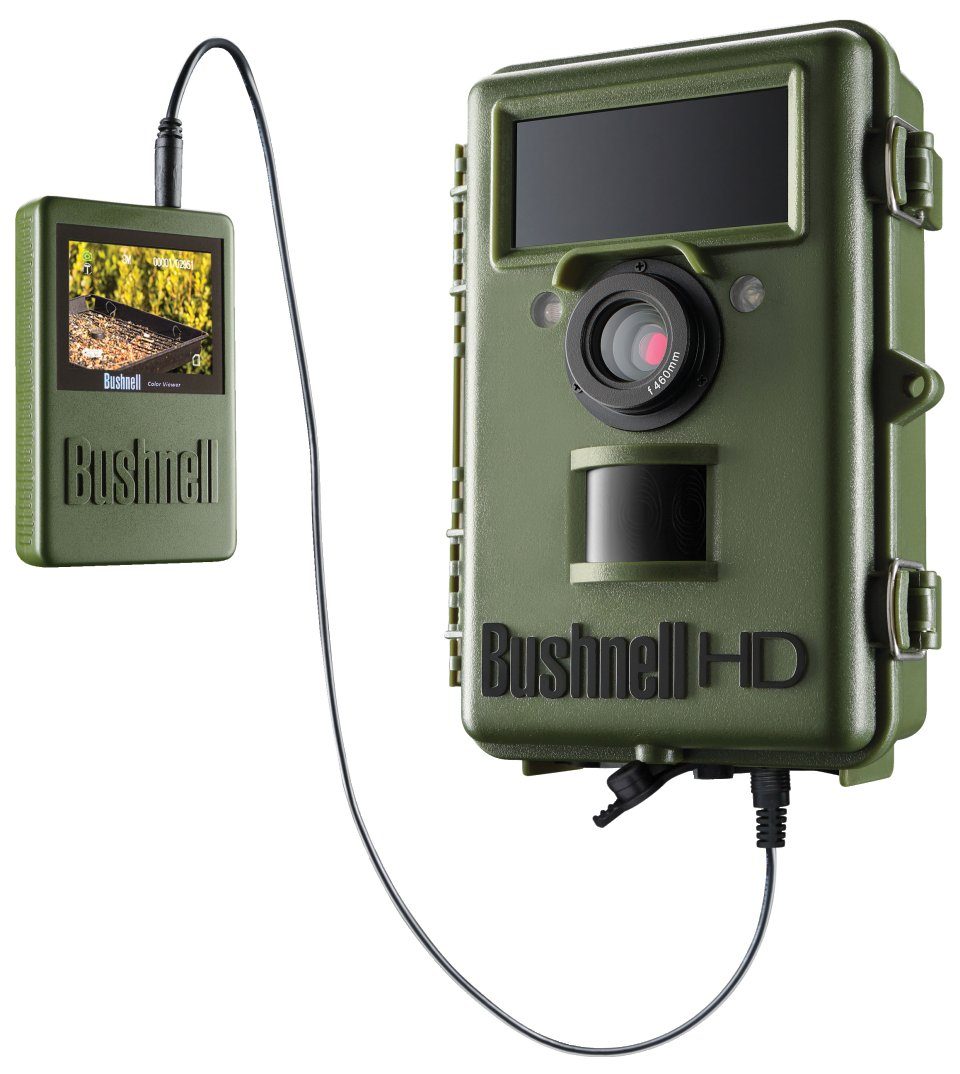
Bushnell NatureView Live View

A NatureView Live View is a great camera for garden wildlife. It features a plug-in screen that helps you get your camera positioned correctly when setting up, and also comes with 3 close focus lenses for when you would like to record smaller animals such as birds or small mammals. It features a quick 0.2 second trigger speed and takes 14MP with 1920 x 1080p footage.


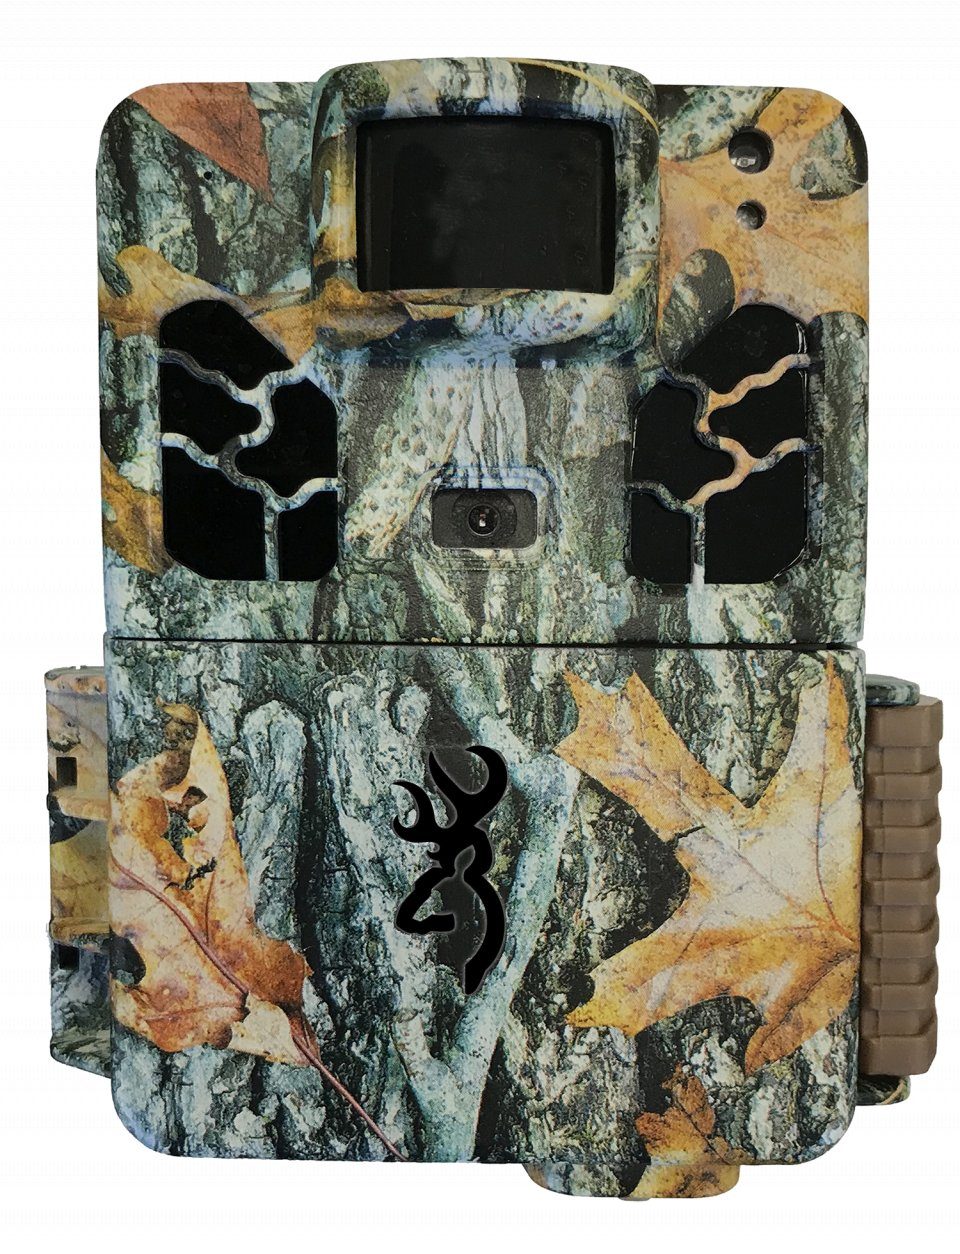
Browning Dark Ops Pro X 20MP

Browning’s Dark Ops Pro X 20MP is another great trail camera with some impressive specifications for its price. It records HD videos (1600 x 900 HD+) and 20MP images and has a 0.22 second trigger speed – great for capturing faster wildlife such as foxes or deer. It also features a built in viewing screen for easy setup and No-Glow IR LEDs that are invisible to humans or wildlife.

Starter Bundles

If you are looking to buy a trail camera and want to start capturing images and videos as soon as it arrives, then you may want to take a look at our starter bundle options. These bundles come with a memory card and batteries to ensure you have everything you need to get started.

Would you like some more advice on which trail camera or nest box camera is most suitable for you? Contact us on +44 (0)1803 865913 or email customer.services@nhbs.com . Alternatively, reply below and we will get back to you.