The European Badger (Meles meles) is one of the most iconic species found on the British Isles. These shy and elusive animals spend much of their time during the day hidden away within their extensive underground setts, emerging around dusk to forage on smaller mammals, earthworms, roots, bulbs and fruit.
Within their territories, badgers will follow established routes between foraging areas. When these pathways become obstructed by fencing, such as exclusion fencing for stock or deer, badgers will often dig under the obstruction to regain access to a familiar site and in doing so they may cause damage to the fence and allow in potentially unwanted species. In these circumstances, many developers will install a badger gate to allow badgers to freely access the site. These rectangular gates are constructed of either wood or metal and often feature locking mechanisms to ensure badgers can only pass through in a certain direction.
Although badgers are protected under the Protection of Badgers Act 1992, there are situations where developers need to temporarily or permanently exclude badgers from areas. This may be when they, or their setts, could be at risk of harm or disturbance. In these circumstances, and under acquisition of a license, one-way badger gates can be installed in sett entrances or in fencing surrounding a development to gradually exclude badgers from the area. These badgers will then either relocate to a new territory or to a nearby artificially-created sett.
At NHBS we manufacture a range of badger gates and this article will outline how they can be installed and used in different badger mitigation projects.
Softwood Badger Gate
This softwood badger gate has been designed in accordance with the specifications outlined by Natural England (available here) and is an excellent economic choice for many projects. It is constructed from untreated FSC-certified timber, which ensures badgers will not be harmed if they ingest any chewed wood. This gate has been designed so that it will not jam following periods of rain when the wood may swell.
The softwood gate is suitable for use where badgers require access through a fence. This gate can also be used in exclusion projects; however unlike our aluminium gates they can be damaged by chewing and often have a shorter lifespan.
Frame Dimensions: 450mm (H) x 285mm (W)
Entrance Dimensions: 250mm (H) x 200mm (W)
Material: Untreated FSC timber
Weight: 2.1kg
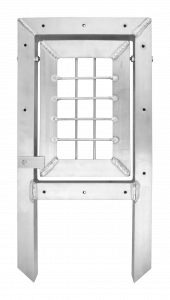
Access Badger Gate
The access badger gate is constructed from marine grade aluminium which ensures it is strong enough for repeated use while keeping it lighter than most steel gates. It features a heavy-duty grill panel which allows badgers to view what is on the other side of the gate, which can encourage some badgers to pass through. It has pointed legs which should be driven into the ground using a wooden mallet, however a hammer can also be used with a block of wood (striking the frame directly may cause warping and damage). The gate has two locking tabs that can be adjusted using a size 10 spanner to allow either two-way or one-way access.
This gate is designed for use in long-term projects where badgers need access through stock or deer fencing. For exclusion projects we would recommend our exclusion gates.
Frame Dimensions: 595mm (H) x 295mm (W)
Entrance Dimensions: 320mm (H) x 220mm (W)
Material: Marine Grade Aluminium
Weight: 3kg
Exclusion Badger Gate
The exclusion badger gate is also constructed from marine grade aluminium and comes fitted with a solid gate flap. This solid door has been designed based on evidence that some badgers can learn to use their claws to lift grill gates open. Another feature of this gate is that it does not have legs. This allows the gate to be positioned either vertically or horizontally in awkward sett entrances where a typical vertical gate would not be suitable. By installing this gate ecologists and developers can be confident that badgers will not be able to re-enter an exclusion zone.
This gate is also available with pointed legs, for installation within exclusion fencing.
Frame Dimensions: 400mm (H) x 295mm (W)
Entrance Dimensions: 320mm (H) x 220mm (W)
Material: Marine Grade Aluminium
Weight: 2.6kg
Accessories
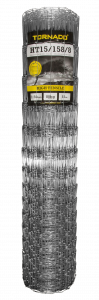
Badger Fencing
All of our gates can be incorporated into this high tensile wire fencing. It can be erected as a freestanding barrier or installed across a sett to prevent badgers from digging to form new entrances or to get around any installed gates.
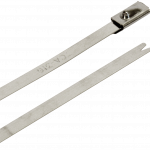
Stainless Steel Cable Ties
These strong, corrosion resistant cable ties can be used to quickly and easily secure a badger gate frame to the surrounding fencing.
Caudon® High Tensile Steel Pegs
These steel pegs are excellent for securing fencing to the ground, particularly in areas where badgers are prone to tunnelling. These pegs can also be driven through the access and exclusion badger gates to provide a firmer placement.
Badgers An updated edition of Michael Clark’s acclaimed study of the biology and natural history of the badger has been completely updated to include the controversy of badger culls.
The Badger This new edition provides basic information on Britain’s best known member of the weasel family, covering natural history, behaviour, ecology and conservation.
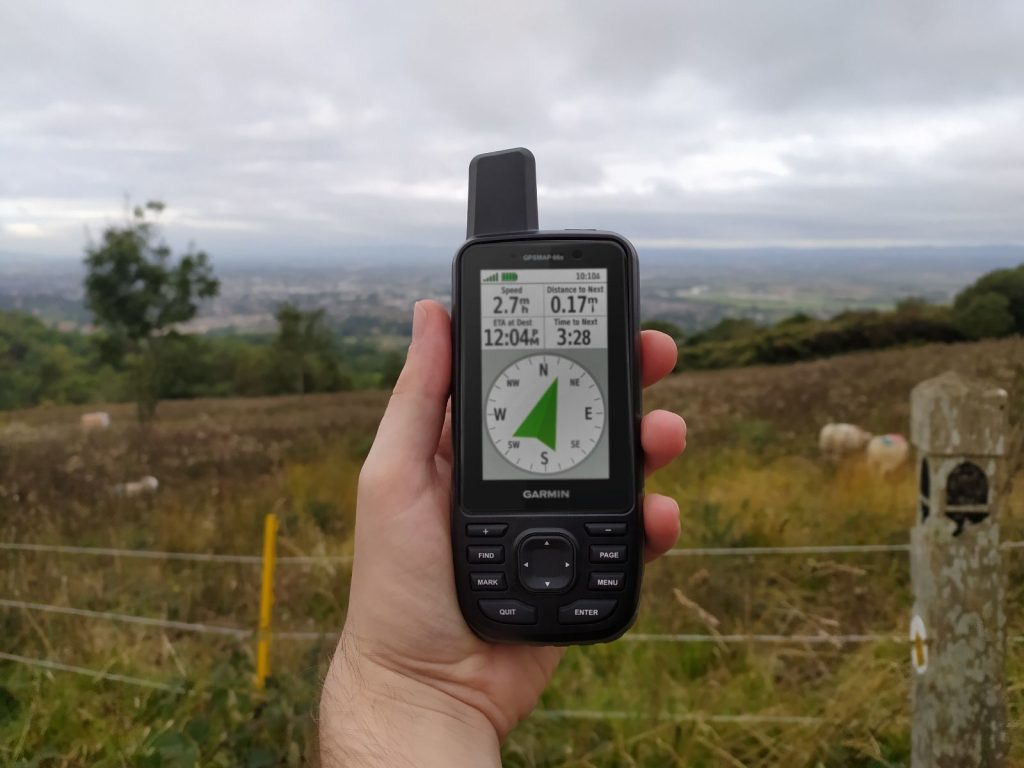
The GPSMAP 66s is one of Garmin’s most advanced handheld GPSs. Originally released in 2018, the 66s builds on the success of earlier models to provide the best tracking possible, along with a plethora of other features and improvements.
Handheld GPS devices are used by researchers and ecologists in situations where there is a need to create or follow a particular route (e.g. a transect survey) or where there is an area of interest (e.g. a bat roost) that may need to be marked for later analysis or to allow the surveyor to return to that spot in the future.
Outside of environmental monitoring and research, handheld GPSs are primarily used by walkers, hikers and cyclists looking to plot and record their routes. In late September, I tested the usability of a Garmin GPSMAP 66s by taking one with me on an eight-day walk along the Cotswolds Way – a national trail covering around 100 miles from Chipping Campden to Bath.
How we tested
Setting up the path on the GPS
One of the most important things to understand with all Garmin GPS units is the difference between a “track” and a “route”. The published literature from Garmin does not do a great job of distinguishing this, but thankfully there are a few superb YouTube videos that helped clarify the distinction between these terms and allowed me to choose the most suitable option for my purposes.
Routes: Designed to help guide you along a strict path, similar to a Satnav in your car. A route is made up of a number of waypoints (coordinates) placed typically at places where the user would have to change course or direction – this means that more complex routes require more waypoints to provide accurate navigation (hiking trails in remote areas, for instance, would most likely need more waypoints than driving in the city). When following a route, the GPS gives you on-screen advice about the direction you should be heading to reach the next waypoint and can alert you when you need to be aware of an upcoming change in direction. The two major drawbacks I found when using routes for my purpose were that the dense number of waypoints required made the screen almost unreadable and I did not need or particularly want the device directing me exactly where to go the entire time.
Tracks: Designed to show you on a map where you or someone else has been previously, like drawing a line on a map. A track is in principle far simpler than a route. The GPS inherently has a running log of your current activity, including your location which is displayed on-screen as a cyan trail across the map you have loaded. When you are done with that period of activity, you can save this data as a track if desired. When needed, you can load this track and it will display your previous path on screen as a red line, which you can then use to navigate. Tracks, however, do not provide active navigational assistance; when you have a track loaded, the GPS will not direct you to go one way or the other and it will not alert you if you deviate at all. In my case, I did not want instructive navigation and the visual clarity offered by a track when compared to an equivalent route meant this was far more appealing to use for my walk.
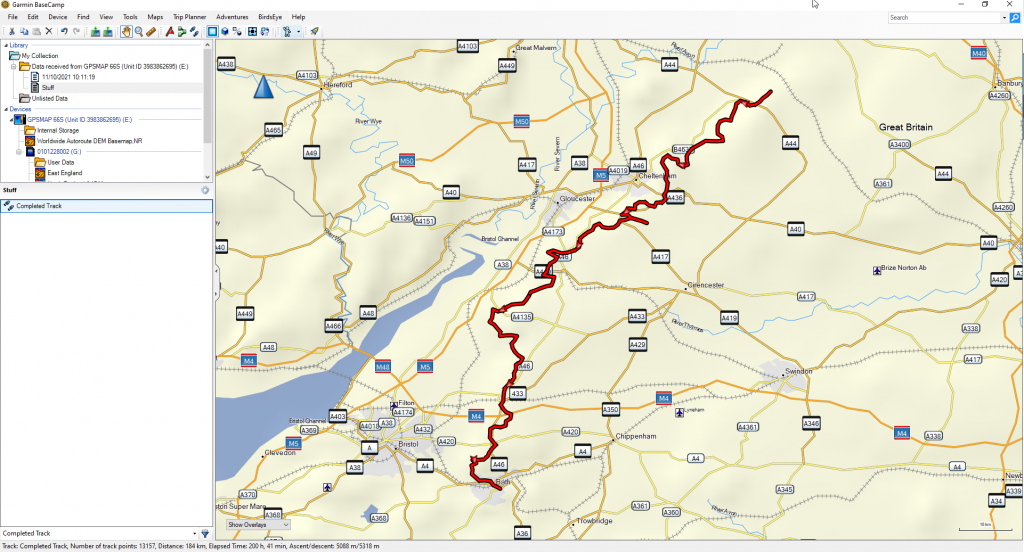
Once I had decided the system I was going to use, I was able to easily find a track of the Cotswolds Way online. Tracks and routes can be exported from or imported onto your GPS as GPX files. A handy tool when checking a route or track is Garmin’s BaseCamp program. This free software can be used on your computer to view routes/tracks, add in waypoints and transfer files to and from your GPS. I used BaseCamp to make sure the track I found looked suitable and I also added in a few waypoints to mark specific points along the walk, such as our accommodation and a few shops. You can customise the icon and name of these waypoints to provide the best denotation, and additionally, you can add notes to each waypoint (particularly handy for noting down the contact details of accommodation).
Using the GPS
The GPS was able to operate for approximately 25 hours on the walk before needing to replace the batteries, so for my purposes, I only had to carry one additional set of batteries to power the GPS for the whole 8 days. The GPSMAP 66s comes with a carabiner clip piece, which is easily slotted onto the device. This was very convenient as it allowed me to attach the device to the outside of my backpack, meaning I could easily check the device without having to worry about it falling out of a side pouch. I ran the GPS for the duration of each day’s walking and saved these as individual tracks, which I later combined in BaseCamp for the purposes of this article.
What we found
I found that using the GPSMAP 66s was slightly intimidating at first as there are a lot of settings and it can be easy to push the wrong button and end up on a different sub-menu. However, I put a bit of time aside before we started to allow myself to test using the device, and this was enough to help me resolve a few small issues I was having.
On the walk, I found the GPS was easy to use and very handy. Turning on in the morning and saving the track at the end of the day’s activity is fast and simple, and having the on-screen route was an incredibly handy reference in areas where the written directions were unclear, or the route signage was lacking. My unit came with the TOPO Great Britain PRO Bundle, which includes Ordnance Survey maps of all Great Britain, and this was very helpful in getting a quick detailed picture of the surrounding area. This was of great help in one instance where we needed to find a safer alternative route to our accommodation to avoid a rather unpleasant walk along the A436.
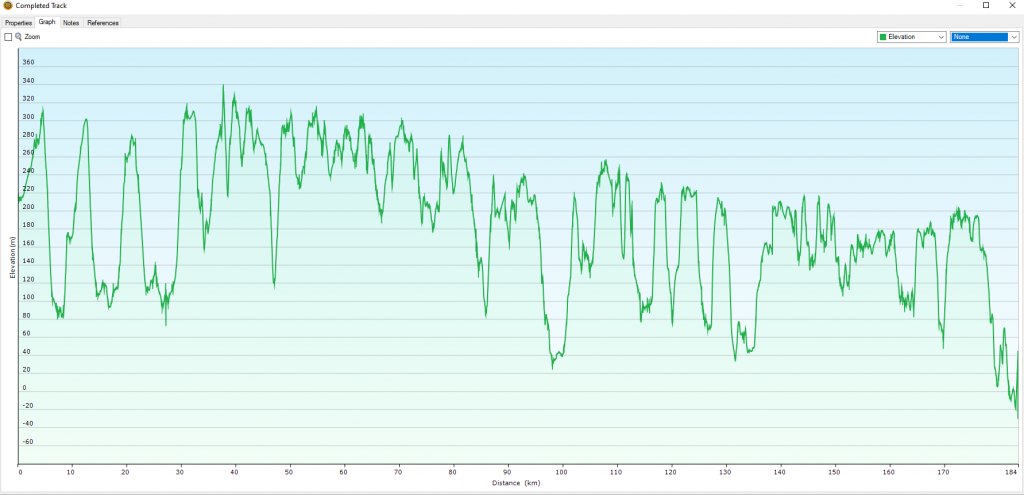
One unexpected benefit of the GPSMAP 66s was the reward of reviewing your activity at the end of the day on the GPS. The device will give you a summary of your walk including interesting data such as your average movement speed, total elapsed movement time and, thanks to its built-in barometric altimeter, your total ascent and descent (also visible as an elevation graph). Being able to see these data after a particularly exhausting day was a fantastic morale boost!
The saved individual tracks were easy to import back into BaseCamp and, once imported, I was then able to merge these to form an overall track of the entire route. This is a very nice feature as you are then able to view your entire route and you are provided summary data along with this. One slight issue was that the summary data did not initially update properly, showing just a single day’s activity rather than the complete walk. However, deleting a single point of data was sufficient to kickstart the program into correcting this issue.
Our opinion
Overall, I was pleasantly surprised by the Garmin GPSMAP 66s. It exceeded my expectations in terms of usability and usefulness. While there is certainly a slight intimidation factor involved when first using the device, it does not take long for those fears to dissipate and in a short space of time, it can become an incredibly helpful tool for navigating and recording.
Based on my experiences, I would suggest that the GPSMAP 66s would be suitable for ecological work in open spaces where there is a need to recording transect routes or coordinates. However, care should be taken when using the GPS to mark precise coordinates as the unit is only accurate to around 2 to 5 meters in good conditions and features such as tall buildings, steep valleys, harsh weather and dense tree cover can reduce this accuracy.
I would recommend the TOPO Pro Bundle option as the more detailed OS maps are a massive step up from the basic maps that come with all Garmin GPS devices.
The GPSMAP 66s can be found here. Our full range of handheld GPS devices can be found here.
If you have any questions about our range or would like some advice on the right product for you then please contact us via email at customer.services@nhbs.com or phone on 01803 865913.
Moths are a fascinating and beautiful part of the natural landscape in the UK. However due in part to their elusive nature, often plain colouration and the unfavourable habits of a few cloth eating species, they very rarely receive the same recognition as their more illustrious butterfly cousins.
However, understanding and protecting our moths is more important now than ever. Recent studies in the UK have highlighted that many common and specialist moth species are continuing along a worrying trend of decline as they are subject to increasing pressures from urbanisation, pollution, agricultural intensification and climate change. The latest State of Moths Report estimated declines in moth abundance of around 33% between 1968 and 2021, while the latest State of Nature report estimates declines for many common moths of around 25% between 1978 and 2018. While the estimated rate of decline does vary between studies, being influenced by the timescale over which data was collected and the geographic location data was collected from (northern counties appear to undergo slower declines in moth abundance than southern counties), they come to the same conclusion that many of the UK’s moths are declining at significant rates.
These reports would not be possible without the extensive records provided by professional entomologists and amateur moth enthusiasts around the country. You can help conserve this key group by submitting your own records to either a local record centre or to a national recording scheme, such as the National Moth Recording Scheme (NMRS).
Identifying Moths
Getting started with identifying moths can appear a rather daunting task. This concern is understandable as a quick skim through any field guide will quickly show the near identical appearances of some species and the extreme variation present in others. However there are a number of moth species that are quite distinct and offer an excellent introduction to the world of moths.
In this article we have compiled a list of those species which can be encountered throughout most of the UK. Some species are more restricted than others and some are only typically encountered when using a light trap, however they are all fantastic species to become familiar with.
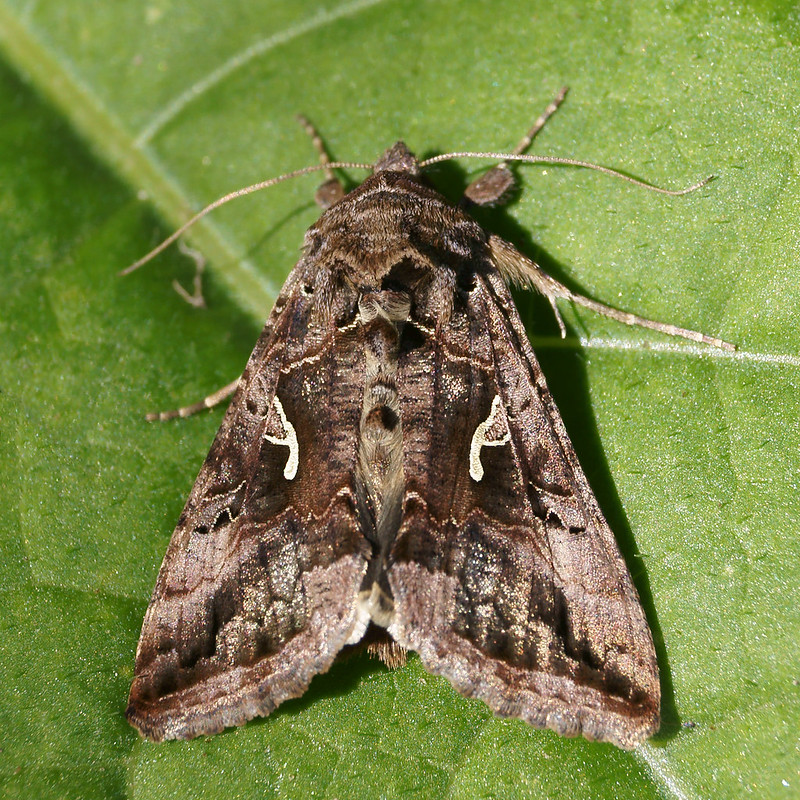
Silver-Y
Latin name:Autographa gamma Distribution: Throughout UK Size: Medium Look out for: Unbroken silver “y” on the upper forewing. Did you know?: The Silver-Y undertake intergenerational migrations. Immigrant moths in spring will breed and over successive generations swell their population size by around four times, until the Autumn when they emigrate back across the channel and south through Europe.
Silver-Y Moth (Autographa gamma) by xulescu_g via Flickr
Large Yellow Underwing
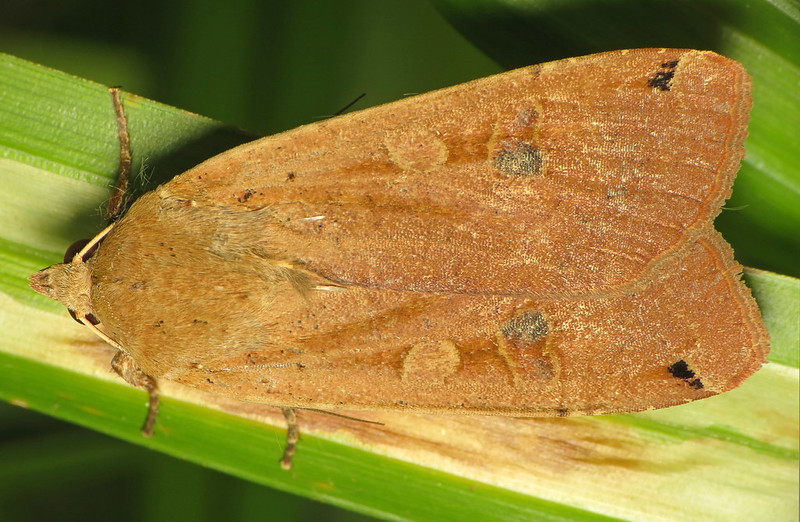
Latin name:Noctua pronuba Distribution: Throughout UK Size: Medium/Large Identification: Yellow hindwings with black borders are the best indicator, however it often rests with wings closed and has a highly variable appearance. Did you know?: Considered by some to be one of our most common medium-large moths, especially when populations are bolstered by occasional large immigrations in the south of the UK.
Large Yellow Underwing Moth (Noctua pronuba) by Martin Cooper via Flickr
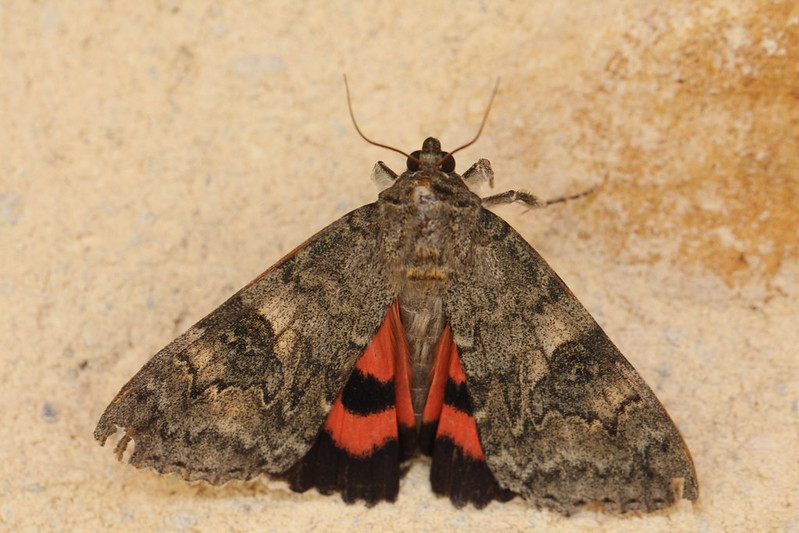
Red Underwing
Latin name:Catocala nupta Distribution: Throughout UK, most common in south-central England Size: Large Identification: Red hindwing is very distinctive. Similar looking species have a darker crimson red and are much scarcer. Did you know?: The Red Underwing is gradually increasing its range northwards and becoming more common in previously low-density colder regions.
Red Underwing Moth (Catocala nupta) by Alastair Rae via Flickr
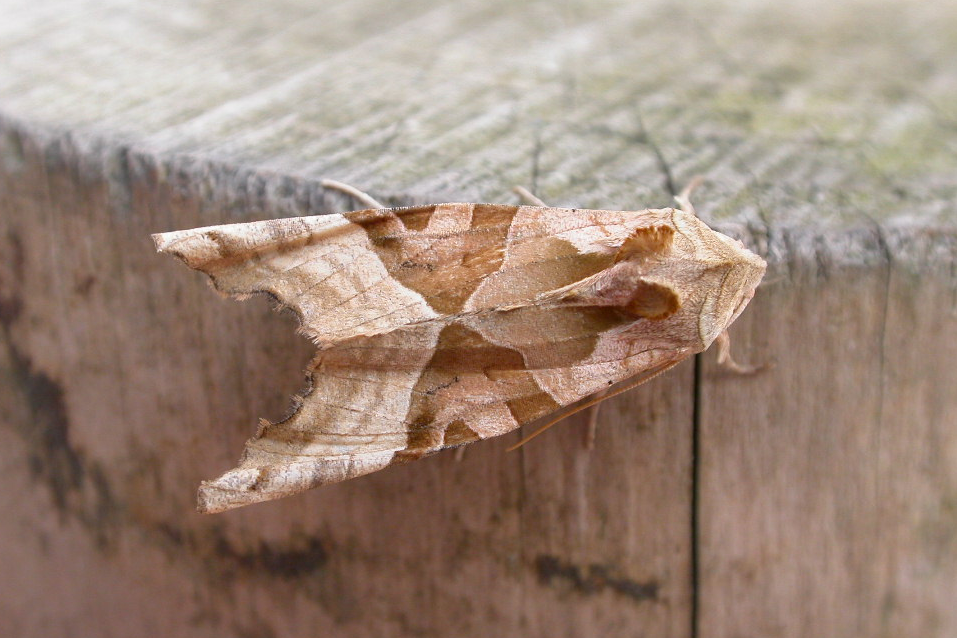
Angle Shades
Latin name:Phlogophora meticulosa Distribution: Throughout UK Size: Medium Identification: Unique folded wings give the impression of a fallen autumn leaf Did you know?: Adult moths are often encountered in the day resting in the open.
Angle Shades Moth (Phlogophora meticulosa) by Donald Hobern via Flickr
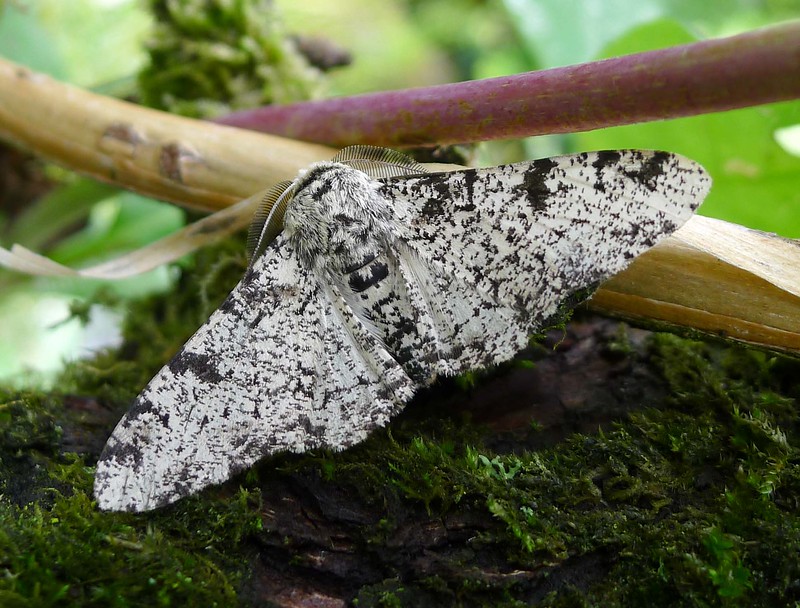
Peppered Moth
Latin name:Biston betularia Distribution: Throughout UK Size: Large Identification: Rests with wings spread open. White form is peppered with black spots. Black form has mostly uniform colour and is generally only found in urban areas. Did you know?: The abundance of white and black variants of the Peppered Moth has been extensively studied and is often used as an example of evolution by natural selection.
Peppered Moth (Biston betularia) by gailhampshire via Flickr
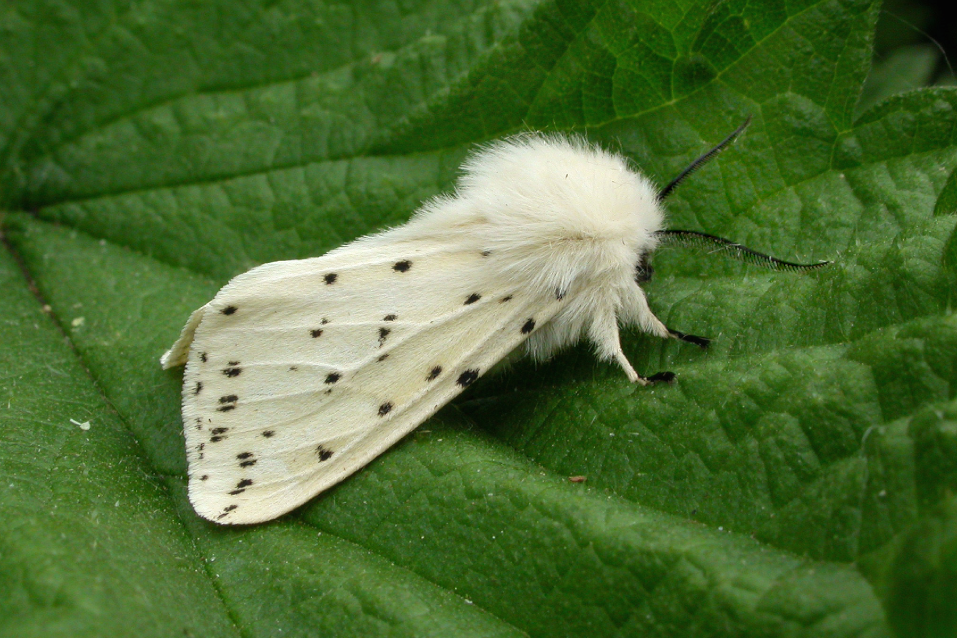
White Ermine
Latin name:Spilosoma lubricipeda Distribution: Throughout UK Size: Medium Identification: Strong white coloured forewings, peppered with black spots, and a yellow-coloured upper abdomen. Wing colour and spotting is variable within and between populations. Did you know?: Its common name is derived from its resemblance to an Ermine coat.
White Ermine Moth (Spilosoma lubricipeda) by Patrick Clement via Flickr
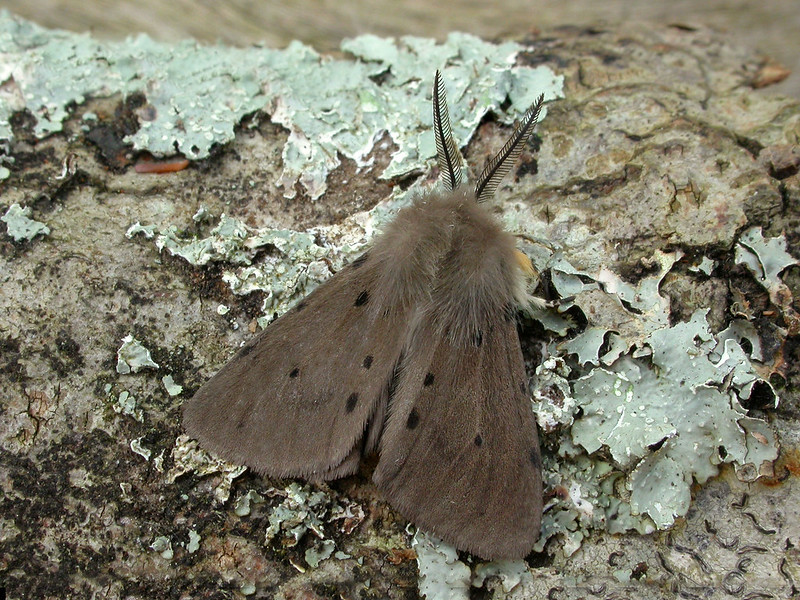
Muslin Moth
Latin name:Diaphora mendica Distribution: Throughout UK Size: Medium Identification: They have large stocky wings. Males typically have grey-brown coloured wings, whereas Females have a similar colouration to White Ermine moths, though their wings are opaque Did you know?: Male Muslin Moths in Ireland have a creamy white colouration to their wings. Similarly coloured males can also be found in some locations on the Cornish/Devon border.
Muslin Moth (Diaphora mendica) by Patrick Clement via Flickr
Swallow-tailed Moth
Latin name:Ourapteryx sambucaria Distribution: Throughout UK, though scarcer in Northern Scotland Size: Large Identification: Broad wings with a pale uniform yellow colour, intersected by diagonal dark lines. Hindwings have short tails. Did you know?: The species is hard to encounter without a light trap. The adults have a short flight period and are strictly nocturnal, while the caterpillars have a cryptic colouration which gives them the appearance of a twig.
Swallow-tailed Moth (Ourapteryx sambucaria) by Ben Sale via Flickr
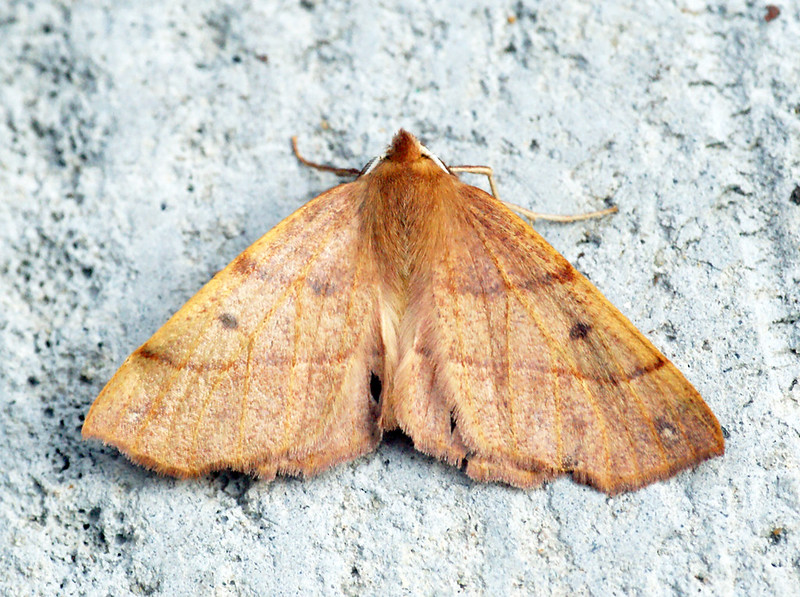
Feathered Thorn
Latin name:Colotois pennaria Distribution: Throughout UK Size: Medium Identification: Rests with wings flat apart. Wings are a reddish brown with a pink hue and have a slightly hooked tip on the forewing. They fly very late in the year which can help with distinguishing from similar species. Did you know?: Their common name is derived from the large feathered antenna present on males of the species.
Feathered Thorn Moth (Colotois pennaria) by Ben Sale via Flickr
Hebrew Character
Latin name:Orthosia gothica Distribution: Throughout UK Size: Medium Identification: Have distinctive and unique black markings on the forewing. Did you know?: Their common name is derived from the markings on the forewing which resemble the Hebrew letter Nun.
Hebrew Character Moth (Orthosia gothica) by Ben Sale via Flickr
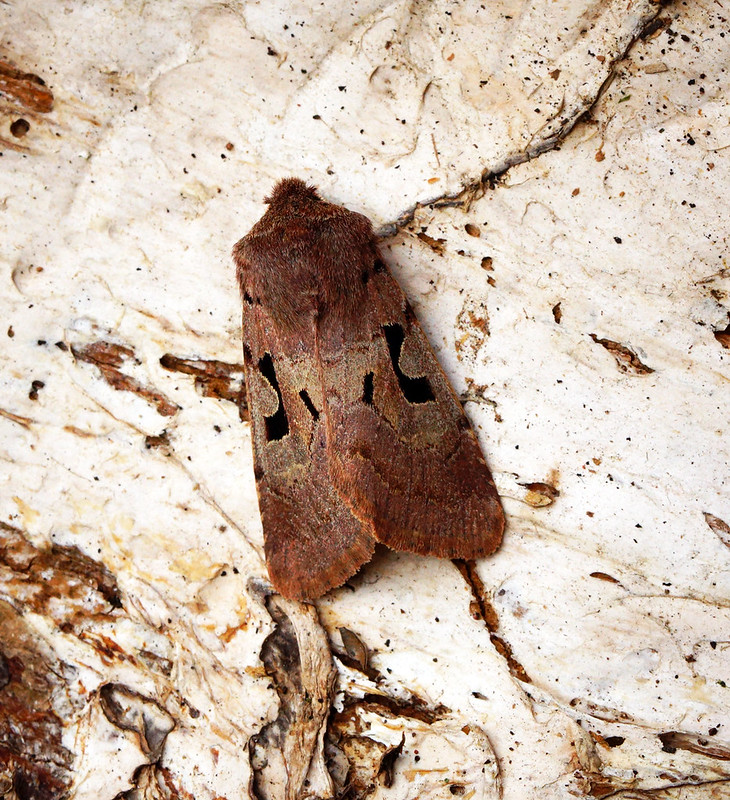
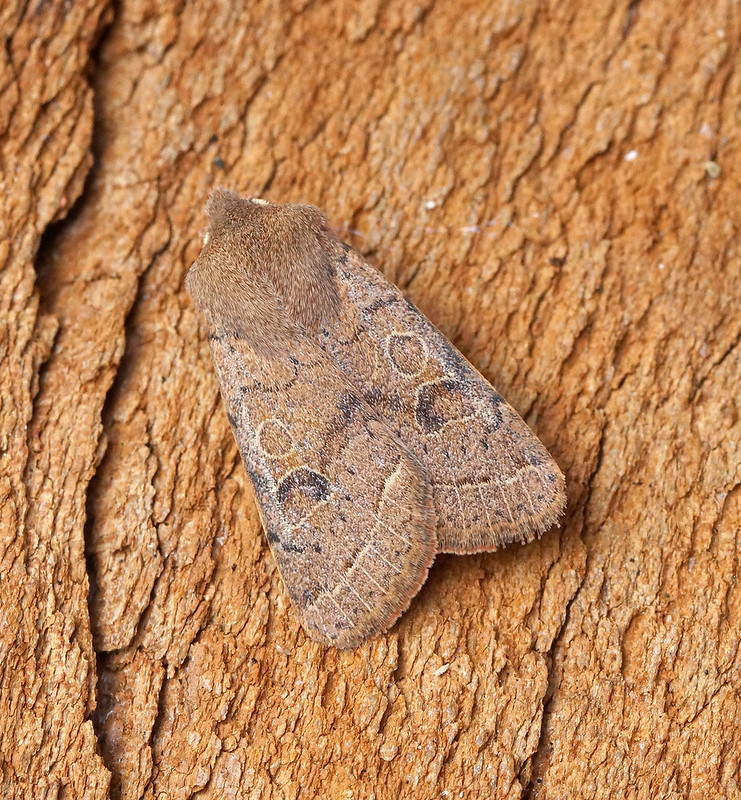
Common Quaker
Latin name:Orthosia cerasi Distribution: Throughout UK, though scarcer in Northern Scotland Size: Medium Identification: Has a highly variable markings and colouration, however the strong outline of the “oval” and “kidney” markings on the forewings is a helpful identifier. Did you know?: The four quaker species in the UK are believed to have received their common name back in the 1700s. Lepidopterists took inspiration from the Quakers at the time, who apparently wore clothing of similar hues.
Common Quaker Moth (Orthosia cerasi) by Ben Sale via Flickr
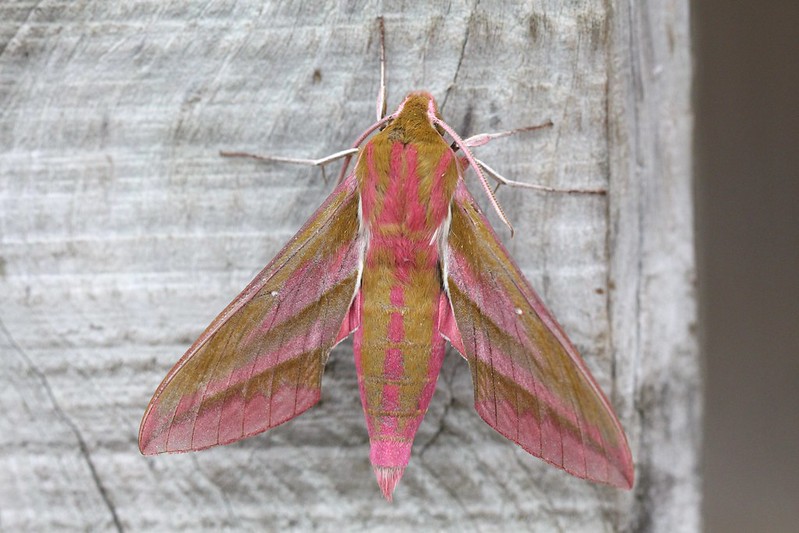
Elephant Hawk-Moth
Latin name:Deilephila elpenor Distribution: Throughout UK, though scarce in Scotland Size: Large Identification: Has striking and well defined pink colouration across the whole body. Did you know?: The name of the Elephant Hawk Moth is derived from its resemblance to an Elephant’s trunk when in its larval form.
Elephant Hawk-Moth (Deilephila elpenor) by Alastair Rae via Flickr
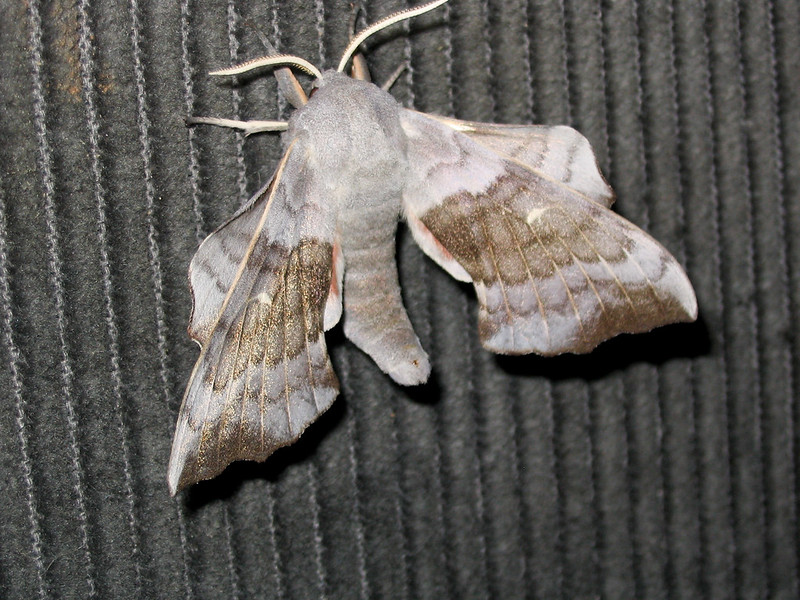
Poplar Hawk-moth
Latin name:Laothoe populi Distribution: Throughout UK Size: Large Identification: Unique wing shape where hindwings extend beyond forewings and gives it a resemblance to a dead leaf. Its abdomen is curved upwards at the tip. Did you know?: This is believed to be our most common Hawk-Moth species and it can be found by light trapping in summer throughout the UK.
Poplar Hawk-moth (Laothoe populi) by Ben Grantham via Flickr
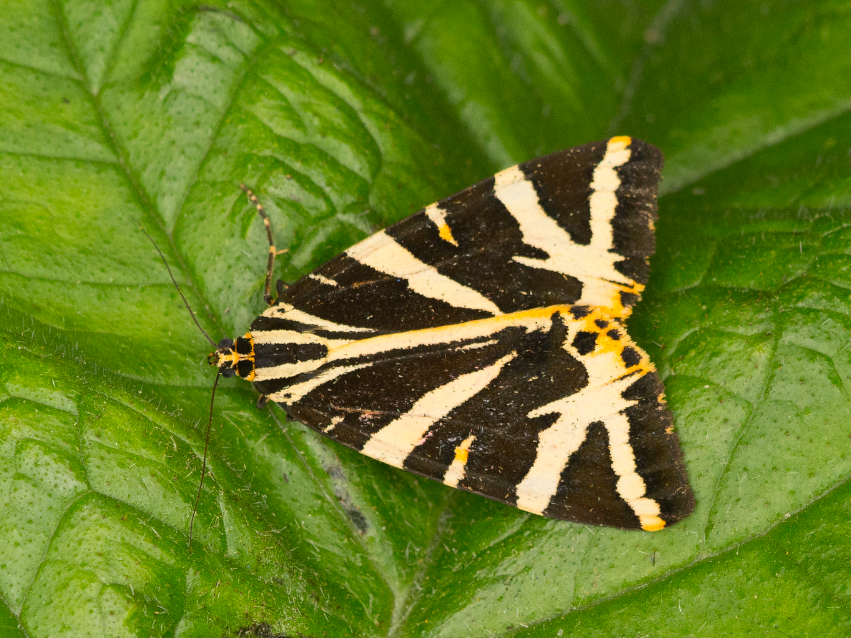
Jersey Tiger Moth
Latin name:Euplagia quadripunctaria Distribution: Mostly found it the South-west of the UK, though it is spreading North Size: Medium-Large Identification: Wings bear a unique diagonal zebra stripe pattern which can be used to tell it apart from other Tiger Moth species. Did you know?: Until recently this moth was considered scarce in the UK and could only be commonly encountered on Jersey and some parts of the South Devon coastline.
Jersey Tiger Moth (Euplagia quadripunctaria) by Paul via Flickr
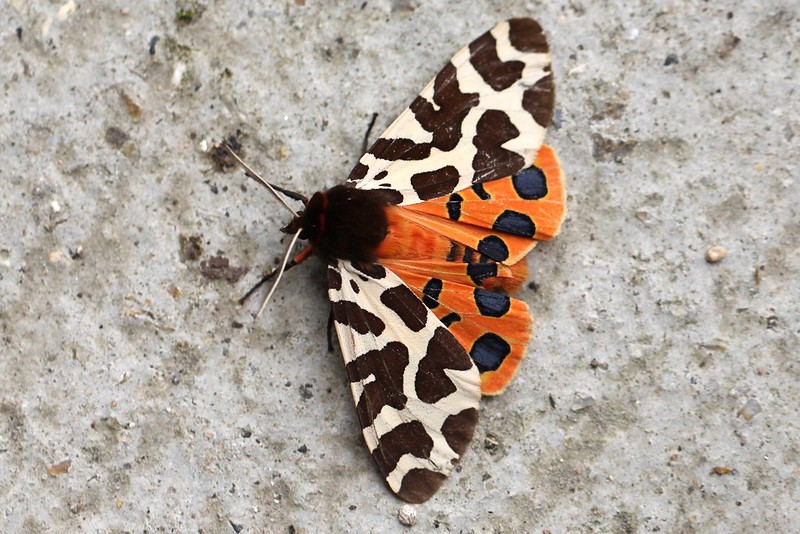
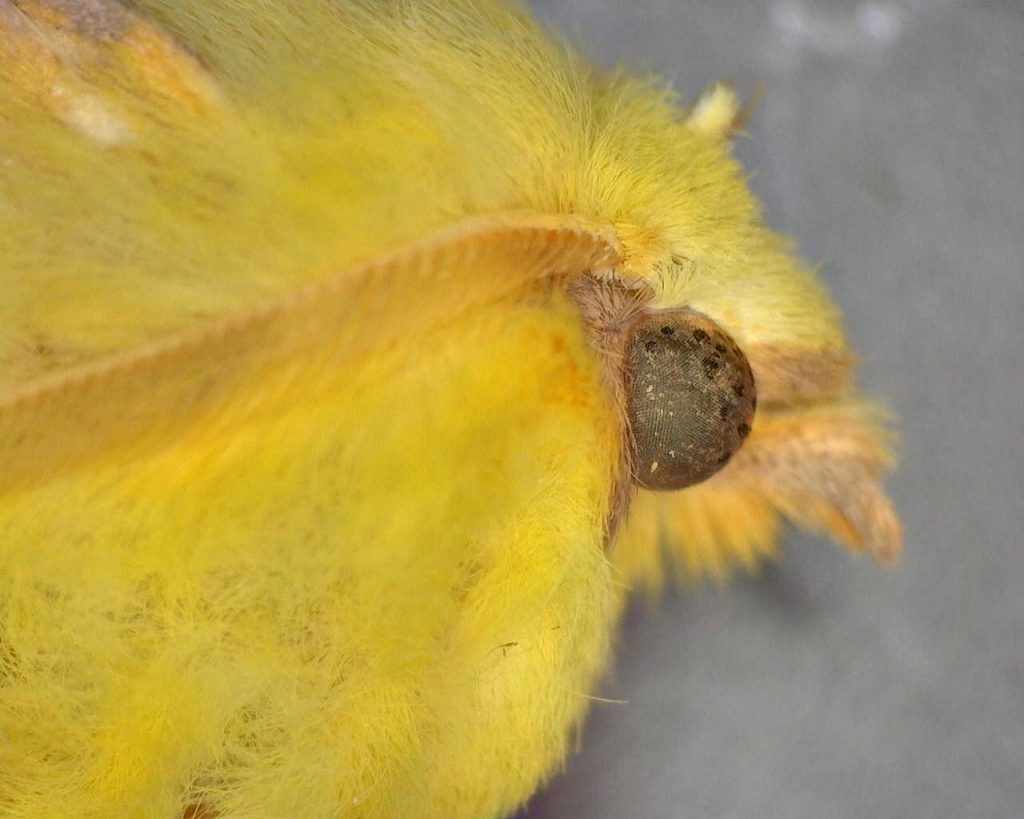
Garden Tiger Moth
Latin name:Arctia caja Distribution: Throughout UK Size: Medium-Large Identification: Bright orange hindwings have bold blue-black spots which can help tell this species apart from other Tiger Moths Did you know?: The Garden Tiger has defensive glands behind its head which it uses to secrete a toxic fluid when attacked.
Garden Tiger Moth (Arctia caja) by Alastair Rae via Flickr
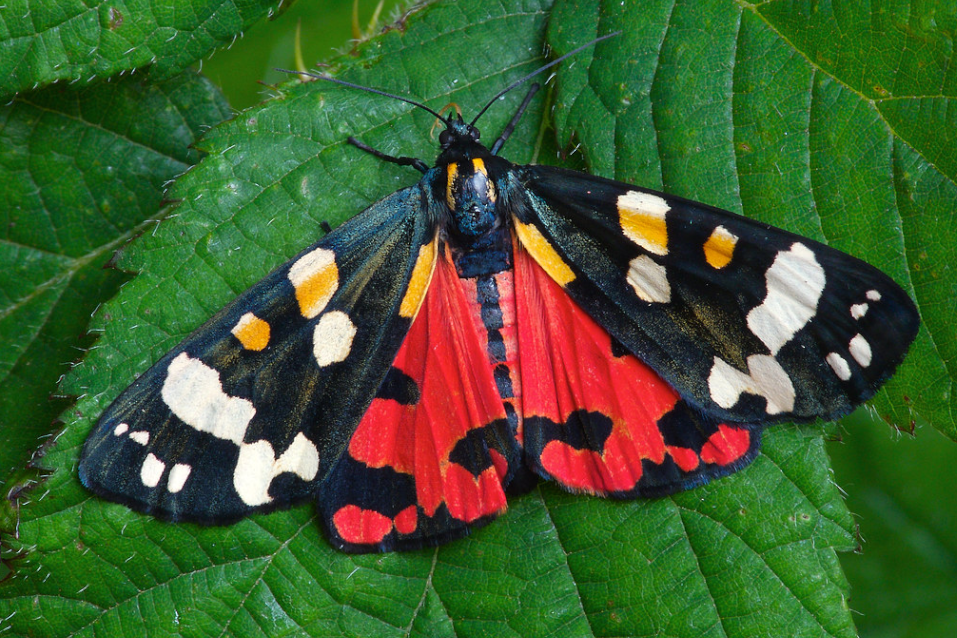
Scarlet Tiger Moth
Latin name:Callimorpha dominula Distribution: Mostly found it the South-West of the UK and Wales Size: Medium Identification: The forewings have a distinct metallic green-black colour patterned with white/cream coloured spots. Hindwings are a striking red colour in most individuals. Did you know?: Rarely aberrant forms of Scarlet Tiger Moth occur with yellow underwings.
Scarlet Tiger Moth (Callimorpha dominula) by Patrick Clement via Flickr
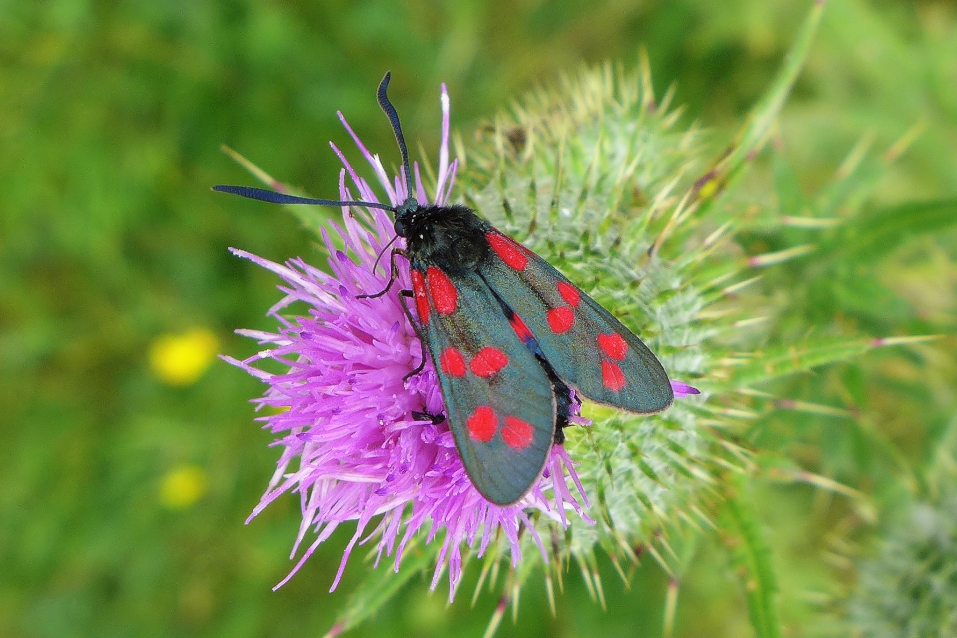
Six-spot Burnet
Latin name:Zygaena filipendulae Distribution: Throughout UK Size: Medium Identification: Has metallic coloured forewings patterned with three pairs of vibrant red spots Did you know?: The six-spot Burnet is the commonest burnet moth in the UK and can be found across most of the country, including the outer hebrides.
Six-spot Burnet Moth (Zygaena filipendulae) by Tom Lee via Flickr
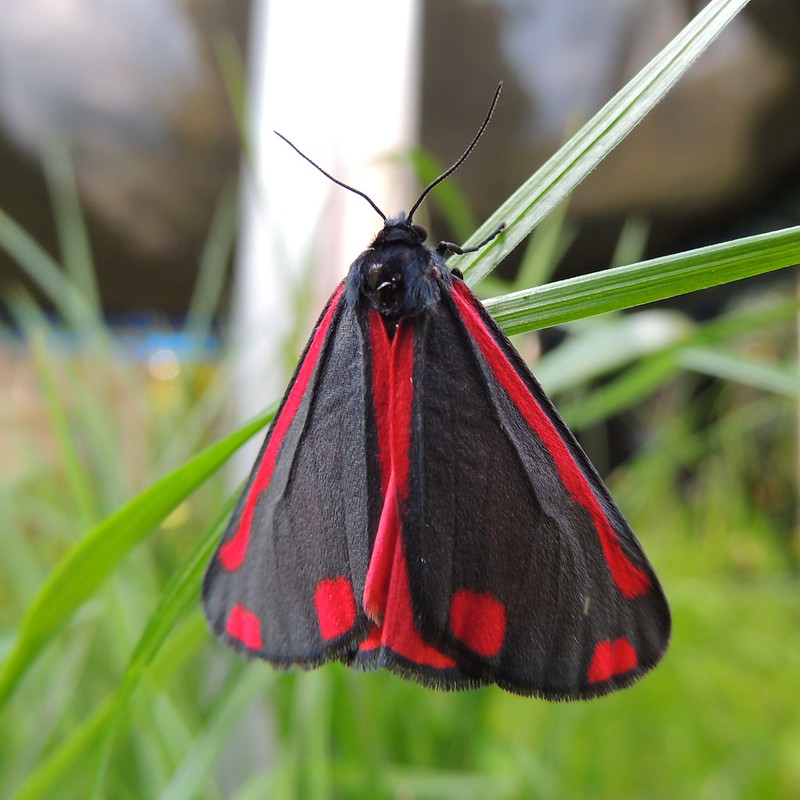
Cinnabar Moth
Latin name:Tyria jacobaeae Distribution: Throughout UK Size: Medium Identification: Forewings are dark black with a long streak of vibrant red on the outer edge. Antennae are thin and lack the bulbous tip of similar looking Burnet moths. Did you know?: The caterpillars are gregarious feeders of ragwort, and have been intentionally introduced into the United States, Australia and New Zealand to biologically control ragwort.
Cinnabar Moth (Tyria jacobaeae) by Orangeaurochs via Flickr
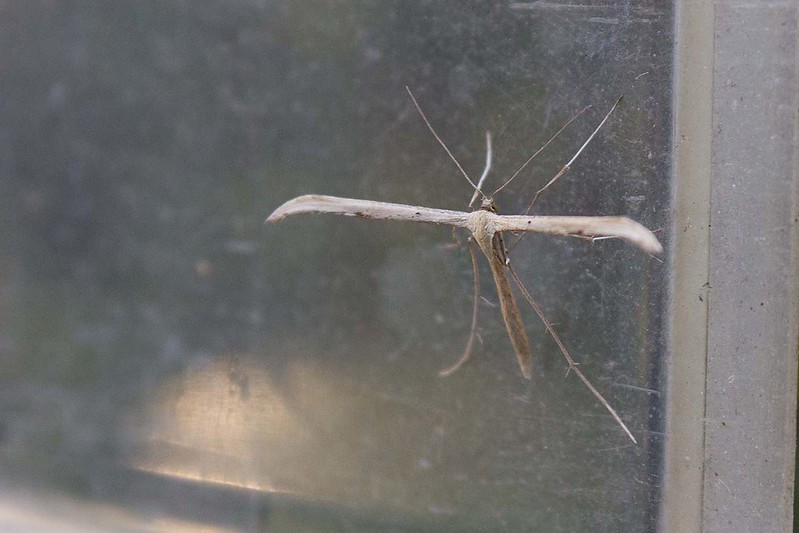
Common Plume
Latin name:Emmelina monodactyla Distribution: Common in England with increasing scarcity further North Size: Small Identification: This rather bizarre looking moth rests with the wings held away from the body, giving it a unique T shape. Did you know?: These moths have clefts in their wings and plumes at the end of each division of the wing.
Common Plume Moth (Emmelina monodactyla) – Rictor Norton & David Allen via Flickr
The third edition of the Field Guide to the Moths of Great Britain and Ireland has been fully revised, updated and restructured, bringing it in line with the latest thinking in taxonomy.
The fully revised and expanded second edition of the ground-breaking book. This is a complete guide to the Micro-moth families found in the UK. The second edition covers over 1,300 species with more than 1,500 detailed photographs and artworks.
British Moths: A Gateway Guide is a wonderful introduction to 350 species of the most common and eye-catching adult moths that you may encounter in the UK. Species are organised by season, and similar-looking moths are placed alongside one another for ease of identification.
Atlas of Britain and Ireland’s Larger Moths includes accounts for 866 macro-moth species, each with a distribution map showing current and historical occurrences, trends, status, a phenology chart and colour image.
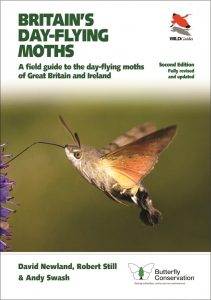
This concise photographic field guide helps you to identify the day-flying moths most likely to be seen in Great Britain and Ireland, combining photographs, clear and authoritative text and an easy-to-use design.
Micro-Moth Field Tips describes how to identify the early stages of more than 170 species of micro-moth larvae at all times of the year. There are 12 chapters, one for each month, as well as recommendations on what micro-moths to look for on field trips at different times of the year. Micro-Moth Field Tips, Volume 2 follows on from the enormous success of the first volume. Designed as being complementary to the first volume, the book has an introduction to the early stages of each family of micro-moths as well as many images of leaf mines.
This 8-page chart shows 103 species of day-flying macro-moths. Paintings show the adult moths at life size and in their natural resting postures. The text, arranged by family with full cross-referencing to images, provides further information on the habitats and distribution of illustrated species.
These 60ml sampling containers are made from see-through polypropylene and have secure screw-on lids. They’re ideal for temporarily keeping small aquatic or terrestrial specimens.
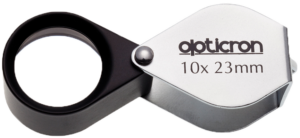
This Opticron Hand Lens contains a high quality 23mm doublet lens, made of glass and provides excellent distortion-free magnification. The 10x magnification is recommended for general observations and this magnifier is the one most commonly recommended for all types of fieldwork.
The NHBS moth trap is a lightweight and highly portable trap, tested and approved by Butterfly Conservation. The starter kit includes 3 x 60m clear collecting pots and the Concise Guide to the Moths of Great Britain and Ireland to help you observe and identify the species you find in your trap.
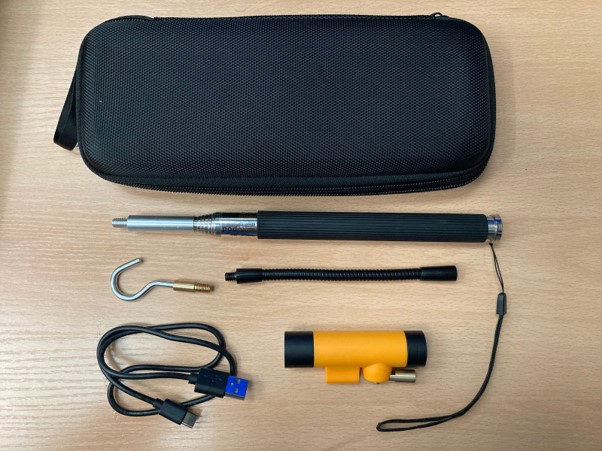
The Telescopic Wi-Fi Video Endoscope is the latest addition to our range of video endoscopes and is manufactured by the company behind the ever-popular Explorer Premium Endoscope. An endoscope is a fantastic piece of kit for any practicing ecologist, allowing you to inspect hard to reach or inaccessible locations. Typical examples of where endoscopes are used include checking burrows, bird nests and bat roosts, where direct visual access may be limited.
This model features quite a few changes in comparison to its predecessors. Although the camera is labelled as an endoscope, it is really a hybrid between a pole mounted camera and a traditional endoscope. All electrical and optical components of the camera are neatly contained in a cylindrical module measuring just 8cm x 2cm (excluding fixing points) which is quickly and easily mounted onto the included telescopic handle. The camera also comes with a 14cm long flexible arm, which can be connected between the camera and the handle to help when manoeuvring in awkward spaces. As the name suggests, the camera transmits footage over Wi-Fi and allows the operator to view a live feed wirelessly on a smartphone or tablet.
We tested this camera in several locations, including a few typical bat and bird boxes to gauge its overall suitability for different applications.
How we tested
In March 2021 we took a Telescopic Wi-Fi Video Endoscope out into the woods surrounding NHBS and simply attempted manoeuvring the camera into a few awkward and hard to reach locations; such as high up in ivy covered ash trees and over the edges of some of the more unstable riverbanks. Our aim was to try and gauge its effectiveness in extending a surveyor’s reach. We also tried using the camera to inspect several empty bird/bat boxes to see how it would measure up against a traditional endoscope in these situations. Additionally, we captured several images using the camera’s free to use ‘Smartcam Wi-Fi’ app.
It is important to note that it is an offence to disturb nesting Schedule 1 bird species and any bat roost without an appropriate license, hence we only inspected boxes we knew to be empty.
The fully assembled camera is incredibly lightweight, weighing little over a few hundred grams, and it comes with a semi-rigid compact carry case that we were able to fit easily into a rucksack.
The camera is powered by a built-in Lithium-ion battery. We charged the camera, using the included USB-C to USB-A cable, for approximately 70 minutes as indicated by the manual supplied with the camera. On a full charge the camera can operate for a total of 90 minutes which was more than sufficient for our needs.
What we found
Connecting the camera to a phone was quite simple. Once we had downloaded the Smartcam-Wi-Fi app, all we had to do was turn on the camera module and connect to its Wi-Fi signal on our phone. It is helpfully called ‘SmartCam-XXXX’ so it is easy to identify. The app has several controls for the camera, including LED brightness, freeze (holds the image displayed until turned off), capture image and start/stop recording. The adjustable LEDs were a very handy feature and allowed us to maintain the optimum light settings when using it outdoors or inside a nest box. One frustration we had with the app was that it lacks an option to rotate the video feed, meaning that it is often necessary to rotate your phone to maintain the correct orientation. Because of this it would be worth investigating whether there are alternative apps more suitable for using with the camera.
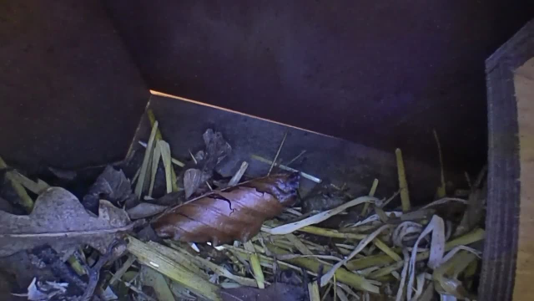
Inspecting an empty bird box
Despite the limitations with the app, we were very pleased with the picture quality of the camera. Certainly, the 720p resolution is noticeably better when compared to an older style Explorer Pro endoscope, which has a slightly lower video resolution of 420p. When fully extended you do have to be careful in holding the camera steady as the image clarity can suffer a bit from camera shake. A nice feature of the camera is that it is waterproof to an IP67 standard, meaning we were able to submerge it briefly to inspect areas of the local river. One thing to note here is that while it was fine operating underwater, the Wi-Fi signal was severely reduced, and it was not able to maintain a stable connection for very long.
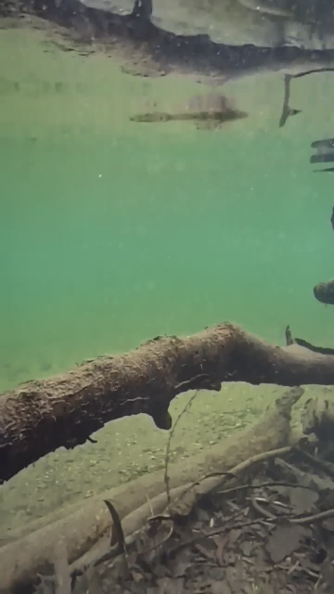
Image taken using the Smartcam Wi-Fi app while submerged in the River Dart
Other than when using the camera underwater, the Wi-Fi signal from the camera was very reliable. When testing the camera indoors we were able to maintain a high-quality live feed at a distance of around 15m with a clear line of sight. Certainly, in the field this was somewhat reduced by obstructions, but we found that the signal was still sufficiently strong with a distance of at least 10m between the camera and our smartphone.
The extended reach of 1m was useful, however we felt in most cases a surveyor would benefit from a greater total extendable length. The supplied handle does feature a thread at its base, meaning it would be possible to attach an additional handle to increase the overall reach. We found the flexi arm provided with the camera was sufficiently strong and allowed us to quickly adjust the camera angle or manoeuvre the camera into an awkward area when using it out in the field.
Investigating thick ivy with the endoscope at full extension
When attempting to use the camera with our nest boxes, we found that for boxes designed to suit larger birds (Barn Owls, Tawny Owls, Kestrels etc) the camera was easy to use and the benefits to workers looking to inspect these boxes were clear. However, its usefulness in inspecting bat boxes and garden bird boxes was more limited. The narrow crevice entrances of most bat boxes are simply too small for the camera to access, and a traditional endoscope style camera tube would be more appropriate in these instances. The 20cm diameter camera body could fit through the entrance holes of most bird boxes; however, it was not always possible to angle the camera as required and still fit it through the entrance hole of the box, meaning that the base of the box was not always visible.
Our opinion
Overall we found that, while the Telescopic Wi-Fi Video Endoscope is not always as effective as a more traditional style endoscope and the associated app is limited by certain design flaws, its affordable price, ease of use and versatility make it a great piece of kit for more general ecological surveying.
The Telescopic Wi-Fi Video Endoscope is available on the NHBS website. To view the full range of endoscopes, along with other survey equipment, visit nhbs.com. If you have any questions or would like some advice on choosing the right product then please contact us via email at customer.services@nhbs.com or phone on 01803 865913.
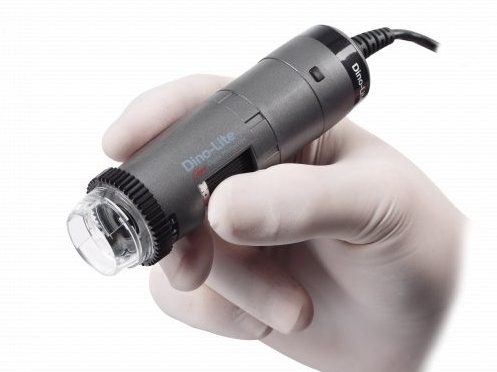
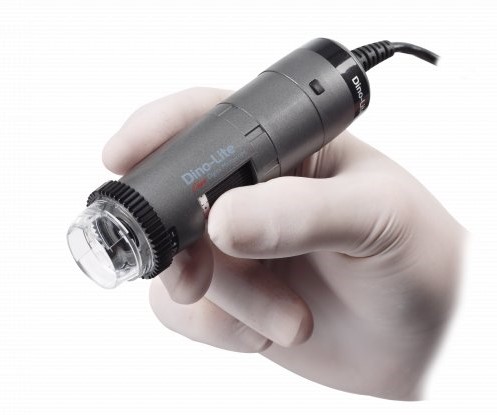
Within the last 15 years the availability and quality of USB digital stereo microscopes has vastly improved, and these fantastic devices are now regularly used by naturalists and hobbyists looking to view the hidden details of the natural world.
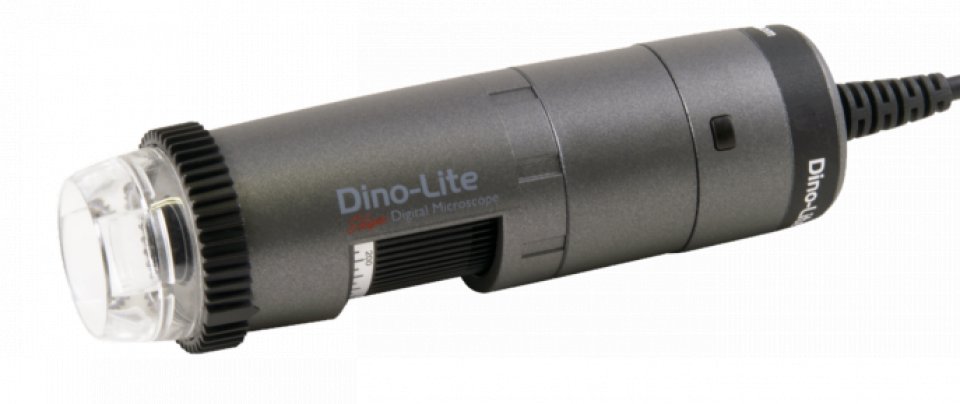
Dino-Lite are a well-known manufacturer of USB microscopes. Their range comprises basic models for those new to the field of microscopy, alongside cutting-edge models that produce stunningly detailed high-quality images and have additional features such as wireless video streaming.
We recently tested the Dino-Lite WF4915ZT Wireless Microscope Kit. This kit is from Dino-Lite’s professional range and it includes an AF4915ZT microscope and a WF-20 wireless adapter. The AF4915ZT is a dynamic microscope and has a number of features which are not available on more basic models. These include: Extended Depth of Field (EDOF), which helps achieve greater overall focus on surfaces with varying heights; Enhanced Dynamic Range (EDR), which helps when viewing objects with large variations in brightness; Flexible LED Control, which allows you to turn on/off pairs of LED lights to achieve the best possible illumination; and Automatic Magnification Reading, which allows the DinoCapture software to automatically register and display the current magnification.
Our aim was to see how easy and intuitive the device was to setup and use, and to explore the benefits offered by its advanced features and wireless functionality.
How We Tested
First we installed the included DinoCapture 2.0 software onto our computer. All DinoLite USB microscopes come supplied with this program loaded onto a CD-ROM, however it is also available online as a digital download. We tested the microscope using DinoCapture 2.0 on a desktop computer, however, you can also use this microscope wirelessly on either a smartphone or a tablet via the free DinoCapture app.
The WF-20 module was charged overnight and then connected to the AF4915ZT. The WF-20 was easy to attach, as the wired end piece of the AF4915ZT has two release buttons which, when pressed simultaneously, allowed us to gently remove this module and then connect the WF-20. When powered on, the WF-20 appears as a wireless network on any nearby Wi-Fi devices. Once connected to this network we were able to view a live feed from the microscope on DinoCapture.
We used the microscope to view a number of plant and insect samples.
Moth eye – viewed with Extended Dynamic Range
What We Found
The 1.3MP resolution is certainly a big improvement over some of the more basic models. Using the microscope at some of the higher magnifications is hugely rewarding, as you are granted some fantastic views of the minute details that are otherwise easily missed. The advanced features (as listed in the introduction to this review) may not be entirely noticeable to those new to digital microscopy, however, compared to older and more economical models they make operating this microscope far simpler. Previously, one would struggle at times to deal with structures having varying levels of brightness (particularly common with iridescent insects for example), and have little control outside of the overall LED brightness to try and address this. However, with the great LED controls and EDR the overall image can be brought closer together and previously obscured features become visible in much greater detail.
The EDOF is also a really helpful tool, especially at lower magnifications and on specimens with a variable structural height (which in our case was an acorn cup and a seed pod). Despite the differing heights, the microscope was able to keep most of the specimen in focus. Both the EDR and EDOF take around five seconds to process, meaning you can view the results and adapt your settings quickly to achieve the best image possible.
Manoeuvring the microscope freehand was relatively easy as it only has a few buttons on its main body, so there wasn’t any accidental mis-clicking. The focus ring is also light enough that it can be manipulated using only the middle and index fingers. Trying to keep the microscope steady and operate the DinoCapture software at the same time was rather difficult, especially at higher magnifications, and so when taking any images I opted to use the device with a stand (specifically the Dino-Lite RK06A). This allowed me to configure the microscope into the perfect position and then operate the computer without fear of losing that positioning.
When used in its wireless configuration we did find that occasionally there were moments of lag on the live feed. While these were only minor interruptions, it was certainly something that had to be considered when making any adjustments to the magnification and focus.
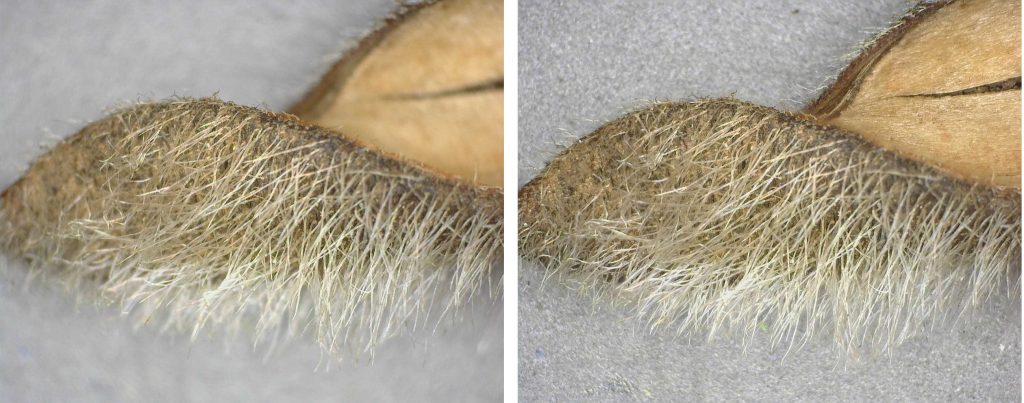
Leaf: (a) Normal mode, (b) with Extended Dynamic Range
Seed pod: (a) Normal mode, (b) with Extended Depth of Field
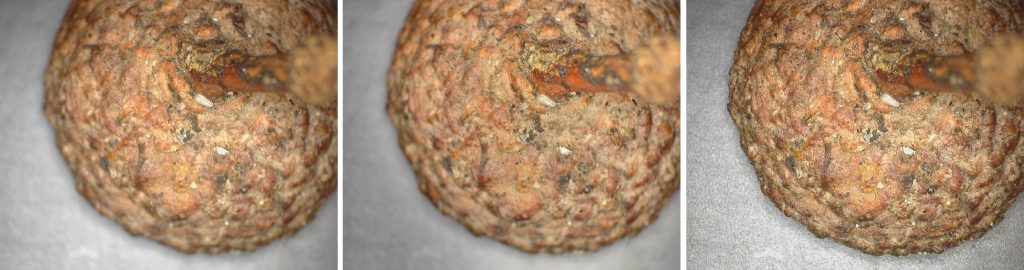
Acorn: (a) Normal mode, (b) with Extended Dynamic Range, (c) with Extended Depth Of Field
Feather
Our Opinion
Although we only used the WF4915ZT on a few select samples, it offered us a great opportunity to learn how to operate this advanced USB microscope. Thankfully the literature provided with the microscope was clear and easy to follow, and within 15 minutes of opening the box I was able to install the software and connect to the device in both its wireless and wired configurations. The image quality and the benefits offered by its advanced settings were also hugely impressive, particularly the EDOF, which really stands out as a key feature for this microscope.
While the wireless functionality of this microscope was a very interesting feature of the WF4915ZT, in practice it is not necessarily universally valuable. In the study of Natural History for example, most microscopy happens at a desk on pre-prepared specimens and as such you do not need the greater manoeuvrability that a wireless microscope offers. In other trades, however, these digital microscopes are used to inspect large objects (e.g. automobile manufacture) and in these situations a lack of trailing wires would be of huge benefit for the operator. In a situation where the operator does not have access to a computer/laptop, the Wi-Fi module allows you to connect to the microscope using a tablet or a smartphone, which is especially useful if you are planning to use it in the field.
In summary, we would highly recommend the WF4915ZT for any hobbyist or professional looking for a high quality and portable USB microscope. The AF4915ZT would be an excellent (and more economical) alternative for those who are unlikely to use the device away from a desk.
The Dino-Lite WF4915ZT is available through the NHBS website.
To view our full range of USB microscopes, visit www.nhbs.com. If you have any questions about microscopy or would like some advice on the right product for you then please contact us via email at customer.services@nhbs.com or phone on 01803 865913.
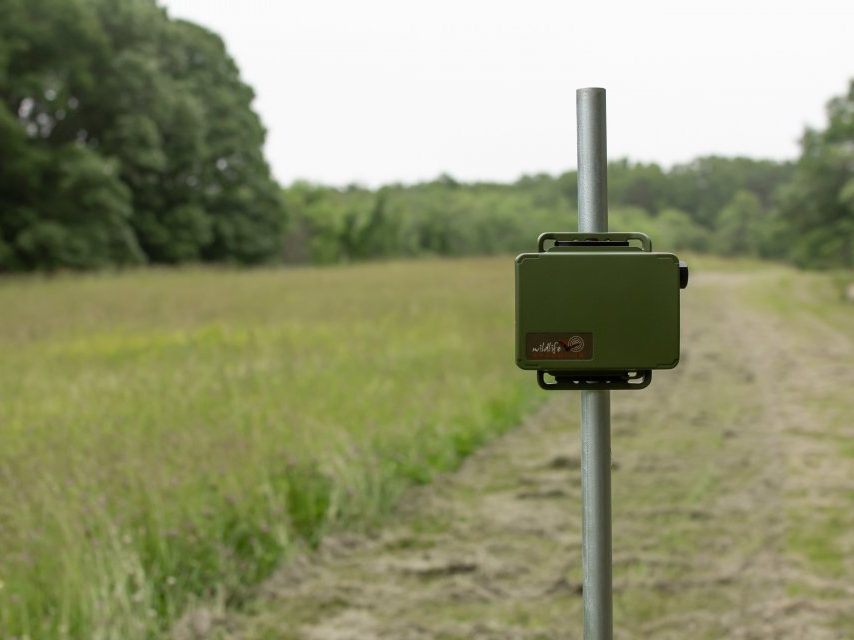
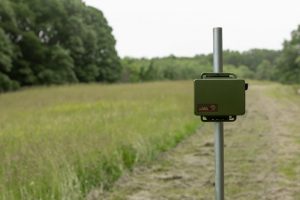
The SM Mini Bat is the latest addition to the ultrasonic range of acoustic recorders produced by Wildlife Acoustics. This passive bat detector offers comparable versatility and quality to the highly successful SM4 Bat but at a much lower cost and a smaller size of only 12cm x 13cm. These impressive detectors also feature an easy to use configuration mode through your smartphone or tablet over Bluetooth.
In mid-March we deployed an SM Mini in a rural location in South Devon to record any emerging bats, as the spring season got underway. Our aim was to find out how easy setup is when using the Mini Configurator app and to get an example of its recording quality. Originally our plan was to retrieve the detector after a period of three weeks, however the developments around Covid-19 meant that it was unsafe to do so. Therefore in this blog we will cover our experiences with setting up and deploying an SM Mini. Once social distancing rules are lifted we will provide a follow on update with our recordings.
We used a 32 GB SDHC card, however the SM Mini Bat can support SDXC cards of up to 1TB. The SM Mini Bat comes with a built-in microphone and when powered using 4x lithium-ion AA batteries it will record for up to 30 ten-hour nights. You can add an additional acoustic microphone to record birds, amphibians and other species when not using the ultrasonic microphone.
Setting Up
The SM Mini is designed to be used with a companion app called Mini Configurator. This free app allows you to easily configure the SM Mini’s recording settings before deployment as well as check the status of your detector while it’s in the field.
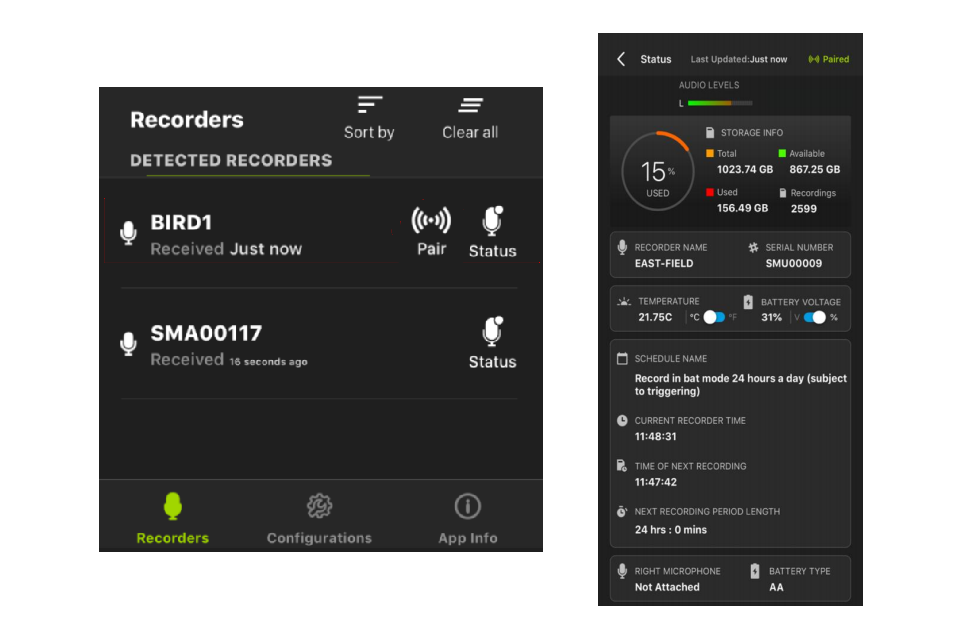
When powered on the SM Mini Bat emits a constant Bluetooth beacon, and when you are within range of this beacon the Configurator app will automatically detect the recorder and display it in the recorders screen of the app. You can now press the status icon on the app and view the current status of the detector, including SD card capacity, battery life, recording mode and number of recordings taken.
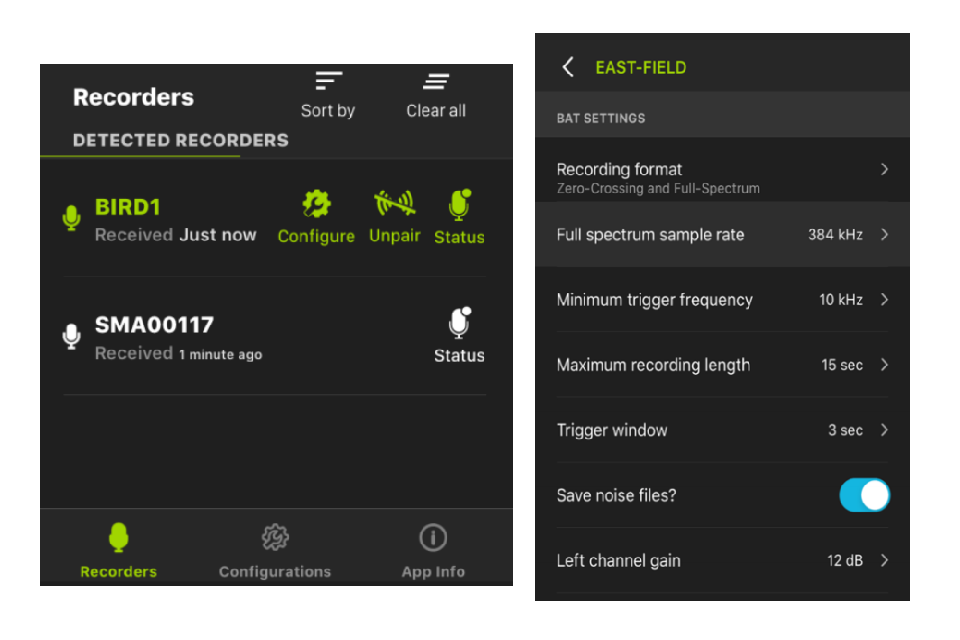
To set up or edit an SM Mini’s recording schedule you must pair the detector with the app. The first step in this process is to hold down the PAIR button on the SM Mini for three seconds, which prepares the device to be paired (indicated by the green flashing Bluetooth light). On the Mini Configurator app a ‘pair’ icon will then appear next to the detector’s name, and once pressed the app will be paired with this detector. Once paired the SM Mini synchronises its time and date to your location and a new ‘configure’ icon will appear next to the detector, which grants access to the SM Mini’s recording settings. These settings include the recording schedule (e.g. an hour before sunset through to sunrise), recording format (zero crossing or full spectrum), minimum trigger frequency and recording length.
What we found
Setting up an SM Mini and getting to grips with the Configurator app can seem daunting at first, but with the quick starter guide and Wildlife Acoustics’ helpful online tutorial videos, we found it to be a relatively straight forward process. The app has a simple user interface with clear graphics and together this really helps make navigating the app easy. This was a welcome change when compared to the issues that new users can have when navigating the older style LCD menus on previous detectors.
The beacon status system has also proved incredibly useful whilst we have had the detector deployed. Since the social distancing restrictions came into place, we have been unable to access the detector. However we were able to guide the owners of the land where the detector is deployed, through the process of installing the app and checking its status for us. This has been incredibly helpful as we can see whether we have recorded any bats in its current location, as well as whether the batteries need to be replaced.
Despite its small size we were still able to run a python lock around the detector, however as our location was a private residential area we were not concerned about theft and so opted for using a few cable ties to secure the detector in place.
Our Opinion….so far
The SM Mini Bat offers a user-friendly passive bat detector building on previous iterations in the Song Meter bat detector range. Its small size means it’s much easier to store and transport, and it is much more discreet when deployed in the field, compared with other detectors. Being unable to add an additional external microphone is a limitation to keep in mind, however for us this wasn’t an issue.
We will post a follow up blog once we are able to retrieve our detector and access our recordings.
The Song Meter Mini Bat Detector is available to order from the NHBS website. For assistance with any queries regarding our range of bat detectors, please do not hesitate to contact our team of Wildlife Equipment Specialists on 01803 865913 or equipment@nhbs.com.
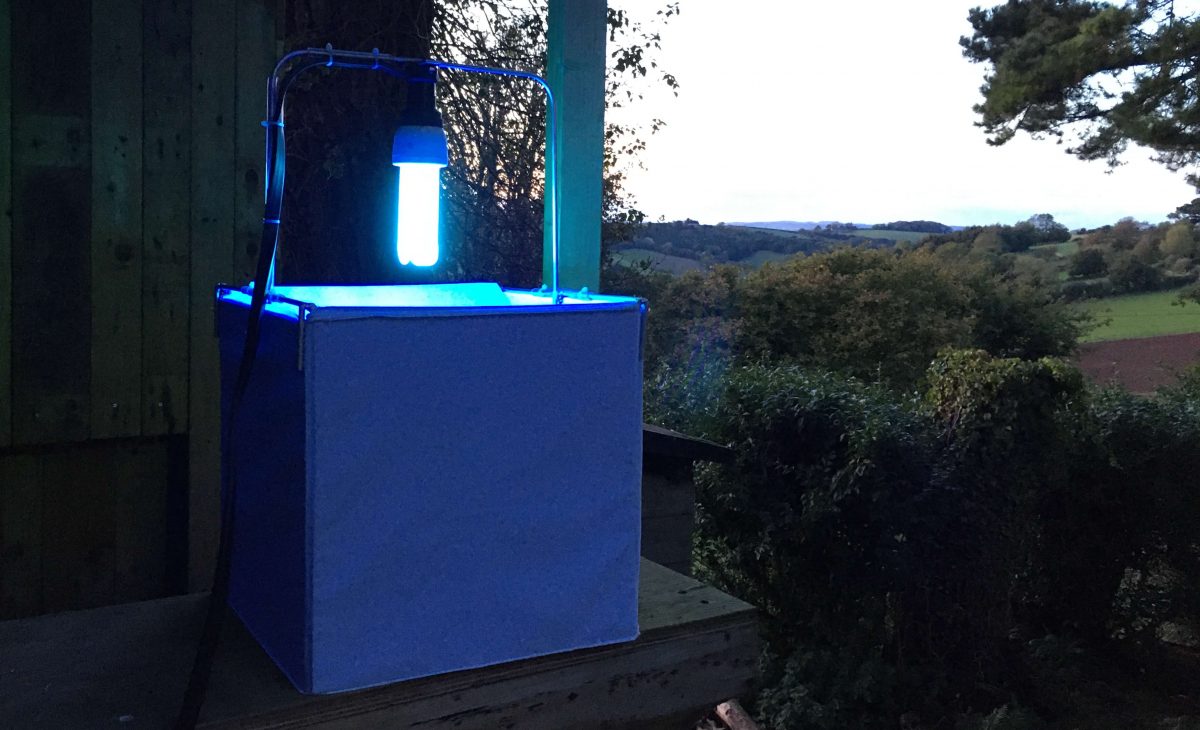
The NHBS Moth Trap is an exciting new lightweight and highly portable Skinner moth trap designed and manufactured onsite at our Devon workshop. It is constructed from lightweight plastic panels covered with a light-coloured nylon material, and is assembled using Velcro. Once assembled the trap container has two panels which help prevent trapped moths escaping. The electrics are added by sliding the light holder into the wall supports. When fully assembled the trap measures approximately 30cm wide x 30cm deep x 50cm tall, it is mains powered and will run a single 20W Blacklight bulb. A benefit of these bulbs is that they will not shatter in contact with rain, however, like with every moth trap we would advise against using it during adverse weather.
The NHBS Moth Trap is designed with portability in mind. It comes supplied with a lightweight carry bag that you can use to transport and store the trap when not in use. This bag measures approximately 30cm wide and 45cm tall when all trap components are included. The complete trap only weighs around 1.6kg; much lighter than the typical solid plastic assemblies of other Skinner traps.
Butterfly Conservation’s review of the trap
In August 2019 we sent our trap to Phil Sterling, one of Butterfly Conservation’s leading moth scientists and author of the ground-breaking “Field Guide to the Micro-Moths of Great Britain and Ireland”. Phil was kind enough to set out our trap over six different nights and offer his feedback on how it fared.
“The trap is very good, and comparably better in my view than equivalent 20W tube traps on the market currently though I haven’t run comparative studies as such. However, I do regularly run a similar sized black plastic trap with a similar 20W bulb, along with a Robinson 125W mercury vapour trap several metres away, as my standard night time trapping in my garden. Using the NHBS trap in an identical position, the NHBS trap has been surprisingly good, consistently catching more moths than I would expect each time, comparing it with the catches in the black plastic trap.
I like the NHBS Moth trap because it is covered with white nylon, which glows with UV light at night when the light is on. I think this helps attract the moths, and critically, by being fairly light inside the trap itself, the moths readily calm down and rest until morning. I also like the portability of the NHBS trap, and particularly that it doesn’t need a rain shield.
I would definitely recommend this trap.”
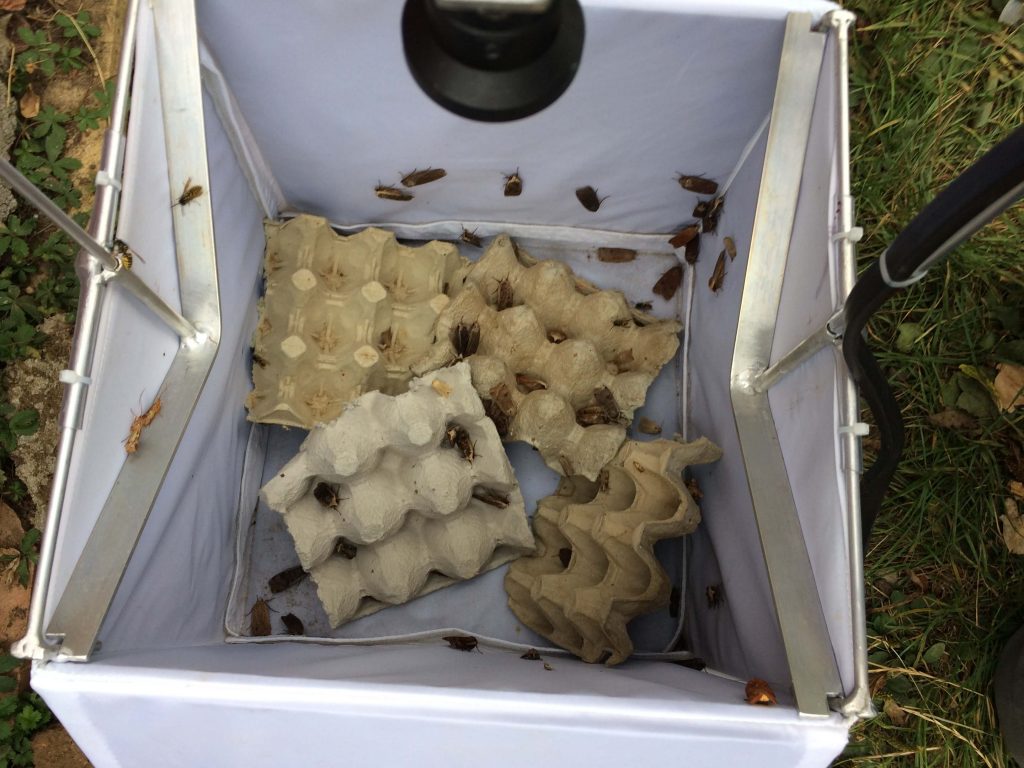
Phil Sterling’s haul from a night’s trapping in August
The NHBS Moth Trap is now available on the NHBS store here. We are grateful to Butterfly Conservation and Phil Sterling for their generosity in reviewing our trap.
To view our full range of entomological equipment please visit www.nhbs.com. If you have any questions on moth traps or would like some advice on the best trap for you then please contact us via email at customer.services@nhbs.com or phone on 01803 865913.
There are many scenarios where our attempts to observe and survey certain species are hampered by our limited sensory systems. Many animals are difficult to detect because they utilise cryptic colouration or disruptive patterns, or they have evolved ingenious behaviours to conceal themselves within their environment. In other cases, environmental conditions such as low light levels or fog, can reduce visibility and disguise even some of our most obvious resident species.
Ecologists, researchers and amateur wildlife enthusiasts have overcome these sensory limitations by using thermal imaging and night vision optics. This article will cover how these different technologies function, highlight their key specifications and give recommendations for those looking to purchase one of these devices.
Thermal imaging works by using an electronic detector element to convert the infrared light (heat) emitted by objects in the environment into a visible pattern of colours that vary depending on the temperature of the object. Thermal imaging devices (TIDs) are becoming increasingly common in ecological surveys because, unlike night vision devices, they can produce an image in daylight or complete darkness, even through fog.
When choosing a TID there are a few key technical specifications that you should consider for your project:
Resolution – The clarity of the images/videos is determined by the number of heat sampling points. The higher the resolution, the easier it is to spot small animals at a distance.
Refresh Rate – Determines how often the screen is updated with a new image. A refresh rate of 30Hz or more is recommended for fast-moving animals such as birds and bats.
Zoom – This is particularly useful for larger species identification and counting your target more accurately.
Field of View (FOV) – The horizontal and vertical angle of view that you can see through the thermal imaging device. A wider field of view is useful when detecting small animals.
Maximum Detection Range – Gives an indication of how far the device will be able to detect a human-sized object effectively.
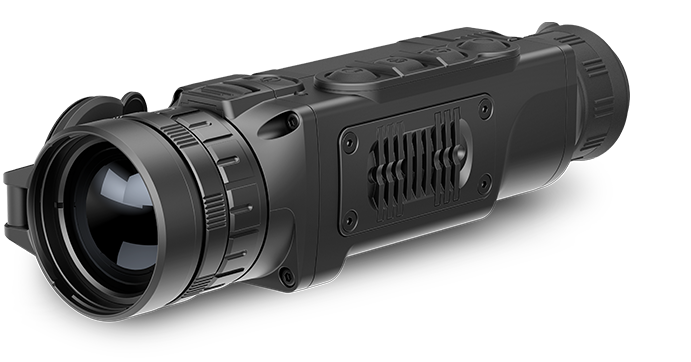
Pulsar Axion XM30S
This thermal monocular has a compact, ergonomic design and features all the excellent capabilities of Pulsar’s more advanced thermal imaging devices.
A powerful thermal imaging monocular with an impressive resolution and detection range, as well as full remote control through the Stream Vision app on a smartphone or tablet.
An advanced model, this thermal monocular has a fantastic field of view and thermal sensitivity, as well as the ability to view live feed and take images and videos remotely.
Night vision technology operates either by using an image-intensifier tube (analogue) or an electronic sensor (digital) to amplify the small amount of light present in dark environments to generate a bright image. They typically produce a monochromatic green or greyscale image, however some newer technologies are now able to capture colour images in low light conditions.
There are a few specifications that you should consider when choosing an night vision device (NVD):
Viewing Range – The distance to which you can see and distinguish objects using the device can be crucial for certain projects. A low-end NVD will typically have a viewing range of around 200m, while more high-end models can achieve viewing ranges of up to 500m.
Analogue Night Vision – These scopes are grouped into generations. Gen 1 scopes are the most economic but have a limited range (approximately 75m), lower resolution and limited field of view. Gen 2 and 2+ scopes offer performance improvements such as longer range, better image resolution and greater field of view.
Digital Night Vision – Digital devices typically produce higher quality images than Generation 1 scopes, often have a video output or SD card allowing video capture.
IR illumination – Most night vision devices have a built-in IR illuminator to increase the brightness of the images it takes, however purchasing an additional IR illuminator may be necessary when working in extreme darkness.
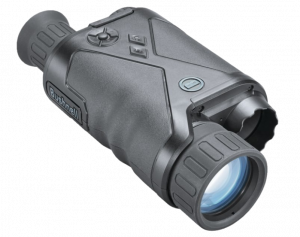
SiOnyx Aurora BASE
This innovative night vision monocular utilises SiOnyx’s Ultra Low-Light Sensor Technology to record colour footage, not only during the day but also in both low-light and night-time conditions. It also features a wifi module to stream or transfer photos and videos.
An impressive digital night vision monocular with a high sensor resolution and viewing range of up to 230m. It can take HD video recordings which can be streamed over Wifi using the dedicated Equinox Z2 App.
To learn more about some of these products or to browse our full range of night vision and thermal imaging optics visit our online store at NHBS.com.
If you would like some more advice on choosing a thermal imaging or night vision device contact us via email at customer.services@nhbs.com or phone on 01803 865913.


 These steel pegs are excellent for securing fencing to the ground, particularly in areas where badgers are prone to tunnelling. These pegs can also be driven through the access and exclusion badger gates to provide a firmer placement.