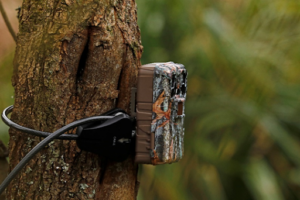
Trail Camera Tips and Troubleshooting: Part 1

Trail cameras are a widely popular solution to monitoring elusive or nocturnal wildlife for both professionals and wildlife enthusiasts alike.

Modern trail cameras tend to be very reliable and are designed to be highly user-friendly. However, there are a few things we would suggest to ensure your camera performs to the best of its ability. These are the initial steps we advise to take if you are experiencing issues with your camera, and these can often resolve or at least identify the problem. For tips on how and where to set up your trail camera, check out part 2 of this series.

Batteries

Try a set of new batteries

Most minor troubles with trail cameras are due to the batteries not providing enough power. This can be down to the type of batteries being used or simply that they are getting low and need replacing. If you are experiencing black night-time images, short night-time videos, or no night-time captures are being taken at all then the first thing to check should be your batteries.

Battery meters on trail cameras are not always accurate, so we suggest checking your batteries with a tester/voltage meter prior to use if possible. This is particularly important for professional usage.

Choose Lithium batteries if at all possible 

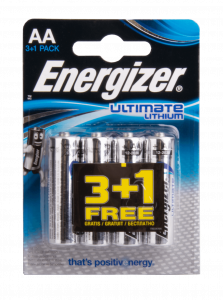
We, and many trail camera manufacturers, highly recommend Lithium batteries as the best option for performance. The Energizer Ultimate Lithium are particularly well thought of, and as such are included in our Starter Bundles (see individual product pages).

Lithium batteries have a significantly longer lifespan than most other types e.g. alkaline and rechargeable NiMH, while also performing more reliably for a number of reasons that are explained below.

Trail cameras generally require 1.5 volts (V) from each AA battery to perform at their full potential. When the voltage begins to drop you may start experiencing issues such as those mentioned above. One of the main benefits of Lithium batteries is that they maintain their voltage until the end of their usable lifespan when it then rapidly drops off. In contrast, Alkaline batteries experience a pretty consistent voltage loss throughout their lifespan, meaning they can drop below 1.5V rather quickly after deployment.

Unfortunately, we do not recommend rechargeable AA batteries (NiMH). At only 1.2V, rechargeable batteries are unlikely to power the camera reliably or for long. If rechargeable batteries are still the preferred option, it is important that the batteries offer at least 2500mAh. Some camera models have been designed to work more effectively with rechargeable batteries, for example the Recon Force Elite HP4, however the performance is still unlikely to be comparable to use with Lithium batteries.

Be prepared for batteries to die more quickly in cold weather

During colder winter months, you should expect your batteries to discharge more rapidly and the battery life to therefore be reduced. At lower temperatures the chemical reactions accruing in the battery are slowed down, diminishing its power.

Alkaline batteries are particularly troublesome in this regard as they contain a water-based electrolyte, which means they seriously struggle as temperatures approach freezing. Again, Lithium batteries are the superior choice and can withstand significantly colder conditions while still performing fantastically, albeit slightly diminished in comparison to use in more mild conditions.

SD cards

SD (Secure Digital) cards are available in a wide variety of sizes and speeds. Generally speaking, we find a 32GB, class 10 SD card a very suitable choice, and this is what is included in our trail camera Starter Bundles. It is worth reading the manual of your chosen trail camera to check for any compatibility requirements or maximum size capacities.

Format your SD card 

Formatting your SD card is an important step when starting with a new camera, or if experiencing SD error alerts on your camera. It is important to be aware that formatting your card will erase all data, so any important videos or images should be transferred elsewhere beforehand.

There are two options for formatting your SD card: using a computer with an SD card reader or via the trail camera itself. When using a computer, simply look for the SD card in your file explorer/file finder, right-click and select ‘Format’. The majority of trail cameras also provide an in-built option to format your SD card via the settings menu. For the brands we offer, the menu options are likely to appear under the following titles (or similar):

Browning –  ‘Delete all’

Bushnell and Spypoint – ‘Format’

Check your SD card is not locked

A common error message seen with trail cameras is ‘missing SD card’. If an SD card is inserted in the camera but the error message is showing nonetheless, it is worth checking if the card is ‘locked’.

Modern SD cards include a small plastic lock switch (seen on the left side of the image) that allows the user to prevent any data being written or images deleted from the card. Simply slide the switch into the unlock position and check if the error message disappears when you re-insert the card.

Settings

Return the camera to the default settings 

When a trail camera is not behaving as it should or how the user would like, we would recommend resetting the camera to the original factory settings. This can be easily done through the menu on the trail camera and is likely to be named ‘default settings’, ‘default’, or similar.

For further advice on settings and placement of your camera, please see Part 2 of our Trail Camera Tips and Troubleshooting series.

Summary

We recommend taking the following steps prior to using your camera for the first time, or if you experience any unexpected problems:

  • Use a brand new set of Lithium batteries
  • Reformat your SD card (and check it is not locked!)
  • Reset your camera to its default settings

If you have any questions about our range or would like some advice on the use of your trail camera, please feel free to get in touch with our Wildlife Equipment Specialist team via email at customer.services@nhbs.com.


The NHBS Guide to Snorkelling

Snorkelling is a great summer pastime and a brilliant way to experience many amazing species that inhabit our oceans. The inshore coastal environment is incredibly diverse and full of life, so there’s a chance you might see something different every time you snorkel! Depending on when and where you swim, you may even be able to see some creatures you recognise from rock pooling and learn how they behave when the tide is in.

Planning a trip

When planning a snorkelling trip, there are several important factors to consider. Firstly, it is important to familiarise yourself with the area you plan to snorkel in. To ensure your safety, make sure that there is constant, safe access to and from the sea, and that the water is clean enough to swim in. An understanding of potentially harmful species you might come across is also important.  For instance, blue-green algae (which is actually a type of bacteria) can lead to illnesses in humans, and others, such as the Portuguese man-of-war (Physalia physalis), have very painful stings that could ruin your trip.

A big factor to take into account is the weather. Rain, wind and cold weather can all impact the quality of your snorkelling trip. From reducing visibility to causing dangerous conditions, the weather should always be taken seriously. Plan to snorkel on a warm, clear, calm day and make sure to continuously monitor the weather during your swim. Be careful not to swim at midday on a hot day either, if you are particularly sensitive to the sun.

Checking the water temperature is important, as it allows you to plan what you’ll need to wear and how long you should be in the water. You should aim to limit your exposure to colder water as it can lead to cold water shock and hypothermia.

Finally, the tide. It is best to swim as close to high tide or low tide as you can. Swimming in a changing tide can be tiring and can reduce the clarity of the water. High tide often offers the clearest water and allows snorkelling access to areas previously too shallow to swim in. It can also be safer in some areas: the increased volume of water could allow for greater space between you and any sharp rocks or reefs on the sea bed. This does mean that it may be too deep in other areas to clearly see the seafloor, so you might have to repeatedly dive down. Also, after high tide, the tide will begin to go out. This can be dangerous for swimmers, especially for those in areas with strong tidal currents, as you can be dragged further out to sea.

At low tide, you can snorkel further offshore, meaning you may see more species. However, certain areas closer to shore may be too shallow for safe snorkelling. The current will be in-bound after low tide, so you won’t be pulled out to sea, but you may be pushed into dangerous inshore areas. It is best to research the currents and coastal geography of the area before beginning your trip!

Check out our collection of tide times guides, as well as a few of our snorkelling guides.

Equipment and method

There are several key pieces of equipment needed for snorkelling and a few extras that can be useful. A snorkel and mask are obvious, but a pair of fins can help you swim for longer without tiring. They can also be helpful in stronger or unexpected currents. A wetsuit or rash vest is advisable for colder water temperatures, as are wetsuit shoes, gloves, and hats to help to keep you warm and protected in the water. A life jacket is a vital piece of gear to keep you afloat if you find yourself in danger or too tired to keep swimming.

Other equipment that you may want to bring are an underwater camera or a waterproof case for a phone. Dive slates or waterproof notebooks will help you keep track of everything you have seen.

To minimise disturbance while snorkelling, keep your distance from any animal you see and make sure not to step on or touch anything on the sea bed, as this habitat can be fragile. When diving down, be careful how you swim and return to the surface; kicking too hard can disturb any sediment below, reducing water clarity. This isn’t great for you as it can limit what you’ll be able to see, but it can also impact marine life, particularly corals and seaweed, as it reduces the amount of light that reaches them.

What could you see?

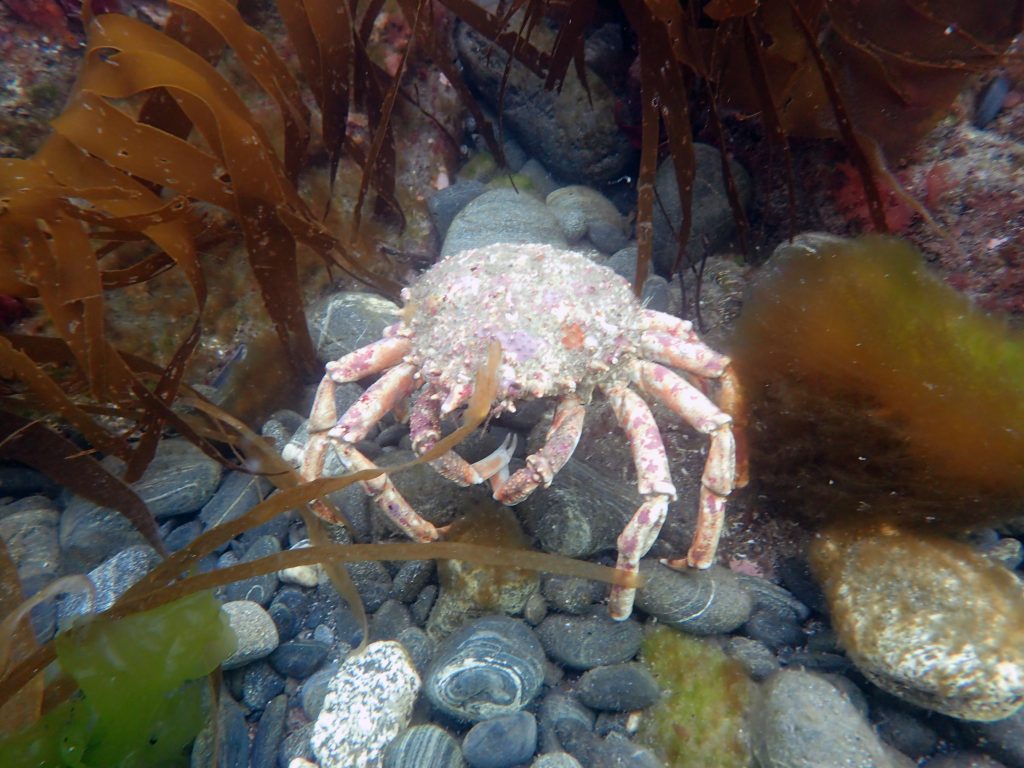
Spider Crab (Maja squinado)
heartypanther via Flickr
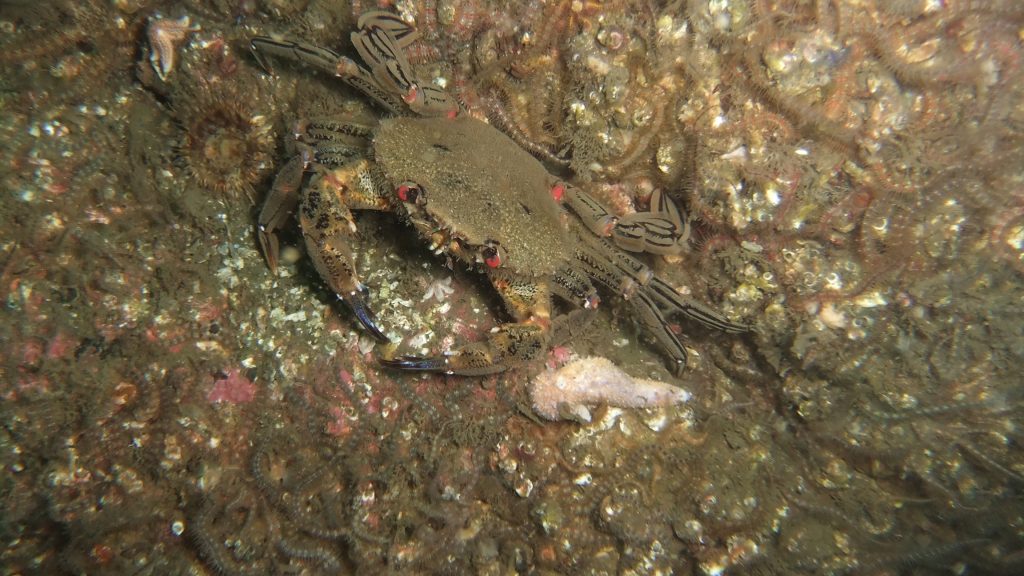
Velvet Swimming Crab (Necora puber)
gordon.milligan via Flickr
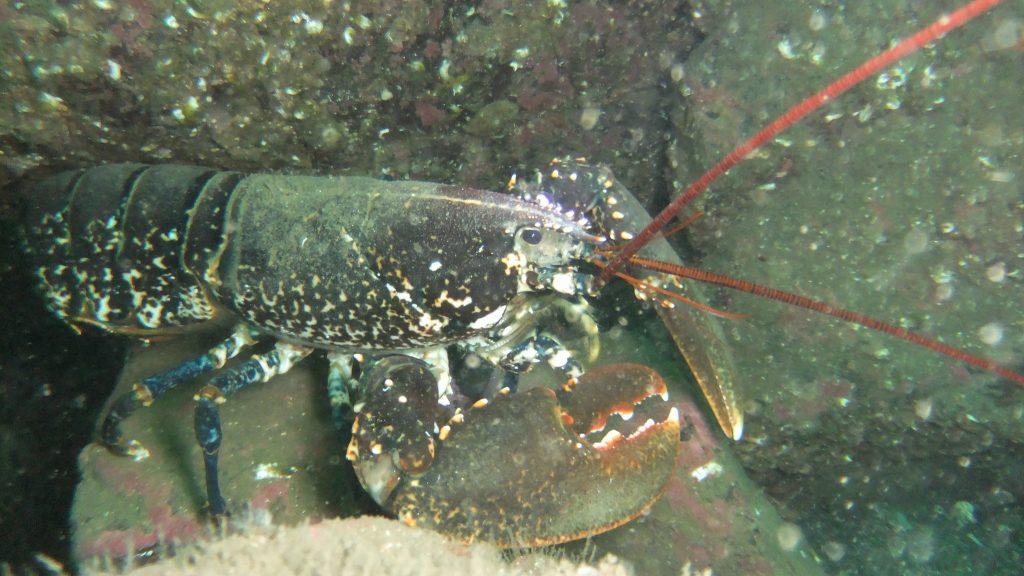
Common Lobster (Homarus gammarus)
gordon.milligan via Flickr
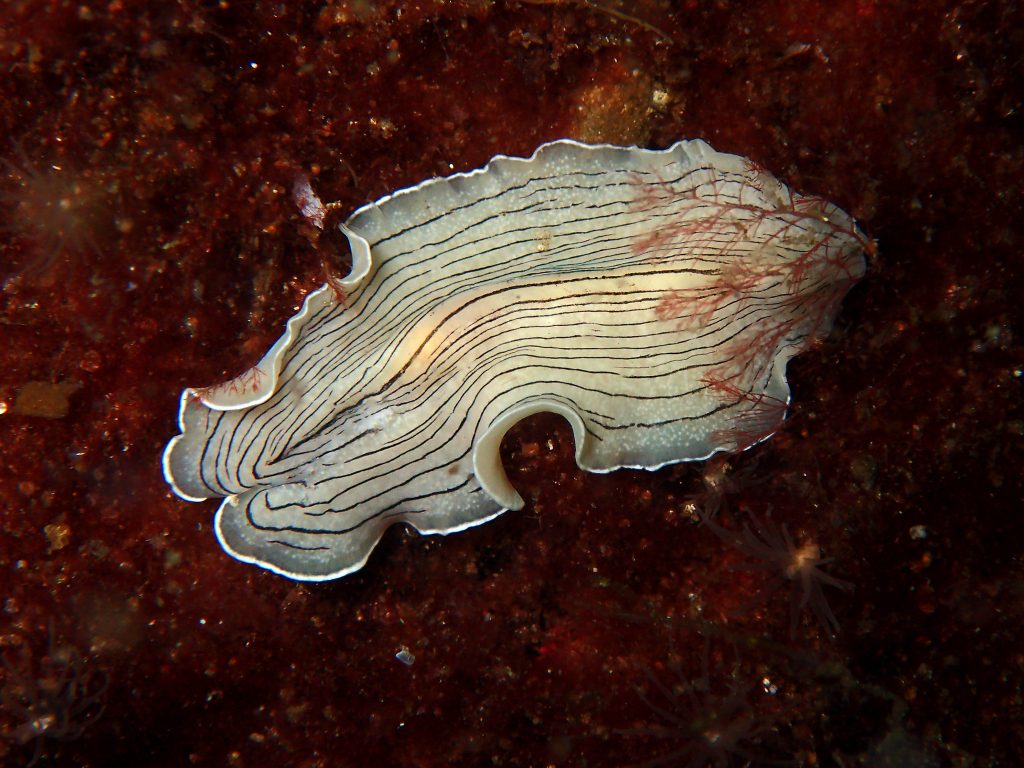
Candy Striped Flatworm (Prostheceraeus vittatus)
Peyman Zehtab Fard via Flickr
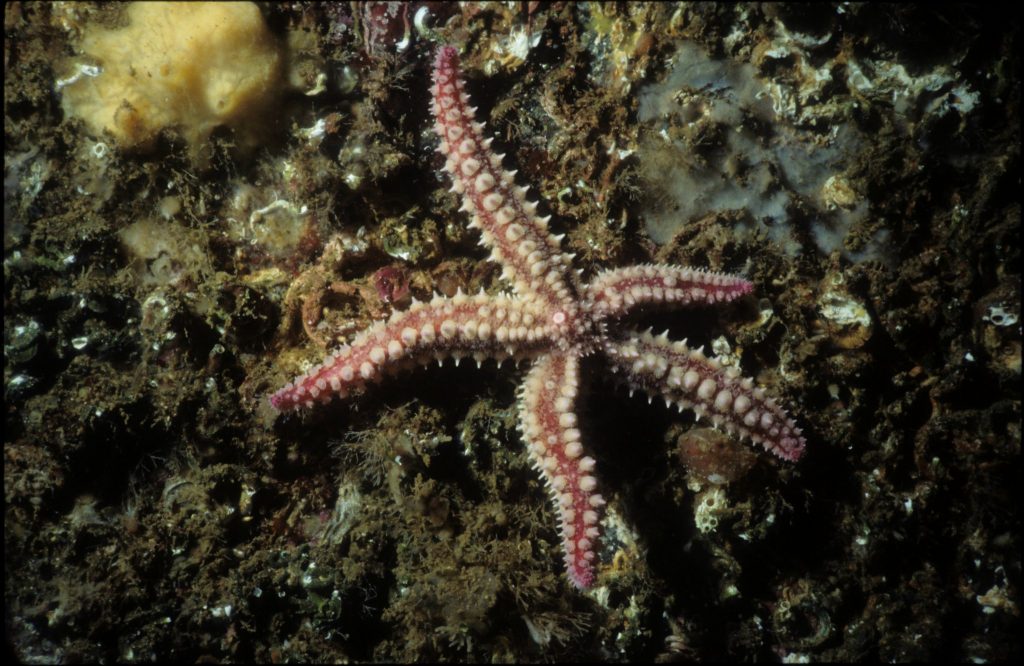
Spiny Starfish (Marthasterias glacialis)
Bengt Littorin via Flickr
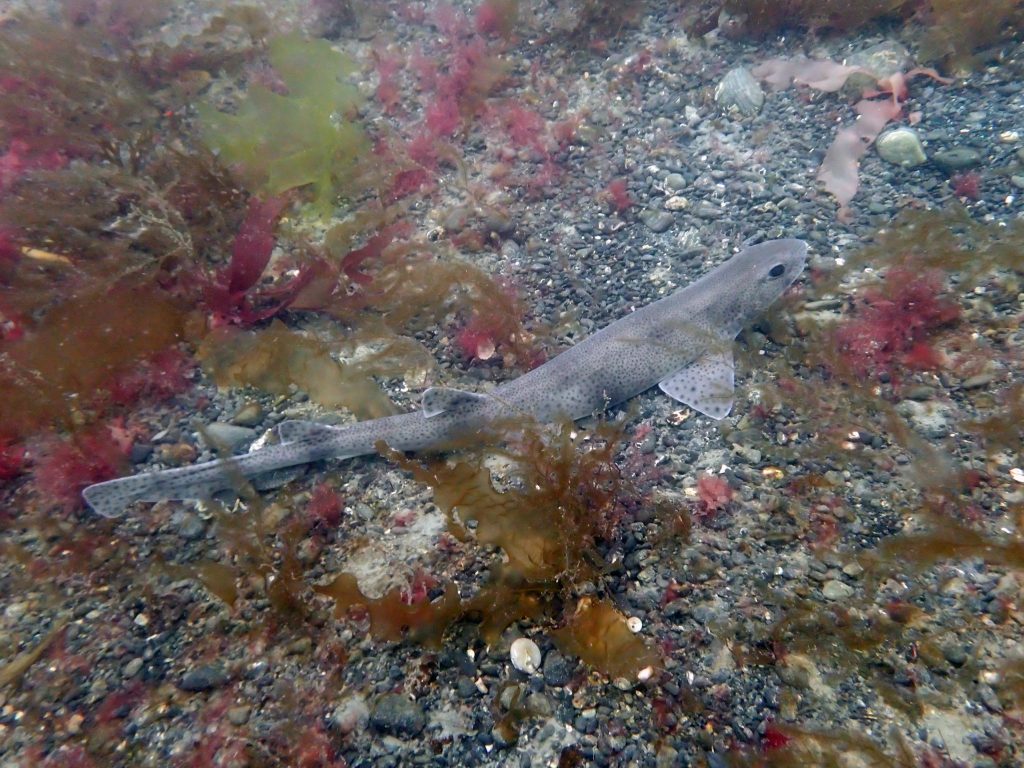
Lesser-Spotted Catshark (Scyliorhinus canicula)
heartypanther via Flickr
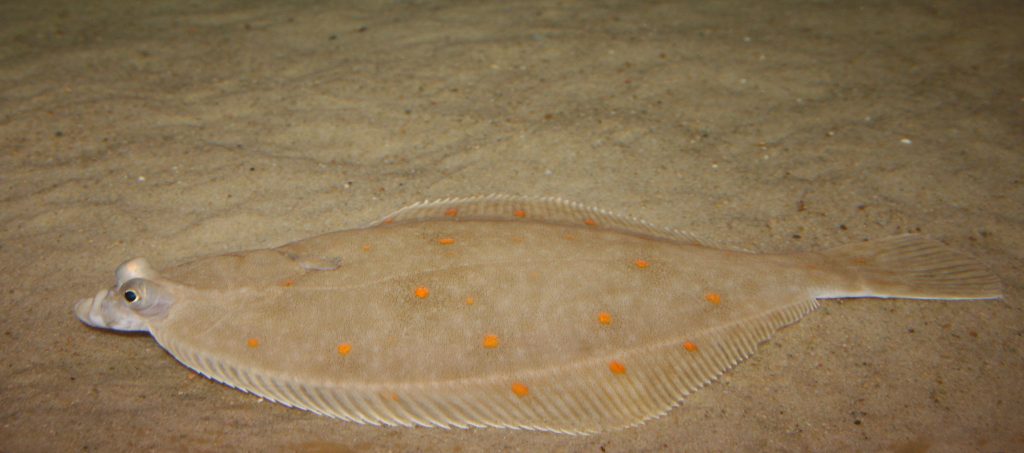
Plaice (Pleuronectes platessa)
Danielle via Flickr
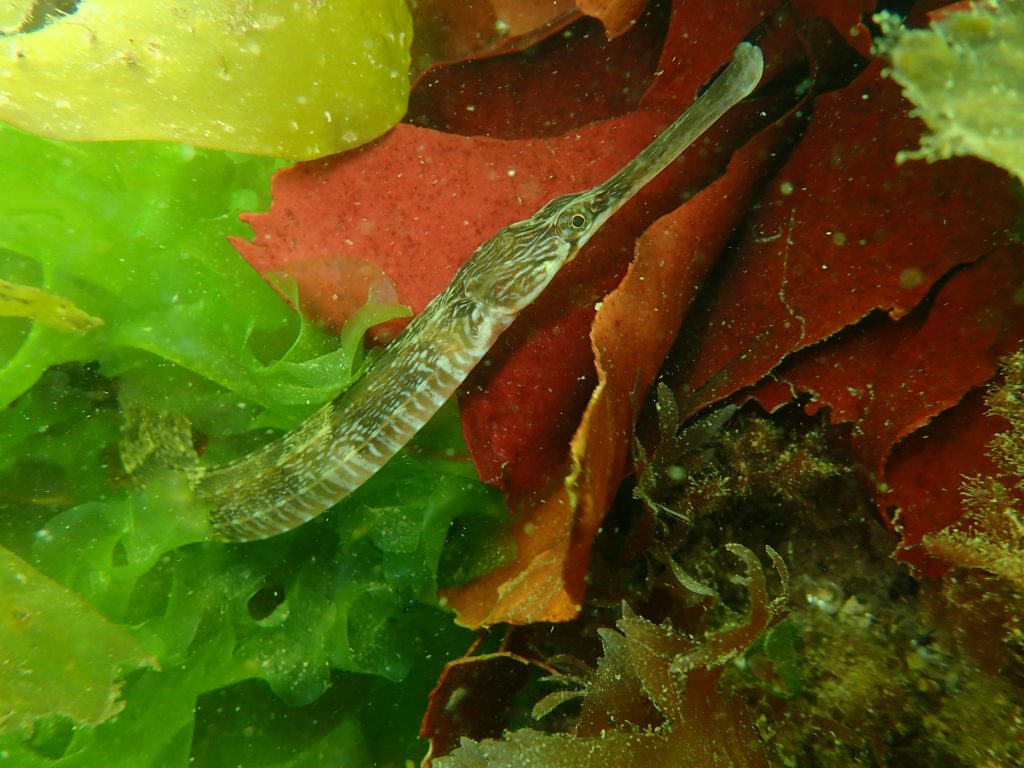
Greater Pipefish (Syngnathus acus)
heartypanther via Flickr
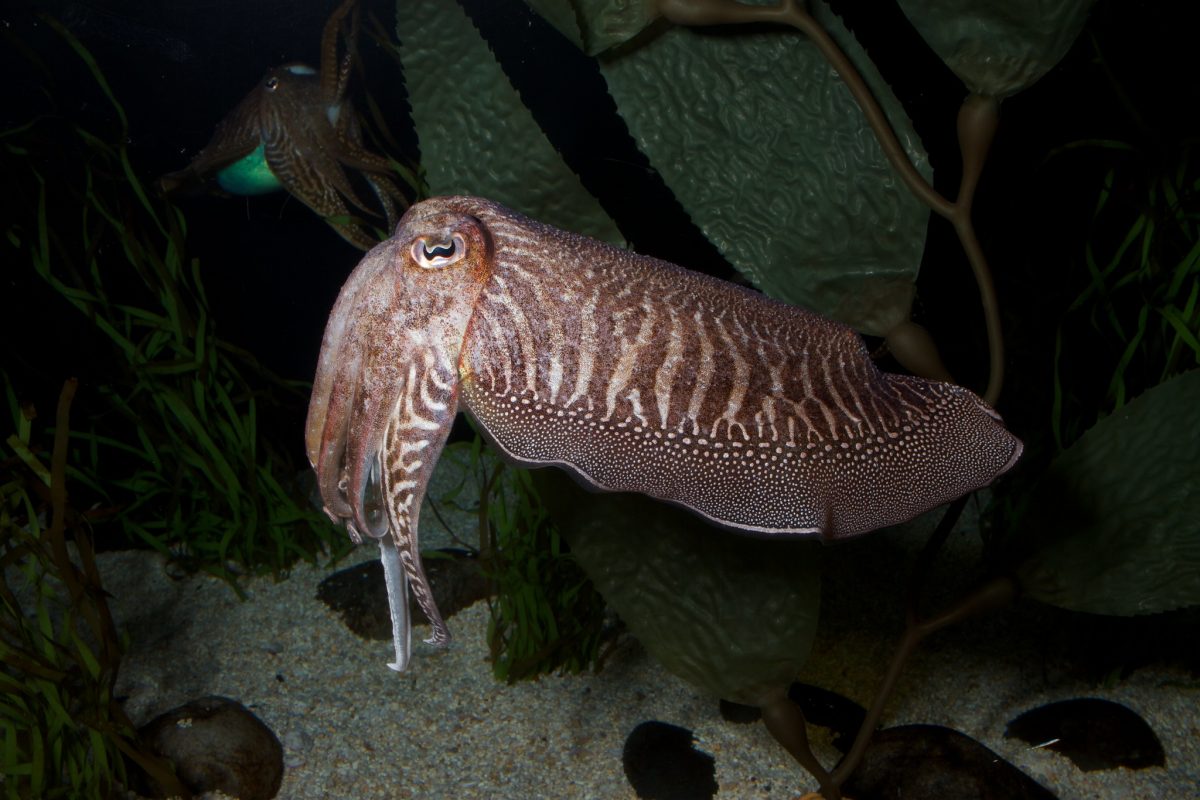
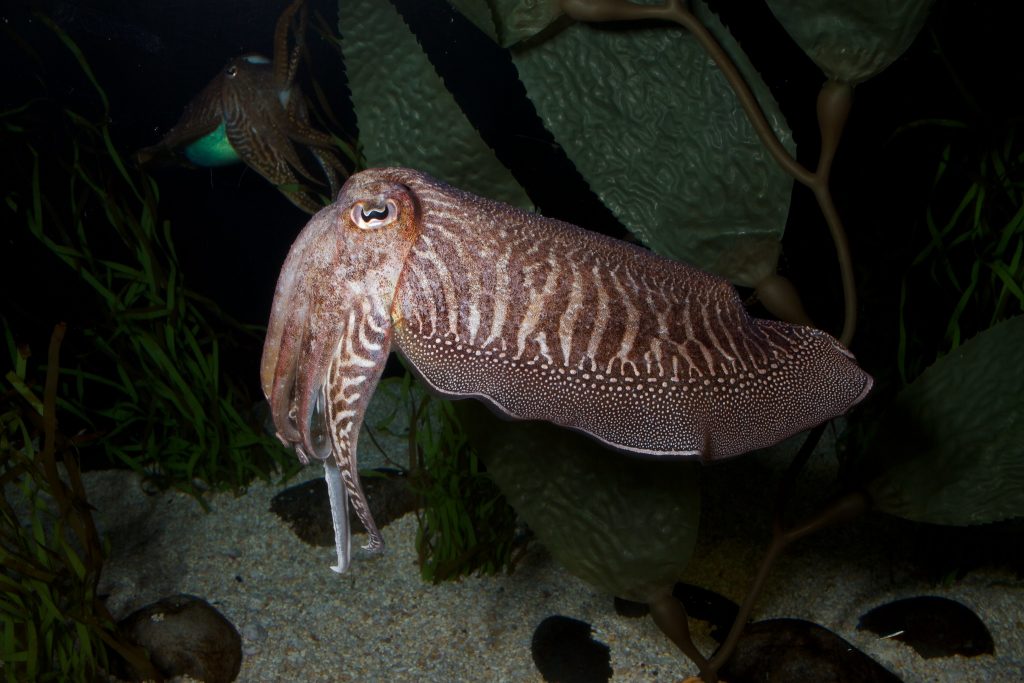
European Cuttlefish (Sepia officinalis)
Brian Gratwicke via Flickr
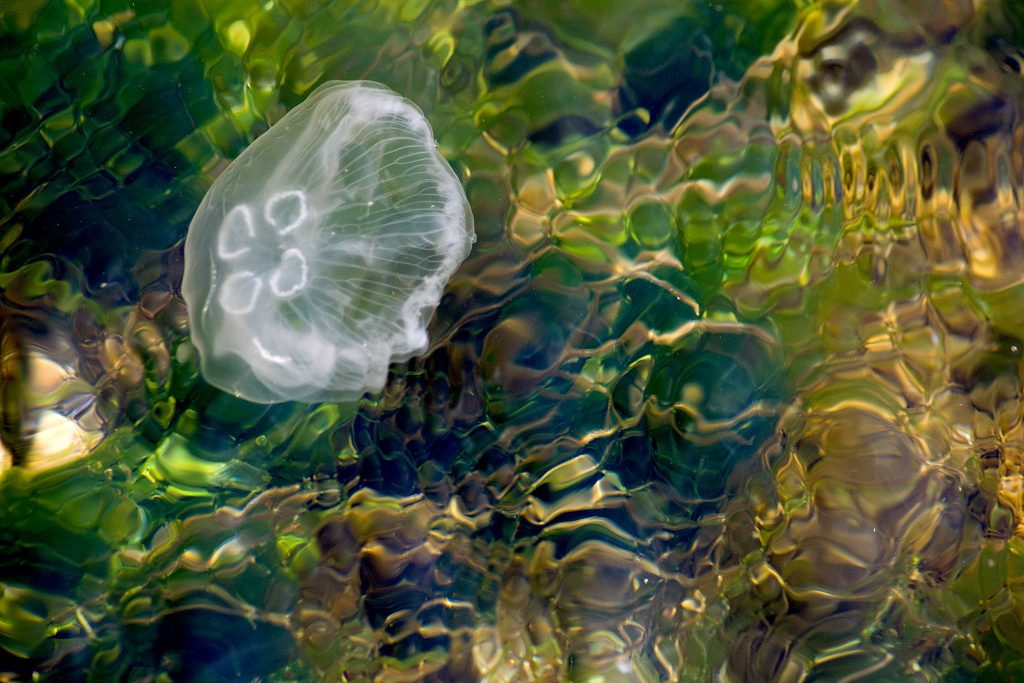
Moon Jellyfish (Aurelia aurita)
Katya via Flickr
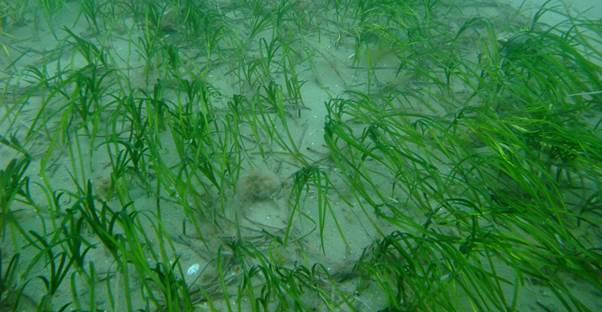
Common Eelgrass (Zostera marina)
Isle of Man Government via Flickr
Oarweed (Laminaria digitata)
far closer via Flickr


The NHBS Guide to Beachcombing

Beachcombing involves searching along the shoreline for interesting, valuable or usable objects. It’s not a new activity; the first use of this word in print was in 1840! Originally the intention of beachcombing was to find and sell objects of value washed up on the coast. Now, it is more of a recreational activity and there is a long list of natural and manmade curiosities that can be found.

Beachcombing is a simple activity that you can do anytime you are at the beach. The best approach is to find the tideline, usually indicated by a ‘line’ of washed-up material such as seaweed. It is best to check the tide times and visit at low tide. Many people also recommend visiting after a storm, as the stronger waves may have washed up more items.

There are several equipment options that may be useful to take with you, including a hand lens, specimen pots, and a camera. You should also bring a bag for any items or litter you collect, as well as gloves and hand sanitiser, plus wear weather-appropriate clothing and sensible shoes. A guidebook to help identify the items you may find would be helpful.

What could you find?

Natural

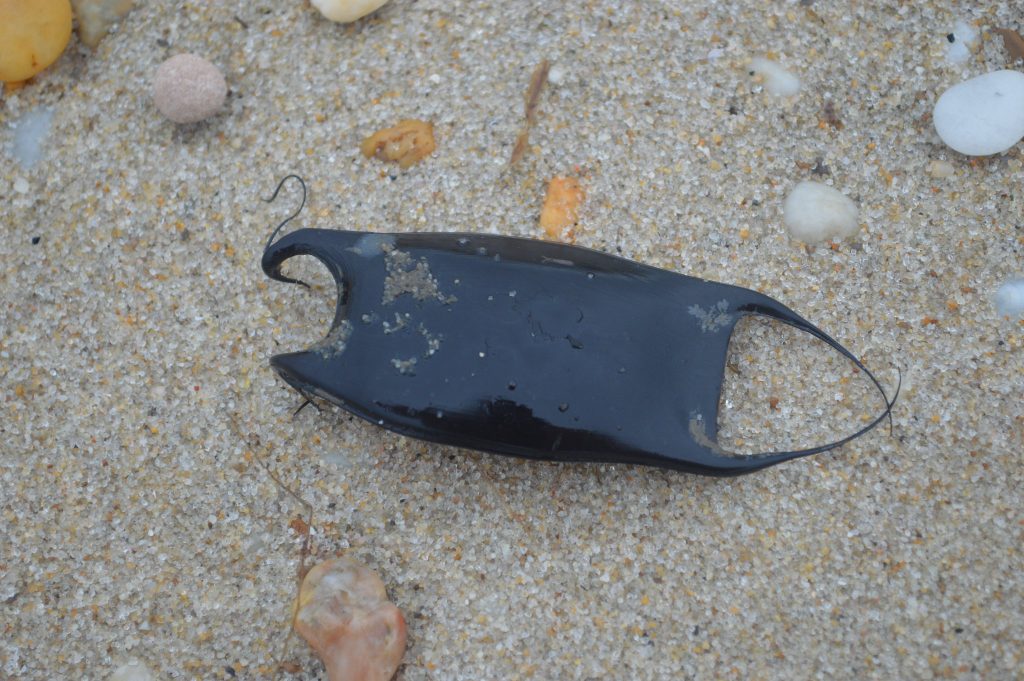
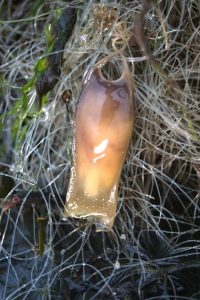
Mermaid’s purse

Skate egg case by Kyle Harts via Flickr
Lesser-spotted catshark egg case by Martyn Fletcher via Flickr

These are the egg cases of sharks, skates, and rays (class Chondrichthyes). They can often be found along the tideline tangled in the seaweed. They come in many different shapes, sizes and colours, depending on the species. Not all Chondrichthyans lay these egg cases, as some give birth to live young. Those that do lay eggs often do so on the seafloor to hide them from predators and to keep them from floating away until they’ve hatched. The exact species can be hard to identify, but there is an online guide that may be useful.

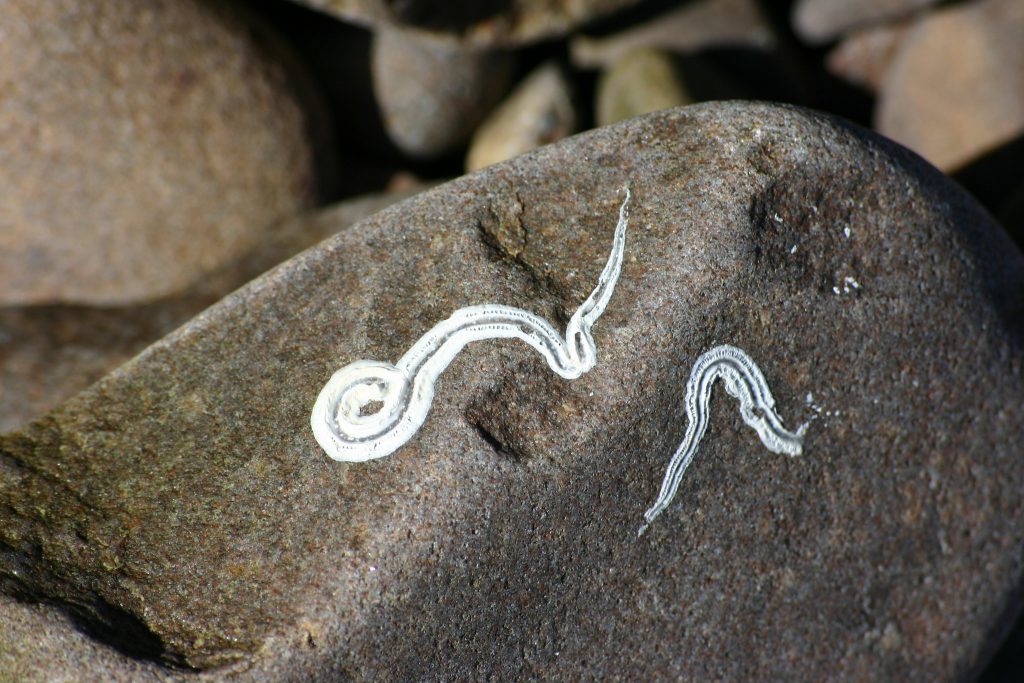
Marine worm tubes

Keel worm tubes by Kevin Walsh via Flickr

Several species of marine worms form calcareous tube structures on rocks, pebbles and shells. These tubes are white, irregularly curved and are a triangular shape when first made. Over time, they can become eroded to two thin white lines. They’re common across our coasts, but rarer finds are objects covered in hundreds of these tubes.

By-the-wind Sailor (Velella velella)

By-the-wind sailor by Philip McErlean via Flickr

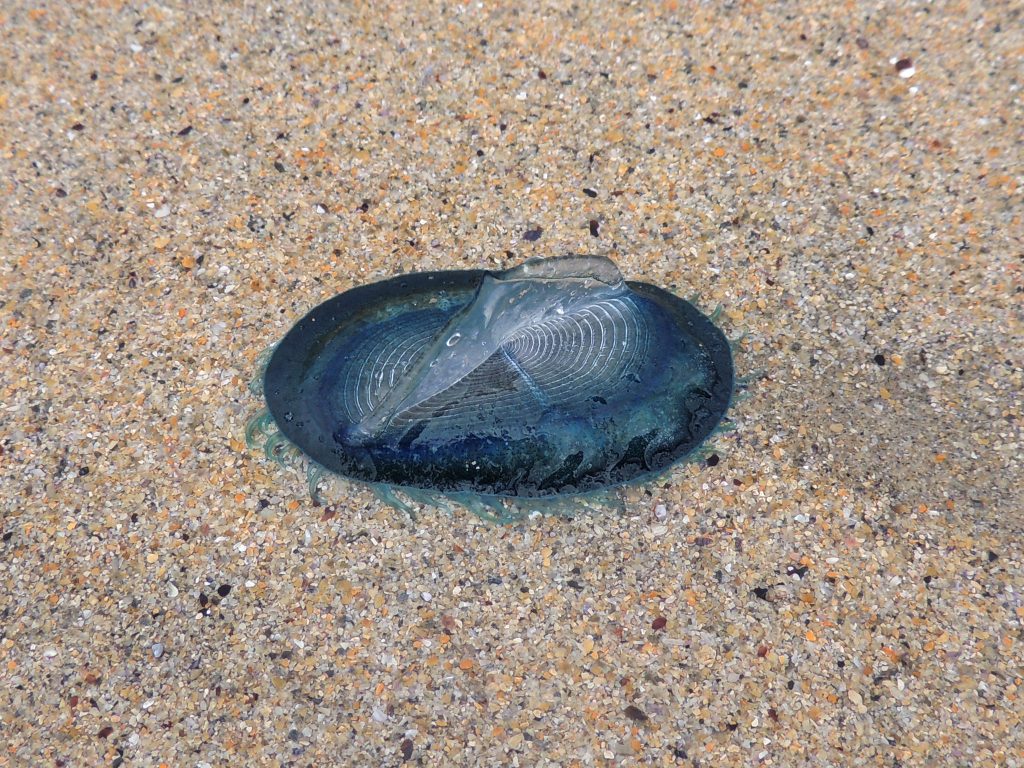
This species may look like a jellyfish but it’s actually a hydrozoa. It is known by many names, such as sea raft, purple sail, or little sail. This species is often mistaken for the Portuguese man o’war, but its sting is much less painful to humans. Often spotted around the UK coastline, particularly after a storm, the by-the-wind sailor can be an interesting sight while beachcombing.

Common Whelk eggs (Buccinum undatum)

Common whelk eggs by Les Chatfield via Flickr

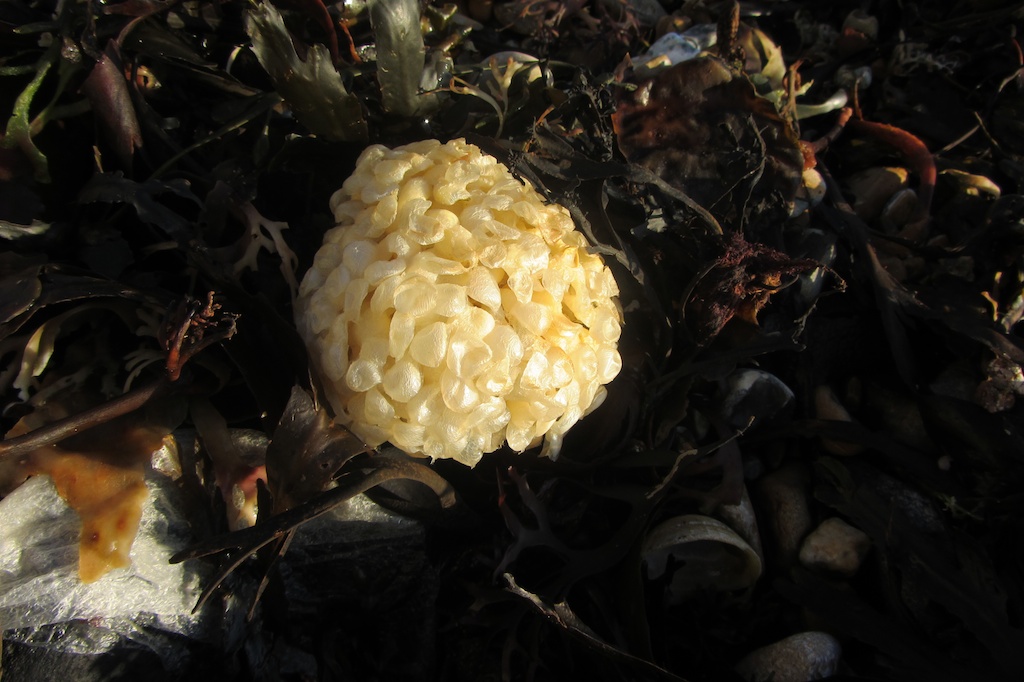
The common whelk is a large marine gastropod found along the shore of the UK. The empty egg cases, formed in a ball, can often be found washed up on beaches during the summer. They have several colloquial names, including sea wash balls, egg clouds and fisherman’s soap.

Fossils

Fossil on beach by Matthew Anderson via Flickr

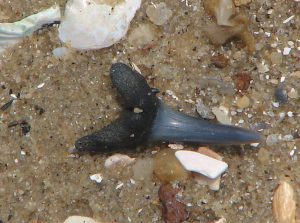
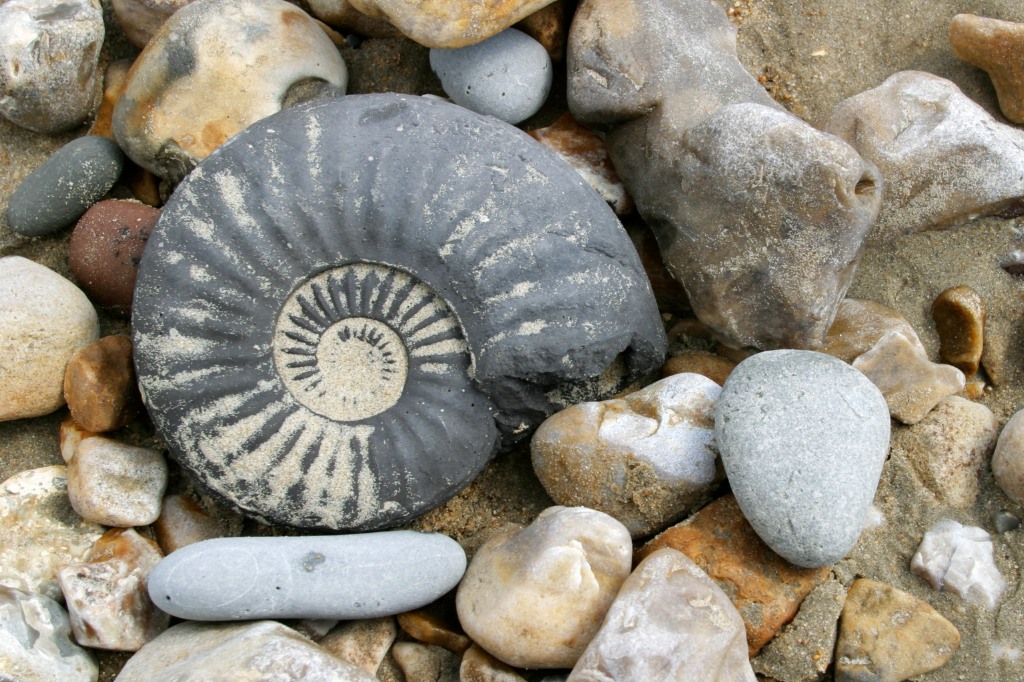
Fossils are physical records of history and one of the main attractions for many beachcombers. Very simply, fossils are formed when organisms are buried in sediment, and as this sediment becomes compacted by heat or pressure, it turns to rock, leaving behind the exact shape or an impression of an organism.

Shark tooth fossil by Virginia State Park via Flickr

There are several beaches, such as Charmouth in Dorset, where fossils are more likely to be seen, but they can be found on any shoreline. There are several guides on how to safely and sustainably search for fossils. The main guidance is to never hammer at cliffs (as they can be unstable), be careful around fragile habitats, and limit the amount of damage you do when extracting fossils. It is better to leave a fossil uncollected than to destroy the area it is held in.

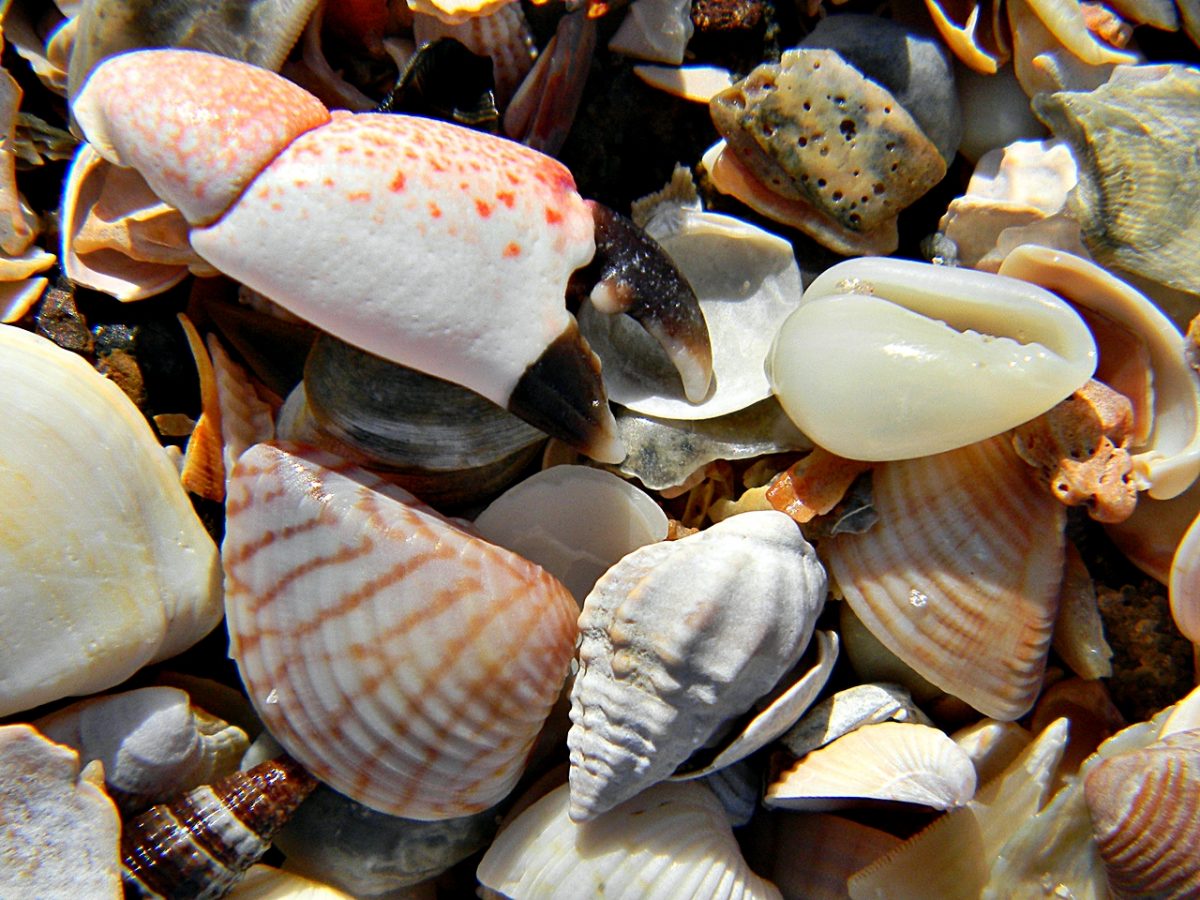
Seashells

Seashells by Bob Peterson via Flickr

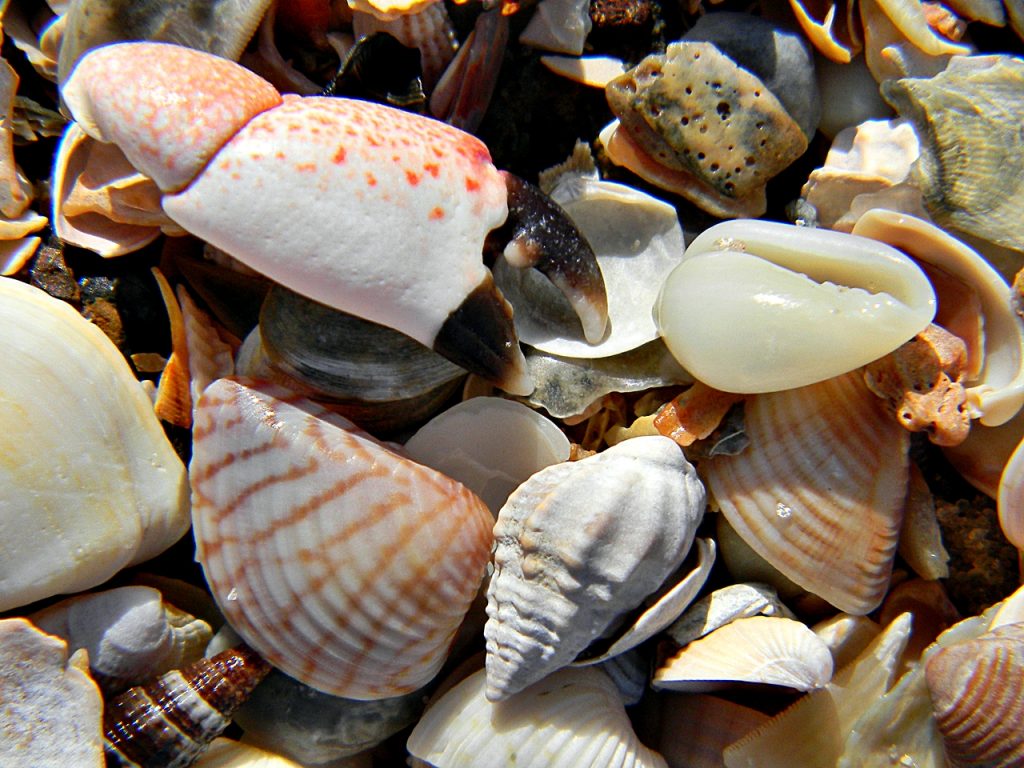
Seashells are the hard, protective outer layer of marine invertebrate species. Empty shells often wash up on beaches and shells from molluscs, barnacles, sea urchins, and crabs can all be found on the shoreline. As they are primarily made from calcium carbonate, seashells can be used in the production of lime. They’re also used in art, as poultry feed, musical instruments, and play a part in religion and spirituality. Throughout history, they’ve been used as decorative items, tools and currency.

Cuttlebone

Cuttlefish bone by Anna Gardiner via Flickr

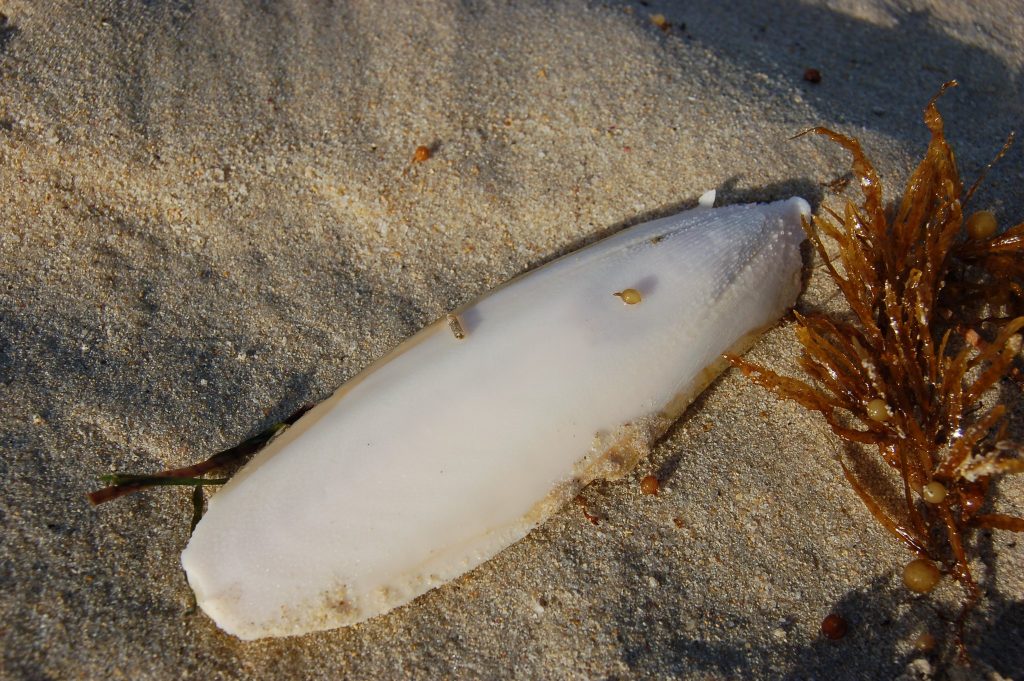
Also known as a cuttlefish bone, the cuttlebone is a hard and brittle structure that forms an internal shell in all cuttlefish (order Sepiida). They can be found along the coast and have several historical uses. They were ground up to make polishing powder, which was used by goldsmiths and added to toothpaste. Cuttlefish bones were also used as an antacid. Today, they are more commonly used as a dietary supplement for pets such as birds, reptiles and shrimp, as they are rich in calcium.

Manmade

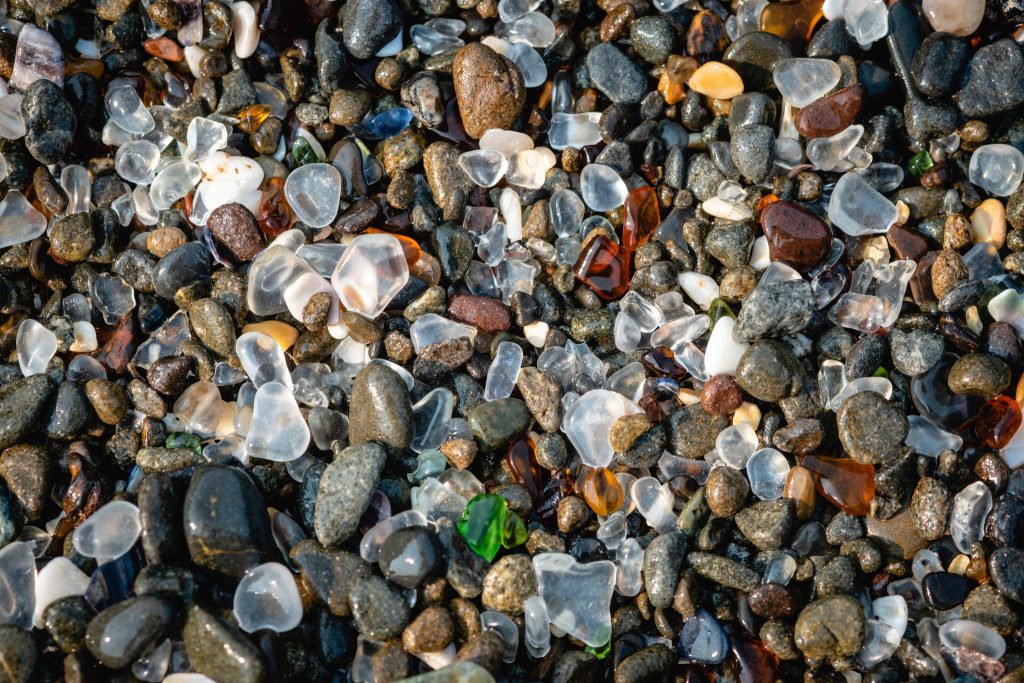
Sadly, you may also find a huge variety of manmade items on the beach. While beautifully painted tiles, sparkling sea glass and ancient treasures may be a highlight of your beachcombing trip, you are far more likely to see washed up fishing gear and plastic.

Sea glass by Sharon Mollerus via Flickr

Fishing gear

Bo Eide via Flickr

Dumped fishing gear, both intentionally and accidentally, is thought to be the biggest contributor to marine litter. One study found that 70% of macroplastics on the surface of the ocean was related to fishing. Another study found that 86% of the macroplastic in the great Pacific garbage patch was fishing nets. These often also wash up on our beaches, tangled together with many different manmade and natural items, and even wildlife.

Other plastics

F Delventhal via Flickr

Beaches can be covered in plastic, particularly after a storm. This is especially true if there is no action plan in place for keeping the beach clean. There are many volunteer groups you can join, or you can organise one yourself, that complete beach cleans. While beachcombing, bringing a bucket or bag with you to collect any plastic or litter is a great way to help your local environment and community.


The NHBS Guide to Moth Trapping

What is moth trapping?

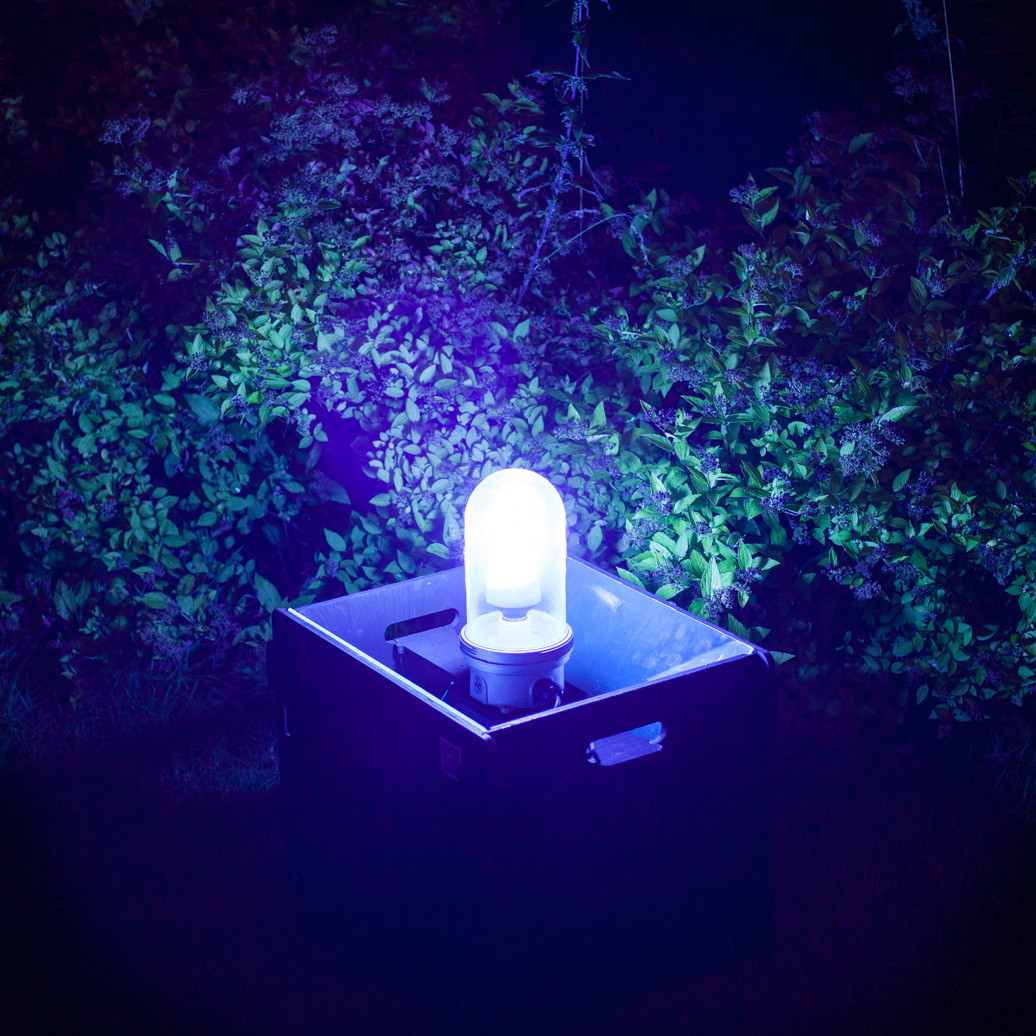
Moth trapping typically involves the use of an artificial light source such as a Mercury Vapour or Actinic bulb to attract moths during the night. In a traditional moth trap the bulb is suspended over a box into which the moths fly, and from where they can be examined and identified before being safely released. However, it is also possible to use the bulb in combination with a white sheet (either laid flat on the ground or suspended vertically using poles and lines) in order to view the moths that are attracted to it. Obviously this technique relies on the light being attended so that moths can be observed as they arrive, as opposed to with a box-style moth trap which can be left unattended overnight and the catch checked in the morning.

Several different types of moth trap are widely available. Take a look at our previous blog post for more information about the most common types of trap; including the Robinson trap, Skinner trap and Heath trap. Options include those which are powered by the mains, as well as battery powered models.

Alternative methods of attracting moths for survey and identification include sugaring, whereby a sweet solution (such as a mixture of treacle, sugar and ale) is painted onto a wooden post in order to attract moths. Similarly, wine-roping involves saturating a natural-fibre rope in a mixture of red wine and sugar for a couple of days and then hanging it from a bush or tree. Both of these methods are most effective during the autumn, winter and early spring when natural sources of nectar are at their lowest. Another very easy method of searching for moths simply involves using a torch to search tree trunks for resting individuals. This low-tech option is particularly fruitful between November and March when there are fewer flying moths and when a light-based moth trap is less effective.

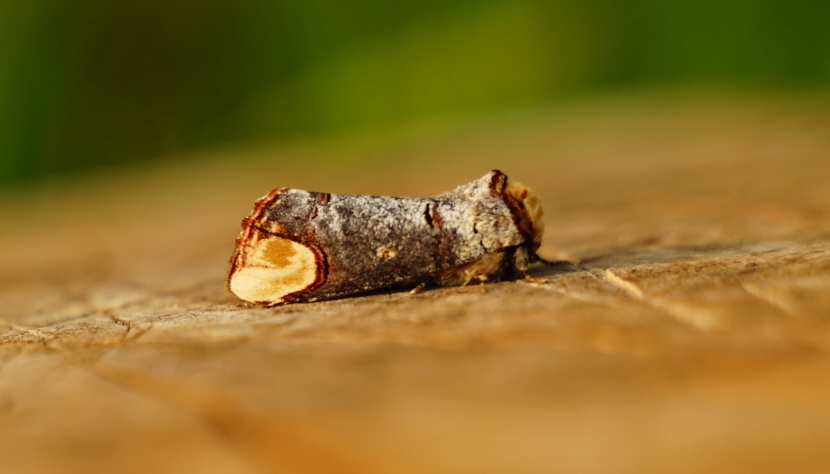
Buff Tip. Image by L Wilkes.
When is the best time for moth trapping?

In general, in the UK, a moth trap can be used from early March to November with varying degrees of success. In woodland habitats they will be effective over more of the season, whereas in open habitats, they are more useful between mid-April and mid-September. Peak months for moth trapping tend to be July and August.

Traps should be set up during the final hour or so of daylight and left to run overnight or for several hours if you wish to stay and monitor the catch. Otherwise, you can simply return at first light to see what your trap has caught. Robinson traps are the only style of trap that will retain all of the catch but other designs such as Skinner and Heath traps still have good retention rates.

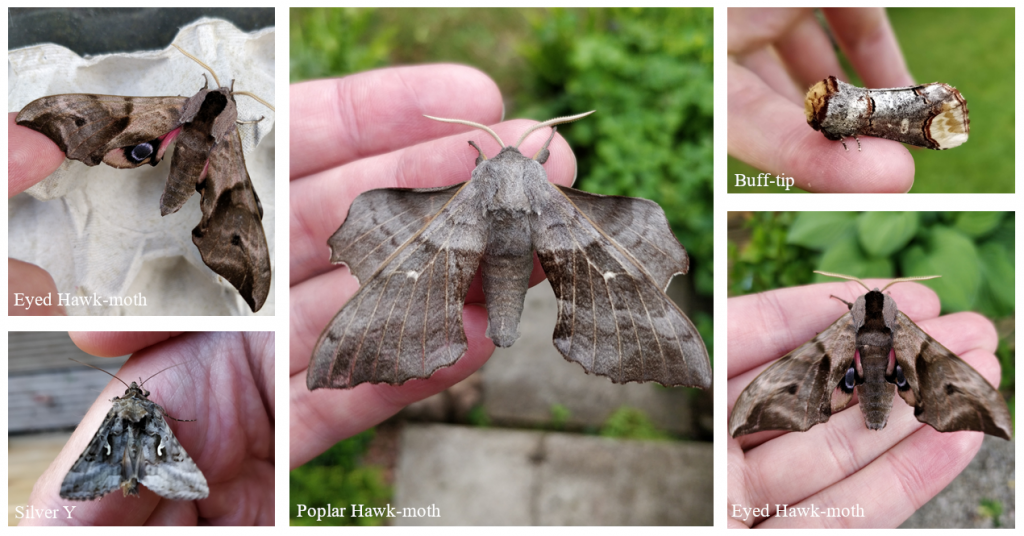
Some of the stunning species commonly arriving at moth traps in the UK. Images by O Haines.
Where should I put my moth trap?

For many people, particularly beginners, the easiest place to begin moth trapping is in the garden. Those with a wide range of flowering plants, especially species with scented flowers such as Jasmine, Honeysuckle, Buddleia and Fuschia, will be particularly attractive to moths. If you own a battery-powered trap (or a generator) then woodlands (broad-leaved or coniferous), wetlands and coastal areas are all good options; each are home to a different range of species.

Traps using a Mercury Vapour bulb, which are much brighter than Actinic ones, are particularly suitable for open habitats and in woodland rides, whilst Actinic traps work well under the canopy or in the understory.

Make sure that you get permission from the landowner of the place where you are trapping. If you wish to trap in a nature reserve, always contact the reserve manager for permission – usually they will be more than happy to give this, particularly if you provide them with the records of species caught afterwards.

What else do I need to know?

• Placing several egg boxes in the base of your trap provides captured moths with a textured surface and a variety of gaps and crevices to roost inside. It also makes emptying the trap easier in the morning, as egg boxes can be removed individually for checking.

• Placing a white sheet underneath often attracts moths that do not enter the trap itself.

• Having a selection of tubs or pots at the ready can be useful for temporarily holding individual moths for further examination. Pots with a magnifying lid, or a separate hand lens are useful for picking out the finer details, particularly on smaller specimens. When handling moths, be as careful as possible not to touch their delicate wings, as the oils on your hands can be damaging to them.

• When trapping in a garden, it is important not to run your trap on consecutive nights, as this increases the chance of the same individuals being trapped on a repeated basis. (In large gardens, this problem can be avoided if it is possible to release the moths at least 50m away from the trapping sight).

• Make sure that moths are released in an overgrown location to minimise the risk of them being predated by birds. If you wish to release them in the evening, cover the trap and place it in a cool, shaded location during the day.

• The weather can be extremely important when choosing which nights to trap. Warm, still nights with plenty of cloud cover are likely to produce the best catches. Strong winds, heavy rain and clear nights, particularly when there is a full moon, will be less productive. Nights with a steady drizzle, however, should not be avoided and can be surprisingly good for trapping.

• Records of your catches can be kept and submitted to your local county recorder, or uploaded on the National Moth Recording Scheme website. This information will help to inform conservation efforts for moths and their habitats at both local and national levels.

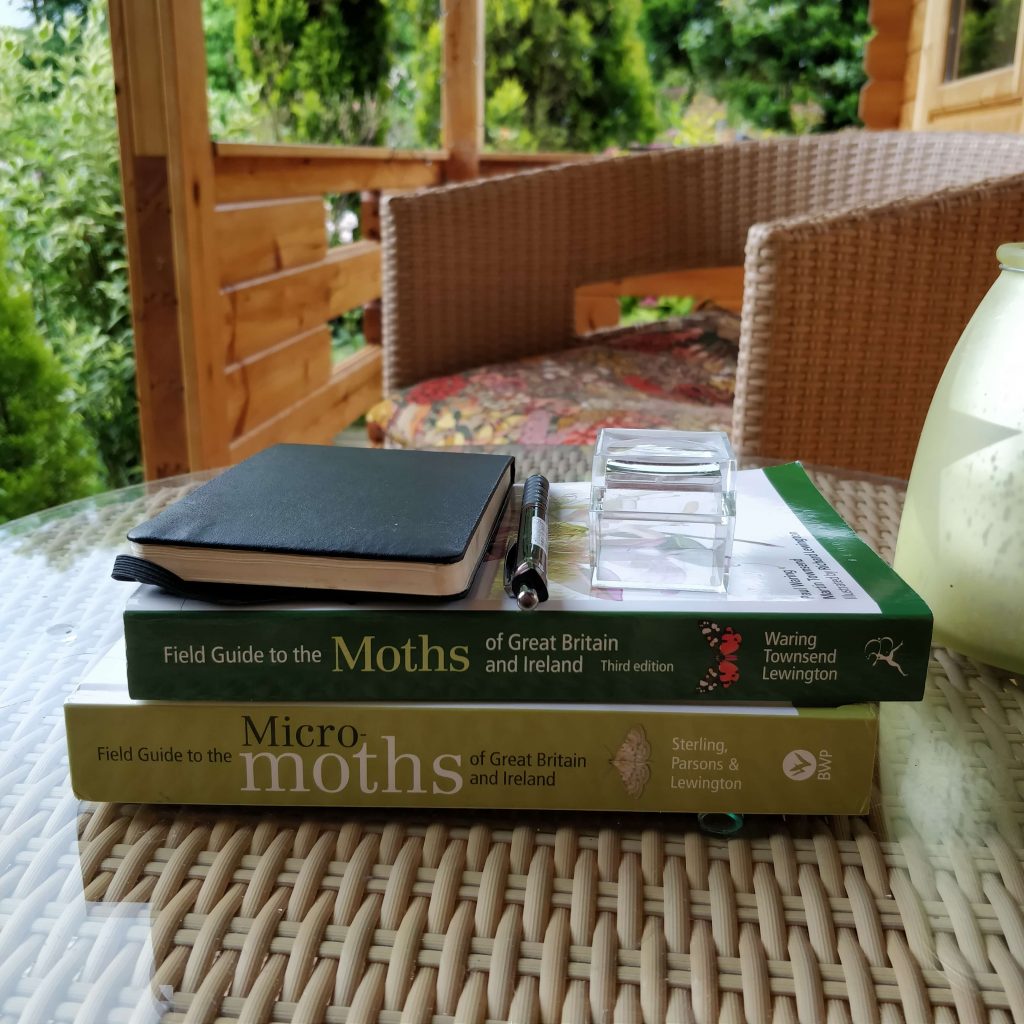
A good field guide is invaluable in identifying your catch. Image by O Haines.
Recommended identification guides

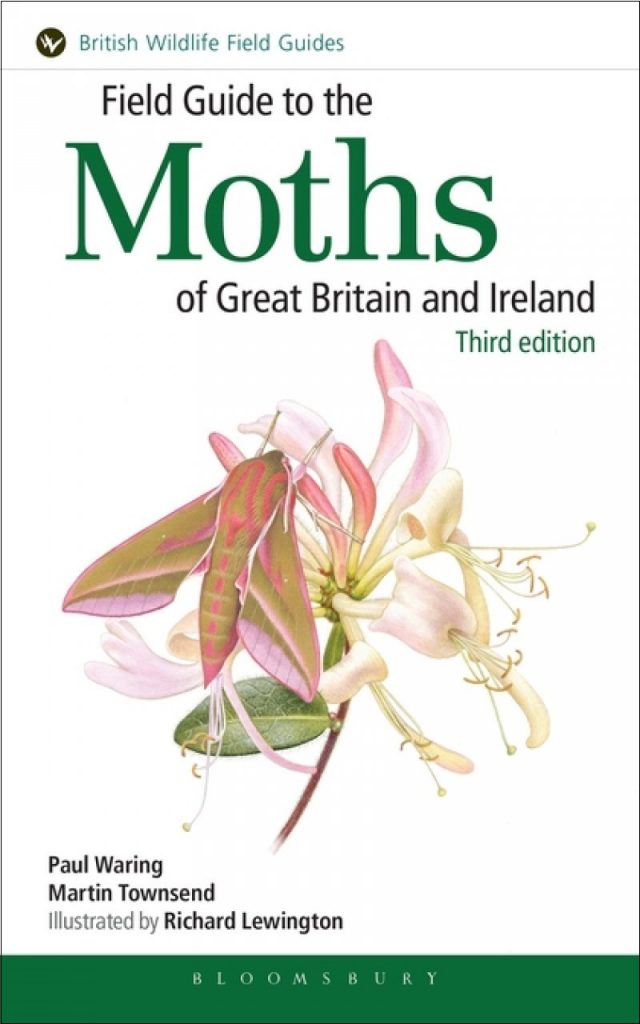
Field Guide to the Moths of Great Britain and Ireland
#243658

The third edition of this notable field guide has been fully revised, updated and restructured. Moths are illustrated in their natural resting postures, and there are also paintings of different forms, underwings and other details to help with identification.


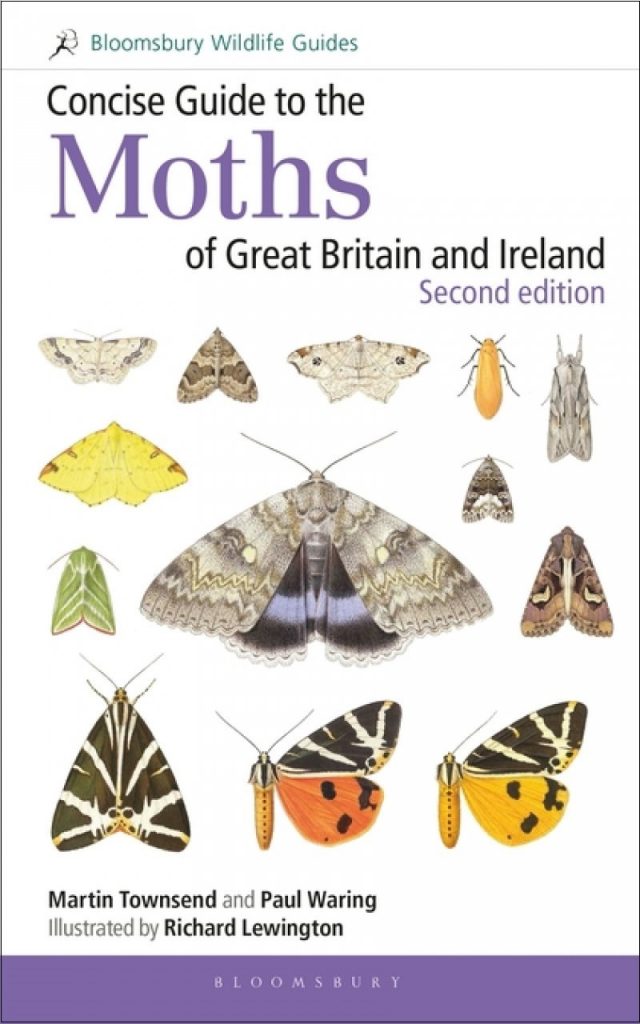
Concise Guide to the Moths of Great Britain and Ireland
#246490

This concise guide is a companion to the main Field Guide to the Moths of Great Britain and Ireland by the same expert authors, but is in a condensed form with artwork opposite the species descriptions and lay-flat binding for ease of use in the field.


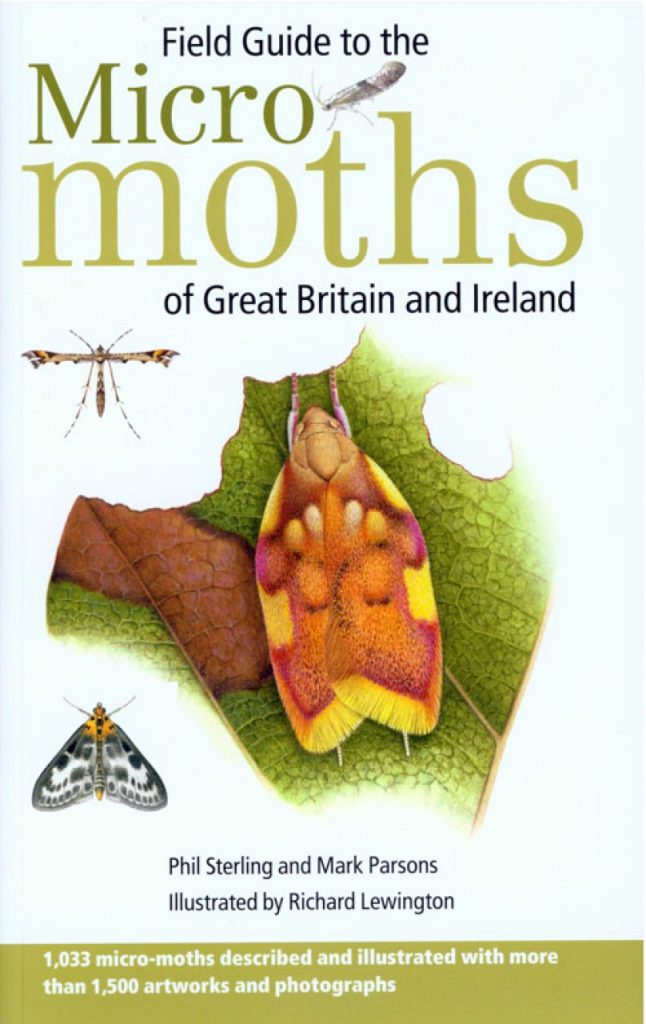
Field Guide to the Micro-Moths of Great Britain and Ireland
#243663

This ground-breaking book is the most comprehensive field guide to micro-moths ever published and for the first time makes this fascinating and important group of insects accessible to the general naturalist.

How to Clean a Nest Box

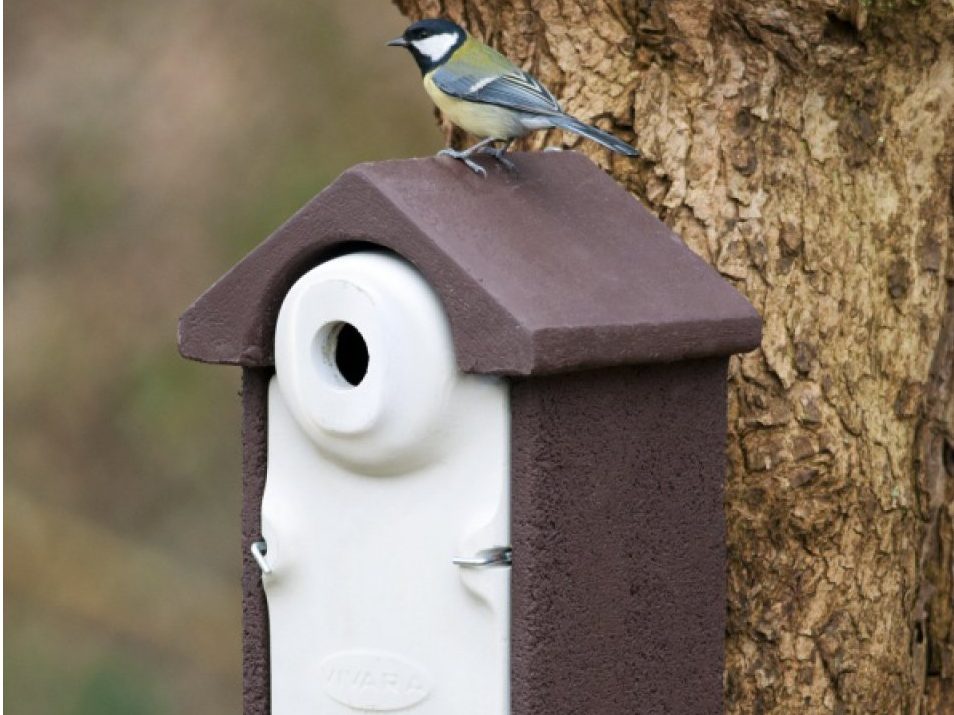
Over time nest boxes can become home to parasites such as lice, fleas and mites, so giving them a thorough clean at the end of each breeding season is good practice to ensure the health and safety of the birds nesting there. Removing old nest material also means that the following year’s birds can build their own nest as far as possible from the box entrance hole, thus reducing the risk of predation.

When to clean your nest boxes

The best time to clean out your nest boxes is in the autumn, after any young birds have fledged. Any time between September and January is fine, but bear in mind that birds who have raised a late brood may still be occupying boxes throughout September. By cleaning boxes during October or early November, you will also be able to leave them undisturbed for birds to roost in during the winter. Unhatched eggs may only be legally removed between 1st September and 31st January (or 1st August and 31st January in Scotland) and any eggs must be destroyed.

What you need

• Rubber gloves
• Stiff brush or nest cleaning tool
• Boiling water
• Wood shavings/clean hay (optional)

What to do

1. If possible, remove the box from the tree/wall so that you can safely work at ground level.
2. Wearing rubber gloves, remove old nesting material from the box, along with any unhatched eggs. Eggs must be disposed of – it is illegal to keep them. If possible, try to remove the nest in one piece, as it is fascinating to study the structure and to see the variety of materials that have been used in its construction. This is a great thing to do with children!
3. Use a nest cleaning tool or stiff bristled brush to clean out any remaining debris from the box corners.
4. Use boiling water to kill any lice, fleas or parasites. Don’t use soap, insecticides or flea powders as the residues of these can be harmful to birds. Leave the box open, preferably in a sunny spot, so that it can dry out.
5. Placing some clean hay or wood shavings in the base of the box may encourage mammals to hibernate or birds to roost in the box over winter. This is not essential, however, and any nesting birds arriving in the spring will bring in their own nest-building material.

Cleaning Bird Feeders

While you’re in the garden cleaning your nest boxes, why not take the opportunity to clean out your feeders and bird table too, ready for use over the winter. To thoroughly clean a bird feeder, first empty out all of the old food. Mix up a solution of animal-safe disinfectant in a bucket and soak the feeders for 10-15 minutes. Use a bottle brush to scrub them then rinse thoroughly in cold water. Leave feeders to dry before refilling.

Health and Safety

By following a few simple guidelines you can make sure that both the birds’ and your own health are not compromised. Always wear rubber gloves when cleaning out your nest boxes and feeders and make sure to wash your hands and forearms well with hot soapy water when you have finished. Take care not to breathe in any of the dust when emptying out the remains of old nests. Both nest boxes and feeders should be cleaned outside rather than bringing them into the house. If possible, nest boxes should be removed for cleaning, as dealing with boiling water while perched at the top of a ladder is not advisable. All brushes and equipment used for cleaning boxes, feeders and bird tables should be cleaned after use and should only be used for this purpose.


Visit nhbs.com to see our complete range of nest boxes, feeders and bird tables.

The NHBS Guide to Pond Dipping

For many naturalists, some of the most exciting encounters with wildlife as a child were around the edge of a pond, with a net in hand and a sampling tray filled with murky water. It is an excellent activity for children of all ages and is a great way to introduce them to a wide range of plants, insects and amphibians. It offers the opportunity to learn about food chains and food webs as well as discovering some of the amazing insect transformations during their lifecycles. For school groups, a pond dipping trip will satisfy many of the criteria for learning about life processes and living things, and it can also be used to provide inspiration for art, maths or English projects. Younger children will enjoy drawing or painting pictures of the creatures they find, as well as writing stories about their experiences.

Don’t forget that pond dipping isn’t just for children. For adults feeling out of touch with nature, it is an ideal way to reconnect. Ponds, pools and small lakes are also an integral part of our ecosystems and surveying the plant and animal diversity within them is an important way of assessing their health. If you are interested in volunteering as a pond surveyor, take a look at the Freshwater Habitats Trust website for more information.
What you need:

White tray – Rummage through your recycling bin for an old ice cream tub or place a sheet of white paper in the bottom of a baking tin. Our heavy-duty sampling trays come in three sizes and are sturdy enough to be carried full of water.
Net – For younger children a small aquarium net is ideal. For adults and older children, a larger pond net will allow you to reach further into the pond.
Collecting pots – Although it’s perfectly fine to observe your catch directly in the tray, individual pots, particularly those with a magnifying lid, are helpful for looking more closely at individual specimens.
•  Field guide – A guide to freshwater animals will help you to identify the species that you find in your pond. You’ll find a few of our favourites at the bottom of this post.

When and where to go:

May to August are the best months for pond dipping as this is when most creatures will be active and breeding. Any body of still water is suitable for studying, but make sure that you have permission to access the area and that the bank of the pond provides safe access to the water. Ponds with a variety of vegetation and open water are likely to support a high diversity of species.

What to do:
  1. Half fill a tray or bucket with water from the pond and set aside. Do the same with your collecting pots and/or magnifying pots (if using).
  2. Use a net to dip into the pond. Sweeping in a figure of eight will ensure that you retain the catch. Areas around the edge of the pond, especially near vegetation, tend to be the most productive. Take care not to scoop up mud from the bottom of the pond, as this will clog up your net and make it difficult to see what you have caught.
  3. Gently turn the net inside out into the tray. Once everything has settled, you should be able to view a fascinating selection of pond-dwelling creatures. A pipette can be used to transfer individual specimens to a magnifying pot for a closer look.
  4. Use a guide such as the Freshwater Name Trail or the FSC What’s in your Pond pack to identify the creatures found. For adults or older children, a more in-depth guide such as Ponds and Small Lakes or the Bloomsbury Concise Pond Wildlife Guide will cover a greater range of species.
  5. When you have finished, make sure to return all water and inhabitants to the pond. Trays, pots and nets should be rinsed and dried thoroughly before storage.

Pond dipping equipment and books:

At NHBS we stock both individual and class-sized pond dipping kits. These contain nets, trays, pots, magnifier and pipettes, as well as the excellent (and waterproof!) Freshwater Name Trail which will help you to identify the key animals found in UK ponds. Or why not choose from our top 10 list of equipment and books for pond dipping:

1. Pond Net
Made at our workshop in Devon, the Pond Net is a high quality, lightweight net with a removable bag for cleaning. The bag is made from woven 1mm mesh which is ideal for pond life. Also available in a telescopic version.


2. FSC Wildlife Pack: Ponds
Find out the names of the insects, plants and birds that you see with this wildlife pack. Features three of the FSC’s popular fold-out charts: Dragonflies and Damselflies, Freshwater Name Trail (classic pond dipping guide) and Commoner Water Plants (from lilypads to water mint). Also includes a card-sized magnifier.


3. Heavy-duty Sampling Trays
These strong white trays are ideal for pond dipping as they are robust and stable enough to be carried when full of water. Available in three sizes.


4. Bug Pots (Set of 10)
This set of ten Bug Pots is perfect for pond dipping, as well as general nature studies. Each pot has a 2.5x magnifying lid and a measurement grid of 5mm squares on the base. They are ideal for storing and observing specimens.


5. Freshwater Life: Britain and Northern Europe

A beautifully illustrated guide to the wide variety of species found in rivers, streams, lakes and ponds in Britain and Europe. Freshwater Life describes and illustrates over 900 species of plant and animal visible with the naked eye. An easy-to-use key guides the user quickly to the correct species without using complex terminology.


6. Economy Telescopic Pond Net
With an aluminium telescopic handle and knotless fine mesh net bag, this pond net will not harm specimens and is guaranteed not to run if holed. Not suitable for heavy-duty use.


7. Ponds and Small Lakes: Microorganisms and Freshwater Ecology

Suitable for adults and older children, this book introduces some of the less familiar and microscopic species found in ponds such as diatoms, desmids and rotifers. Along with excellent photographs, the book provides useful identification keys so that readers can identify, explore and study this microscopic world.


8. Pipettes
Small pipettes are extremely handy for sorting through and picking up tiny creatures found when pond dipping. They can also be used to transfer samples to microscope slides to look at the microscopic specimens found.


9. 125ml Collecting Pots 
These sampling containers are made from see-through rigid polystyrene and have secure screw-on lids. They are recommended for liquids and so are ideal for keeping specimens when pond dipping or rock pooling. Available either singly or in packs of 10, 30 or 100.


10. Bloomsbury Concise Pond Wildlife Guide

This concise guide is packed with information on more than 190 species of animal and plant that inhabit ponds, pools and small lakes in northern Europe. Among the fascinating animals featured are freshwater sponges, hydras, water bears, worms, leeches, water snails, dragonflies and damselflies, frogs and toads, bats, fish, birds, water voles and otter.


Creating your own pond:

During the lockdown imposed by Covid-19, the UK and many other countries have seen a rapid growth of interest in nature, especially found in gardens. It is widely considered that the best way to encourage and benefit wildlife in your garden is by adding a pond. There are many books to help in this process, such as Making Wildlife Ponds, The Wildlife Pond Book, or The Pond Book by Pond Conservation.

30 Days Wild Activities – Bat Walk

The hours around sunset are the best time to see and hear bats. Image by O Haines.

Looking for some inspiration for activities during 30 Days Wild? Why not take a stroll around sunset and see if you can find some bats. If you have a bat detector then you can also listen to the ultrasound calls they produce and have a go at working out which species you’re seeing and hearing. Plus, an evening walk also gives you a chance to see what other nocturnal animals are out and about – owls, foxes, badgers and toads are all more active at night and, if you’re lucky and in the right place, you might also be fortunate enough to hear a Nightjar.

 What you need:
The Echo Meter Touch 2 connects directly to your phone or tablet.

• Bat detector – For beginners, a heterodyne detector is a great choice as they are economical and easy to use. Simply tune it to the frequency that you want to hear and then listen through the speaker or with a pair of headphones. If you want something a little more advanced, the Echo Meter Touch 2 connects directly to your phone and lets you view and record the bat calls, as well as suggesting the most likely species that you’re listening to. (If you don’t have a bat detector, you can still go for a walk at dusk and look for bats flitting beneath the trees and across the surface of the water).
• Torch – Not for seeing the bats but for finding your way safely in the dark!• Warm clothing and sensible footwear – Make sure you have enough warm clothes for when the temperature drops after sunset, and footwear that’s suitable for the chosen terrain. A thermos with a hot drink is also a good idea!
• Guide to bat frequencies – If you’re less familiar with bat detecting then a list of the frequencies at which you are most likely to receive the strongest signal for each species is a good thing to have with you. This simple pdf can be printed out to carry with you, or why not take a look at this guide from the Bedfordshire Bat Group for more detailed information on identifying bats using a heterodyne detector. The FSC Guide to British Bats is also a good choice and provides lots of information on identifying bats in flight.

When to go:

Bats are most active from April to September and the best time of day for seeing and hearing them is around sunset. If you’re walking to a location where you will be using your bat detector or hoping to see bats, then make sure you set off with plenty of time to get there before the sun sets. And don’t forget your torch – even though it will be light when you set out, you’re likely to need it on the way home.

Where to go:
Woodlands, parks and gardens are all good spots to look for bats. Image by O Haines.

Parks and woodland, especially those with aquatic areas such as ponds and lakes, are great places to find bats. If you can find a walk that covers a variety of habitat types then this will increase your chances of seeing/hearing more than one species. Make sure that the route you choose is safe and accessible and that you know where you’re going – places can look very different at night than they do in the day and it’s easy to lose your sense of direction if you’re not on a clearly marked path.

If you don’t want to venture far from home, then you can also look and listen out for bats in your garden. Near hedges or trees is usually a good place to focus your attention.

What to do:
The Magenta Bat 5 is ideal for bat walks

Once sunset is approaching, simply turn your bat detector on, keep as quiet as you can and watch and listen for any bats. The earliest species to emerge tend to be the pipistrelles and noctules. Of these, common and soprano pipistrelles are the most frequently seen. For this reason, it is worth setting your detector to 45 or 55kHz (or switching between the two periodically) to see if you can pick up any sounds. If you can see bats flying but don’t hear any sounds at these frequencies, then try scanning through all frequencies slowly to see which produces the most significant and clear response.

Daubenton’s bat. Image (a).

If you are near water and see bats skimming the surface, then these are likely to be Daubenton’s bats. As with the common pipistrelle, Daubenton’s bats produce the strongest echolocation signal at around 45kHz. (They also tend to emerge later than pipistrelles, so you may have to wait until later in the evening to catch a glimpse of these!).

Once you become used to using your detector, you will become accustomed to the different types of noises produced by different species and, in combination with where and how the bats are flying, will become more confident in deciding which species you are looking at and listening to.

Find out more:

If you want to find out more about bats, the Bat Conservation Trust website is a great resource and offers information on all 18 species of bat found in the UK. They also provide a list of local bat groups and coordinate the National Bat Monitoring Programme. Surveys cater to different levels of experience and knowledge and are fun and rewarding to carry out. Some don’t require any equipment, so you can take part even if you don’t own a bat detector.

Head over to nhbs.com for our complete range of bat detectors and take a look at our blog post for more tips for beginners

The RSPB website is a great place to hear common bird songs and will help you to distinguish between different types of owls. The most common species you are likely to come across are Barn Owls and Tawny Owls. You can also hear an example of a Nightjar call on the website. 

Further reading:

A Guide to British Bats
#129064

This fold-out guide includes 16 species of bats that live and breed in Britain and has two parts: a guide to identifying bats in flight using bat detectors, flight patterns, size, habitat and emergence time after dusk; and a key labelling the different body parts of a bat for identifying them in the hand.


The Bat Detective
#79534

This book takes the reader through both the theoretical and practical aspects of the use of the bat detector and covers all aspects of bat identification in the field, including `jizz’, flight style, foraging behaviour, roost finding, echolocation, and basic survey technique. As each topic is explained, references are given to the relevant tracks on the CD.

British Bat Calls
#181961

Covers topics such as the properties of sound; how bats use sound; bat detection methods; recording devices; analysis software; recording techniques and call analysis. For each species found in the British Isles, information is given on distribution; emergence times; flight and foraging behaviour; habitat; and echolocation.


Image credits:
(a) n51_w1150 from the Biodiversity Heritage Library via Flickr

Gardening for Wildlife: Providing Food

This is the first in our two-part series, Gardening for Wildlife, where we look at how to attract wildlife to your garden, including creating suitable habitats and providing food sources. Spring is blooming all around us, with primroses, wood anemones and blackthorn flowering now and foxgloves on their way. Birds are building nests ready for eggs and the sky will soon be full of wheeling summer migrants such as house martins and swallows.

Wood anemone. Photo: S. Webber

With many of us being confined to our homes, those of us lucky enough to have a garden or outdoor space will probably be spending a lot of time outdoors. Being surrounded by nature is a fantastic way to boost our mental wellbeing, and gardens can be an invaluable resource for wildlife. By following some basic principles, you can turn your garden into an oasis for wildlife and enjoy some brilliant wildlife spectacles up close.


Planting for wildlife

Attracting insects to your garden is one of the primary ways in which you can help wildlife and also increase productivity of plants and trees. You can provide vital food resources for bees, butterflies, nectar-drinking moths and other insects by planting pollinator friendly plants with high levels of pollen and nectar. Lavender, verbena and buddleia are well known for attracting bees and butterflies, but other plants can be equally important, such as goldenrod for hoverflies and late flowering plants such as ivy.

Peacock butterfly on buddleia. Photo: Andrew Fogg, www.flickr.com

The Royal Horticultural Society has a fantastic database of plants for pollinators so that you can choose plants that will flower across the seasons to provide a year-round resource for pollinating insects. Increasing the insect diversity in your garden will also encourage insectivorous birds and mammals into your garden. 


Wildflower borders and meadows

Another option is to create a wildflower border by scattering either annual or perennial wildflower seed mixes on to bare soil. It’s a low maintenance option that will provide invaluable habitat for insects. The UK has lost 96% of its species-rich meadows so these are a beautiful and valuable addition to the garden and broader landscape. It’s best to choose a mix of native plants such as poppies, cornflowers and corn marigolds (annual) or ragged robin, buttercups, yellow rattle, knapweed and grasses (perennials). If you wish to create a permanent area of meadow grassland with perennials then the RSPB has a guide to creating a wildflower meadow. Wildflower seed mixes can be ordered online.

Wildflower meadow. Photo: cristina.sanvito, www.flickr.com

Seeds and fruit

It is also good to think about plants and trees that will produce fruits and seeds for birds. Native species such as hawthorn, elder, and rowan provide a fantastic autumn feast of berries, and if you leave the heads on sunflowers after they have flowered, goldfinches can take the seeds. Fruit trees such as crab apple offer blossom for insects and birds in the spring, and fruit for species such as blackbirds in the autumn. The wild type native trees and shrubs usually attract more birds than some of the cultivars, so they are worth seeking out. Most of these plants and trees can be ordered online.

Feeding birds and mammals

Finally, providing supplementary food for birds and other wildlife can help increase their overwinter survival prospects and give you the most dazzling display of wildlife behaviour.

Greenfinch and goldfinches on a seed feeder. Photo: Nick Holden, www.flickr.com

Investing in a wide range of bird feeder types and food sources will ensure the most diverse range of birds visit your feeders. Peanuts are very popular with blue and great tits, sunflower seeds will draw in finches such as chaffinches, greenfinches and goldfinches and nyger seed is a favourite of siskins. During the winter birds need extra calories so suet balls can be supplied in feeders, or apples left out for ground feeders such as blackbirds and redwings. In addition to hanging bird feeders, a bird table will offer space to ground feeders such as robins and chaffinches. Ensure that feeders are placed at height and away from windows, and not too close to cover, to avoid sudden predator attacks. Birds and mammals also need fresh water so offering a water bath with sloping sides is important, as well as providing a fascinating focal point for watching your garden wildlife.

Hedgehog. Photo: milo bostock, www.flickr.com

Gardens have been shown to be an increasingly important habitat for hedgehogs and with their numbers in steep decline, feeding hedgehogs can give them a much needed extra food resource. Leaving food such as tinned dog or cat food (excluding fish flavours) or cat or dog biscuits will encourage hedgehogs to visit your garden, particularly if there is access from neighbouring gardens via a ‘hedgehog highway’ hole in the fence. Hedgehog feeding stations or nest boxes can provide a useful way of protecting the food from other garden visitors.

Watching wildlife

Having attracted wildlife to your garden, there are a range of ways you can get fantastic views up close.  Binoculars give you great views of wildlife that is further away, but with close focus distances now much improved, they also offer a great way of magnifying insects. Read our blog post to find out How to Choose a Pair of Binoculars. Alternatively trail cameras can be used very effectively in gardens to record garden visitors. They are standalone weatherproof cameras that use passive infrared to detect passing warm-bodied animals and take either still photographs or videos. With options including the Bushnell NatureView Live View, that has interchangeable lenses for excellent close up feeder shots, and the Browning Recon Force Edge that has amazing 60fps video footage. For more information on trail cameras, see our blog post on How to Choose a Trail Camera.

Recommended Reading

Wildlife Gardening
#244291

If you want to attract more bees, birds, frogs and hedgehogs into your garden, look no further than this. Kate Bradbury offers tips on feeding your local wildlife and explains how you can create the perfect habitats for species you’d like to welcome into your garden.

Wild Your Garden
#249932

This shows you how to create a garden that can help boost local biodiversity. Transform a paved-over yard into a lush oasis, create refuges to welcome and support native species or turn a high-maintenance lawn into a nectar-rich mini-meadow to attract bees and butterflies.


The Garden Jungle
PB #249709

The Garden Jungle is about the wildlife that lives right under our noses, in our gardens and parks, between the gaps in the pavement, and in the soil beneath our feet. For anyone who has a garden, and cares about our planet, this is essential reading.


Guide to Garden Wildlife
#246618

Even the smallest garden can be an important haven for wildlife, and this authoritative guide enables everyone to explore this wealth on their back doorstep. It covers all the main animal groups – including pond life – likely to be found in a garden in Great Britain and Ireland.


Butterfly Gardening
#226117

This second guide in the Gardening with Nature Series gives step by step advice on how to encourage butterflies to your garden. Jenny Steel describes the importance of providing shelter and avoiding the use of pesticides, with lists of suitable nectar and larval plants, and their maintenance.


Making Garden Meadows
#212003

If you have ever contemplated a wildflower meadow area in your garden, Making Garden Meadows informs you how to create one and how to look after it to ensure its continued beauty through many years. Illustrated with photographs taken in her own garden, Jenny Steel guides you simply through the process to help you provide a beautiful area full of wildflowers and teaming with wildlife.

Wildlife Gardening Products


Defender Metal Seed Feeder
#238813


Challenger Peanut Feeder
#238828


Defender Metal Niger Feeder
#238816


Echoes Bird Bath
#195520

Our ten favourite spring garden activities for children

This spring is destined to be a different and difficult one for most of us. Some things, however, remain the same – the leaves and buds on the trees are unfurling, the flowers are blooming, and the outside world is gearing up for a new year of growth and renewal. If you’re lucky enough to have a garden, then getting the children outside each day is a great way for them to burn off some energy and to get some fresh air and vitamin D.

With this in mind we have put together ten of our favourite garden activities, most of which are suitable for children (and adults) of all ages – although supervision may be required for the younger ones.

  1. Learn about the insects and bugs in your garden

Insects and bugs are fascinating to children of all ages. As soon as the weather warms up in spring, the garden fills with the buzzing of flies, bees and wasps, whilst the soil teems with beetles, worms and other creepy crawlies. A butterfly or sweep net is ideal for catching flying insects and those in the long grass, while a pooter can be used to pick up tinier specimens. Or simply get down on the ground with a hand lens and see what you can find. There are lots of great field guides that will help you to identify your specimens. FSC guides, such as the Woodland Name Trail and Guide to the Butterflies of Britain and Ireland provide a great starting point. Or, for a more in-depth investigation, the Guide to Garden Wildlife covers not only insects and bugs, but also birds, mammals and amphibians. It also provides suggestions for some great nature-related activities.

  1. Install a nest box (and watch the eggs hatch from the comfort of your home)
Image by gordon.milligan

It’s never too late to install a nest box. Even in late spring you may manage to entice a breeding pair of birds in time to lay a late clutch of eggs. At the very least, you will provide a useful winter roost space and the box will be ready for the breeding birds next year. You can even equip your nest box with a tiny camera which will allow you to watch all the nesting, rearing and fledging action from the comfort of your home. Kits are available which contain everything you need to get started; choose from wired, wireless or Wi-Fi options. See our blog post on nest box cameras for more information.

  1. Learn to identify plants

Rummage around in the wilder parts of your garden and you’re likely to find a wide range of plants that your little ones can study and try to identify. Even in the most manicured of outdoor spaces, you’re sure to find some ‘weeds’ that will provide a useful starting place. This is a great way to learn about common and Latin names and to study the different parts of flowers. The Pocket Guide to Wildflower Families will help you to identify the family to which your flower belongs, and the Collins Wild Flower Guide is a beautifully illustrated guide for those wanting a more in-depth look.

  1. Watch (and listen to) the birds
Image by Airwolfhound

Get to know the birds in your garden by installing a feeder. During the spring there should be plenty of wild food sources for them to use, but protein-rich foods such as black sunflower seeds, mealworm and high-quality seed mixes will provide a valuable addition to their diet. (Avoid feeding fat balls and peanuts at this time of year, as they can be harmful to young birds.) If you’re not sure what kind of bird you’re looking at, the RSPB website has a great identifier tool which includes information on 408 species found in the UK. Once you’ve identified your bird, the website also allows you to listen to its song, helping you to further improve your identification skills.

For a fun garden game, why not play bird bingo? Simply draw a 3×3 grid on a piece of paper, and write the name of a common garden bird in each square. Put a cross in the square when you spot the bird – the winner is the first to cross off all nine squares.

  1. Grow something pretty or edible

If you have space, now is a great time to sow some seeds. Sunflowers and sweet peas provide a great splash of colour in the summer and will provide food for birds (sunflower heads) and pollinators (sweet peas). Peas and beans are both easy to grow in a small space and are happy in pots. Strawberries and bush varieties of tomatoes can be grown in hanging baskets.

Making seed bombs is another excellent activity to do with children and, when planted in the garden, will provide much needed flowers for pollinating insects. The Wildlife Trusts have a recipe that’s simple to make, along with a list of recommended flower seeds to include.

  1. Be a weather watcher
Image by Paper of Light

In most temperate countries (and particularly in the UK), the weather is constantly changing, making it a fascinating thing to track and record. A weather diary is a great way to do this. You can include as much information as you like, or keep it simple with just pictures for the younger children. You could even make a weather board, where the day’s weather is displayed every day. Wind speed, temperature and humidity can be easily measured using an anemometer, and rainfall with a simple rain gauge. (For more economical options, use a large yoghurt container with measurements marked on the side as a rain gauge and a piece of lightweight fabric tied to a pole to track the direction of the wind).

Clouds are also endlessly interesting – learn about the different types with Weather WizKids which has lots of information and explains how they are formed, why they look the way they do and how we can use them to predict the weather. Why not also investigate some of the old-wives tales pertaining to the weather? For example, is it really true that ‘swallows high, staying dry; swallows low, wet will blow’, or ‘Red sky at night, shepherds’ delight, red sky in the morning, shepherds’ warning’?

  1. Make a pond
Image by Alex Thomson

Recent surveys have shown that some amphibians, such as frogs, are now more common in garden ponds than they are in the wild. When planted with a variety of submerged and emergent plants, a pond will provide a complex environment with a variety of micro-habitats, and is also an attractive feature for the garden. Even in a small space it’s easy to use a bucket or other container to create a small aquatic environment which will provide valuable habitat for amphibians, insects and lots of other species. Take a look at the Wildlife Trusts website for a step-by-step guide to making a garden pond (including a handy list of suitable aquatic plants) or this RSPB page for advice on making a mini pond from an old washing-up bowl. Always ensure that younger children are supervised around water.

  1. Weave with nature

Weaving with natural materials is a fun activity and a great choice for several reasons: it is cheap to do and the results, while temporarily beautiful, can be composted, making it the ultimate in sustainable art. To begin, make a simple frame from four twigs, held together at the corners with a small amount of natural twine. Wind more twine from side to side around the frame leaving gaps between each winding, and then repeat in the other direction. Collect a wide selection of leaves, twigs, weeds, flowers, feathers and grass and weave into your frame in a pattern of your choice. For the best results, try and include as many different colours and textures as possible. Hang your masterpiece inside or in the garden to enjoy until the colours fade, and then throw it on the compost heap or in your garden waste bin.

  1. Eat some weeds

Did you know that lots of the weeds in your garden are actually edible? And what’s more, many contain higher amounts of trace elements like iron than their supermarket equivalents such as spinach and kale. Nettles are extremely common, very easy to identify, and can be made into a tasty soup (don’t worry, they lose their sting as soon as they are cooked). Similarly, dandelion leaves, fat hen, hairy bittercress and chickweed are prevalent in most gardens and can be used as salad greens. Children will love knowing that they have picked some of their meal for free, and that they are eating the garden weeds. If you’re unsure about what you’re picking, there are lots of helpful guides and images on the internet. Or you can invest in a book such as Food for Free, Foraging, or the compact and economical FSC’s Guide to Foraging.

  1. Draw from nature
Image from the Biodiversity Heritage Library

Sketching from nature was once a vital part of the naturalist’s skill set. Accurate drawings of specimens, alive or dead, played a vital part in classifying and sharing information about new species. Although this process has largely been replaced by photography, the act of putting pencil to paper and studying a specimen closely enough to draw it accurately can provide an excellent opportunity to study its structure and finer details. Flowers, plants and feathers are ideal starting points as they won’t fly or scuttle away; but insects, birds and other animals can also be fun to try. Keep notes of when and where your drawings were made and, over time, they can form the basis of a wonderful nature journal.

During these troubling times, we hope you can find inspiration in nature and we wish you all the best of health.

For a great selection of garden wildlife books and ID guides, take a look at the Garden Activities for Children collection at nhbs.com.

NHBS Guide: Where to Hang and How to Maintain your Bat Box

Natural roosting sites for bats are in decline due to changes in building standards and countryside management practices. Installing a bat box is a simple and affordable way of providing much needed roost space for a variety of species and now is the ideal time to install one, before bats fully emerge from hibernation. However, placing your bat boxes in the correct location and at the correct height is essential to encourage bats to occupy them. With this in mind, we have put together some answers to the most frequently asked questions about bat boxes – covering where and when to put up your boxes, cleaning and maintenance, and the legalities of checking whether they are occupied.

Which bat box should I purchase?

Bat boxes can be placed in trees, on walls and on or in the brickwork of buildings. To help you choose the most suitable bat box based on where you want to locate it, take a look at our three-part series designed to help you make the right choice:  

Top 10 Bat Boxes for Trees and Woodland

Top 10 Bat Boxes for Walls and Fences 

Top 10 Bat Boxes for New Builds and Developments

When is the best time to put up a bat box?

Bat boxes can be installed at any time of year, but they are more likely to be used during their first summer if they are put up before the bats emerge from hibernation in the spring. If you are installing bat boxes as part of an exclusion project from a building, it is best to erect the boxes four to six weeks before the exclusion. 

Schwegler 1FF Bat Boxes

Where should I hang my bat box?

All bat boxes should be positioned at a height of 3-6 metres (the higher the better) in an open, sunny position (6-8 hours of direct sunlight, or in a location where it receives the morning sun if this is not possible). Try to install the bat box where it will not be disturbed by bright lights at night such as porch or security lights. 

The most common location to hang a bat box is on a tree using a strong nail that is at least 85 mm in length. It is important to use aluminium nails, as these will not damage a chainsaw (or chainsaw user) should they be left in the tree when it is felled. For more details on how to hang your bat box to a tree, wall or fence, please read our blog on where to hang and how to maintain your nest box, which, although mainly focused on bird boxes, is equally relevant for bat boxes. 

How do I check whether the box is occupied?

Many bat boxes have an opening at the bottom and do not require any maintenance as the droppings will simply fall out of this space. If cleaning is required it is essential that you ensure that the box is not occupied before carrying out any maintenance. Once bats have inhabited a roost site they may only be disturbed by licensed bat workers. If you are unsure whether your bat box is occupied the best way to check for box occupancy is to observe the box at dusk (15 minutes after sunset for around 30 minutes) to watch for any bats leaving. Additionally, you can look under and nearby the box for guano (bat droppings). If there are bats present, wait until later in the season and then check again. It’s also a good opportunity to use a bat detector to identify the bats in your box – take a look at our guide on bat detecting for beginners.

Large Multi Chamber Bat Box

How do I maintain my bat box?

The best time to clean the majority of bat boxes (those suitable for summer roosts) is during the autumn or winter. Once you have ensured the bat box is not occupied you can open the box and clean out any droppings. Whilst you are cleaning the bat box it is a good idea to look for any damage, as this may mean it is unlikely to be used. The most likely damage will be broken seams around the roof, because the constant heating and cooling during the day can warp the wood slightly. To repair this, we would recommend using a roof sealant. 

Head over to the NHBS website to browse our full range of bat boxes. If you have any other questions or would like further advice, please get in touch with our team of Wildlife Equipment Specialists (email: equipment@nhbs.com or phone +44 (0)1803 865913).