Cambridge University Press (CUP) published its first book in 1534, making it the world’s oldest publisher. Since then it has been at the forefront of scientific research, publishing ground-breaking works such as: Newton’s Principia Mathematica and Noam Chomsky’s Language and Mind.
NHBS is pleased to announce Cambridge University Press as our Publisher of the Month for March. We are offering up to 40% discount on a selection of their new and bestselling books throughout the month; making this a perfect opportunity to explore their vibrant publishing history.
Just Published and Forthcoming Highlight
From accessible books on climate change, works on barn owl ecology and textbooks on the fascinating subject of mycology, there are plenty of forthcoming books for the beginning of 2020 to augment their recent bestsellers in conservation, ecology and natural history.
Save 40% on classic Cambridge University Press books in our backlist bargains sale, as well as some recent bestsellers on price offers until March 31st.
Habitat Suitability and Distribution Models: with Applications in R
Paperback| September 2017| £35.99£39.99 Introduces the key stages of niche-based habitat suitability model building, evaluation, and prediction required for understanding and predicting future patterns of species and biodiversity
Rewilding
Paperback| January 2019| £34.49£37.99 The latest addition to theEcological Reviews Series, Rewilding discusses, analyses and summarizes the conservation concept of rewilding.
Wood Ant Ecology and Conservation
Hardback| July 2016| £37.99£62.99 Get a great deal on this study of The Wood Ant – a keystone species in woodland ecosystems.
Cambridge University Press is a contributing publisher to the Gratis Book Scheme.
One of the most rewarding CUP-NHBS collaborations has been in the form of the Gratis Books Scheme. Since 1999, with support and assistance from the British Ecological Society, this scheme has been sending free copies of books to conservationists in developing countries who would otherwise be unable to obtain them.
Mike Potts’ career as a wildlife cameraman took him to many of the world’s most spectacular locations and involved filming with Sir David Attenborough.
What made you pursue a career as a wildlife cameraman? From an early age I developed an interest in natural history and photography, particularly of birds. I was fortunate in being able to turn a passionate hobby into a profession from early beginnings with the RSPB Film Unit.
How did you manage a work-life balance when your work took you far away for significantly long periods?
My wife, although working herself, was able to run things at home in my absence.
Today, there is GPS and the internet: 30 years ago that technology wasn’t as advanced. What difficulties did that present and how were they overcome? (I’m trying not to say, did you ever get ‘lost’?)
In the early years of my career, before mobile phones, we would often be out of contact for many days, or weeks, when out in the field camping. On some trips, we did have the use of the early satellite phones, so at least there was some contact. Having a local biologist that was familiar with the terrain was essential, otherwise getting lost was a real possibility. It did happen in Australia when I was lost on my own in a tropical forest for several hours, quite scary!
Was there one exceptional location you filmed in that stood out from all the rest?
Alaska particularly has many special memories. I spent over a year there working on three 50 minute programmes. If I had to choose one location, it would be the McNeil River in SE Alaska; here brown bears gather in summer to feed on salmon moving upriver to spawn. Sometimes, over 50 bears can be seen in the river, and standing shoulder to shoulder use various different techniques to capture the fish that are so essential to put on fat for their winter hibernation.
What does ‘Untangling the Knot’ in the title of your book refer to?
Some years ago I worked on a film called ‘Untangling the Knot’, which was about the bird, the Red Knot. It has a long migration from its wintering grounds in South America to breeding grounds in the high Arctic of Canada. So ‘Untangling the Knot’ was the story of the feeding habits, complex migration routes, and remote breeding areas of these great travellers.
If someone was inspired to pursue a career filming wildlife, what advice would you give them to get started?
When I started my filming career in 1978 everything was shot on film, which was expensive, as was the equipment to shoot it with. The only way to prove your ability was to shoot a sequence and try to get it seen by wildlife producers at the BBC Natural History Unit or the RSPB film Unit. There were not any wildlife film courses back then. Now there are many more people interested in becoming wildlife cameramen, so the competition is great. What advice would I give? One advantage now with the proliferation of video cameras at low cost is that it is possible to go out and shoot a sequence at no great expense. Choose a subject that you have good knowledge of and try to shoot it differently from what has been done before, then get it seen by someone within the business. If you have access to a scarce or unusual subject, even better, especially if it is on your doorstep (always check licence requirements). You can of course try and get a placement on a ‘wildlife film making’ course but that doesn’t mean a job at the end of it. Virtually all cameramen are freelance, so work is never guaranteed. Good luck.
Can you recall any one moment or experience in your career that encapsulates all that being a wildlife cameraman involved?
I think the most rewarding experience was filming Birds of Paradise in New Guinea. Sitting in my tiny mosquito-filled hide in the pitch-black, 150 feet off the ground, I wondered quite what I was doing there. Then as the dawn began to break and the chorus of tropical birds started I knew why. Shortly afterwards as the first Greater Birds of Paradise appeared the excitement was overpowering. Several males with their golden plumes were bouncing around just 60 feet in front of me, courting the growing number of females nearby. This made all the 3.00 am starts, the long walks through the forest and the exhausting tree climbing worthwhile.
What are your current plans and are there any future projects you can tell us about?
I am now retired from filming, and although I have been trying to get a film off the ground on the Albatross, it is difficult to get the substantial funding for these projects. For the last 2 years I have been writing the book and having exhibitions of my photographic work.
Mike has spent more than 30 years as a wildlife cameraman. A highlight of that career was filming the Birds of Paradise and Bowerbirds with David Attenborough.
We recently became aware of a fantastic series of manuals that give readers instructions on how to clean, prepare, and articulate animal skeletons. We caught up with the author, Lee Post, a self-professed bone man, to ask him more about these guides and his work.
Hello Lee, thanks for the opportunity to ask you some questions. How does one become a bone builder? Was this always something you were interested in or did you fall into this more or less by accident?
As a child, growing up, I was a classic nature nerd. My room looked more like a Victorian curio cabinet than some place someone might actually sleep. Anything related to the animal kingdom was something I was interested in collecting. The ultimate treasures were bones and skulls. But I had never thought about articulating anything myself. My passion for articulating skeletons grew out of a move to a small town in Alaska that had a very progressive little natural history museum. I had a part-time job in the winter and volunteered the rest of my time at this museum. I was given an opportunity to research and articulate a 17 foot Stejnegers Beaked Whale the staff had collected and cleaned. That was my first winter project. My research into how to articulate that skeleton came to a lot of dead ends and some questionable advice. I could find nothing in print on building whale skeletons. With a background in bicycle mechanics and carpentry, and a lot of suggestions from local craftsmen and women, I got that skeleton together, and from then on I never stopped working with bones. Collecting, cleaning, building, illustrating, curating. It was being in the right place at the right time under the right circumstances. In other words, a total accident.
What made you decide to write manuals on constructing and articulating skeletons?
For years I’d been cleaning and articulating a skeleton or two each year. This led to a 3-year Pratt Museum, Homer High School collaborative project, in which I worked at the school with all kinds of interested students. We articulated a 41 foot long sperm whale in the school, and the
following year students worked on about a dozen other skeleton projects, ranging from sea otters to a moose, to porpoises, to a porcupine. The exhibited work they did in their school was open to the public over the following couple of summers. Teachers and educators from lots of places that saw those exhibits wanted to know how they could do similar projects with their students. I had kept a notebook on almost every skeleton I worked on and from those made some crude, hand-lettered, illustrated manuals on how to prepare and build animal skeletons. My day job was working in a bookstore, and there were no books in print on working with bones. This was 20 years ago. Later, an intersection of those hand-printed, photocopied notes, and me, and a talented lady (now my wife) who knew how to do desktop publishing, resulted in the birth of the Bone Building Books about 15 years ago.
Who buys these guides? Do you find that they are used by museum curators, or mostly by individual naturalists? And what has the feedback been?
The manuals were originally written for teachers and students who wanted to do a museum quality skeleton on a limited budget, with materials they
should be able to find even in a small town. Over the years, the manuals have been enlarged and corrected and improved each time I have worked on that type of skeleton. I’m always trying different materials and testing new techniques. Today they are used by everyone from teachers to museum workers, to home hobbyists to University projects with students. The other group of people who were getting these were bone collectors and zoo archaeologists who really just wanted to look at the pictures. They had no interest in the articles or in building a skeleton. And the manuals didn’t even have a centerfold. The feedback has been very enthusiastic. For many hobbyists and home naturalists who have wanted to get accurate information on how to prepare the bones and build the skeletons, these have been their bibles. When people get stuck, they often e-mail me. That’s often a clue I didn’t explain something well enough, and the next revision will try to remedy that.
What advice do you have for aspiring bone builders?
Don’t plan on doing this for a career. You would likely starve. But if this is your interest and passion, there is enough information out there these days that you should definitely pursue that interest. There are no skeleton police. There are no university degrees in this. Many of the best skeleton articulations of land mammals are being done by home hobbyists. You too could be doing that.
From the short video clip of Indie Alaska that I saw, it seems you teach courses to students. Do you also offer workshops for museum professionals?
Many of my favorite projects have been done with groups of interns and docents in museums and marine-life centers. On occasion, the paid staff have joined in, but usually, the staff has too much other work to be able to take the time off to do much hands-on work building a large skeleton. My favorite projects are when I have an enthusiastic group of volunteers and an organization with someone who wants to organize a large skeleton build project. Then, I get to teach and be the foreman and boss around the volunteers, who get the thrill of working with real bones and being part of a team that builds a world-class skeleton.
Are there any particularly challenging skeletons you worked on, or any particular animal skeletons you would still love to tackle?
I’m still sorting out sea turtle skeletons. They have very unusual bones. I’ll be trying to figure out a crocodile skeleton soon. I’m always interested in working on new marine mammal species. They are the animals I have the most experience with.
You have now written nine guides to specific animals and animal groups, plus a general reference book, the Bone Builder’s Notebook. Are there plans to write any more guides?
I’m doing a lot of illustration work on bird bones. I can imagine these might
one day get compiled into some type of identification guide to bird bones. I’m also getting more and more requests for information on articulating reptiles. I live in Alaska, and there is a serious lack of reptiles in my area. However, I’ll be working on some large reptiles in Mexico in the near future, and I never know when I’ll get so inspired that I might try to write something useful on how those bones fit together.
You can discover the complete selection of Bone Building Books on the NHBS website
Wind farms, conflicts in conservation, and the use of photo identification as a population monitoring technique were amongst the many themes covered at the 2020 Herpetofauna Workers’ Meeting. Running for over 30 years, this popular event attracts ecological consultants, academics, students, and conservation organisations from far and wide. As the weather worsened with the arrival of Storm Dennis, we settled in for a jam-packed two days filled with presentations, workshops, and poster displays.
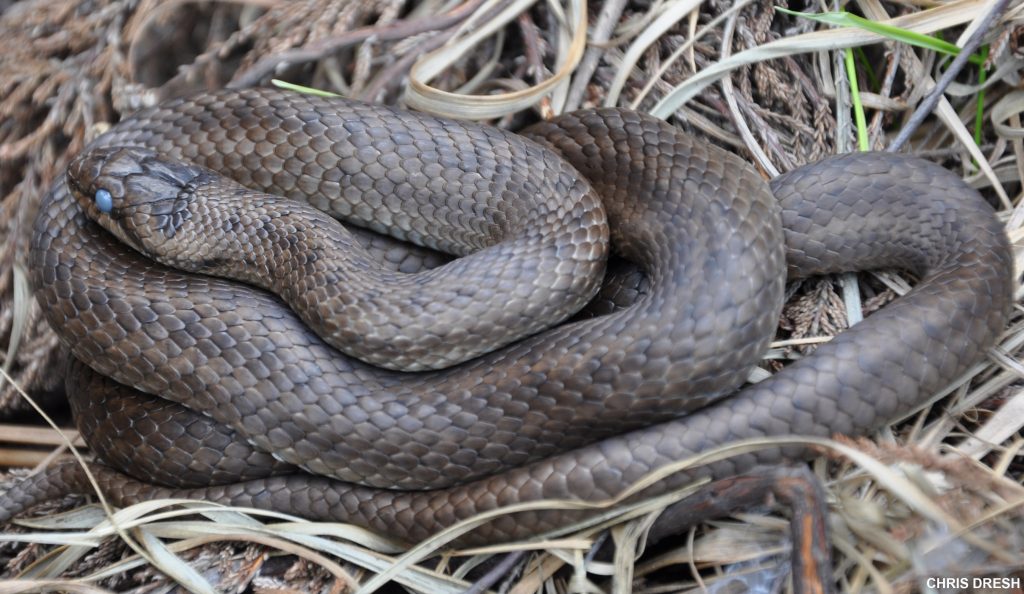
So how is a talk on wind farms relevant at a herpetology conference? Wind farms cover a large expanse of land and, as Jeanette Hall from the Highland Biological Recording Group explained, could provide a conservation opportunity for Adders Vipera berus. Birds of prey are typically the main predator of Adders, but these predators are present in low numbers on wind farms. If managed correctly, wind farms could offer a suitable refuge for Adders. To test this Jeanette and her team used clay snake models to measure avian attack rates both within the wind farm and on a control site roughly a kilometre away. The models were made to roughly the same size as a yearling Adder, and the attacks were recorded by the presence of talon marks on the clay models.
Despite observing raptors in both sites, they found that attack rates were significantly lower on the wind farm. Interestingly, attack rates were higher in areas where grazing sheep were present.
With grazing and habitat management in mind, could these vast areas that wind farms cover offer an opportunity for reptile conservation?
Clay snake models are one simple but effective approach for measuring attack rates. Suzanne Collinson, from the University of Cumbria and the Cumbria Amphibian & Reptile Group, discussed another interesting technique that she used when studying Slow Worms Anguis fragilis. She used photo identification to study the size and dynamics of a Slow Worm population in a churchyard in Dalston, Cumbria. Slow Worms are a UK Biodiversity Action Plan priority species and protected under the Wildlife and Countryside Act 1981 due to their overall decline, therefore this population in the village of Dalston is of great interest, especially to the locals. Due to their morphology and cryptic behaviour, mark and recapture is a difficult method to use to survey Slow Worms. In addition to this, the markings on the neck and chin of a Slow Worm are unique to the individual and so, photo identification could offer a viable monitoring method.
In order to take a photograph of an individual, the Slow Worm would be placed on a clear tray, enabling photographs of the Slow Worm’s ventral surface to be taken quickly. The Slow Worms were found at various shelters or ACO’s (artificial cover objects) that were positioned across the churchyard. Suzanne also measured the body length of each new individual that she photographed and recorded the ambient temperature and the number of ant nests and snails present at the ACO. Suzanne counted 25 individuals in total (the original population estimate was 18) and found that as temperatures increased, Slow Worm encounters decreased. Ending on this note, Suzanne discussed the potential implications of climate change and how future monitoring will be necessary to understand what these future impacts could be on the population.
On both days there was a choice of five different workshops, all on very different topics, that we could take part in. On the first day, we attended ‘Managing habitats for conflicting species’ led by Jim Foster and Andrew Hampson from the Amphibian and Reptile Conservation Trust. Faced with a real-time scenario, we discussed in small groups the potential conflicts that could arise and what approach should be used to move forward – our scenario was based at the dunes of Sefton coast, and focused on the population of Natterjack toads that reside there. This was an interesting opportunity to hear what lessons had been learnt from previous conservation projects and how this knowledge can be used for effective conservation planning in the future.
Of course, this is just a snapshot of the range of topics discussed over the duration of the conference. Hearing first hand what organisations such as the Amphibian and Reptile Conservation Trust and Amphibian and Reptile Groups of UK are doing to conserve reptile and amphibian species in the UK, plus the ongoing research on both British species and those of other countries was fascinating.
You can visit the NHBS website here to browse our selection of herpetology books, as well as a range of equipment required for the surveying or monitoring of reptiles and amphibians
Thermal imaging technology has become an invaluable tool for researchers and ecologists studying nocturnal, crepuscular, cryptic or reclusive species. Thermal imaging devices work by using an electronic detector to convert heat emitted by the subject into a visible colour pattern. They have a distinct advantage over other night vision technologies in that you can use them during the day and in foggy conditions, as well as in total darkness. This means that they are ideal for surveying bat roosts, detecting nocturnal foraging animals, spotting birds in cover and even nest finding.
We tested the Pulsar Helion XP50 Thermal Imaging Scope at night time and in daylight. Our aim was to see if it enhanced our ability to detect and observe animals. We also wanted to examine the quality of the footage it produced.
The Pulsar Helion XP50 is a powerful thermal imaging scope with 640 x 480 resolution and a detection range of up to 1800m. With a 50Hz frame rate it is great for observing even fast moving animals such as bats. The XP50 has inbuilt memory for storing video and still images, which can then be downloaded later via USB. Alternatively you can live stream, record and store images and video on a smartphone or tablet via the Stream Vision app.
How We Tested
We took the Pulsar Helion XP50 out a few times during daylight and night time to test its capabilities in as many conditions as possible. Steve went out searching for Lesser spotted woodpeckers on Dartmoor, Simone took the scope out to get some night footage of woodcock and we tested the daytime recording functionality again near the NHBS head office.
To get night time footage we tested the XP50 on a very drizzly, foggy evening in January, on agricultural land in Dorset that is managed organically. We knew this was a good area for overwintering woodcock and hoped to spot some foraging along with other wildlife. The scope is an all-in-one unit, so we just took it in its case and didn’t need any other accessories.
What We Found
We found the scope easy to use one-handed, particularly due to the strap and the design of the button interface. It was simple to switch magnification zoom setting, take still images or videos, change colour palette and look at the stadiametric rangefinder one handed, meaning we could maintain our focus on the wildlife in front of us. All of the menu options appear on the screen and on recordings so you know what settings you had when you took the footage. The detection range was impressive and we easily spotted larger animals such as deer and hares when scanning the fields in the dark.
The WiFi streaming was exceptionally easy to set up and a fantastically useful tool to allow other people to view what was happening through the camera. It also allows you to control the camera and record footage. Downloading images from the internal camera memory via USB was very simple afterwards.
Daytime use
We obtained good daytime footage of squirrels and passerines such as blue tits, robins and blackbirds, with the scope making it very easy to pick out birds moving through the leafless tree canopy. The mallards on the river near NHBS head office were easy to spot without the scope but it did help us find a hidden teal and a moorhen that we would have missed otherwise.
Night time use
The XP50 came into its own at night and we picked up many animals that were missed when we surveyed the area with a lamp, even small animals such as mice and meadow pipits. We detected animals through the fog, drizzle and some ground cover with ease. We spotted roe deer, hares, rabbits, mice, meadow pipits, woodcock and a barn owl. The bird species were easy to follow when flying and provided smooth video footage due to the fast frame rate.
Our Opinion
We think that the Pulsar Helion XP50 is an absolutely fantastic thermal imaging scope and would be a great addition to any researcher or ecologist’s survey equipment collection. The standout features are the detection range, the one handed operation and the streaming function. We would advise users to memorise the shortcut buttons before you go out as it can be difficult to remember how to switch modes in the field. The magnification zoom was useful if animals were fairly close but the footage became very blurry if they were further away so we tended to stick to 2.5x or 5x. Camera shake also becomes a real problem at the higher magnifications and a tripod would have improved our recorded footage quite dramatically. Thermal imaging technology opens up a world of possibilities for night time wildlife watching, bird ringing and surveying and we think this is an excellent scope for all of these purposes.
Now is the time of year when many bird species are starting to defend territories more noisily and to look for suitable nest sites. To coincide with National Nest Box Week (14th to 21st February), we have been busy selecting our favourite nest boxes, updating our advisory blog posts on where to site nest boxes and how to put them up, and installing our own nest box cameras at our warehouse in Devon.
At this time of year, the birds will currently be exploring nest sites and should start bringing nesting material into the boxes in the next couple of weeks.
Given that it has been a mild winter, the breeding season should start earlier this year, but we still would not expect the first eggs to appear until April. This means that there is still time to get a nest box up in your garden to provide much needed nesting space for birds. You could even consider enjoying this amazing spring spectacle up close with a nest box camera.
Choosing the nest boxes and cameras
We chose two of our Camera Ready Nest Boxes because they have a perspex panel in the side to let in extra light, which gives better daytime images in colour, and a camera clip on the lid. We then selected two of our most popular cameras, the WiFi Nest Box Camera, which can stream footage directly to a smartphone or tablet, and the IP Nest Box Camera, which can provide a live stream to a website. There are many options available when it comes to selecting a nest box camera, and our blog post on Watching Wildlife – How to choose the right Nest Box Camera can help you decide between the different options.
How to install the camera in the nest box
The procedure for attaching the camera to the lid was the same for the WiFi and IP cameras. We found that the easiest way of installing the camera into the box lid was to attach the camera bracket to the lid first and then to attach the camera to its bracket afterwards. We unscrewed the camera clip with a large Phillips screwdriver, slid the camera bracket underneath the clip on the inside of the lid and then tightened the clip screw back up again.
Then we attached the camera onto its bracket using a very small Phillips screwdriver.
With the WiFi camera we found that it was best to point the aerial downwards because our nest box roof was sloping. You can check the angle of the camera through the perspex panel on the side – it is best to have it pointing directly downwards and not angled. Ensure that the camera cable is running out of the notch on the back of the box so that the lid fits down snugly.
Putting up the nest boxes
We sited the nest boxes on the eastern side of the building close to the tree cover along the river. To maximise the chances of occupation, it is advisable to site boxes for cavity nesting birds such as blue and great tits away from prevailing winds, and with a direct flight path to some tree cover. We attached them securely to the wall, approximately 2m off the ground – this is high enough to prevent interference but close enough to reach for monitoring and maintenance. We have put them as far apart as possible from each other and out of the sight of our bird feeder around the corner. We think that it may be unlikely that tit species would nest that closely to each other but if the boxes are occupied by house sparrows then these two boxes could form the start of a colony.
Connecting up the cameras
The IP Nest Box Camera connects via Ethernet cable directly into a router, hub or switch and then you need to choose software to allow you to access the camera feed and live stream to a website. We are currently trialling Anycam.iO. If there is no WiFi network, the WiFi camera can be used as a standalone WiFi source that you connect to directly with your smartphone or tablet. Alternatively you can tether the WiFi camera to your existing WiFi network and access it as a node on the network. The WiFi camera is viewed via an app on your smartphone or tablet and we are currently trialling ICSee Pro.
Now we just have to wait and hope that the local birds decide that these are desirable nesting sites! For further advice on nest boxes and cameras, please do not hesitate to contact our team of Wildlife Equipment Specialists.
Red Sixty Seven features our most vulnerable bird species, beautifully illustrated by some amazing wildlife artists. All of the publishers profits from the sale of this book will be donated to BTO and RSPB to further their work on red listed birds.
Contributors include Chris Packham, Ann Cleeves, David Lindo, and Patrick Barkham.
This book should not exist.
In an ideal world this book, and the official Red List of the most vulnerable birds in the UK it is based on, would not be needed. But the world is far from ideal and our bird populations are declining at an alarming rate. In the past few years alone the once widespread Wryneck has ceased breeding in the UK altogether and has dropped off the list completely. Which species will be next?
Editor, Kit Jewitt has taken some time to answer a few questions about the Red Sixty Seven book project and the list itself.
Of all the birds on the Red List which do you think is most vulnerable?
If I had to choose one, it would be the Hen Harrier. Not only do they have to deal with all of the natural challenges they face, they also have to contend with persecution from criminals within the grouse shooting industry, which evidence now suggests is the main cause of their decline in numbers. The fact that 72% of tagged Hen Harriers are confirmed or considered likely to have been illegally killed is a national disgrace. However, in terms of the recent rate of decline I would also suggest Turtle Dove is a species of highest concern.
Many people will be surprised to see herring gull on the list, could you expand on how this seemingly ubiquitous bird has made the list?
Herring Gull populations in coastal areas have dropped by over 50% in my lifetime. This is largely due to the lack of food at coastal sites, with overfishing of UK coastal waters and warming seas caused by climate change likely to be the main reasons for the reduced amount of food available to gulls and other seabirds. They are adaptable, intelligent birds though, so moving to inland areas, or areas where humans create waste for them to eat has been a way for some populations to survive.
Have any birds managed to move away from the Red List to Amber over the last year or so, and which birds are the most recent additions?
Nineteen species were added to the red list for the first time when it was last updated in 2015, and one species, Merlin, moved back onto the list. Breeding seabirds, such as Puffin, Kittiwake and Shag are now included, and with the additions of species such as Woodcock, Nightingale and Pied Flycatcher there are now more woodland birds on the list than any other habitat. Two species, Bittern and Nightjar, have moved from the red to amber lists thanks to the creation and management of suitable habitat, stimulated by species action plans.
We know how we as individuals can help garden birds, but the list contains a high proportion of iconic water birds. How can we as individuals help preserve the many waders and ducks that are on the list?
Many projects being conducted by BTO, RSPB WWT and others help waders, seabirds and ducks, so fundraising for these is vitally important. My main motivation behind the Red Sixty Seven project was to do something to help these declining birds, by spreading the word and raising money for conservationists on the ground. By highlighting the red list far and wide, more people will care and will then hopefully start their own fundraising for BTO’s Operation Wader or Curlew appeal, or WWTs Black-tailed Godwits appeal, or whichever scheme chimes with them. I can’t run marathons or undertake extreme endurance like my friend Jonny Rankin, who has raised over £19,000 for Turtle Doves, so I had to think of a different way of fundraising!
Farmland bird species also make up a large part of the list. Can you see any hope for securing the future of our most rapidly declining farmland species?
The change in farming and land management practices over the last 40 years, including the use of pesticides and changes in crops grown have ultimately reduced the amount of appropriate habitat, and food sources for our farmland birds. Post Brexit, there is an opportunity for the government to make changes to policy to help our farmland wildlife. I just hope they take full advantage of it.
We love the idea of using the power of beautiful words and paintings to deliver a conservation message. Do you think that engaging the reader emotionally can result in more concrete conservation actions being taken?
I hope so! As well as raising funds for crucial work to help red-listed species, I hope Red Sixty Seven brings the list and the plight of these birds to a wider audience, inspiring other people to take action themselves, whatever that might be. The artwork and stories within the book bring home the message in a very accessible way, and you are left under no illusion that we must do something. There is a poignant sting in the tale at the end of the book; an ‘In Memoriam’ section devoted to the birds we have lost as breeding species in recent years. This book is a call-to-arms.
All of the publisher’s profits from the sale of this book will be donated to BTO and RSPB to further their work on red listed birds.
We have previously looked at the where to hang and how to maintain a nest box. Now we’d like to get down to the details, and take a look at the actual process of putting the box up.
For most situations, you will want to put the box on a tree, fence or wall, so we will address each of these individually. (If you have a box that is designed to be built into a house wall or roof, then it is likely that your builder will care of this for you).
The tips below are suitable for both bird and bat boxes.
Fixing to a tree
There are several things to be aware of when attaching a nest box to a living tree. The most important is that the growth of the tree will affect the fitting. This means that boxes should be checked at least once a year to make sure that they are still secure. A box which has fallen to the ground is of little use to birds, and one which falls down with a nest and eggs inside is disastrous.
The most common way to put up a nest box is using a strong nail which is at least 85mm in length. It is important to use aluminium nails, as these will not damage a chainsaw (or chainsaw user), should they be left in the tree when it is felled. Nylon, brass, copper and hardwood nails can also be used but steel nails should be avoided as they will quickly rust, making them difficult to adjust or remove.
Using a screw instead of a nail can also be a good option and means that you can loosen it by a couple of turns every year to compensate for the growth of the tree. Screws are more suitable for hardwood trees as they will be very difficult to adjust in softwood. Make sure that all nails or screws are removed from the tree if the boxes are taken down.
An alternative to using a nail or screw is to tie the box to the tree. Wire and synthetic twine both work well and, if boxes are tied loosely, they can be edged upwards as the tree grows. Boxes can also be hung from a horizontal branch if they come with a suitable hanger (e.g.Schwegler 1B).
Fixing to a fence
Hanging a bird box on a fence poses fewer problems than siting a box on a tree, as you will not need to worry about the wood growing. Use a strong nail or screw and check it annually to make sure that it still feels secure.
Fixing to a wall
To fix a box to a brick wall will require a power drill with hammer action, masonry bits and a screwdriver. You will also need wall plugs and screws which are small enough to go through the hole in the box. Using the drill, make a hole which is slightly longer than your wall plug. (You can use a piece of tape around the drill bit to indicate the depth to which you need to drill). Insert the plug and then screw in the screw, first threading it through the hole in the box. Having a second person to hold the box will probably be helpful and, if you are using ladders, make sure that you take sensible steps to ensure your safety. Appropriate eye protection and clothing should always be worn.
There is a shortage of natural nesting sites for birds and this has played a part in the decline of some of the UK’s most iconic species. It is easy to provide nesting opportunities for birds in our gardens and outdoor spaces, however, and with spring rapidly approaching, now is the ideal time to start thinking about nest boxes for your local birds. Locating your nest boxes correctly is one of the key determinants in how likely birds are to occupy them and with this in mind we have put together some answers to the most frequently asked questions about nest boxes – covering where and when to put up your boxes, cleaning and maintenance as well as dealing with predators.
There really is no ‘best’ time to put up nest boxes. By putting up boxes in the autumn you can provide much needed winter refuges for roosting birds and possibly increase the chance of them staying and nesting there when spring comes around. However, any box erected before the end of February stands a good chance of being occupied if it is sited correctly. Even after February there is still a chance that they will be used; tits have been known to move in during April and house martins as late as July. Therefore, put your nest box up as soon as it is available rather than leaving it in the shed!
Where should I hang my nest box?
When it comes to nest boxes, the ‘where’ is much more important than the ‘when’. Nest boxes must provide a safe, comfortable environment and protect the inhabitants from predators and the worst of the weather. This may be difficult to achieve; a safe location out of reach of predators may also be exposed to the weather, so have a good think before you start bashing nails in.
Nest boxes can be fixed to walls, trees or buildings and different styles of boxes are available which are suitable for each. Fixing to artificial surfaces means the growth of the tree does not have to be considered which is useful for Schwegler and Vivara Pro nest boxes which last for at least 20-25 years: a significant amount of time in the life of a small tree. If you’re planning any building work, remember that some bird and bat boxes can also be built directly into walls and roofs.
Locating boxes out of the reach of predators can be a challenge (weasels can climb almost anything), but there are things you can do to make it harder for them. Boxes in gardens should be located where cats cannot get to them and prickly or thorny bushes can also help to deter unwanted visitors. Some nest boxes also have anti-predator designs (e.g. Schwegler’s 1N deep nest box). It is best to avoid nest boxes that have a combined bird feeder and boxes should not be sited too close to the bird feeders in your garden. Visitors to the feeder may disturb the nesting birds and the feeder could attract unwanted attention from predators.
For many species the height of the box is not crucial. However, by placing it at least two metres off the ground you can help prevent predators and human interference. The direction of the entrance hole should be away from the prevailing wind and it is beneficial for there to be a clear flight path to the box. Crucially, the box should be also be sheltered from the prevailing wind, rain and strong sunlight, so in most UK gardens aim for an aspect of northerly, easterly or south-easterly. If possible, position the box with a slight downward angle to provide further protection from the rain. Some species do have specific requirements for where a box should be sited (e.g. house martins and swifts nests need to be sited under the eaves); please see our product details for particular instructions for different species. Wherever you position the box, try to ensure that you can still get access to it for maintenance. And finally, if possible, try to put it somewhere where you can see it, or invest in a nest box camera, so as to maximise your enjoyment of watching wild birds in your garden.
Is there anything else I can do to deter predators?
As already mentioned, location is the most important factor when trying to deter predators. Whilst some mammals can climb walls, a blank wall is fairly inaccessible so can be a good choice. Ensure that the box cannot be reached by a single jump from a nearby branch or the ground.
Box design can also help deter predators. An entrance hole reinforced with a metal plate will prevent grey squirrels and some avian predators from enlarging the hole and gaining access to the nest. Woodcrete and WoodStone boxes are too hard for any predator to break through. However, you can also reinforce a nest box yourself with metal protection plates or provide additional protection with prickly twigs. Deep boxes may prevent predators reaching in and grabbing nest occupants, although some tits have been known to fill up deep boxes with copious quantities of nesting material. If using open-fronted nest boxes, a balloon of chicken wire over the entrance can work well. If you live in an urban area, cats are likely to be the most common predator. Gardeners have long since used various methods to exclude these unwanted visitors, such as pellets, electronic scarers and even lion dung (available from your nearest obliging zoo), all with varying degrees of success.
How do I manage the nest box?
A well-designed nest box will only need one annual clean in the autumn. It is important not to clean out nest boxes before August as they may still be occupied. Wait until autumn and then remove the contents, scattering them on the ground some way from the box to help prevent parasites re-infesting the nest box. Wear gloves and use a small brush or scraper to remove debris from the corners. Boiling water can be used to kill any parasites remaining in the box, but remember to leave the lid off for a while for it to try out. Do not wait until the winter to clean out nest boxes as birds may already be roosting in them. The tit species do a thorough clean out of any old nesting material or roosting debris before they begin nesting again but it will save them energy if you can help out.
How many nest boxes do I need?
The exact amount of boxes required will depend on the species and the surrounding habitat. As a very general rule of thumb, start with ten assorted small boxes per hectare (ensure uniform spacing between boxes). Keep adding several more boxes each season until some remain unused and hopefully you’ll hit on the correct density of boxes. However, even if you only have space for one box it is still worthwhile, providing it is suitably located. Many UK bird species need all the additional nesting habitat they can get.
If you are interested in installing a nest box camera into one of your bird boxes, take a look at our “How to choose the right nest box camera” article, for more information on choosing the model that’s right for you.
Further information about individual nest boxes, including advice on positioning, can be found alongside each nest box in our range. If you have any other questions or would like any further advice, then please get in touch with our team of Wildlife Equipment Specialists.
Greeted by the trumpeting of elephants across the otherwise silent car park, we arrived at Chester Zoo. With a quick glimpse into the rhino enclosure, we turned away from the main entrance and headed towards the lecture theatre (passing an impressive and colourful bug hotel) for the start of the BIAZA conference. The theme for this event was to be rewilding – an extremely topical and exciting subject in the current world of conservation.
It seemed fitting that the event began with a talk by the highly esteemed conservationist Professor Alastair Driver, who is also the director of Rewilding Britain. It was amazing to hear how much popularity the concept of rewilding has gained, with many landowners now approaching Rewilding Britain, searching for advice on how best to rewild their own land. Dr Daniel Hayhow, the main author of the State of Nature report published in October 2019, followed with a discussion of the key findings of this pivotal report to paint a picture of how nature is faring in the UK. Jo Kennedy with the Manchester Mossland project brought the first session of the day to an end, demonstrating how collaborations such as the one that exists with themselves and Chester Zoo have been a vital aspect of captive bred reintroduction projects. The successful reintroduction of the Large Heath butterfly to the Manchester Mosslands Special Area of Conservation is a great example of this.
As the attendees patiently queued for their cups of tea and bourbon biscuits, we stationed ourselves in the adjoining room by the NHBS stand. We had brought with us various pieces of kit that are used for species surveys and monitoring, an important aspect of assessing the success of rewilding projects. Our selection of trail cameras were a popular talking point in particular, attracting interest from keen naturalists eager to investigate the wildlife in their back garden, to professional researchers and conservationists in charge of species reintroductions.
In the same room you could also marvel at the amazing models on the Manchester Mossland project display that show the species that they are working with at their sites. Or perhaps explore the insect collection brought by the Tanyptera Project, who seek to promote the study of invertebrates in Lancashire, Merseyside, Cheshire and Great Manchester. There was also a raffle where a lucky winner had the opportunity to win a NHBS voucher or a British Wildlife gift subscription!
The next session featured a rather lively talk from Philip Turvil of Kew Gardens, who told us how 4 million people have been engaged by the Grow Wild mission, and certainly entertained all of us with a ‘Wildflower rap’ video (not performed by Philip I hasten to add!). BIAZA also used this opportunity to launch ‘Grab that Gap’, an initiative to encourage BIAZA members to transform a section of their site (the edge of a car park for example) into a wildlife haven and calls for participants to use social media to share their story #GrabthatGap2020.
After lunch we were all taken outside to explore Chester Zoo’s very own nature reserve. We were taken through the history of the reserve, the types of species to be found (14 species of dragonfly at the last count, and over 20 butterfly species) and management techniques in place. It struck us how much vandalism occurs at the site; many Malaise traps had been destroyed and there was evidence of graffiti. But the staff at Chester Zoo are extremely dedicated and have big visions for the future.
We were also given an opportunity to pitch in and help. Dead hedges are used not only to stop the little ones from running down the hill and straight into the pond, but also to provide a habitat for invertebrates and birds as the hedge starts to rot down. Our job was to top up these hedges with new branches (and to not slip down the muddy hill of course).
Then back to the warmth with an interesting line up of talks to finish the day. This session had a species reintroduction theme covering mammals, birds and insects, starting with the reintroduction of Pine Martens to the Forest of Dean. It was fascinating to hear of all the measures involved to ensure that there is a genetically diverse reintroduced population, minimal stress to the animals and the prevention of the spread of disease. The focus was shifted to a rare invertebrate, the Pine Hoverfly Blera fallax – the adults of which have not been seen in the wild for seven years. Dr Helen Taylor from RZSS discussed the captive breeding programme put in place to ensure there is a viable population for future reintroductions and the associated challenges with this approach.
Next we heard about the Red-billed Chough, the flagship species for the Birds On The Edge project, and their reintroduction to Jersey following a successful captive-breeding programme at Jersey Zoo. The session was drawn to a close with the final two talks of the day, the first of which reviewed the native bat species recorded at Knowsley Estate and their habitat use, followed by Will Mallard describing his PhD research project on the Barberry Carpet Moth.
The take home message? Rewilding is a step in the right direction to restore ecosystems and habitats to a state where nature can take care of itself. It isn’t just about wolves and bears.
With each day we were all generously given a free ticket to enter Chester Zoo, so of course we had to nip in before we left!