Free Webinar: Cold Weather Soundscapes; from Arctic Coasts to Alpine Valleys

Cold-Weather-Webinar_800x300_2024-01-10-151956_zlmv

Researchers are using bioacoustics to study how animals in cold-weather environments hear and process sound, why they vocalise, and whether acoustic tools can help mitigate conflicts. Meanwhile, artists are documenting the impact of climate change, recording the sound of melting glacial ice to curate immersive exhibits.

How are their efforts drawing attention to fragile ecosystems? Find out at the Wildlife Acoustics FREE webinar at 3pm (GMT) on 8th February!

Click here to register your place.

Wildlife Acoustics Logo


FEATURING

The Cry Wolf Project: Bioacoustics & Carnivores in Yellowstone National Park

Come and learn about how bioacoustics are being used to study wolf vocalisations in the remote and often wintery locations of Yellowstone National Park. We’ll cover the use of wildlife recorders for studying the function of wolf vocalisations, generating population estimates, and mediating wildlife-livestock conflicts. We’ll also demonstrate how Kaleidoscope Pro classifiers were used to find wolf vocalisations in large recording datasets. Most importantly, we’ll have fun listening to never-before-heard wild wolf sounds, recorded non-invasively in 2023.

Un Suono in Estinzione (A Sound in Extinction) – Adamello Glacier, Italian Alps

Hear the results of an experimental research project aimed at monitoring the implications of climate change on Alpine glaciers through the analysis of sound expressed in educational, artistic, and scientific activities. Un Suono in Estinzione (A Sound in Extinction) began in 2020 with researcher and sound artist Sergio Maggioni, around whom a team of professionals from different fields was created in a short time. Learn about the results of this fascinating bioacoustics project and its inspiration.

Acoustic Sensory Ecology of Diving Alcid Seabirds & Potential Noise Impacts

Alcid seabirds like the Atlantic Puffin are important components of holarctic coastal ecosystems and may derive important acoustic cues from the surrounding natural soundscape. As people increasingly utilise Arctic coastal areas, it is essential to characterise these soundscapes as a baseline for understanding seabird acoustic biology so that we can quantify the effects of human activity on their acoustic ecology over time. Learn how passive acoustic monitoring was used to document and describe the aerial soundscape dynamics of puffins and other Alcids seabirds such as Common Murres and Marbled Murrelets, and explore how these soundscapes may be related to their acoustic sensory biology.

———————-

PRESENTERS

Jeff Reed, PhD
CEO | Grizzly Systems
Montana, United States

Jeff Reed, Wolf Researcher

Jeff Reed was born and raised in the Greater Yellowstone Ecosystem in southwest Montana, United States, and owns Reedfly Farm in Paradise Valley, Montana. After obtaining a PhD in computational linguistics and history, Jeff spent 30 years in the technology industry, working on linguistics and artificial intelligence solutions, and now builds visual and audio tech solutions for wildlife managers. He is an executive committee member of the Upper Yellowstone Watershed Group and Wild Livelihoods, promoting the coexistence of people and wildlife (though he considers people wildlife, too!).

Sergio Maggioni (NEUNAU)
Lead Artist | Un Suono in Estinzione
Adamello-Presanella Alps | Lombardy, Italy

Sergio Maggioni (aka NEUNAU), Researcher and Artist

Sergio Maggioni is the mastermind behind NEUNAU, an artistic sound research project born in Val Camonica, Italy, in 2015. The artist’s namesake is engraved on a rock in Loa, a place of worship from the Iron Age. NEUNAU’s investigations begin with the details a sound source expresses, first capturing and then exploring the sound to compose audio tracks, documentary films, specific performances, and installations that tell the story of the sound’s origins. In 2020, Sergio became the lead artist of Un Suono in Estinzione (A Sound in Extinction), an experimental research project that monitors the implications of climate change on Alpine glaciers through sound analysis in collaboration with universities, institutions, and partners.

Adam Smith, PhD
Postdoctoral Investigator | Dept of Biology Marine Bioacoustics
University of Southern Denmark | Syddanmark, Denmark

Adam Smith, Alcid Researcher

Adam Smith, PhD, grew up in a small town in South Dakota, United States, but became fascinated with the ocean and marine biology through National Geographic magazine articles and Discovery Channel documentaries. As an undergrad, he volunteered to help with research projects on acoustic communication in frogs. This experience hooked him on studying bioacoustics, a field that naturally combines his two great interests: music and nature. In 2011, Adam received his PhD in Zoology from the University of Hawaii at Manoa, where he studied hearing and echolocation in marine mammals. He then spent the following year on a Fulbright Fellowship studying the acoustic sensory ecology of Atlantic Puffins in Iceland. Adam is currently a postdoctoral investigator at the University of Southern Denmark, where he continues to research seabird acoustics and studies the auditory dynamics of biosonar in toothed whales.

Supplier interview with Fran Tattersall from Wildlife Acoustics

Wildlife Acoustics creates world leading wildlife acoustic monitoring tools, specially designed to help scientists make impactful discoveries that expand our understanding of this biologically diverse planet.

A passionate and innovative group of technologists, operational experts, wildlife enthusiasts and conservationists, they have a zeal for helping their customers succeed in their research —understanding their needs and creating wildlife audio recording and analysis tools specially designed to help them conduct research across the globe.

We recently chatted with Fran Tattersall about the history of the company, their latest products, and the incredible ways that they are enabling researchers to collect vital data.

Fran works as the European Business Development Consultant for Wildlife Acoustics and is passionate about the environment and conservation. She is incredibly knowledgeable about the company and their products, and we were grateful to her for taking time out of her busy schedule to answer our questions.


Could you tell us about the history of Wildlife Acoustics? What inspired its creation?

Wildlife Acoustics was founded by Ian Agranat, an engineer, technologist, and nature enthusiast who is still the company’s CEO.

On a family hike in the early 2000s, Ian’s brother-in-law wondered aloud about creating a device for recording and identifying birds by their songs. Wildlife Acoustics’ first product, Song Sleuth, was launched shortly thereafter. Long before we were familiar with such tools, Song Sleuth used AI to identify North American bird species by their calls!

The US Geological Service was intrigued by the possibilities and asked Ian to develop a reliable, programmable recorder and software to help identify bird calls. This led to the invention of the Song Meter SM1, the first commercially available, built-for-purpose acoustic wildlife recorder, and the Song Scope software. Biologists now had a fully integrated, cost-effective, weatherproof solution for monitoring and analyzing the vocalizations of birds, amphibians, and terrestrial animals. (The first SM1 is still in the field today!)

Can you tell us more about the people that use Wildlife Acoustics’ products and what they use them for?

We have products for anyone who wants to record vocal wildlife, bats, or soundscapes!

Our recorders and sound analysis software are used for research projects at universities and NGOs around the world. For example, Bat Conservation International used a Song Meter SM4BAT-FS to re-discover the Hills Horseshoe bat in Rwanda—an endemic species once thought to be extirpated.

Song Meter recorders are also used by ecological consultancies working on everything from large infrastructure projects, such as HS2 and wind farms, to individual householders replacing their roofs.

Our Echo Meter Touch 2 bat detector, which allows people to use their Android devices to hear bats echolocating in real time, has been particularly popular with the general public and is a great engagement tool on bat walks. More recently, our Song Meter Micro has gained popularity with birders who want to record nocturnal migration flyovers.

What are some of the most interesting ways you have seen Wildlife Acoustics’ products being used?

In February, we will be hosting a webinar on the use of our recorders in cold places, and one of the speakers is monitoring glaciers with a Song Meter SM4. I’m looking forward to learning more about that!

More usually our recorders are listening to wildlife. Mammals are my personal favourite species group. We have people recording Maned Wolves, Manatees, elephants, Okapi, moose, Rock Hyrax, and many more.

Interestingly, it’s not just bats that use ultrasound to communicate. Our “bat” recorders have been instrumental in finding and monitoring the invasive White-toothed Shrew in northeast England and discovering that Indonesian Slow Loris use ultrasound to avoid predators. We even have a customer who records lab rats “laughing” when tickled.

Our customers are always finding fascinating new ways to use our equipment!

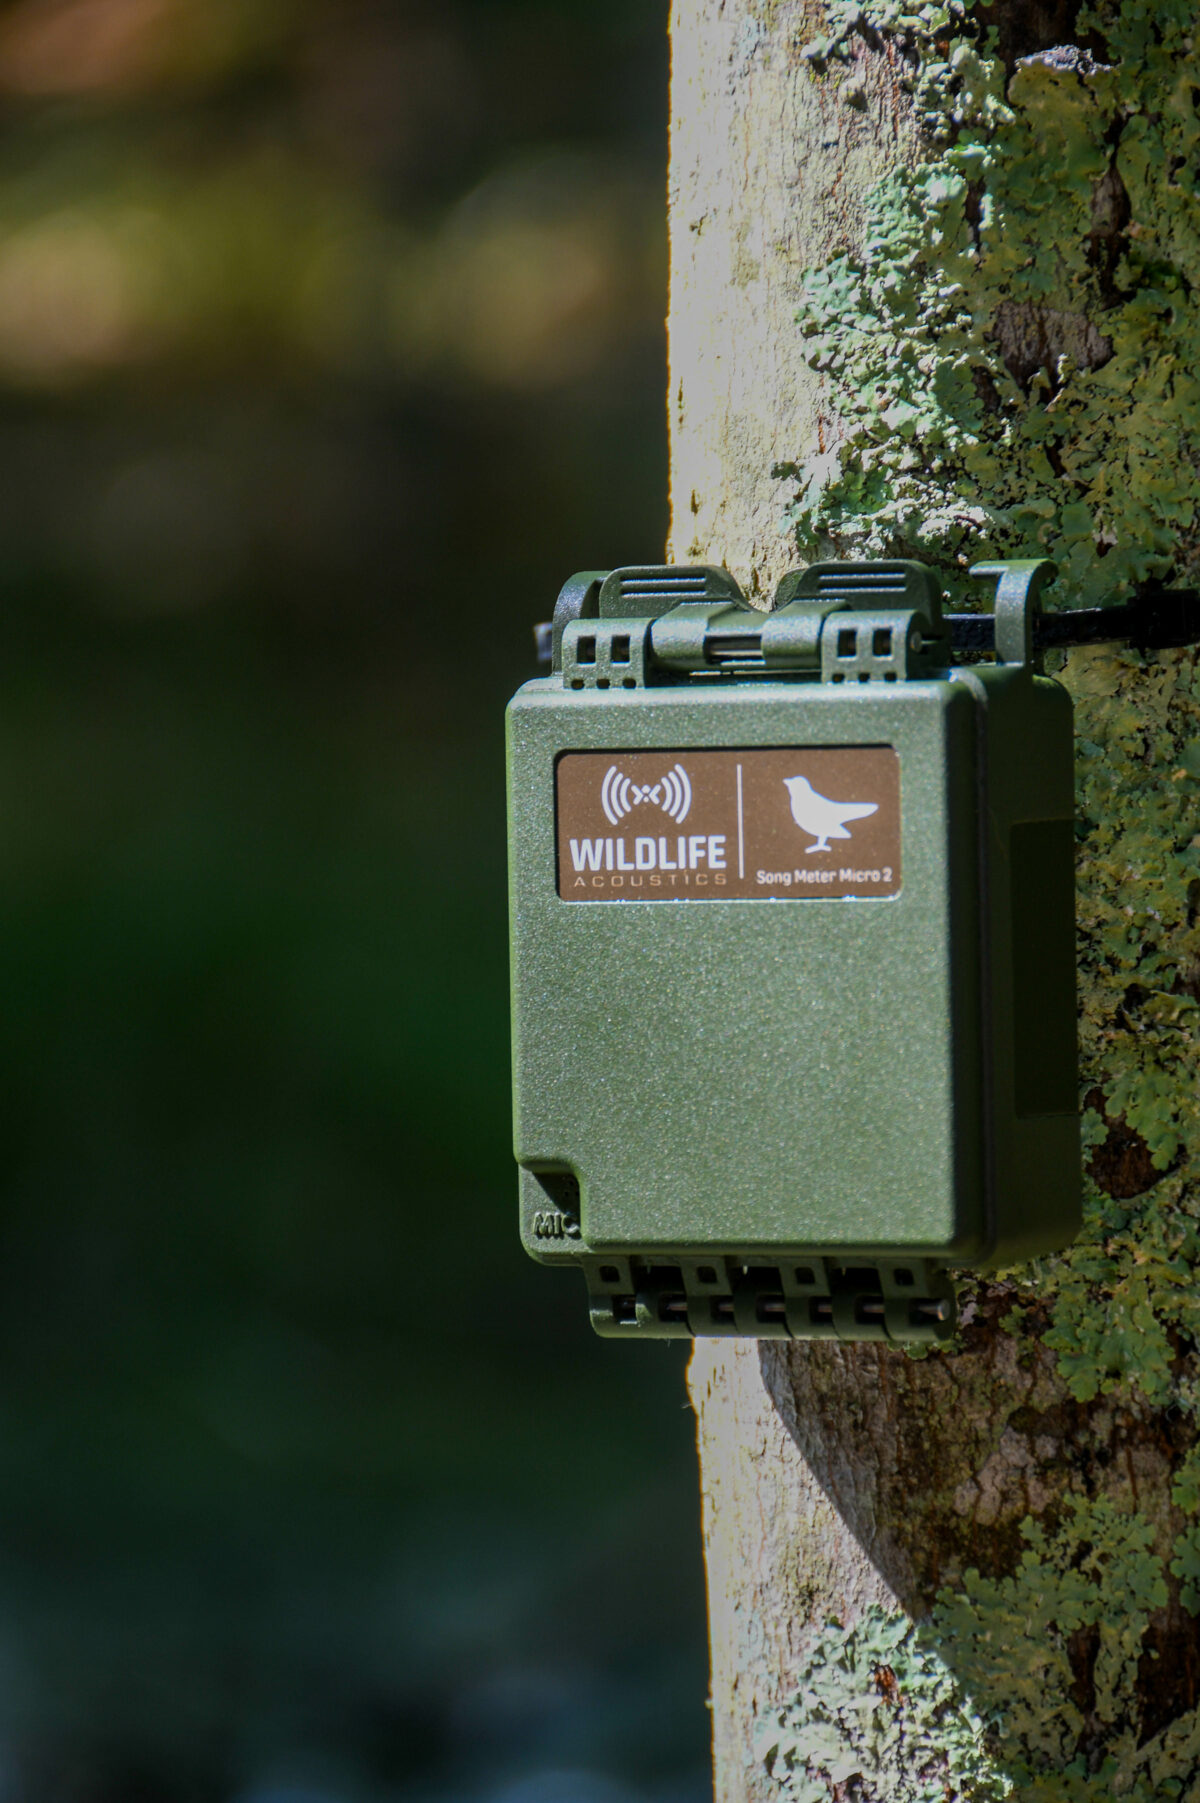
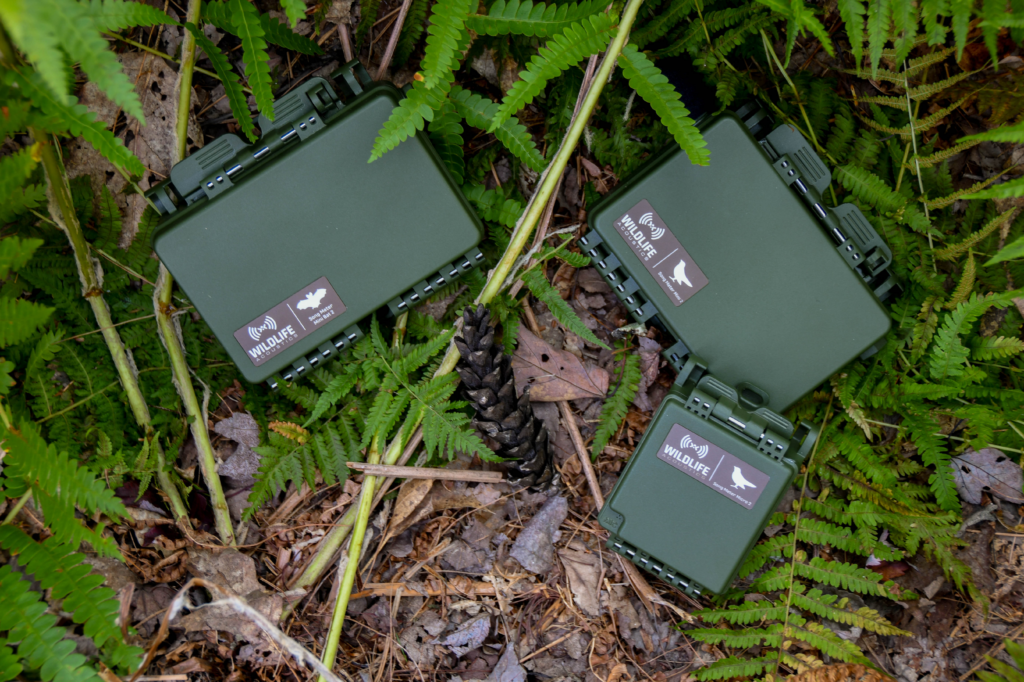
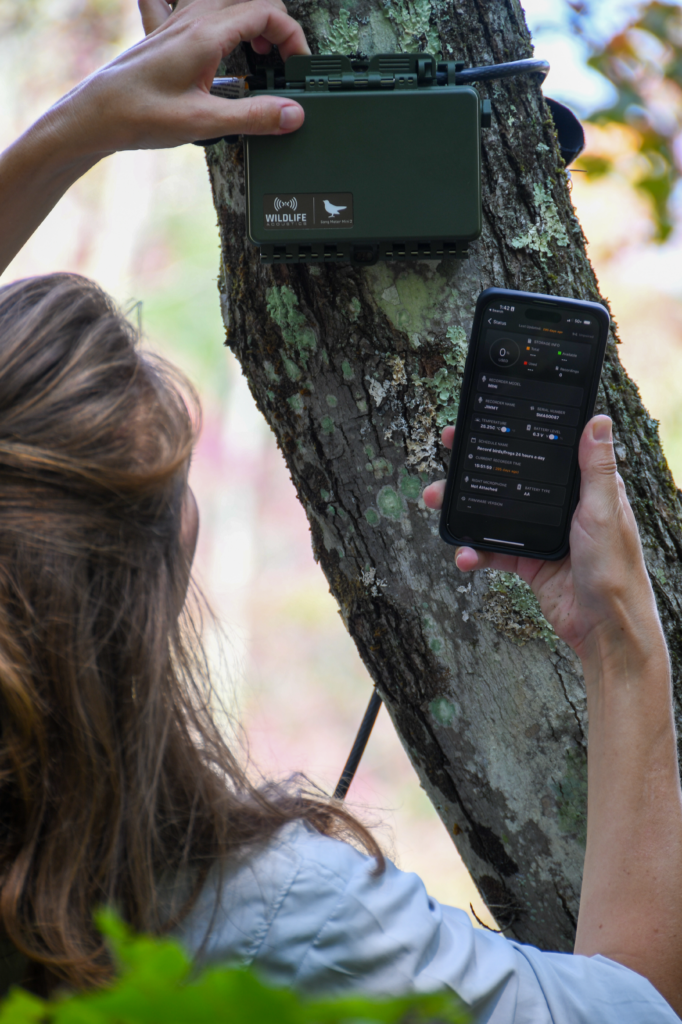
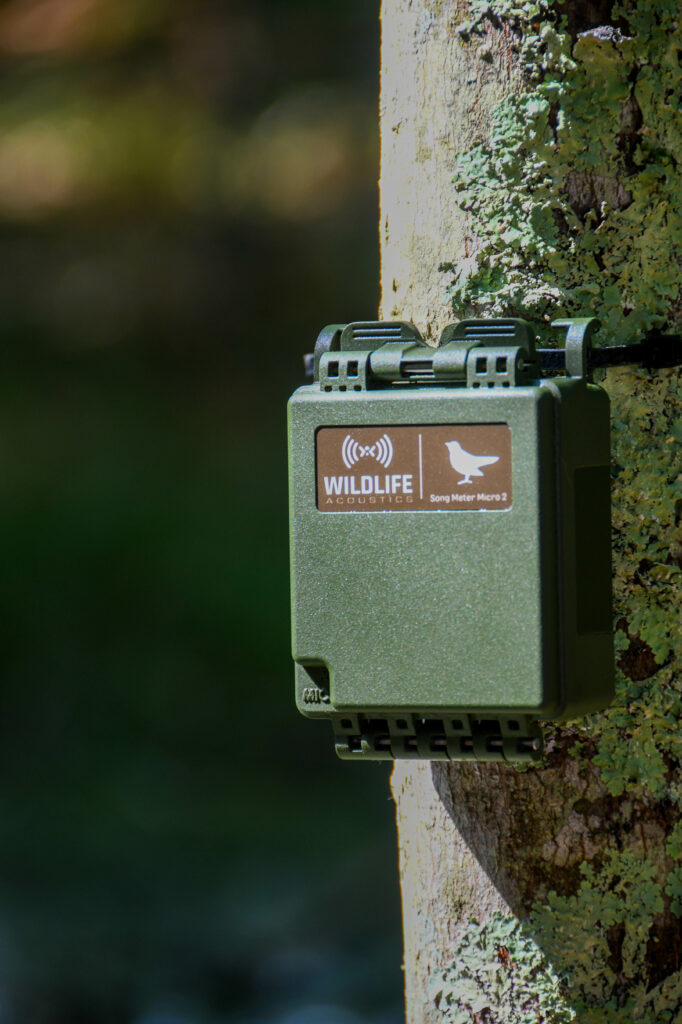
The new Song Meter Mini 2 and Song Meter Micro 2 are due to be launched soon. How do the new versions compare to their predecessors?

We’ve listened to customer feedback and improved the enclosure, extended battery life even further, created separate AA and Li-ion versions (18650 batteries) for the Mini 2 and the Mini Bat 2, and added a quarter-inch, 20-thread-per-inch tripod mount.

The ergonomics of the closure mechanism have been improved, using a hinged lid that can be secured with a simple cable lock. No more having to keep track of a separate lid. And the whole thing is now IP67-rated and built to withstand even the most rugged terrestrial deployments.

AA battery life has been significantly improved thanks to a larger battery tray that doubles the capacity from four to eight batteries. So for a Mini Bat 2, that means up to fifty 10-hour nights of recording, and for a Mini 2, it’s 420 hours of acoustic recording! (And best of all, the price of the AA versions remains the same.)

On the Micro 2, in addition to housing improvements, we improved the design by making room for an additional AA battery, which extends recording time by 33 percent.

Which of the new products is your favourite and why?

I enjoy exploring the new science of acoustic indices and soundscape analysis and am looking forward to using the Song Meter Micro 2, which has a flatter frequency response than its predecessor, making it eminently suitable for this type of work.

It’s also a great little device to take on wildlife holidays because it is so small—perfect for recording dawn choruses, nocturnal soundscapes, and finding that elusive bird. It’s always exciting to look at the contents of your SD card in the morning and hear what’s been around!

What can you tell us about plans for new features or products in the future?

Only that we’re not resting on our laurels. Our engineers are working on new ideas all the time, and NHBS will be the first to know when we’re ready to make announcements!


All of Wildlife Acoustics’ products are available at nhbs.com. For more information or advice tailored to your specific requirements, please contact us and speak with one of our technical advisors.

Author Q&A with Kayleigh Fawcett Williams: Thermal Imaging for Wildlife Applications

Thermal Imaging for Wildlife Applications offers readers an invaluable and practical guide to this exciting technology. Covering a wealth of basics, including the history of thermal imaging and its advantages and challenges, the book also provides readers with all the information they need to begin choosing and using the right equipment. A chapter on wildlife applications covers all of the main animal groups for which the technology is of use, and a final chapter discusses the future possibilities of thermal imaging.

Kayleigh Fawcett Williams is a Wildlife Technology Trainer and Consultant and has been using technology for wildlife applications for the past sixteen years. As the founder of Wildlifetek and KFW Scientific & Creative she helps wildlife students, professionals and enthusiasts use technology to improve their wildlife work via her online training and support services. Kayleigh is also the author of the Thermal Imaging Bat Survey Guidelines which were published in 2019 in association with the Bat Conservation Trust (BCT).


During your PhD, you spent some time training to be a thermographer. What did this training involve, and how valuable do you consider this type of ‘formal’ training to be for anyone wanting to use thermal imaging equipment for their work or studies?

My thermography journey really began when I took my Level 1 Thermography Certification. This was an in-depth technical training with the Infrared Training Centre (ITC) at FLIR’s UK Headquarters in West Malling. It was a fantastic grounding in thermal science and kick-started my use of this technology. I always recommend this training to students and researchers who need to know how to carry out temperature measurement. This is usually only for very specialist research applications where the body temperature of the animal that they are working with is needed.

However, it’s definitely not for everyone. In fact, very few wildlife applications require temperature measurement, but all of them require an understanding of how the technology works, its limitations and, of course, its benefits. That’s why I have since developed wildlife-specific training for those that want to use this technology effectively but don’t need temperature measurements.

Thermal imaging equipment has been around in one form or another since the 1960s/70s. Why do you think it has taken so long for it to become more widely adopted?

It’s a long story, which I cover in much more detail in the book, but I think there are two key elements that have affected our adoption of this technology for wildlife.

Firstly, a key factor is the nature of the equipment itself. Early thermal imaging devices were expensive and cumbersome, making them largely inaccessible and impractical for most wildlife professionals. Over the decades, we have seen huge improvements in both the affordability and practicality of models available on the market. This has accelerated in recent years, where we’ve seen a massive shift towards the use of thermal imaging by both professional wildlife ecologists and amateur recorders alike.

Secondly, another major influence is the expertise of those using the equipment. Without an appropriate understanding of the technology, many have failed in their attempts to use it effectively. Unfortunately, in some cases this has led to misuse and the spread of misinformation about the technology. This has undoubtedly slowed our adoption of this technology for wildlife purposes.

Among the 300+ documents I reviewed as part of the research for the book, I noticed time and time again that these factors, equipment and expertise, determine the success or failure of thermal imaging for a wide range of wildlife species.

What do you consider to be the main challenges in working with this type of equipment?

Again, it is usually those same two factors we just discussed: equipment and expertise.

The number one question I am asked by ecologists, researchers and amateur recorders is: “What thermal imaging equipment should I buy?”. With an ever increasing list of thermal imaging devices available for us to buy, we can experience a paradox of choice where we can become confused by the array of different options on offer. So choosing the appropriate equipment for a specific wildlife application can be challenging, yet it is absolutely vital to get this bit right.

Once we have chosen our kit, the next challenge is being able to use it effectively. This requires an appropriate level of knowledge and experience, but acquiring this kind of expertise can be difficult, as I found out when I first began my work in this area thirteen years ago. Back then there were very few training opportunities and hardly anyone was using the technique outside of academia. Thankfully, things have changed a lot since then and wildlife-specific training is now available, making it much less of a challenge to access the knowledge and develop the skills that are needed.

The recently published 4th edition of Bat Surveys for Professional Ecologists includes, for the first time, new content on night-vision aids. How much of an impact do you think these recommendations will have on routine bat surveys and their results?

I think the widespread use of night-vision aids for bat surveys will be transformative for the ecology sector. Personally, I have been using thermal imaging technology for this kind of survey for many years so I am well aware of what we can achieve using night-vision aids compared to traditional methods. As a trainer, I am lucky that I also get to see lots of my students experience this for themselves. Many ecologists have told me what a game-changer it has been for them and what a difference it can make to their survey results.

So what have they been missing? Well, in the past, without using night-vision aids, surveyors often battled with the painful but common uncertainty that can lead to writing the words “possible bat emergence” on a survey form. The knock-on effects of these three words can spiral out of control, leading to a raft of unnecessary effort and costs associated with a bat that may or may not have emerged from a tree, building or other man-made structure. On the other hand, we can also easily miss bats using traditional methods. This can of course be costly financially but, more importantly, can lead to harm to the bats themselves.
So it is undoubtedly going to have some massive benefits, but it is also important to consider that, to achieve them, many ecologists out there are now having to get to grips with some new technologies. Some have found this easy and have embraced this change with enthusiasm, while others have a steep learning curve to contend with. Either way, I think it is going to be worth it.

When considering the use of thermal imaging equipment, a lot of attention is given to choosing the right product and designing a suitable survey protocol. However, do you think that the post-processing stage is equally important? And are there widely available software packages that can help with data processing and analysis?

Post-processing and analysis can be just as important, depending on the target species. When used for bat surveys, for example, post-processing and analysis using specialist software packages can make a big difference to the level of accuracy we can achieve using thermal imaging technology. To get those levels of accuracy, however, requires another level of cost in terms of effort, time and investment in software packages. Some software packages for these tasks can be quite expensive, but there are open source options as well. Thankfully, advances in automation procedures are also paving the way to streamlining this process in the future.

Finally, what’s keeping you busy this winter? Do you have plans to write further books?

I do have plans for another book, but right now I am taking a break from writing to focus on something a little bit different. I am currently filming some exciting footage for an upcoming video series called “Wildlife Detectives” on my new YouTube Channel. As part of this I will be using some really cool technologies, including thermal imaging, to find some fascinating wildlife species out in the field. Keep an eye out for it in the New Year!


Thermal Imaging for Wildlife Applications by Kayleigh Fawcett Williams was published in October 2023 by Pelagic Publishing and is available from nhbs.com.

NHBS staff picks 2023

Every year at NHBS we see a huge range of books and equipment travel through our offices and warehouse, via desks and bookshelves, finally leaving us in packages on their way to our valued customers. Invariably, we end up purchasing a number of these for ourselves, and others become gifts for our friends and families. This year, for our staff picks roundup, we have chosen the books and equipment items that we’re hoping to gift to our loved ones this Christmas.


Blue Machine: How the Ocean Shapes Our World 

An engrossing odyssey into oceanography that reveals a fascinating planetary engine. Equal parts physical oceanography, marine biology, and science history, topped off with human-interest stories, Czerski has written a captivating book that oozes lyricism in places.
Leon Vlieger, Catalogue Editor


NHBS Kent Bat Box

New for 2023, the NHBS Kent Bat box is based on the proven and popular design from the Kent Bat Group. Made from untreated rough-sawn Douglas Fir, the box is self-cleaning, easy to install and reasonably priced, making it an ideal gift for the bat enthusiast in your life.
Johnny Mitchell, Senior Wildlife Equipment Specialist


The Book of Wilding: A Practical Guide to Rewilding Big and Small 

An attractive, practical and inspiring guide that not only illuminates the greater need for wilding in the larger landscape, but also some really thoughtful ways people can engage on smaller scales. It’s hopeful too, which makes a good gift I always think!
Oli Haines, Graphic Designer


Echo Meter Touch 2

A fantastic gift for someone with an interest in bats. To set it up, simply plug it into your phone and start recording. It converts the ultrasonic sounds from the bats into audible noises and auto-identifies the species you are listening to.
Samuel Brook, Technical Advisor


Antarctica: A Birds-eye View

A beautiful coffee table book which I would like for myself or my photographer friends. A book that gives you an insight into a threatened world from a view you wouldn’t normally see. Both beautiful and barren, the images create a feeling of being there with the nature and environment that is threatened and disappearing fast.
Simon Palmer, Technical Advisor

Dinosaur Monopoly

I bought this for my son as a present last year as he is obsessed with Monopoly and dinosaurs. It was such a hit, my youngest son asked for it this year. It is a great alternative to traditional Monopoly and we loved the dinosaur pieces .
Mark Fisher, Product and Purchasing Manager


The Observant Walker: Wild Food, Nature and Hidden Treasures on the Pathways of Britain

It is always a pleasure to gift someone a book that you have previously delighted in reading yourself. The Observant Walker for me is one such book. Written in John Wright’s wonderfully conversational style, the book is both informative and witty; the perfect choice for anyone who loves nature and discovering its edible bounties.
Luanne Wilkes, Senior Editor


Image of the Digi-Scope Smart Phone Adapter being used with a binocular scope attached taking a photo of a black and white bird in grass.Digi-Scope Smartphone Adapter

Really useful for anyone who wants to try taking pictures while they’re out exploring nature with their binoculars and want to quickly be able to take pictures of what they’re seeing through the binoculars. I use mine regularly and it’s helped me get some great images. It’s also really easy to use and a great addition to any hiking kit!
Adam Hampton, Technical Advisor

Entangled Life: How Fungi Make Our Worlds (The Illustrated Edition)

This book includes an absolutely stunning collection of photographs that show the incredible detail, vibrant colours and sometimes strange features of many different types of fungi. I really love how the photographs zoom in on this often overlooked lifeform that is so difficult to appreciate fully with the naked eye.
Jo Graeser, Marketing Assistant


Browning Recon Force Elite HP5

I installed the Browning Recon Force Elite HP5 wildlife camera on a tree in our orchard AND WE LOVE IT! It shoots both stills and video, but my absolute favourite setting is the moving image function, especially paired with the no-glow night vision LED light during the night.
Sabine Lang, Customer Services Advisor


Why a trail camera makes the perfect gift this Christmas

Badger image taken with the Browning Spec Ops Elite HP5

Choosing the right gift for friends and loved ones can be a tricky affair, but for any keen wildlife watcher, and particularly one with a fondness for photography, a trail camera could be the perfect option. Here’s just a few reasons why we’re fans:

1. Catch a glimpse of wildlife that you wouldn’t otherwise be able to see
An obvious one perhaps, but trail cameras give you a wonderful opportunity to see and capture footage of all sorts of wildlife, particularly species that are easily startled or those that are active at times when we’d prefer not to be out and about (such as in the middle of the night) – a trail camera will allow you to observe the hidden lives all around you. The video below, recorded with the Browning Recon Force Elite HP5, is a wonderful example of what you can achieve right outside your back door.

2. See what animals are up to at times when you wouldn’t usually be watching
A perfect example of this is observing nocturnal animals. While the hardiest wildlife watcher might not be averse to wandering the fields and woods in the middle of the night equipped with the latest night vision gear, most of us would prefer to be tucked up in our beds. Trail cameras, with their night vision technology, can take images and videos of all the action so you can view it later at a time that’s more convenient. The video below shows a young fox passing through at night, recorded using a  Browning Recon Force Elite HP5 by Two J’s Wildlife Camera Set in Cornwall.

3. View behaviours and interactions that are usually unseen
While nothing beats an in-person encounter with a wild animal, such experiences are often brief and offer us limited insight into their life. Trail cameras, particularly those equipped with no-glow night vision technology (which means there is no tell-tale red flash when they take a photograph), are inconspicuous and will record footage for as long as there is movement within their capture range. This means that they are great for letting us experience a much broader range of behaviours and interactions. The video of the squabbling squirrels below was recorded by Two J’s Wildlife Camera Set in Cornwall.

4. Create stunning time-lapse videos
Almost all trail cameras can be programmed to capture images at a time interval of your choice, regardless of whether there is any movement detected. Using this function makes it possible to capture the subtle and gradual changes in the environment that would be difficult to observe in real time. Similarly, they can also be used to record behaviours that take place over longer periods, allowing you to view them at an accelerated speed.

A wren sitting on a branch in scrub.
A Wren photographed using the Browning Strike Force Pro X 1080

5. Share your findings with others
Whether you’re conducting research or simply want to know what’s happening in your back garden, the images and videos from a trail camera are perfect for sharing your findings with friends, family and colleagues. The quality of the photos/videos can be impressive, particularly when using models with high resolution lenses.

Browse the full range of cameras available from NHBS at nhbs.com.

For more advice about choosing a camera to suit your needs and budget, why not take a look at our Trail Camera Buyer’s Guide or contact us to chat with one of our experienced Wildlife Equipment Specialists.

In The Field: Browning Strike Force Pro X 1080

At NHBS, we offer trail cameras from a range of different manufacturers. Among these is Browning, who offer high quality at a reasonable price. The Browning Strike Force HD Pro X was one of our most popular cameras, and we regularly recommended it to customers. It offered ease of use, affordability, and excellent daytime and night-time photography. Browning regularly update their range of trail cameras, and given that the Strike Force has been on the market for several years, it has likewise been upgraded to a newer model, the Browning Strike Force Pro X 1080.

Trail camera with camouflage facing the camera with white background.
The Browning Strike Force Pro X 1080.

We wanted to test out the new Browning Strike Force trail camera to ensure it lives up to the standards of its predecessor. Here we will detail how we tested this camera and what we found.

Set up

To test the Strike Force, we headed to an estate in Devon that is managed to improve the condition of wildlife.

The set-up was relatively simple; we found a clearing between two areas of scrub where we suspected that animals would pass through, and secured the camera to a small tree at around waist height using a Python Lock.

The Strike Force comes with a camera strap included which works excellently, but we would recommend purchasing extra security options like a Python Lock if you are placing your camera in a public place. The strap and Python Lock can fit around a tree or a fence post and be tightened to hold the trail camera in position.

I set the camera to default settings and then changed it to photo mode and set the multi-shot option to three photos. I wanted to leave the camera out for a significant length of time, and I knew that videos would drain the battery and fill up the memory card rapidly. The multi-shot mode would hopefully allow me to get a few pictures of an animal moving through the frame.

Results

After three months in the field, the results yielded surpassed our expectations. We knew from talking with the conservation manager at the estate that we might get some decent pictures, but the range of species was unexpected.

The trail camera captured pictures of a range of bird species including one of a buzzard in flight.

Buzzard in flying past bushes.
A buzzard in flight.

We were lucky enough to get an amazing shot of a deer reaching for a leaf from the swaying branch of a willow tree as well as an excellent night time photo of a deer.

Deer reaching for a willow leaf.
A deer reaching for a willow branch.
Deer in a field at night. IR image.
A night-time image of a deer using IR photography.

A herd of Belted Galloway cattle were spotted passing through the clearing.

Cows with white stripe walking through a field with bushes around.
A herd of Belted Galloway cattle pass by the camera.
A herd of striped cows pass by the camera with calves in tow.
A Belted Galloway calf.

This herd of cows were curious and ended up nudging the camera with their noses, causing the camera to face towards a bush. We then caught a glimpse of a fox with the infrared camera mode. The image is a bit overexposed due to the vegetation in the foreground.

IR image of vegetation in the foreground and the faint image of a fox in the background.
A fox passes through the clearing.

Despite the overexposure, many of the IR pictures were excellent.

IR picture of vegetation in the foreground with two deer in the background passing through a clearing in the vegetation.
Deer at night.

We even managed to get a picture of what looks to be a Barn Owl on the ground at night. While not very clear due to the overexposure, it certainly confirms its presence in the area.

Vegetation with a barn owl on the ground in the background in IR photo mode.
A sighting of a Barn Owl on the ground.

The cows came back and pushed the trail camera even further to the right so that it was pointing into a bush. Fortuitously, we managed to get pictures of a mouse, a Robin and a Wren.

An IR photo of a mouse climbing a stick in foreground to the right of the image and vegetation in the background.
A night-time photo of what looks to be a Field Mouse.
Robin sitting on a branch surrounded by vegetation.
A Robin sitting in scrub.
A wren sitting on a branch in scrub.
A Wren sitting in the same spot as the Robin.

In addition to the species featured above, we also captured pictures of butterflies, squirrels, pheasants, Wood Pigeons, a thrush and a Great Tit.

Performance

When sorting through the 5,500 photographs captured, I found that the vast majority didn’t show any animals. I suspect that this could be remedied by better camera placement, although this may be unavoidable if there is a lot of vegetation around the area you wish to monitor. The major downside of taking so many photographs is that it takes a long time to sort through, and could potentially fill up your storage too quickly if you set your camera to video mode.

The image quality was impressive, with high-quality images and limited motion blur. The most notable issue was the level of exposure in the images, mainly at night. This was largely an issue because a herd of curious cows nudged the camera so it was facing the edge of a bush. This is unlikely to be a problem in the majority of cases and, prior to this, the night pictures were excellent.

Longevity

We placed the camera in the field in mid-July and collected it in mid-October. As such we were able to get around three months of footage. Image quality was set to 24MP with 1.5–2.5MB of storage used per image and around 5,500 images in total. This meant that we only used around 11GB out of a total of 32GB of storage available on the SD card. Remarkably, when the camera was collected it registered 94% battery, demonstrating the longevity of the Strike Force in the field, especially when set to photo mode. I suspect that this camera could have been left for another three months in the field without running out of storage or battery power.

Verdict

Overall, our experience demonstrates that the Strike Force Pro X 1080 is an impressive trail camera with high-quality day and night footage and impressive longevity. While it perhaps doesn’t quite reach the heights of the Browning Recon Force Elite HP5 or the Bushnell Core DS-4K in terms of picture quality, a more affordable price and impressive performance make this camera highly recommendable for both professionals and hobbyists.

No-glow alternative camera – Browning Dark Ops Pro X 1080

The Browning Strike Force Pro X 1080 is a low-glow camera meaning that the glow from the IR bulbs can be seen by both humans and animals. A no-glow camera may be the best option if you are looking for extra security or photographing an easily alarmed species. The Browning Dark Ops Pro X 1080 is an ideal no-glow alternative to the Browning Strike Force Pro X 1080. While a little more expensive, it is stealthier, and humans are less likely to notice it due to its no-glow flash. The only disadvantage is the shorter 24m flash range of the no-glow bulbs compared to the 36.58m flash of the Strike Force.

Trail camera facing towards the camera with camouflage coating with a white background.
The Browning Dark Ops Pro X 1080.
Accessories

The Python Lock is an ideal accessory for your trail camera. It won’t stop your camera from being damaged but it will prevent theft and keep your camera securely fastened to a tree or post. The lock is anti-picking, weatherproof and vinyl-coated. We used a Python Lock, and it held the camera in place until a herd of cows decided to turn it.

Image of a coiled up python lock.
Python Lock.

Spare memory cards and batteries are also highly recommended, especially if you are planning to use your trail camera on video mode. These additions will help you keep your camera operational for longer. Lithium batteries are highly recommended as, even when they have low charge levels, they supply sufficient power to the trail camera. Users of alkaline batteries may find that their trail camera isn’t performing well at night; this is because the batteries are not supplying sufficient power for the IR bulbs to function correctly.


Get your Browning Strike Force Pro X 1080 from our online shop.

Hawke Digi-Scope Smart Phone Adapter

Hawke DIGI-SCOPE SMART PHONE ADAPTER with a binocular lens attached being used to take a photograph of a black and white bird in the grass.

Getting into nature photography can be a daunting prospect. What camera do you buy? Which lenses do you choose, and what size should they be? How much should you spend? These are all questions that require a good bit of thought, and rightly so. However, what if you wanted to dip your toe in at the shallow end and use equipment that you may already have lying around to take decent photos at a fraction of the price? That’s precisely where the Hawke Digi-Scope Smart Phone Adapter comes in. I decided to put it to the test by taking images of local wildlife at a variety of ranges with two of Hawke’s spotting scopes and a pair of Kite binoculars. To do this, I used the Hawke Nature-Trek 20–60 × 80 and the Nature-Trek 13–39 × 56 scopes, and a pair of Kite Ursus 8 × 32 binoculars. 

Hawke have established a name for themselves as producing reliable and rugged optics for the entry to mid-level markets and this optical adapter fits nicely into that niche, giving anyone with an optical device the option to transform their optics into a camera lens, when combined with a smartphone camera. 


Out of the box – first impressions 

The adapter comes packaged with a small instruction manual and some small foam sticky pads to place around the aperture clamp and prevent damage to the ocular lens of the optics you are using. Made from lightweight ABS plastic, the adapter feels light in the hand but not fragile. Stated compatibility on the box is for eyepieces 23–50mm in diameter, so make sure that the optics you plan to use meet these specifications. There is also a minimum and maximum size for compatible phones (width 66–95mm), but most currently produced models should fit fine.

Front and back of the black scope phone attachment.

Ease of use  

The adapter is a simple piece of kit that is designed to fit around the ocular lens of a spotting scope, microscope, telescope or, most commonly, a pair of binoculars. The spring-loaded clamp then allows you to place your phones rear camera to the eyepiece and align them, in essence creating an inexpensive camera and physical lens arrangement. This will then allow your smartphone to take photos at ranges that the vast majority of devices on the market wouldn’t be capable of. Getting this alignment right can be quite fiddly but once found, the adapter holds fast, and the point of focus doesn’t drift. It’s important to try to remember to reduce/disable the auto focussing on the device as this can be at odds with the manual focus of the scope itself. Likewise, make sure to zoom the phone camera slightly to avoid giving a ‘scoped’ view to your photos, with a circular black border (see below).

Photograph taken through the scope attached to a phone of some ducks in a garden with a black ring around it in the shape of the lens. Photograph taken through the scope attached to a phone of some ducks in a garden without a black ring the shape of the lens around it, focused nicely and closely on the ducks.

In the field 

Testing the adapter involved setting it up on the window ledge of a bird hide and using it while combing along the River Dart, allowing tests over variable distances to look and capture at different focus points and ranges. I often found that target acquisition with the scopes was a bit of a lesson in trial and error as any hand movement through high magnification lenses will be exacerbated massively through the screen. However, this will be greatly reduced by using a lesser magnification or a stabilising structure such as a tripod (or a handy fence post). The use of a phone in this case proved crucial as the post- processing from the device helped to mute the amount of disturbance to the final image from this unavoidable shaking. While there was some aberration introduced to the final photos, it didn’t mar the result too much or overly distract from the images (see below). 

Photo of a mallard duck swimming on the river by some reeds taken through the Hawke smartphone adapter. Photo of a duck flapping its wings and splashing on the river by some reeds with a vignette image border taken through the Hawke smartphone adapter.

Using the adapter with a pair of binoculars was where the Hawke Digi-Scope really shone. Quick to acquire and quick to capture, the photos produced were, in my opinion, superb, making this an ideal tool for an enthusiast beginning their journey into nature photography. (see images below) 

Zoomed in photograph of a squirrel on a grey and red roof. Photograph of a crow on some grass which is scattered in autumn leaves.

While the adapter itself is a lightweight bit of kit, whatever you mount within it will add weight to the back of your optics and upset any built-in centre of balance – much as I found out when, after attaching the phone, the scope made a determined attempt at see-sawing off the bird-hide window ledge. When not attached to the optics, however, the adapter is small and portable, fitting easily into a pocket without any discernible bulk or weight. 

Taking pictures with the adapter was as simple as hitting the camera button on the phone and snapping away, making sure to adjust the focus using the scope/binoculars as needed (this took a bit of practice to get used to). I didn’t manage to get any images of animals moving at great speed (something a dedicated nature photography camera would have no issues doing) while using the scopes, as acquiring and holding onto the target while also focusing using the scope lent itself to more stationary birds (see image 9). The binoculars, on the other hand, were great for reactive type photography, albeit at much reduced ranges (e.g. image 10). 

Photograph of a brown duck standing on one leg scratching the underside of its wing with its beak stood on a log taken through a lens.
Image 9
Motion photograph of a crow taking off in flight from a patch of grass scattered in autumn leaves.
Image 10


Conclusions

While using the Hawke Digi-Scope, it is important to remember that the phone you use, the post processing that it does, and the settings you enable will all modulate the end result in some way, and this is an unavoidable part of using your phone to take images with a non-attached magnification device. Unlike an expensive camera with light meters and other tools, this setup will never quite produce a true to life image with no introduced imperfections.  

In terms of optics, the scopes performed well and were great in their own right; however, both the models I used were technically 1–2mm over the maximum specified eyepiece diameter. This was surprising as the mount seemed to fit fine (a little snug if anything), but also surprising as it begs the question as to why this adapter doesn’t fit the full range of Hawke products. This was not an issue with the binoculars as they have a much smaller ocular aperture. 

It is just as important to stress this wasn’t a test of the optics used but rather the adapter itself and, in that role, it performed very well. It held the phone securely and the rubberised touch points prevented slippage, keeping both the scope and phone lenses aligned. But, as stated before, this was a bit of a fiddly procedure.  

I do think that this adapter helps to bridge the gap between the more professional nature photography market and the more casual enthusiast who wishes to go and get some decent photos of what’s living in the area around them, and it will help to extend the reach of the average person’s smartphone camera by quite a distance. The speed of setup and lack of any frills really helps to make this adapter a portable, reliable workhorse or a spur of the moment image capturing tool. If you’re looking for an inexpensive bit of kit to add to your usual birding/hiking/survey gear alongside your pick of optics, this is the adapter for you.  


The Hawke Digi-Scope Smart Phone Adapter is available at www.nhbs.com/digi-scope

In the Field – Hawke Endurance ED Marine Binoculars 7 x 50

Introduction. 

Choosing the right binoculars for either your hobby or work is something you should spend time on. While using binoculars on dry land sometimes has challenges with poor weather conditions, if you then wish to use a pair of optics out at sea, you should consider some additional points. 

Wind, changing light conditions and weight are amongst the deciding factors on what makes a good pair of optics but add variable movement and changing landscapes to the list of elements to assess a pair of binoculars and you need to review your selection even more carefully. I’m very lucky to be able to have access to a boat for cetacean spotting and surveying. With that in mind, I decided to put the Hawke Maritime 7 x 50 binoculars through a test. But one thing that always makes it a challenge is the sea state, coupled with fast-changing light and weather conditions. Many of the points outlined below still form part of the normal considerations for use on land, but I’ve tried to extend the thoughts to the case of ‘at sea’. 

What to look for in a pair of marine binoculars? 

Crisp image 

I have found that some binoculars are let down, not by the amount of light going through the lens elements, but by the overall quality of the image. While a bright image is important, chromatic aberrations can cause issues with the identification of surface or flying objects, especially when they are near the edge of the field of view. When the sea state is above 1 (calm or glass-like), there is more movement in the wave height and the amount of time you have to determine the object on the far side of the wave is reduced. Is it a bird, or a dorsal fin? At certain times of the year, it becomes even more of a challenge when you have adult guillemots on the surface of the water with their black and white bodies that can look like the dorsal fins of cetaceans.  

This is also important with the large field of view. Maritime binoculars are all about the amount of vision you have. If you are a skipper on a boat and need to make decisions that affect the safety of your vessel, then seeing more of what is at a distance from you is critical. The choice of a BaK-4 Roof prism also plays into the quality of the image as this design of prism is reserved for higher-end products, and it shows with the quality of the image. 

Brightness 

The overall brightness of the image in all weather conditions is a big help. Timed survey periods for cetaceans rely on the confidence of the surveyor in deciding what they have seen. Whether the light is behind you or in front, the subject brightness needs to be enough to see markings, details of any dorsal fin damage (nicks, cuts), and for the assessment of age. Typically, the youngest calf will have fetal folds on its body, and a bright image will assist in making out those factors to allow assessment of age as they lose these folds after about six months. The Hawke Endurance ED Marine binoculars come in two sizes of front element, the larger giving a brighter image, but at the cost of weight (see below) with the larger binoculars being over 50 per cent heavier than the smaller version. I tested the 7 x 50 version which did not disappoint in brightness and, in my opinion, worth the cost in weight. 

Wide field of view 

The difference between the two main pairs of binoculars in the range from Hawke is dictated by size. The smaller version (not tested) is lighter in weight and contains a smaller front element (less brightness compared with their larger version) but with a greater field of view. This may be part of your decision for the selection as it is worth remembering that the amount of extra view may not be as much as you first thought. A useful tip to remember is that one degree of field of view equates to about 17.5 meters at a distance of 1000 meters. So the difference between the two versions of the maritime product is just under 23 meters of view!  

Waterproof 

The binoculars have been rated IP67. Technically they are waterproof and can be immersed in water for a short period of time without any problems. Hawke have given consideration to this by adding a set of float-assisted neck straps. Coloured bright yellow, it makes it easy to spot should you accidentally drop them over the side of the boat. The strap will keep them afloat. Needless to say, I didn’t test this benefit! It is also worth keeping a cloth with you for wiping away the salt water as, no matter how durable a pair of binoculars can be, sea spray will eventually damage the product. 

Weight 

The 7 x 50 binoculars compared with many others are no heavier than the average. However, my view on weight is reflected by the circumstances of use. If you intend to use them on a boat, and the conditions are less than calm, then holding them with one hand while using your other hand for stability is a great test. Long periods of time holding them in one hand can start to strain the wrist. Using the neck strap is important. 

Conclusion

I found the 7 x 50 binoculars to be a joy to use. Overall, the specifications have been well thought through, and provide the majority of what you would need to survey. They even produce a version with a compass built in, which I can imagine would be a further benefit for recording the sighting direction when surveying. They are comfortable to hold and generate a bright image, making it easy to identify the subject matter. It should also be noted that Hawke provide a lifetime warranty on product defects, which I feel is an outstanding part of the manufacturer’s services. 


The Hawke Endurance ED Marine Binoculars can be found here. Our full range of Hawke Optics binoculars can be found here.

If you have any questions about our range or would like some advice on the right product for you then please contact us via email at customer.services@nhbs.com or phone on 01803 865913.

Buyers’ Guide: Trail Cameras

Quick links:
Introduction
Key features
Our suggestions
Accessories
Recommended reading

Introduction

Trail cameras are an invaluable piece of technology allowing users to monitor wildlife without disturbing the animal. The trail cameras in our range can take pictures and video during the day and at night using infrared (IR) imaging technology. Likewise, they can endure tough conditions, surviving harsh winds, rain and extreme temperatures making them suitable for almost all situations.

At NHBS we sell a wide range of trail cameras, and while this does give customers plenty of choice, it can sometimes be difficult to decide which camera will best suit your situation and requirements. The information in this guide will help you to make an informed choice.

Key features

No-glow or low-glow?

There are two main types of IR LEDs that trail cameras use to capture images in low-light conditions: no-glow and low-glow. No-glow LEDs produce a very small amount of visible light which is not visible to the human eye, animals will likely see very little of this light; although, this may well depend on the species. Low-glow LEDs do produce a faint glow, and so are not completely invisible and may alert certain animals. One advantage of low-glow cameras is their capacity to illuminate over a longer range.

Trigger speed and recovery time

Trigger speed is the time taken for a trail camera to take a photo once movement has been detected. Recovery time is how long it takes for a camera to take a photo and be ready to capture another one. A camera with a rapid trigger speed like the Browning Spec Ops Elite HP5 is ideal for capturing images of fast-moving creatures. Likewise, if you are looking to capture multiple images in a short time frame, a trail camera with a speedy recovery time is the best option. Once more, this is perfect for those quick-moving animals.

Resolution and interpolation

Resolution is a major influence on the quality of your images and videos. It is important to bear in mind, however, that the photograph megapixel ratings offered by manufacturers are often inflated and the result of a process called interpolation. Many trail cameras have the option of adjusting the resolution – increasing it through interpolation or decreasing it through compression. Compression can be useful for saving storage space by reducing the number of pixels. Interpolation digitally adds pixels to an image which eats up storage and generates longer recovery times while doing next to nothing to enhance picture quality. The best way to compare picture quality is to look at sample photographs.

Flash range and motion detection range

If you are planning on monitoring an open area where you expect animals to pass by at a distance, the motion detection range and flash range of a trail camera are worth considering. Motion detection range is the maximum distance a trail camera can register the movement of an animal. The flash range is how far the IR flash will reach. If the flash range is low and an animal is at a distance, you may not see the animal clearly in low-light pictures.

Cellular and solar cameras

Cellular cameras are an excellent choice if you are looking for remote access to your trail camera’s photos and settings without having to regularly interact with your camera in the field. Likewise, the addition of a small solar panel to your trail camera can improve deployment time. This is particularly useful when deploying multiple cameras at the same time or when monitoring inaccessible locations.

Our range of Spypoint cameras are an excellent choice when considering cellular or solar cameras. The Spypoint CELL-LINK, however, enables cellular functionality for trail cameras from non-Spypoint brands and you can purchase solar panels for Bushnell and Browning cameras.

Our suggestions

Entry-level cameras

Trail camera viewed from front showing camera lens and IR bulbsThe Browning Strike Force Pro X 1080 is ideal for those looking for high quality at an affordable price. This low-glow Browning camera boasts a rapid 0.22 second trigger speed, a colour screen, and superb picture quality.

Alternatively, if you are looking for an economical no-glow camera, the Browning Dark Ops Pro X 1080 is an excellent choice.


Popular cameras

The Bushnell CORE DS-4K is an excellent trail camera featuring top-of-the-range picture quality and no-glow IR LEDs, keeping disturbance to a minimum. Additionally, this camera will last for an extended period out in the field due to its long battery life.

Another trail camera with excellent picture quality, the low-glow Browning Recon Force Elite HP5 is an outstanding all-rounder. One benefit of this camera is its longer IR flash range when compared to the Bushnell CORE DS-4K, allowing for improved low-light imagery when the animal is further away.

If you are monitoring a particularly quick species, the Browning Spec Ops Elite HP5’s trigger speed can be adjusted to a lightning-fast 0.1 seconds. This stealthy no-glow camera also features a rapid 0.5 second recovery time and excellent picture quality both during the day and at night, making it one of the top trail cameras in our range.

Accessories

Powering your trail camera

Lithium batteries are essential for operating your trail camera effectively. One of the most common reasons for why a trail camera is not working properly is the use of non-lithium batteries. Most of our trail cameras can be purchased as part of a bundle which includes lithium batteries and a suitable memory card.

Keeping your trail camera safe

The 180cm long Python Lock is ideal for securing your trail camera to trees and posts and preventing theft.

Our range of security boxes will provide additional protection against theft and damage. Double check that the security box you are purchasing is compatible with your trail camera model.

Recommended reading

For an in-depth comparison of the trail cameras in our range, check out our trail camera comparison blog.

Take a look at our in-the-field analysis of two of our top trail cameras – the Browning Spec Ops Elite HP5 and the Browning Recon Force Elite HP5.


Explore our complete range of trail cameras on our website or if you have any questions about our range or would like some advice on the right product for you then please contact us via email at customer.services@nhbs.com or phone on 01803 865913.

Buyers’ Guide: Bat Boxes

Quick links:
Introduction to bat boxes
Bat box design
Bat box materials
Mounting and installing bat boxes
Further information
Accessories and suggested reading

Introduction to bat boxes

Globally there are over 1,400 different species of bat and the UK inhabits 18 of these bat species. Although UK bat species do not create their own roost sites, they will roost in trees and occupy spaces that are created by other animals or decaying trees. But due to the removal of trees and suitable habitat, bats will now often favour human-made roosting sites. The addition of available roost sites is an important way to help prevent the ever-declining UK bat populations.

When choosing which bat box fits your needs, there are a few things to consider – the design of the bat box, the material, and the mounting and installation method. These features can be determined by identifying the target bat species alongside the location and habitat you wish to situate the bat box.

Bat box design

There are several types of bat box design and these can be split into crevice, cavity and hybrid boxes, as well as hibernation, maternity and heated boxes.

Crevice boxes provide a narrower roost space for species that naturally prefer smaller roosts, such as Brandts, Natterers and Pipistrelles, whereas cavity boxes offer a more spacious roost space favoured in general by the larger bat species such as the Greater and Lesser Horseshoe, Barbastelle and Brown Long-eared. Some boxes are designed to be hybrid boxes, meaning they can accommodate both cavity and crevice bat species.

Crevice: Low Profile WoodStone Bat Box

Cavity: Improved Cavity Bat Box 

Hybrid: General Purpose Bat Box 

Hibernation and maternity boxes are similar in their design to provide a warm and safe roosting space. Both boxes tend to be well insulated and larger in size with multiple internal chambers, especially important for maternity boxes that accommodate breeding colonies. There are also heated bat boxes; in these, the temperature is controlled by an external thermostat and can aid with mitigation schemes for the loss of bat maternity sites.

Hibernation: Large Multi Chamber WoodStone Bat Box

Maternity: Causa Maternity Bat Box

Heated: Heated Bat Roost Box

Bat box materials

Bat boxes can be made from a number of different materials; these vary in longevity, durability and often price. The most common materials are wood (often timber); a wood and concrete blend, sometimes known as woodstone or woodcrete; eco-plastic; and concrete. Below is a brief description of each alongside one of our best sellers.

Wooden bat boxes 

  • Lightweight
  • Suitable for externally mounting on both trees and buildings
  • Less robust and shorter longevity than woodstone/woodcrete boxes

Double Chamber Bat Box


Woodstone and woodcrete bat boxes

  • Very durable and long-lasting
  • Well insulated
  • Can be built in or externally mounted to buildings
  • Heavier than wooden and eco-plastic boxes

Beaumaris Woodstone Bat Box 


Eco-plastic bat boxes

  • Sustainably sourced recycled plastic
  • Lighter than woodstone/woodcrete and more durable than wooden boxes
  • Although made from recycled plastic, it is still plastic

Integrated Eco Bat Box


Concrete bat boxes

  • Very durable
  • Very heavy and can only be built directly into buildings

Bat Block


Mounting and installing bat boxes

Bat boxes fall into externally mounted or integrated boxes. Mounted boxes can be fixed to trees, fences or buildings, and integrated boxes are built directly into the brickwork of a building.

Externally mounted boxes can vary in size and material, and often they are wooden or woodstone/woodcrete. When choosing an externally mounted bat box, it is important to consider the weight of the box and the surface you are mounting the box to. Some are lighter and ideal for mounting on trees, while some are more durable and can be fixed to buildings.

All bat boxes should be positioned in an open and sunny location (ideally boxes should have 6-8 hours of direct sunlight), around 3-6 metres high (the higher the better). It is important to avoid placing these close to any artificial lights such as streetlamps or security lights. External mounted boxes can be attached via a hanger or fixing bracket and it is best to fix using aluminium nails.

Vivara Pro WoodStone Bat Box

2F Schwegler Bat Box (General Purpose)

Integrated bat boxes are self-contained concrete roosts. They are popular with new housing developments as they are unobtrusive and often aesthetically pleasing. The boxes can be built flush to the wall or beneath a rendered surface, and each box has an entry point that must be left exposed for the bats to access the box. Some boxes are plain for rendering or can be custom faced with a chosen brick type which adds to their discreteness.

Habibat Bat Box 001

Vivara Pro Build-in WoodStone Bat Box


There are also pole-mounted bat boxes (sometimes known as rocket boxes). These bat boxes are helpful alternatives in areas where there is nowhere to mount the bat box. An additional benefit is that they ensure that the bat box gains maximum sunlight in shaded areas.

Pole Mounted Large Colony Bat Box


Lastly, there are bat roost access titles and bricks. These are designed to provide bats with access points within roof or ridge tiles. Some bats will roost in the confined spaces beneath the tiles and others will use the open roof space to roost.

Bat Access Tile Set

Further information

We supply a wide range of bat boxes, and we hope this Buyer’s Guide is informative and provides a useful breakdown of the different types available to help you decide which bat boxes best suits your needs.

For further information, please get in contact with us directly and take a look at our blogs including The NHBS Guide to UK Bat Identification and the NHBS Guide: Where to hang and how to maintain your bat box.

Accessories and suggested reading

Heavy Duty Aluminium Nails 

Xtend & Climb Pro Telescopic Ladder

A Miscellany of Bats 

Bat Calls of Britain and Europe: A Guide to Species Identification


  • Our full range of bat boxes can be found here.

    If you have any questions about our range or would like some advice on the right product for you then please contact us via email at customer.services@nhbs.com or phone on 01803 865913.