A Summer of Dragonflies

Seeing dragonflies swoop over water is a quintessential sign that summer is upon us. When in flight their movements are mesmerising – using their two sets of wings either in synchrony or beating separately, they are able to fly in any direction they choose, altering their speed and movement instantly in mid-flight to create a dance that is unlike any other organism. But while the flying adults are frequently seen during the warmer months, many of us know very little about their life during the rest of the year.

In this article we will take a look at the dragonfly life cycle, explore how climate change and other threats are affecting dragonfly populations globally, and offer some tips on how to attract dragonflies to your garden.

Dragonfly life history

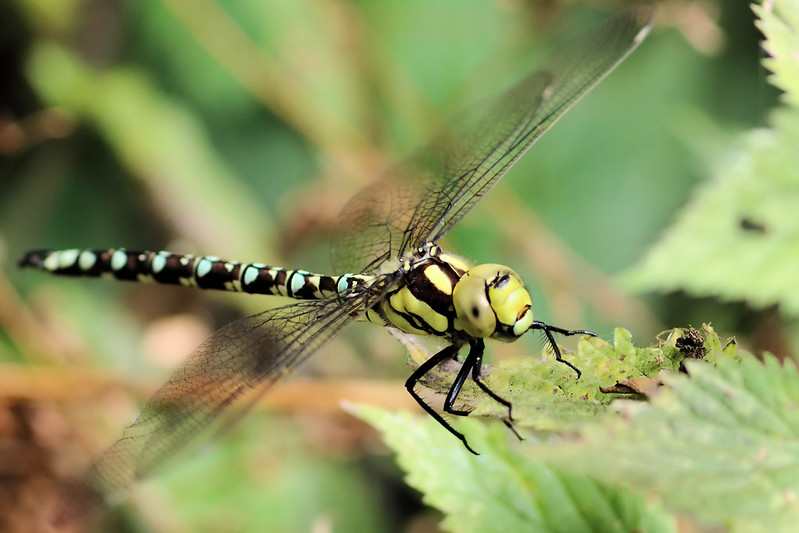
Dragonflies belong to the order Odonata within the sub-order Anisoptera (meaning ‘unequal-winged’). This order is also home to the closely-related damselflies (sub-order Zygoptera). Although at first glance dragonflies and damselflies appear similar, dragonflies are usually larger and bulkier with significantly larger eyes when compared to the slightly built and rather delicate damsels. When at rest dragonflies hold their wings open whereas damsels keep theirs closed, next to the body.

There are three distinct phases in the dragonfly life cycle: egg, nymph (larva) and adult.

Dragonflies breed in or on water bodies such as marshes, swamps, ponds, pools and rivers; after mating the female will lay hundreds of eggs over the course of several days or months. Some species lay their eggs inside plant material, either on the surface of the water or submerged. Others encase their eggs in a jelly-like substance and deposit them directly into the water. Eggs usually hatch within a few weeks, although some remain in the water throughout the colder months and hatch the following spring.

The first larva that hatches from the egg is known as a prolarva, and this very quickly moults into the first proper larval stage. The larvae, or nymphs, then proceed to moult a further 514 times – typically taking place over 12 years, although it can be as long as five years in species such as the Golden-Ringed Dragonfly. Nymphs continue to live in the water and are voracious eaters, feeding on insect larvae, crustaceans, worms, snails, tadpoles and even small fish.

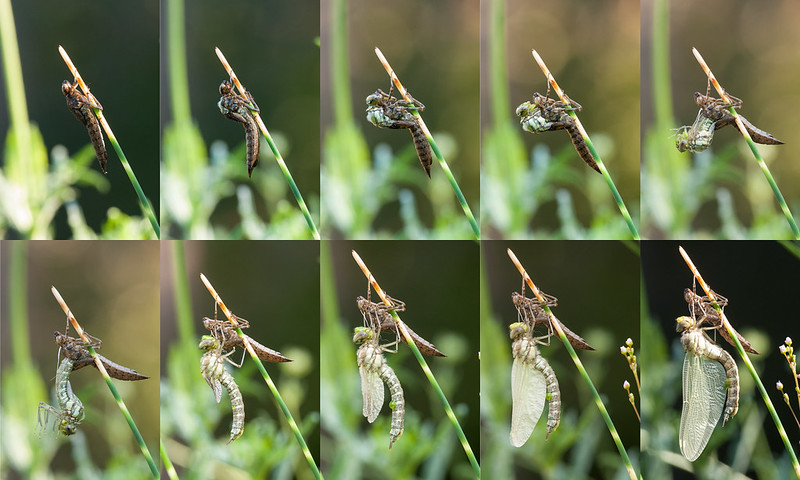
Southern Hawker undergoing the final moult from nymph to winged adult. Image by John Copley via Flickr.

Unlike many other flying insects, such as butterflies and moths, the final moult of the dragonfly does not feature a pupal stage – known as incomplete metamorphosis. This moult takes place out of the water where the winged adult emerges from the nymph skin, leaving behind an exuvia, or skin cast. A period of time is then spent feeding away from the water before the adult dragonfly returns to breed and begin the cycle again. Life expectancy of the adult dragonfly is short – typically only 12 weeks, although some will live for up to 56 weeks.

Conservation and climate change

An IUCN update in December 2021 stated that the destruction of wetlands is driving a worldwide decline in dragonflies. Despite their high ecological value, marshes, swamps and boggy areas continue to be degraded by intensified agriculture and urbanisation and, along with longer periods of drought, this is vastly reducing the amount of habitat in which dragonflies and damselflies can survive.

Clean water is also paramount for dragonfly nymphs – so much so that their presence is regarded as an useful indicator of wetland health. Pollution of waterways and water bodies by pesticides and effluent are problematic and are compounding the issue of habitat loss.

In their favour is the fact that dragonflies are highly mobile and appear to colonise new habitats relatively rapidly. With global temperatures on the rise, we are already seeing species shift to higher latitudes and altitudes. Even in the UK, Mediterranean migrants are being recorded with increasing frequency.

Which dragonflies are you most likely to see?

There are just under 30 species of dragonfly living in the UK. Identification of these is primarily achieved using the patterns and colouration of the thorax and abdomen, although a few similar species require the finer details, such as leg colour, to be examined.

Take a look at our article The NHBS Guide to UK Dragonfly Identification for ten of the most common and widespread species you are likely to spot in the UK.

Or why not check out this interactive map from the British Dragonfly Society where you can search for good places to look for dragonflies near you. You can also filter the results by species if you’re looking for something specific.

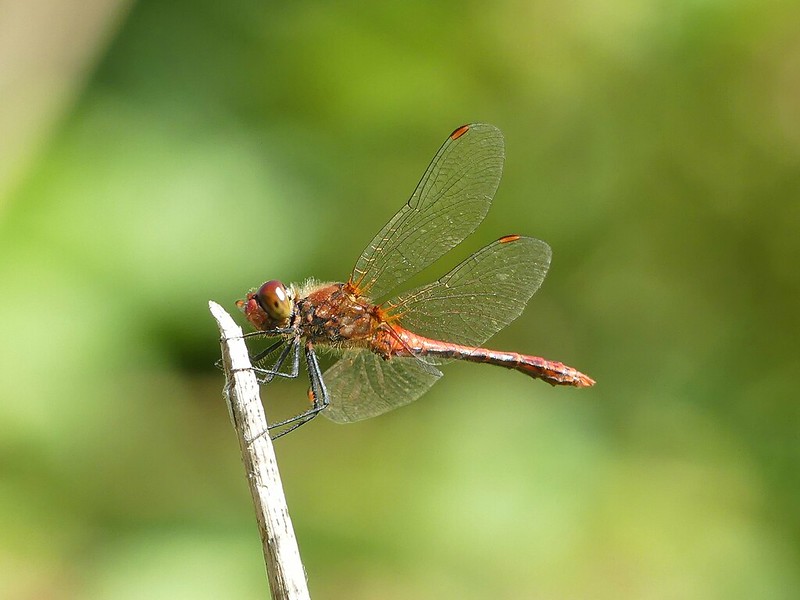
Dragonflies can often be found perching in a sunny spot in the morning, warming their wing muscles before their first flight. Image by Ian Preston via Flickr.
How to attract dragonflies to your garden

Water is an integral part of the dragonfly life cycle, so having a pond in your garden is by far the best way to attract them. If you only have a small outdoor space then sinking a bucket or trough into the ground is a low-cost and space-efficient solution. A larger pond with both floating and emergent vegetation, however, will provide dragonflies with somewhere to lay their eggs and for the nymphs to live once they have hatched. It is important to have some vegetation which extends out of the pond as this will allow nymphs to leave the water when they are ready to undergo the final moult into their adult, winged form. Ponds with carnivorous fish or those used by waterfowl will be less useful as these will both prey on the dragonfly larvae.

Having a variety of flowers and herbs growing nearby will help to attract other insects which the dragonflies will feed on. Providing some canes or small stakes will also give them a place to perch – this is particularly important in the morning when dragonflies need to spend time basking in the sun before their wing muscles are warm enough for flight.

Fun facts

• Dragonflies see the world in colour and can detect ultraviolet as well as blue, green and red.
• Dragonflies have been around for 300 million years. Their ancestors were some of the largest insects ever to have existed – some had wingspans of up to 80cm!
• Dragonflies are true acrobats and can fly both upside down and backwards.
• Although they can live for up to five or six years, dragonflies only spend a tiny portion of this time – between a week and two months – as the colourful flying adults that we recognise. The majority of their lives are spent in the water as nymphs (larvae).

Further reading and equipment

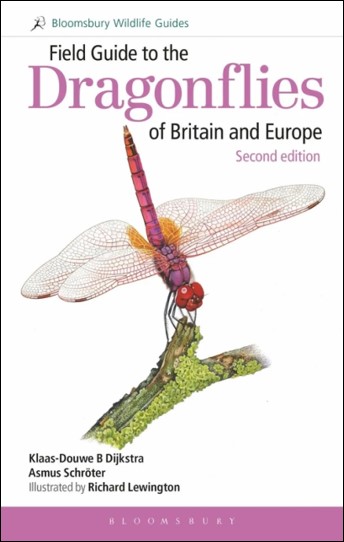
Field Guide to the Dragonflies of Britain and Europe

A superb identification guide with identification texts and distribution maps as well as an introduction to larvae identification. Each species is lavishly illustrated with artworks of males, females and variations, as well as close-ups of important identifying characters.


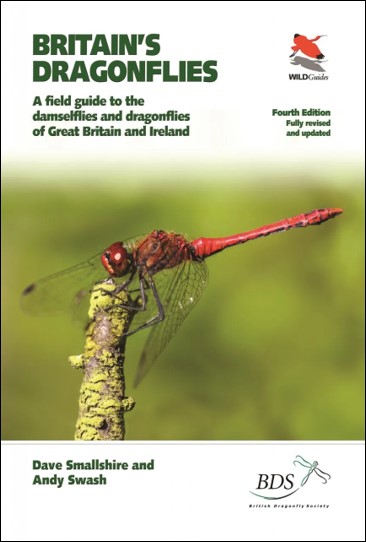
Britain’s Dragonflies: A Field Guide to the Damselflies and Dragonflies of Great Britain and Ireland

Written by two of Britain’s foremost dragonfly experts, this excellent guide is focused on the identification of both adults and larvae. It features hundreds of stunning images and identification charts covering all 57 resident, migrant and former breeding species, and six potential vagrants.


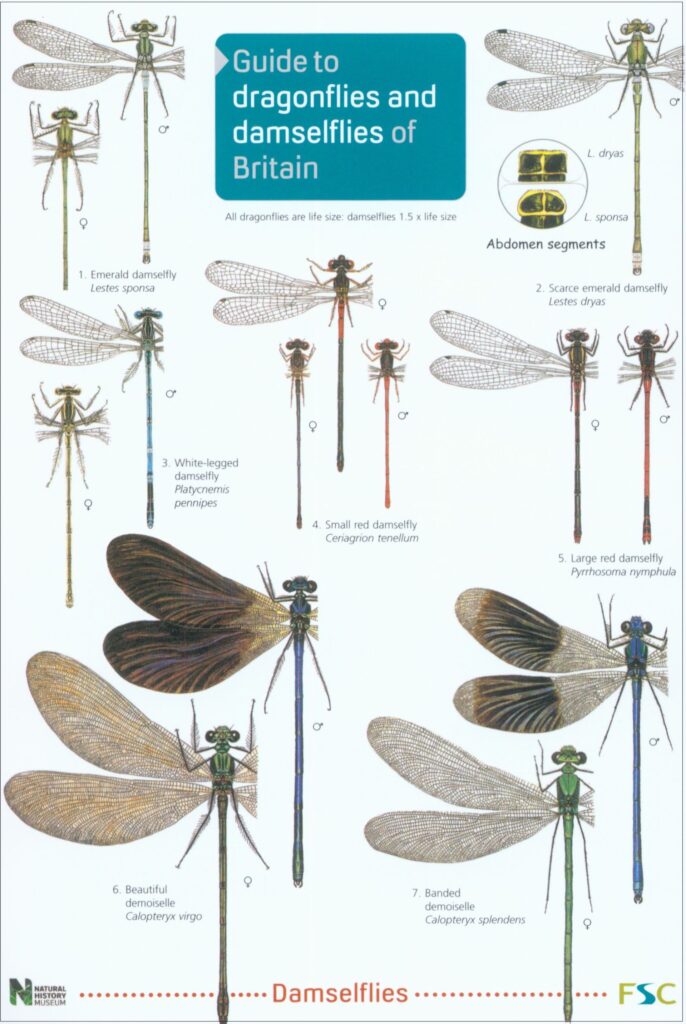
Guide to Dragonflies and Damselflies of Britain

This handy and affordable fold-out guide from the Field Studies Council features 28 dragonfly and 16 damselfly species and is a useful aid to identifying them in the field, often while in flight. It is a perfect size to pack into a bag while out and about and is a great choice for beginners.

Owl Pellet Dissection

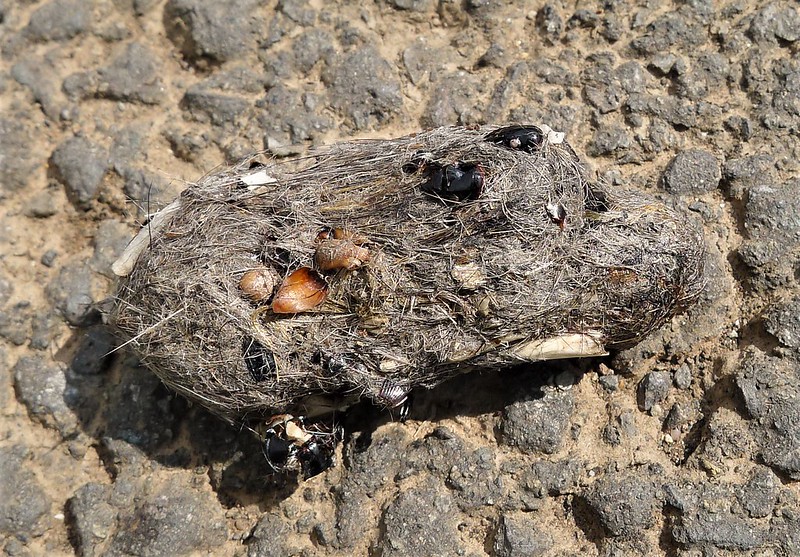
Owl pellets contain all of the indigestible parts of the prey. Image by Gail Hampshire via Flickr.
What is an owl pellet?

Owls feed on a variety of prey; most commonly small mammals but also birds, frogs and other small animals. These prey items are consumed in their entirety and, while the flesh is digested by enzymes, the owl is unable to digest the harder parts of the body, including the teeth, bones, fur or feathers. These indigestible parts are regurgitated as a pellet. Unless they are very fresh, pellets are dry, light and odourless.

In this article we will look at where to find owl pellets and how to tell which species of owl they came from. We will also provide some tips on how to dissect a pellet, how to group the bones into types, and how to identify some of the main species of small mammal that you will find in pellets in the UK.

Where to find owl pellets

Owl pellets can frequently be found wherever owls nest or roost. Good places to search are at the base of tall trees within woodland areas, or in barns or outbuildings where owls are known to roost. Please be aware that you must not disturb breeding or roosting owls in order to collect pellets. Barn Owls in particular are protected in the UK by law under the Wildlife & Countryside Act 1981 and their breeding sites must not be disturbed under any circumstances.

If you don’t have any luck finding your own pellets or don’t have access to places where you might find them, there are several places online where you can order some. Reputable sources in the UK include the Barn Owl Trust and the Suffolk Owl Sanctuary.

What species of owl is my pellet from?

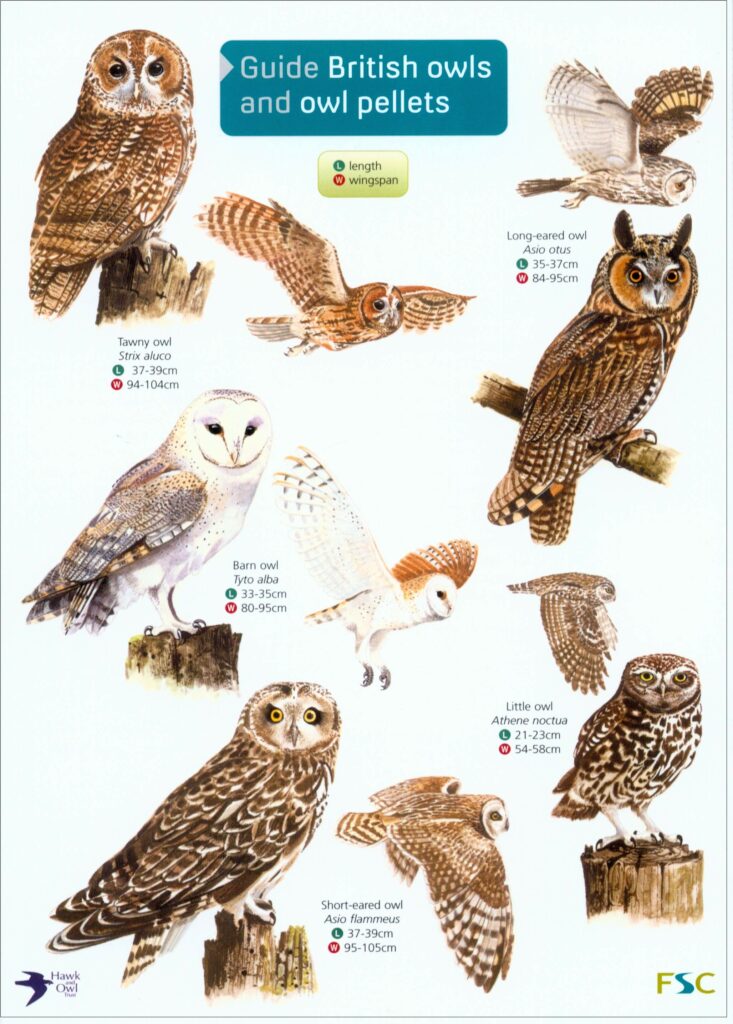
There are five resident species of owl in the UK: Barn Owl, Tawny Owl, Little Owl, Short-Eared Owl and Long-Eared Owl. All of these species produce pellets that are relatively easy to tell apart, particularly if you also know the habitat where they were found. Below is a brief guide to their main characteristics.

Barn Owl: pellets usually measure 3-7cm in length and are rounded at both ends. They are fairly dark in colour and have a smooth surface.
Tawny Owl: pellets measure 2-5cm in length and are narrow and bumpy, often having tapered ends. Greyish in colour and sometimes furry looking.
Little Owl: pellets are fairly small measuring only 1.5-2cm in length. Long and narrow with a soft crumbly texture.
Short-Eared Owl: pellets are fairly large, measuring 3-6cm in length. Narrow with one rounded end and one tapered end. They are grey and smooth and very lightweight.
Long-Eared Owl: pellets measure around 2-4cm and are narrow and bumpy. Usually grey in colour.

The most common pellets you will find in the UK are from Barn Owls.

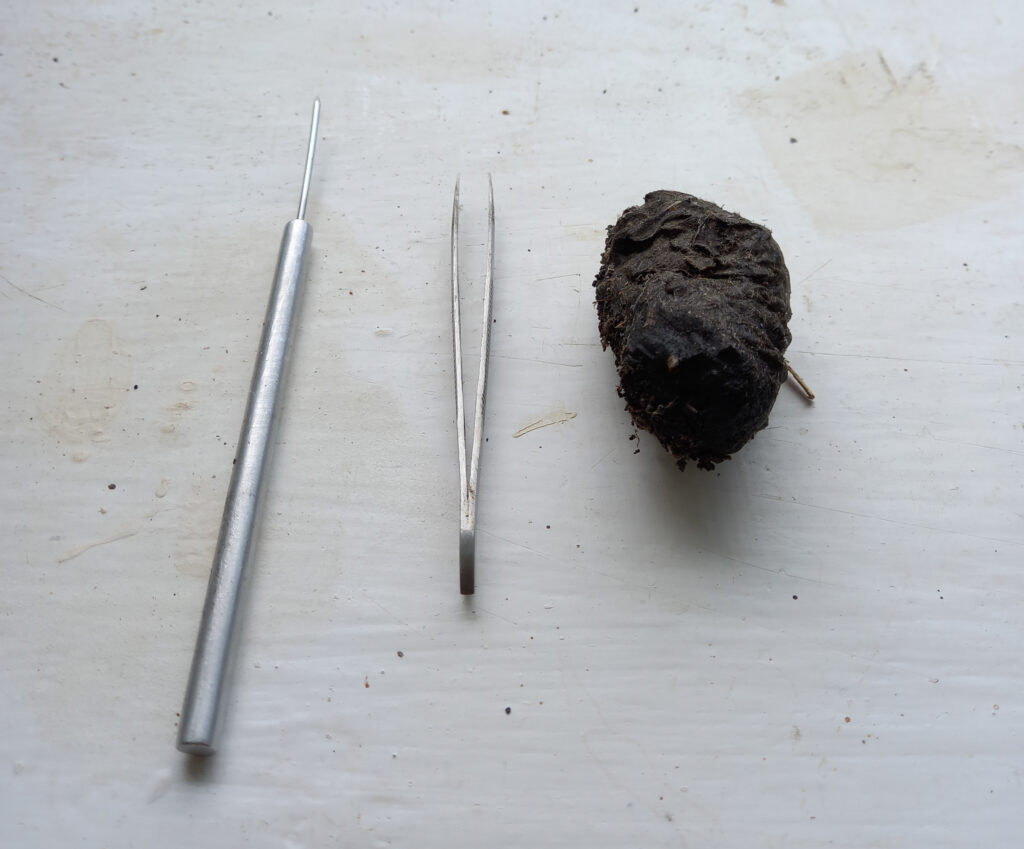
Barn Owl pellet with mounted needle and fine pointed forceps.
How to dissect an owl pellet

There isn’t much equipment you need to dissect an owl pellet, but a few items will make the job a bit easier:

Mounted needle: this is useful for teasing out fur from around the bones, and moving around delicate specimens. A cocktail stick or needle pushed into a cork will also do the trick.
Forceps/tweezers: helpful for picking up bones and particularly for removing fur from inside skulls. Forceps with a fine point are best.
Magnifying glass/hand lens: a small magnifier will allow you to get a closer look at the bones that you find. Jaw bones in particular are very useful for identifying the species and a magnifier will help you get a better look at the arrangement and structure of the teeth.
White paper/card and glue: it can be helpful to arrange your bones by type onto a sheet of white paper which you can then write on when you have decided what they are and who they belong to. If you would like to make a permanent ID aid you can also glue them onto a piece of card and add permanent labels.

How to identify the contents of an owl pellet

The first thing you will need to do is to tease apart the pellet and separate the bones from the fur and feathers that are holding it all together. To begin with it is easiest to gently break the pellet into several smaller sections then work on each of these in turn. Use your fingers as well as the forceps to carefully tease apart each section, removing any bones and placing them to one side for identification. If your pellet is very hard and dry, try soaking it in water first to soften it.

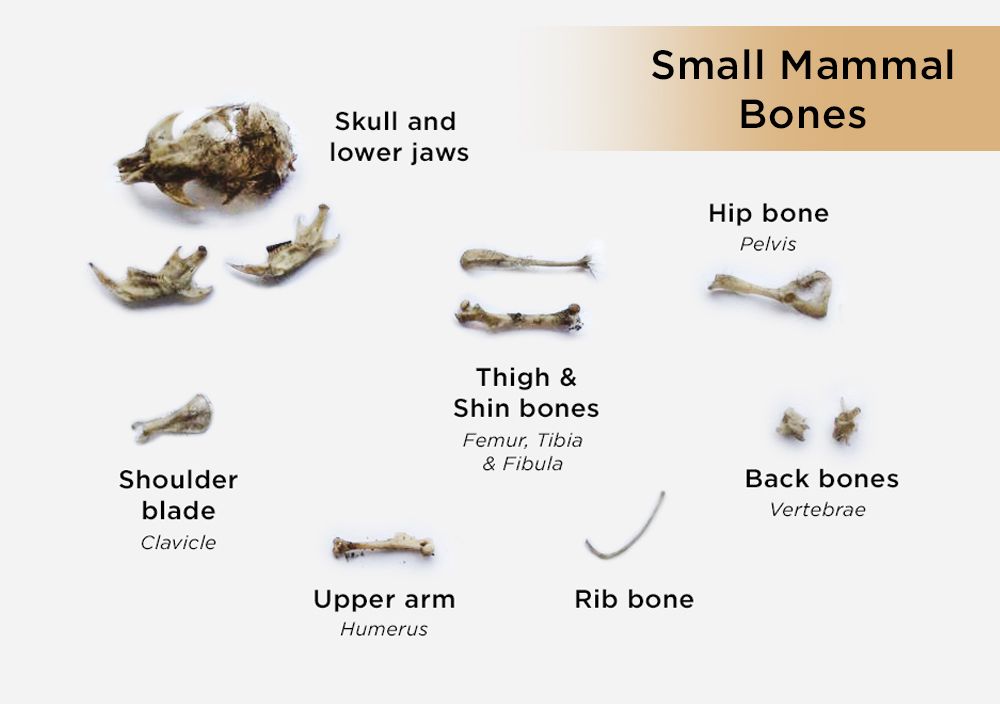
Once you have all of the bones from your owl pellet, try to group them into types on your sheet of paper. The most common bones you will find are the following:

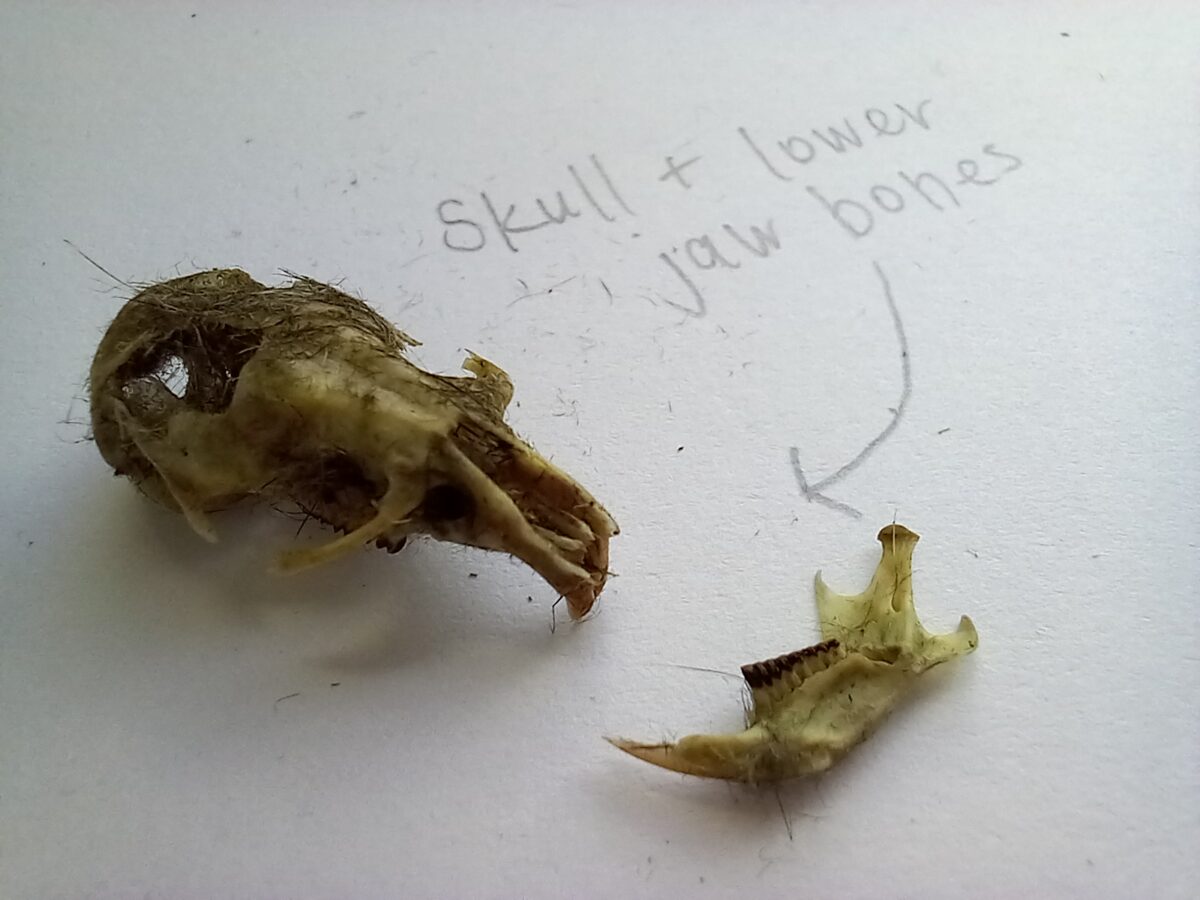
  • Skulls: for mammals, this consists of the top part of the skull and upper jaw, along with the lower jaw, although this is likely to become detached once you have cleaned all of the fur and other material from inside. For bird species this will include the upper and lower parts of the beak.
  • Back legs: includes the thigh bone (femur) and the lower leg bones (fibula and tibia)
  • Front legs (arms or wings): includes both upper (humerus) and lower (radius and ulna) bones
  • Hip bones
  • Shoulder blades (scapula)
  • Back bones (vertebrae)
  • Ribs

The image below illustrates typical examples of each type of bone. You can also download a useful bone identification sheet from the Suffolk Owl Sanctuary website.


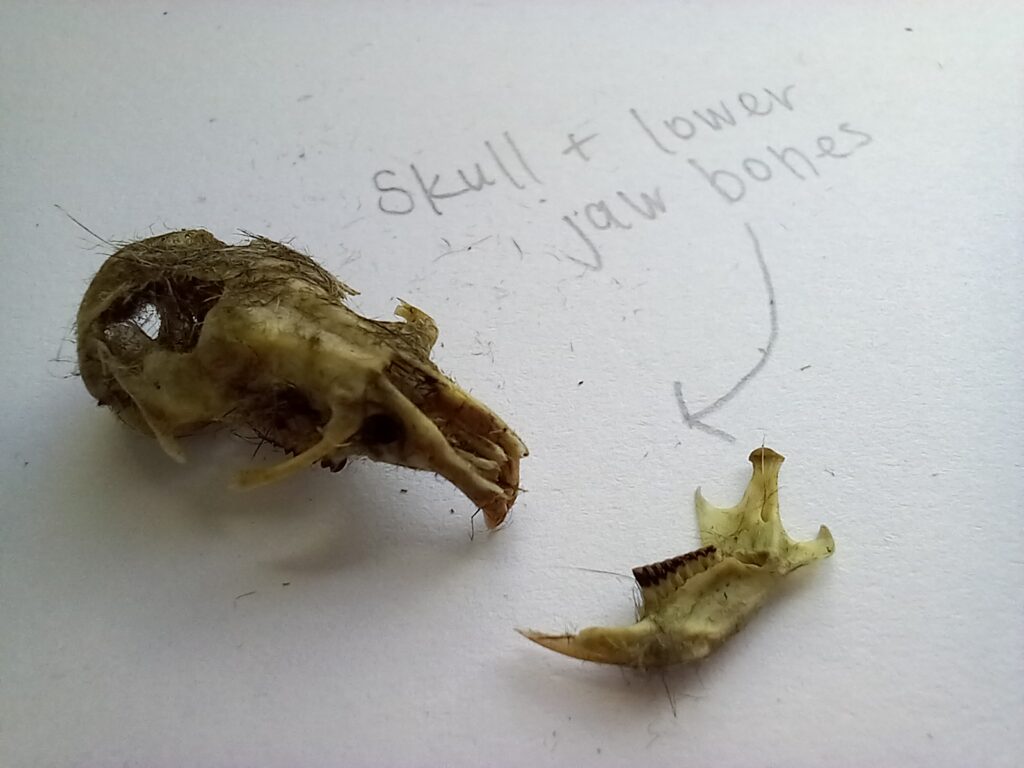
The most useful part of the skeleton for identification is the skull and jaws or beak. Bird skulls will obviously be very distinct from those of mammals due to the presence of the beak, so these can immediately be separated out. For the remaining mammal skulls, however, we will need to take a closer look at their lower jaw bones and teeth.
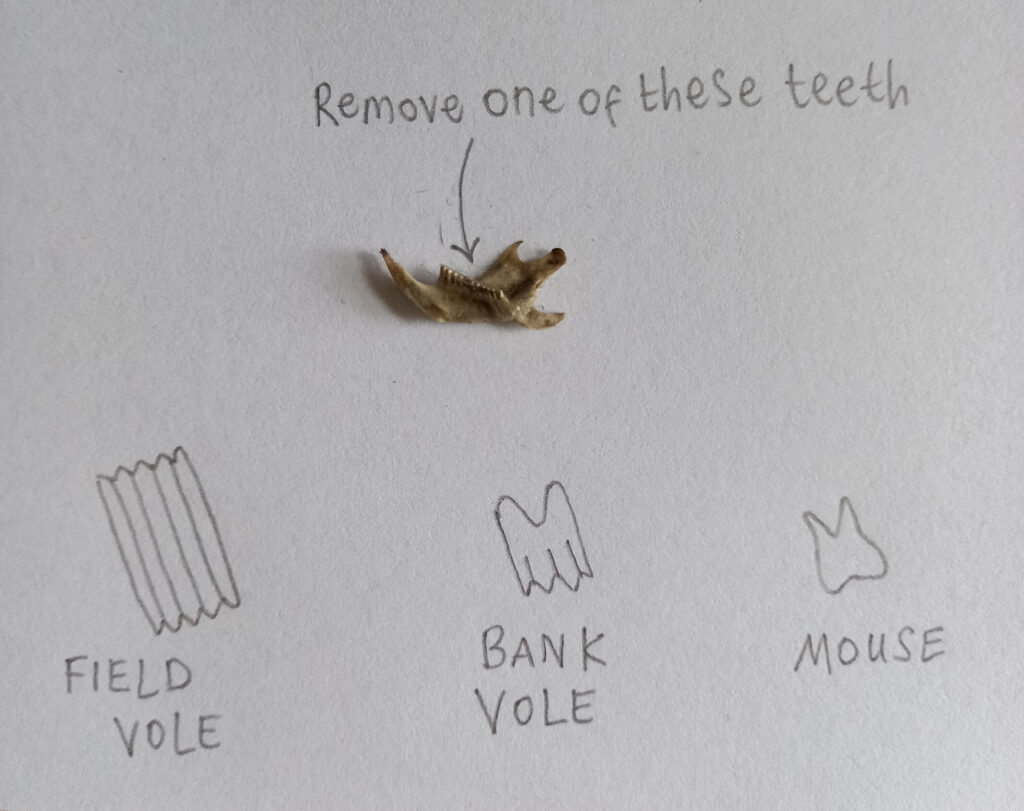
In the UK the most common small mammals you will find in owl pellets are voles, mice and shrews. It is very easy to distinguish which of the lower jaws belong to shrews as they have a continuous line of teeth from the front to the back of the jaw. This is because shrews are insectivores and chew their food, much the same as we do. Voles and mice, however, both gnaw their food, and have a big gap between the long front tooth and the back teeth.
To tell the difference between voles and shrews, we need to take a closer look at their back teeth. Voles have teeth with distinctive grooves down the sides.  In those of a field vole, the grooves run all the way down the side of the tooth. There is also no obvious root. Bank voles have grooves which only run part-way down the side of the tooth and they have two obvious roots, similar to those of a human tooth. The back tooth from a mouse jaw is much smaller when compared to a vole and its structure is much more similar to that of a human tooth. It also has two roots. This sheet from the Barn Owl Trust has a great illustration of the various small mammal lower jaws with size guidelines to help with identification.
Hopefully this article has been a useful introduction to owl pellet dissection and the identification of some of the most common prey species contained within them. If you want more help with identifying all of the bones in your pellet down to species level, the guides listed below are invaluable. Once you have categorised all of the bones you can attach them to a piece of card with permanent labels or arrange them to create a complete skeleton of each species.

Finally, don’t forget to wash your hands well when you have finished your dissection. Any pellet remains can be safely composted.

Further reading

Guide to British Owls and Owl Pellets

This fold-out chart includes colour paintings of the five species of owl permanently resident in the British Isles, shown both perched and at rest. Also included are illustrations and written descriptions of the different pellets that may be found, and a systematic identification key to their contents, including complete skulls, jaws, teeth and other recognisable bones and animal parts.


The Analysis of Owl Pellets

This booklet will not only enable you to identify what you find in the pellets of British owls, but also shows how the data may be usefully presented and how to estimate the actual weight of food the birds have eaten.


The NHBS Guide to UK Hoverflies: Part 2

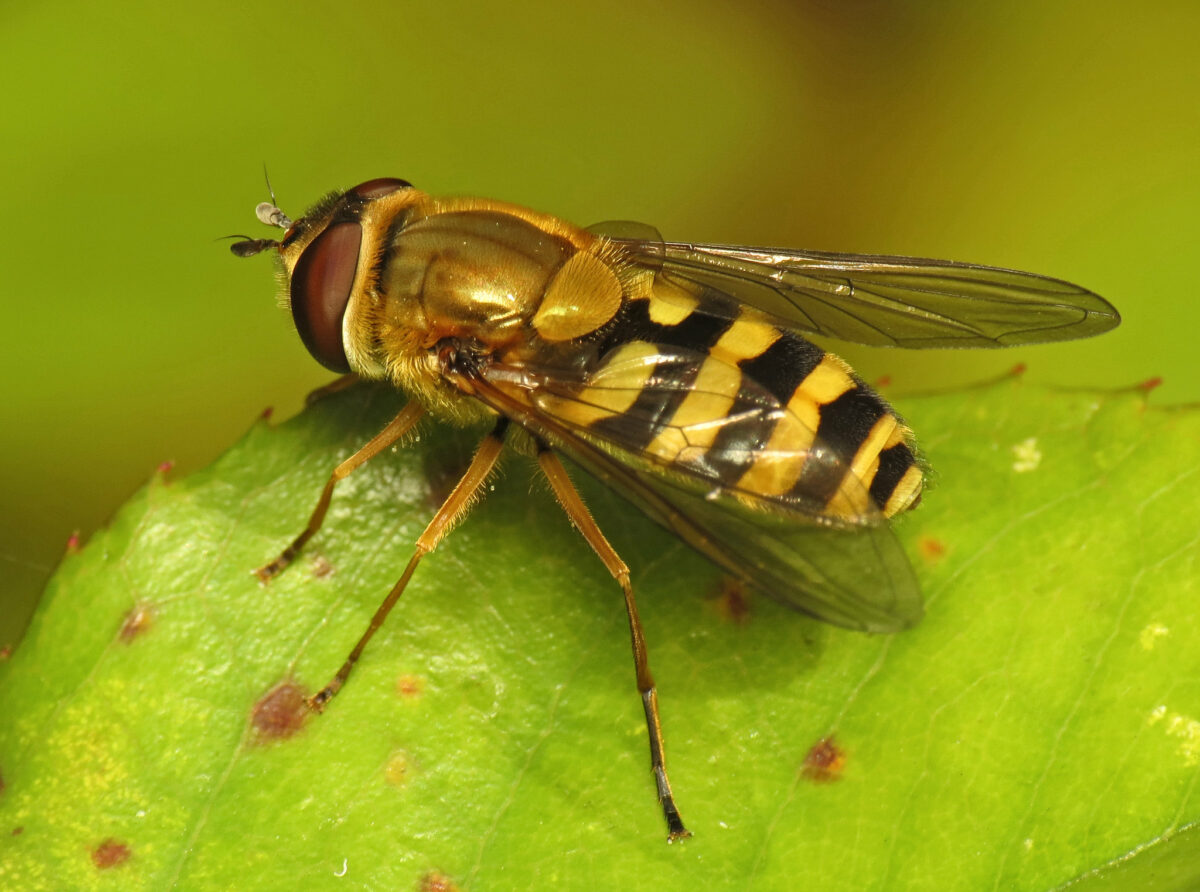
Hoverflies, of the insect family Syrphidae, are often to be found hovering around flowers and, for this reason, are known as flower flies in many parts of the world. The adults of most species feed largely on nectar and pollen making them important pollinators. Their larvae eat a range of foods; some feed on decaying plant and animal matter whilst others are important predators of aphids, thrips and other insects commonly considered to be ‘crop pests’. Although completely harmless to humans and other mammals, many hoverfly species mimic stinging wasps or bees in an effort to protect themselves from predation.

This is the second instalment in our two part guide to UK hoverflies, in which we cover many of the common species that you are likely to encounter in your garden or local outdoor space. Part one can be found here.

Eristalis pertinax

Distribution: Widespread throughout Britain and Ireland.
Habitat: E. pertinax can be found in a number of habitats, including woodlands, gardens and moorland. 
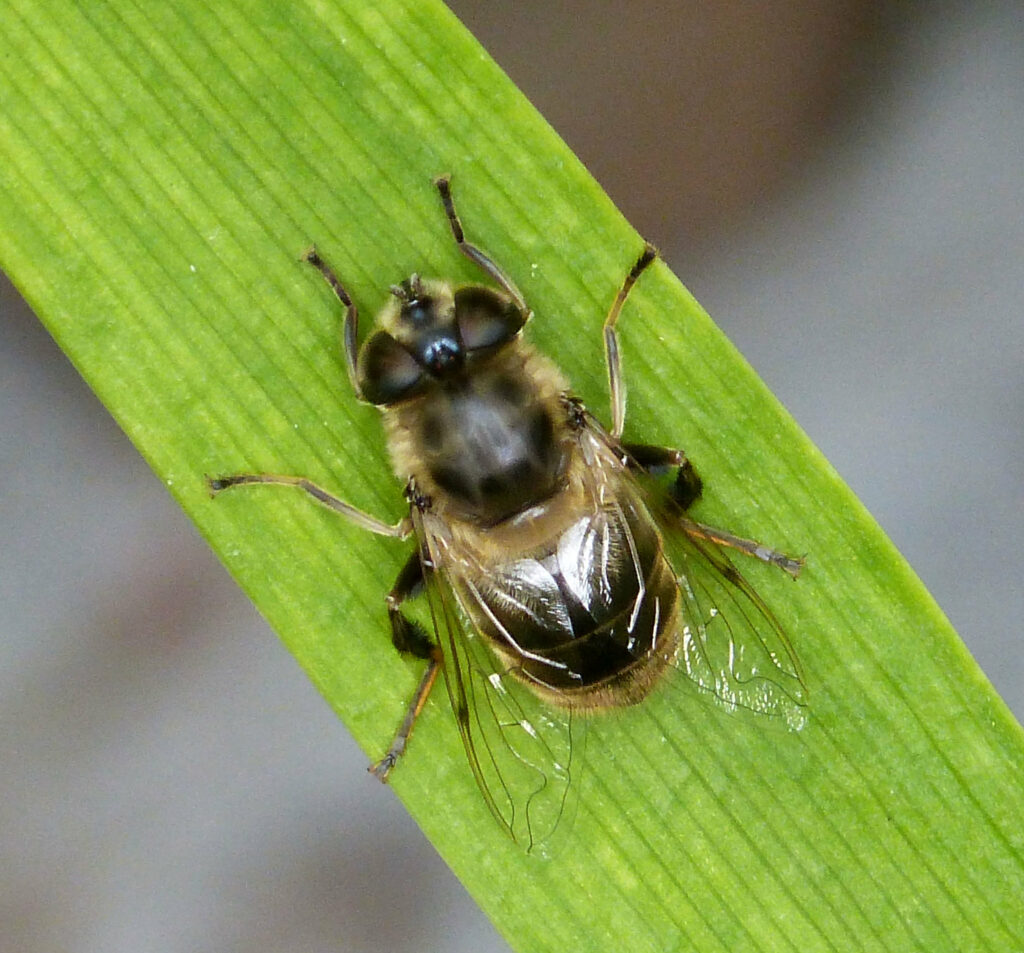
What to look for: Similar in size and appearance to E. tenax (see The NHBS guide to UK hoverflies: Part 1), the easiest character to use to identify this species is the yellow tarsi (the last segments of the leg) on the front and middle legs. The abdomen tapers towards the end, giving it a triangular shape that can also help to separate this species from E. tenax
Months active: March to November, with peaks in both May and August.
Did you know: This is one of the first species to emerge in the spring, when males can often be seen defending territories in woodland rides and around flowers. 

Eristalis pertinax. Image by Gail Hampshire via Flickr.

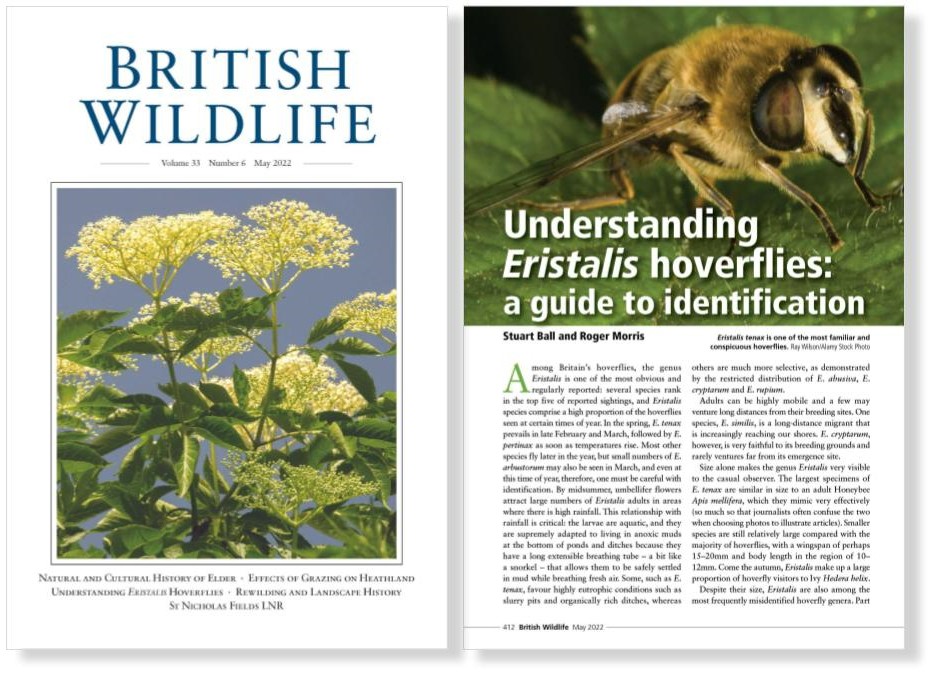
The Eristalis genus includes a number of common species that are likely to be encountered in gardens, such as E. pertinax and E. arbustorum. The May issue of British Wildlife magazine includes an article by Roger Morris and Stuart Ball that provides an introduction to the Eristalis genus, and includes an identification key to the ten Eristalis species that occur in the UK. 

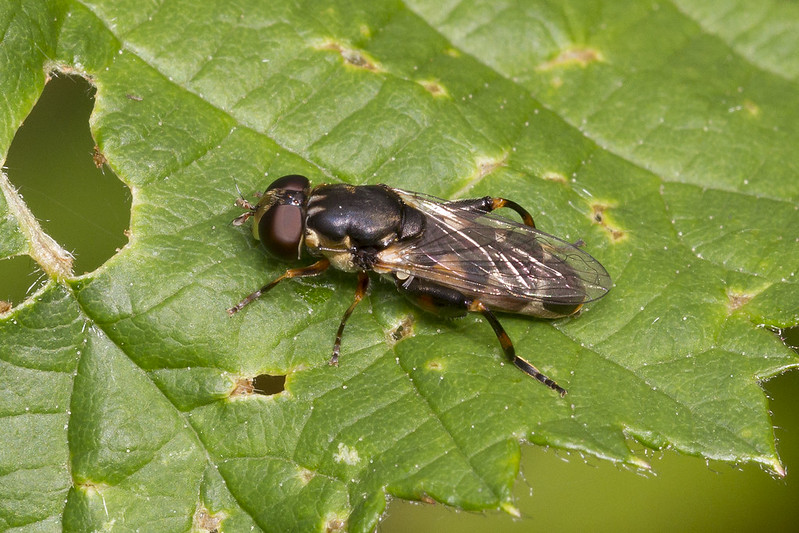
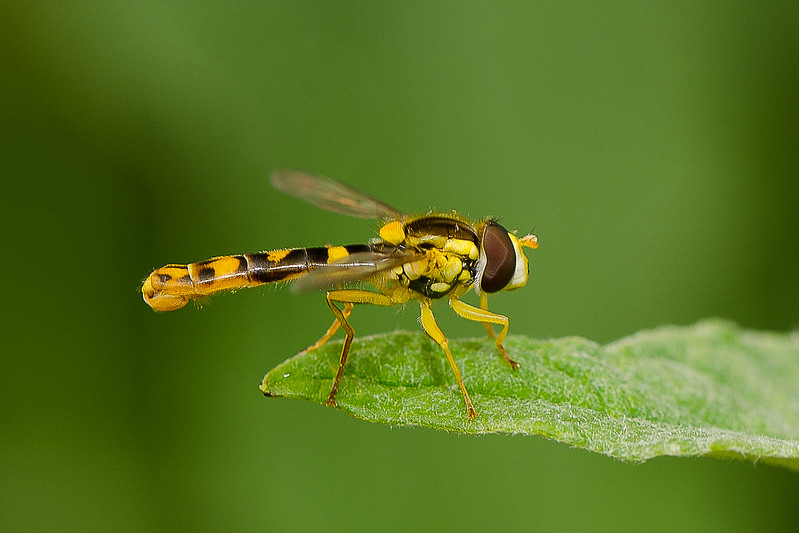
Baccha elongata

Distribution: Widespread throughout Britain and Ireland, although less common in parts of Scotland.
Habitat: Prefers shaded spots, such as woodland margins and hedgerows.
What to look for: Although generally overlooked due to its small size, B. elongata is unmistakable because of its long, slender, wasp-like abdomen.
Months active: April to November, with peaks in both May and September.
Did you know: Unlike many other hoverflies, B. elongata is rarely seen basking in sunlit areas but tends to be found in low, shaded vegetation. The predatory larvae feed on a number of aphid species, such as Nettle Aphid and Bramble Aphid.

Baccha elongata. Image by Frank Vassen via Flickr.

Episyrphus balteatus

Distribution: Widespread throughout Britain and Ireland.
Habitat: A wide range of habitats, including gardens and woodlands.
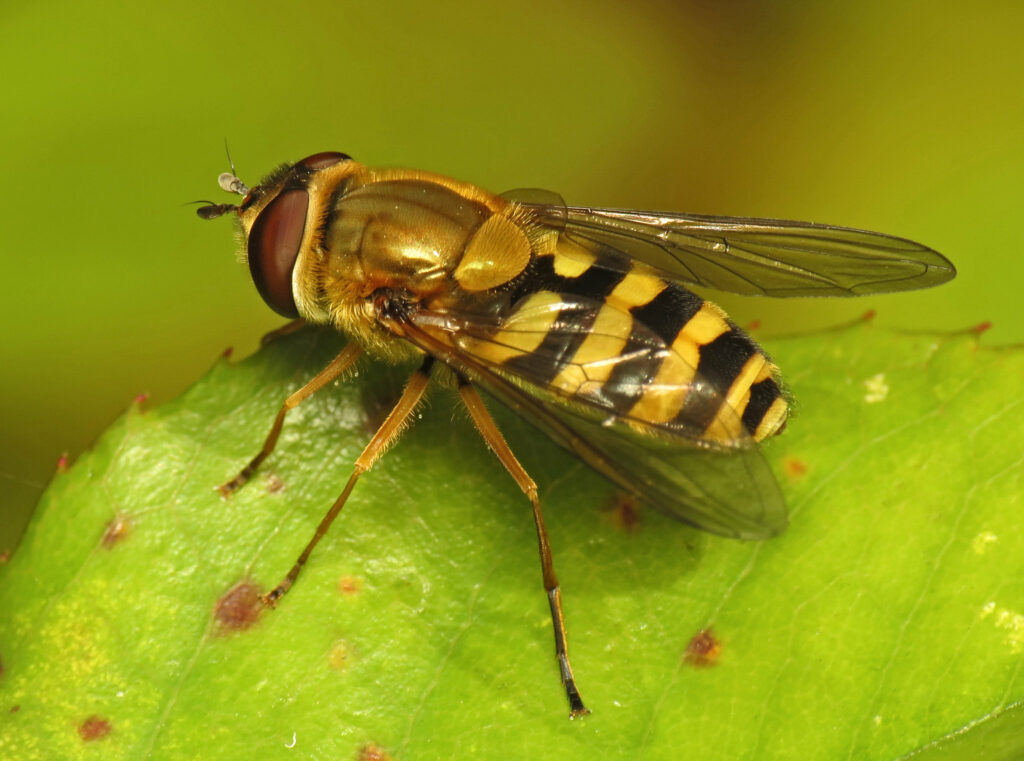
What to look for: Episyrphus balteatus, often known as the Marmalade Hoverfly, is an easily recognisable species and one of the most common hoverflies in the UK  – it won’t take too long for you to spot this regular garden visitor. Each of the abdominal segments has two black bands separated by orange bands. This pattern is unique to this species, but the overall colouration of individuals can vary depending on the temperature at which the larvae develop. 
Months active: Individuals can be recorded in all months of the year, but there is usually a peak in numbers in July.  
Did you know: The arrival of huge numbers of migrants from mainland Europe can sometimes lead to reports in the media of a mass influx of ‘wasps’. 

Episyrphus balteatus. Image by Gail Hampshire via Flickr.

Scaeva pyrastri

Distribution: Widespread in England, Wales and Ireland, but much less common in Scotland.
Habitat: Can be found in a variety of habitats, including gardens and woodlands.
What to look for: White, comma-shaped spots on the abdomen are a key identification feature, but completely black individuals can occur. 
Months active: May to November, with a peak in August.
Did you know: S. pyrastri is a migratory species and its numbers in Britain vary greatly between years.  

Scaeva pyrastri. Image by Frank Vassen via Flickr.

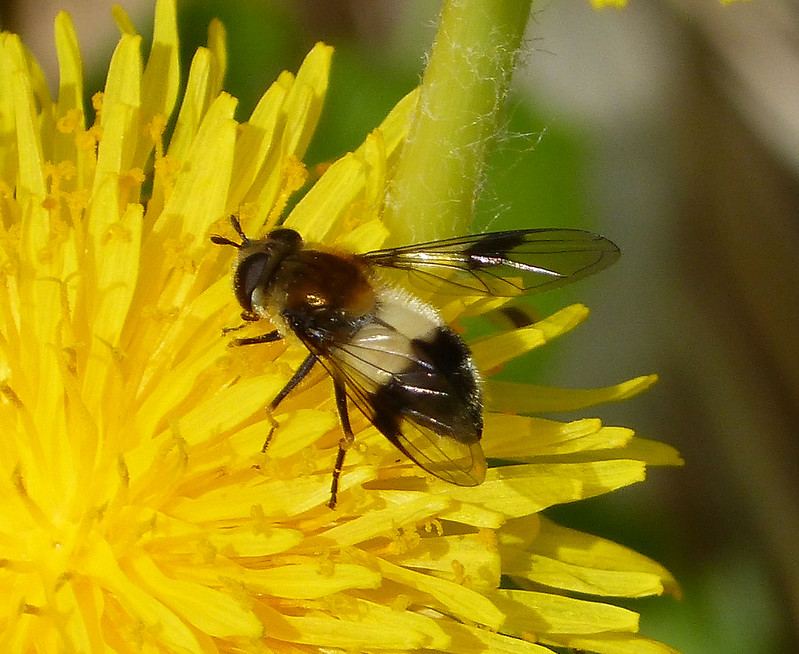
Leucozona lucorum

Distribution: Widespread throughout Britain and Ireland, although less abundant in northern Scotland.
Habitat: Woodland rides and edges, and hedgerows.
What to look for: The black wing clouds and broad creamy markings on the second abdominal segment are distinctive characteristics of this species. Confusion can occur with the similar Cheliosa illustrata, but the yellow scutellum (a shield-shaped segment behind the thorax) of L. lucorum will help with identification. 
Months active: Between May and August, with a peak in May and June.
Did you know: L. lucorum is primarily a spring species, but in some years there is a second generation in midsummer. 

Leucozona lucorum. Image by Gail Hampshire via Flickr.

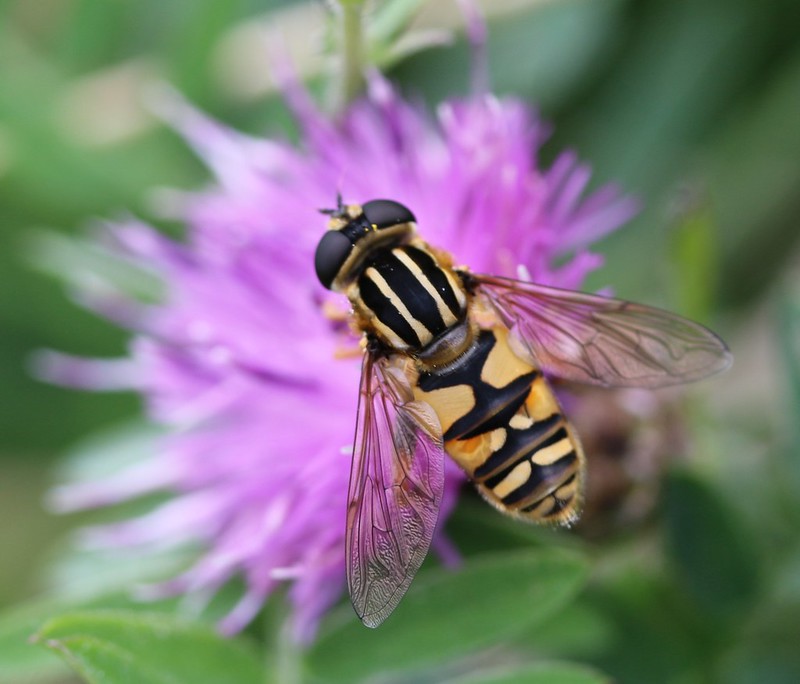
Helophilus pendulus

Distribution: Widespread throughout Britain and Ireland.
Habitat: A wide range of habitats, including gardens.
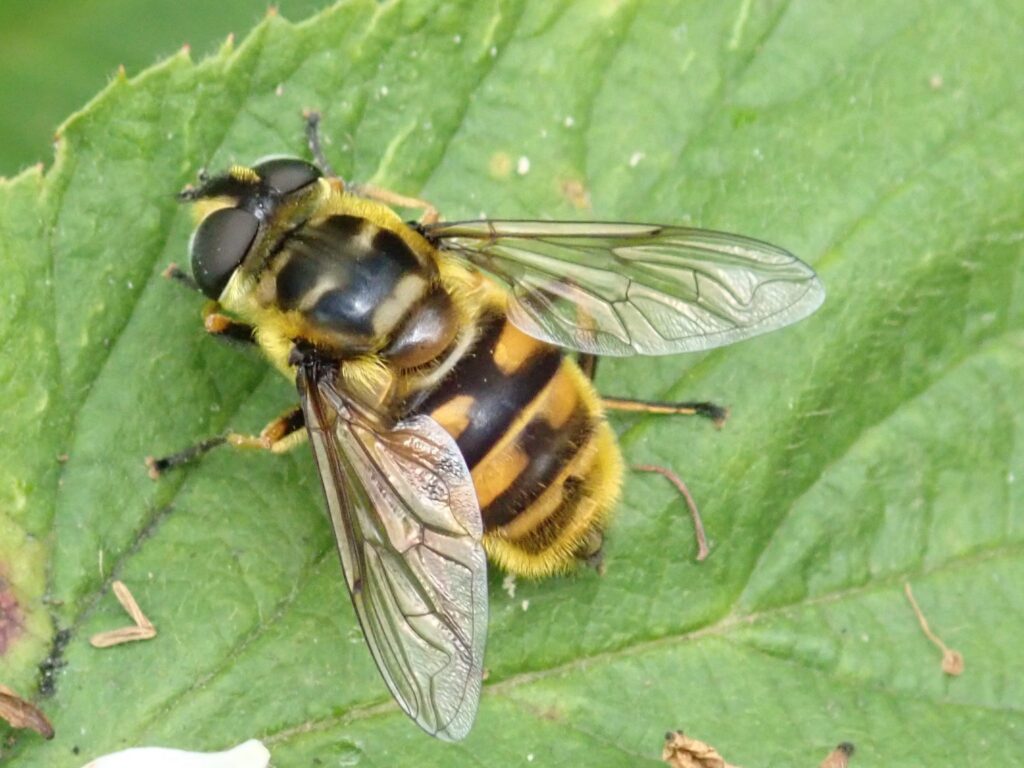
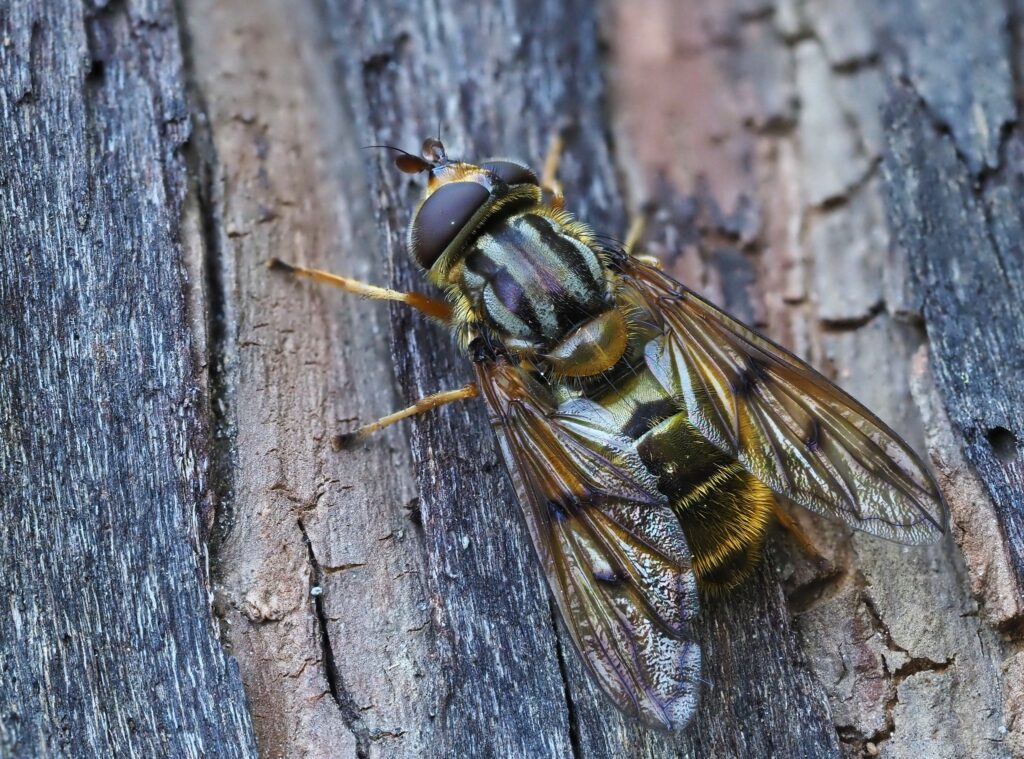
What to look for: A very eye-catching hoverfly with pale, longitudinal stripes on its thorax and a yellow face with a dark central stripe. It is possible to confuse this species with H. hybridus, although the yellow markings on the second and third abdominal segments are separated by a black band. 
Months active: Between April and November with a peak in July.
Did you know: H. pendulus is commonly seen basking on leaves and often produces a buzzing sound while doing so. 

Helophilus pendulus. Image by Nick Goodrum via Flickr.

Syritta pipiens

Distribution: Widespread in Britain and Ireland, although less abundant in parts of northern Scotland.
Habitat: A variety of habitats and common in gardens.
What to look for: Despite being a small, slender species, S. pipiens is instantly recognisable by the swollen hind femora. The sides of the thorax are also dusted grey.  
Months active: April to November, but more abundant in late summer. 
Did you know: Male S. pipiens are highly territorial and will force each other to move backwards and forwards until one admits defeat and gives up. 

Syritta pipiens. Image by Chris via Flickr.

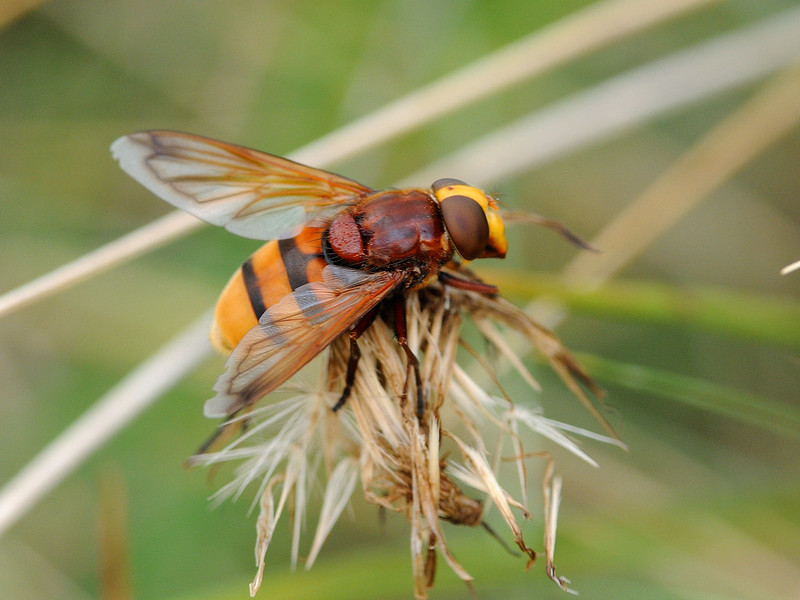
Volucella zonaria

Distribution: Widespread in southern England and parts of Wales.
Habitat: A variety of habitats, including gardens and parks in urban areas
What to look for: Britain’s largest hoverfly, this species is often known as the Hornet Hoverfly due to the strong yellow-and-black bands on the abdomen and the impressive size (wing length can be between 15.5mm and 19.5mm). The only other hoverfly that V. zonaria could be confused with is V. inanis, but the latter is largely yellow underneath whereas V. zonaria is chestnut coloured with broad black bands. 
Months active: May to November, with a peak in August. 
Did you know: V. zonaria is a relatively recent addition to the British fauna. It first colonised the south of England in the 1930s and its range is rapidly expanding. The larvae live in the nests of social wasps, such as the Hornet and Common Wasp. 

Volucella zonaria. Image by Tim Worfolk via Flickr.

Sphaerophoria scripta

Distribution: Widespread in England and Wales, but only recorded from the east coast of Ireland and less abundant in northern England and Scotland. 
Habitat: Grasslands.
What to look for: Identifying individual species in the Sphaerophoria genus, particularly females, can be extremely difficult. Male S. scripta can be easier to identify as the abdomen is much longer than the wings and has broad yellow bands, although the markings can vary. Confusion can occur with S. batava and S. taeniata, as these two species also have yellow bands; examination of the male genitalia is the only way to determine identification. 
Months active: Between April and November, with a peak in July and August
Did you know: This is the most common Sphaerophoria species and is often found in grassland. There is no resident population in northern Britain, but numbers are boosted in some years by an influx of migrant individuals. 

Sphaerophoria scripta. Image by Sebastien Faillon via Flickr.

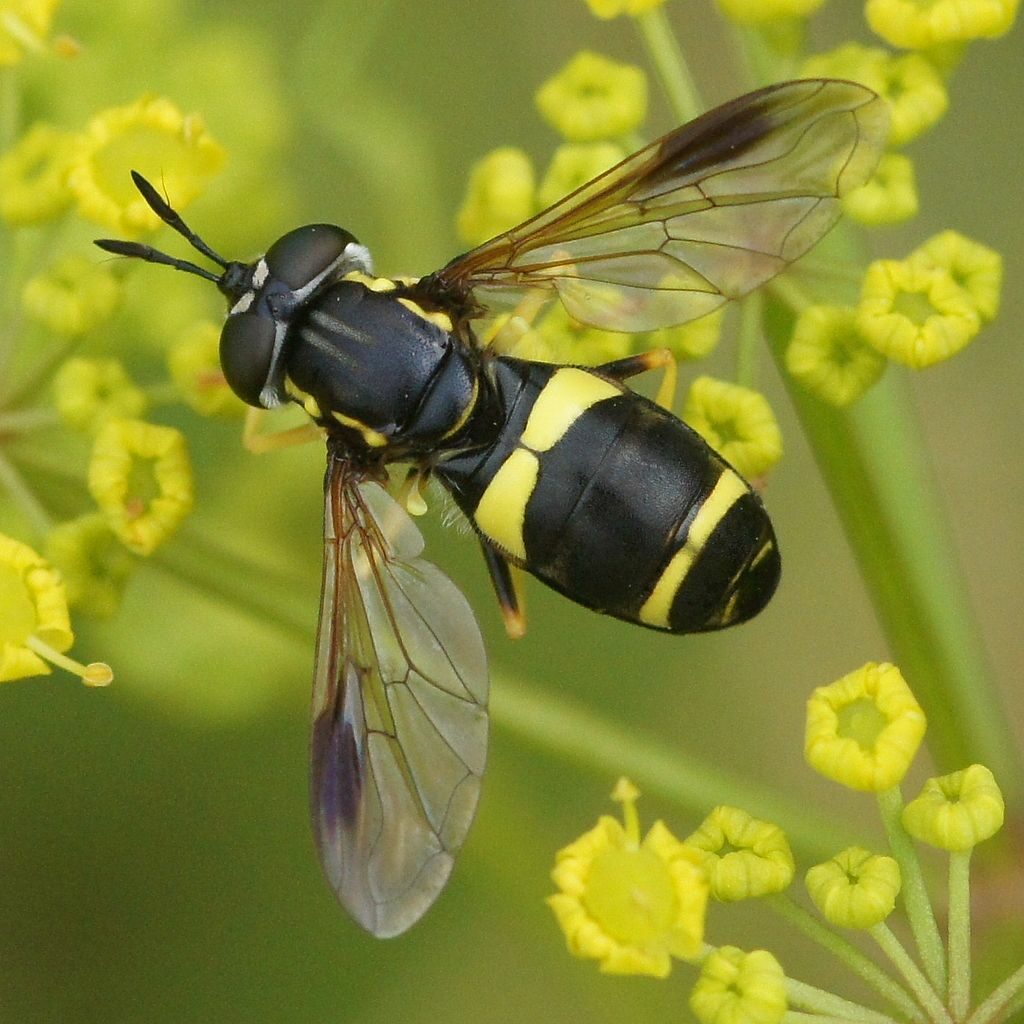
Chrysotoxum bicinctum

Distribution: Widespread in Ireland and southern England, but less common in northern England and Scotland. 
Habitat: Open grasslands and grassy woodland rides.
What to look for: The yellow bars on the second and fourth abdominal segment and the chocolate-brown patches on the wings make this wasp mimic instantly recognisable. 
Months active: May to September, with a peak between June and August. 
Did you know: Members of the Chrysotoxum genus are easy to recognise due to their long antennae which point forwards. Other hoverfly groups with similar antennae do not have the yellow-and-black markings of Chrysotoxum.  

Chrysotoxum bicinctum. Image by Martin Andersson via Wikipedia.

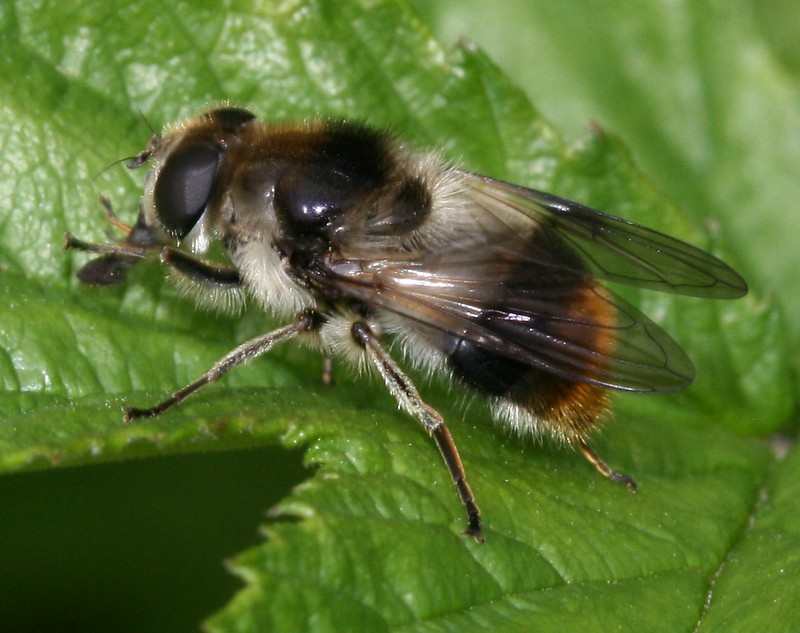
Cheilosia illustrata

Distribution: Widespread throughout Britain and Ireland, although less abundant in the north-east of Scotland.
Habitat: Hedgerows and woodland edges where umbellifers such as Hogweed or Angelica are present.
What to look for: Not an entirely believable bumblebee mimic, C. illustrata has a band of pale hairs at the end of the abdomen and dark wing clouds. It is possible to mistake this species for Leucozona lucorum, but the black face and black scutellum of C. illustrata help to distinguish it.
Months active: April to September, peaking in July.
Did you know: The larvae of this species mine the roots and stems of large Hogweed plants and the adults are often observed feeding on the flowers. 

Cheilosia illustrata. Image by S. Rae via Flickr.

Recommended books and equipment

Britain’s Hoverflies: A Field Guide
£17.99 £24.99

A beautifully illustrated photographic field guide to the hoverflies of Britain, focusing on the species that can be most readily identified.


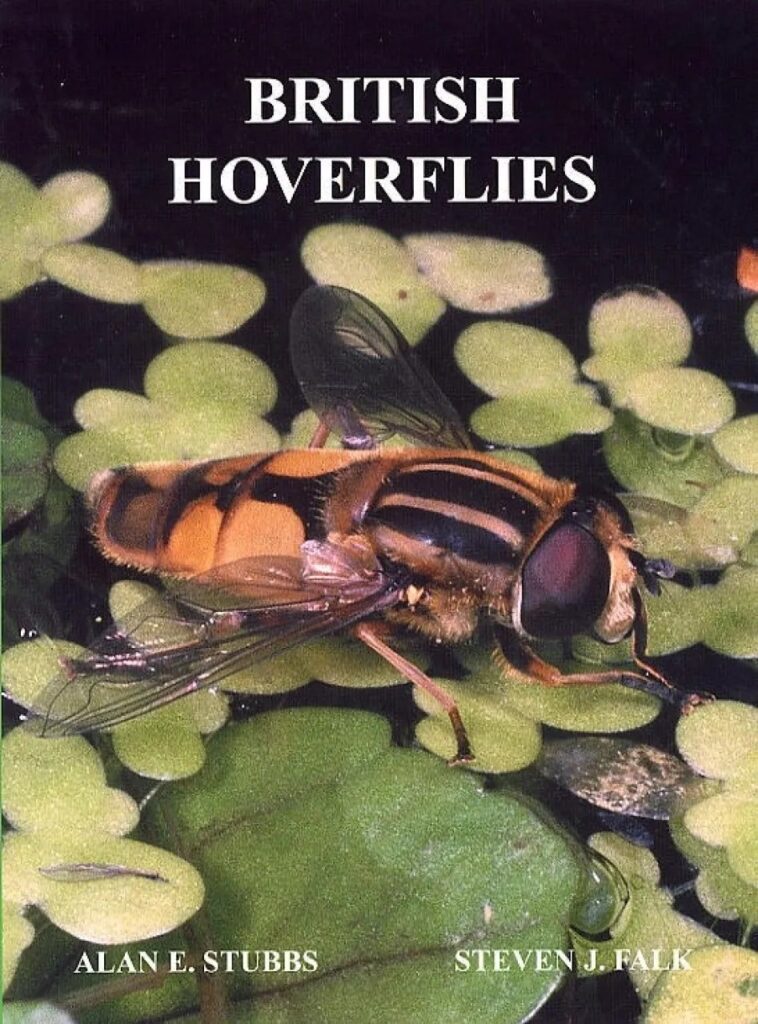
British Hoverflies: An Illustrated Identification Guide
£37.50

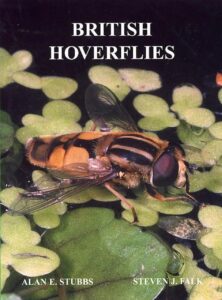
In this classic work by Stubbs and Falk, 276 species are described. Their identification is made easy by the extensive keys which incorporate over 640 line drawings.


60ml Collecting Pot
From £0.35

These small sampling containers are made from see-through polypropylene and have secure screw-on lids. They are ideal for the temporary storage of specimens.


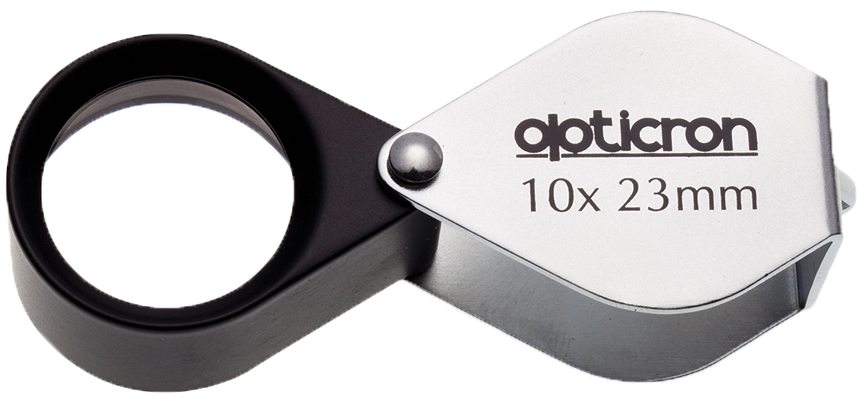
Opticron Hand Lens (10x 23mm)
£12.95 £14.95

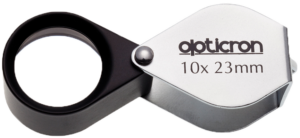
Observe the finer details of your specimen with this high-quality 23mm doublet lens, the most commonly recommended magnifier for all types of fieldwork.


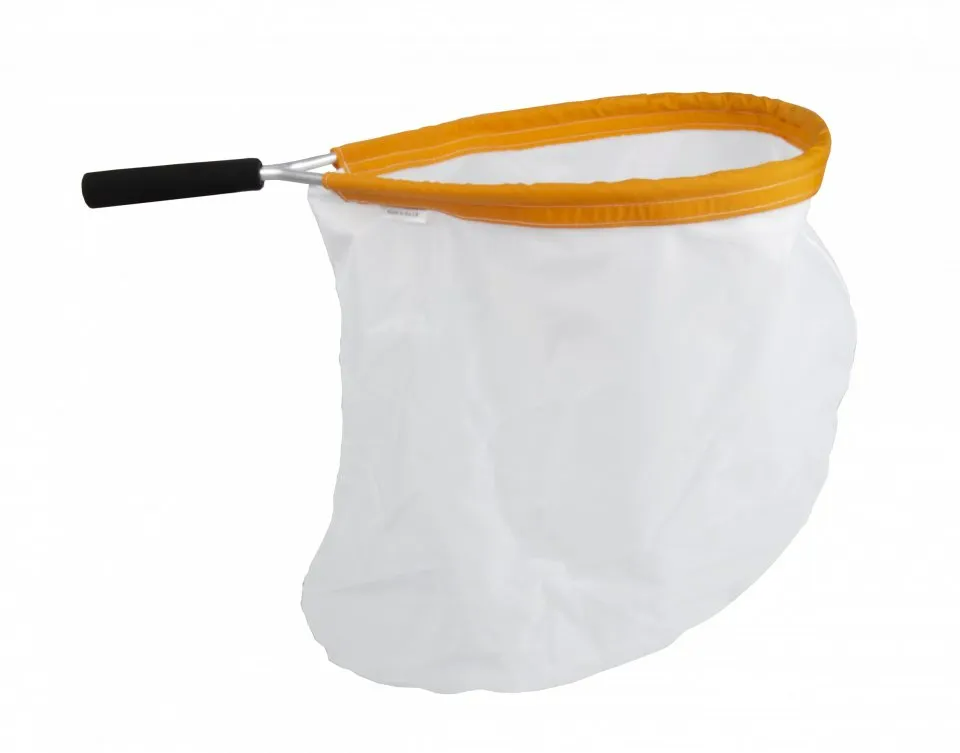
Sweep Net
£31.99

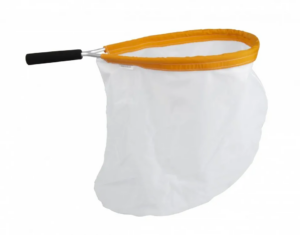
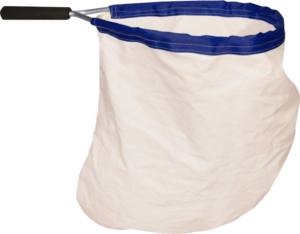
This high-quality sweep net is designed for catching insects and other bugs from long grass and shrubs


All prices are correct at the time of posting, but may change at any time.
Please see nhbs.com for up to date pricing and availability.

How to use a quadrat

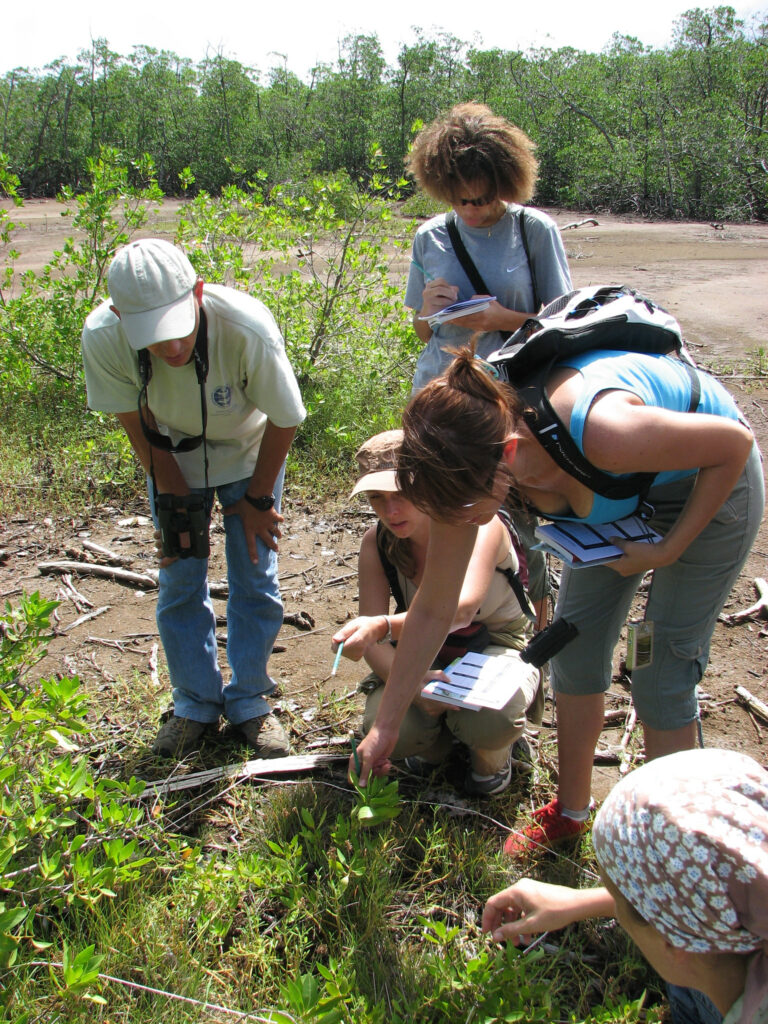
Surveying plants within a quadrat (a)
What is a quadrat?

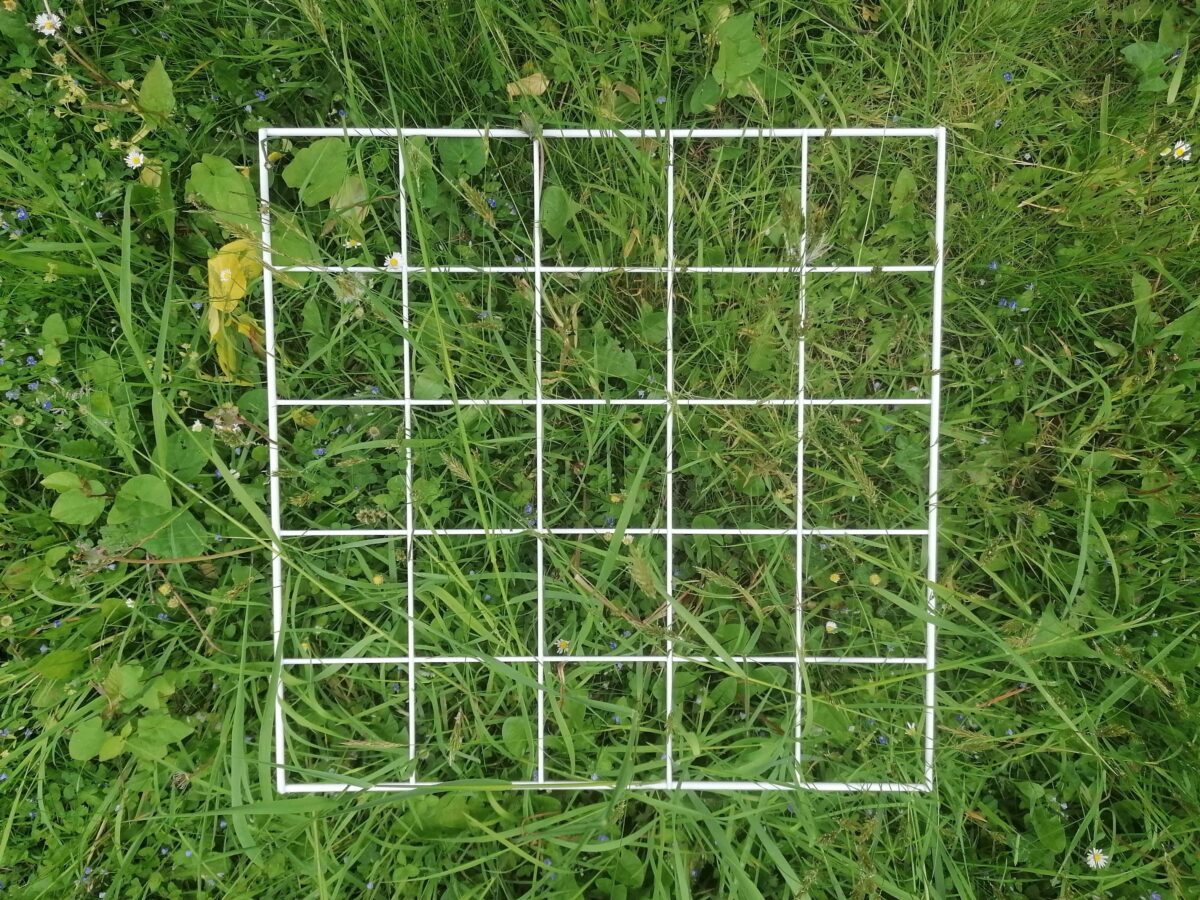
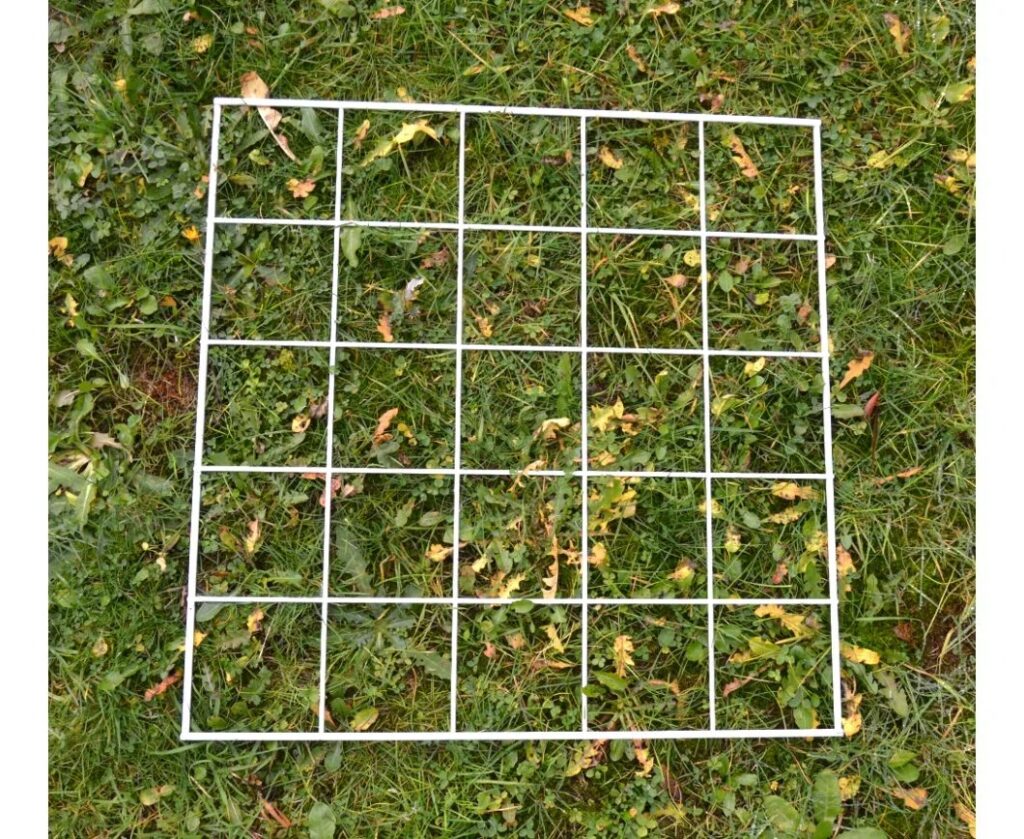
A quadrat is a square frame, usually constructed from wire or plastic-coated wire, although they can be made from any sturdy material. Most commonly they measure 50cm x 50cm (i.e. 0.25m2), and may have further internal divisions to create either 25 squares each measuring 10cm x 10cm or 100 squares measuring 5cm x 5cm. Some frames are also collapsible which allows you to connect several pieces together to create larger sample areas.

What are quadrats used for?

Quadrats are used to survey plants or slow-moving/sedentary animals. They can be used either on land or underwater to gain an estimate of:

  • total number of an individual (or several) species.
  • species richness/diversity – the number of different species present in an area.
  • plant frequency/frequency index – the uniformity of a plant’s distribution within a surveyed area (not a measure of abundance).
  • percentage cover –  useful in situations where it is difficult to identify and count individual plants, such as grasses or mosses.

By deploying several quadrats it is possible to compare any of these factors either spatially (for example in locations with different light or pH levels) or over time, such as at different points throughout the year.

Quadrats being used along an intertidal transect to study rocky shore ecology (b)
How to use a quadrat

Most surveys require that quadrats are placed randomly within the survey site. One way to ensure that placements are truly random is to divide your survey area into quadrat-sized spaces and then use a random number generator to choose x and y coordinates. The quadrat can then be placed in the appropriate position. The number of samples you require will depend largely on the size of your survey site and the amount of time/manpower you have available. A minimum of ten samples should ideally be used.

In some situations, more specific placement of the quadrats is required. For example, when studying the changes in species presence/abundance on a shoreline, you may wish to take samples at regular intervals along a transect up the beach.

Creating a species list

One of the simplest ways of using a quadrat is to create a species list. To do this, the quadrat is placed randomly several times within the target area and the plants present within them are recorded. This will not provide any information on abundance or distribution, but will be a useful guide as to the species that are present at the time of sampling.

Estimating the total number of a species

For plants or animals that are easy to count, it is possible to estimate their total numbers for your survey area. To do this, simply count the number present in a series of quadrat samples then divide the total by the number of samples to get an average count per quadrat. If you know the dimensions of your entire survey site you can then multiply this up to get an estimate of the total number of a species present.

Estimating plant frequency/frequency index

To calculate plant frequency or frequency index, you simply need to note down whether the target species is present or absent within each quadrat sampled. The number of quadrats in which the species was present should be divided by the total number of samples taken and then multiplied by 100 to get the frequency as a percentage. For example, in a survey where 10 samples were taken, dandelions were found in 6 of these. This would give a frequency index of (6/10) x 100 = 60%.

Estimating percentage cover

For species in which it is difficult to count individual plants (e.g. grasses and mosses) it is easier to estimate percentage cover. For this purpose a quadrat with internal divisions is recommended – one with 100 5cm x 5cm squares is particularly useful. Results from several quadrats can then be averaged and scaled up to get an estimate for the entire survey area.

Important things to remember
Quadrat with 25 10cm x 10cm divisions

• The number of samples you take (i.e. the number of times you deploy your quadrat during your survey) will affect the reliability of your results. Sample sizes which are too small are much more likely to be affected by anomalous counts (e.g. localised clusters of individual species). On the other hand, planning for too many samples can create an impractical workload.

• Bear in mind that there will always be observer bias. By their nature, flowering plants are easy to overestimate and low-growing species are more likely to be missed.

• Take care to make sure that your quadrats are randomly placed if your survey design requires this. It is easy to subconsciously place them where there are large numbers of flowers or easy to count species. Using a coordinate-based system will solve this problem.

Quadrats available from NHBS

At NHBS we sell a selection of high-quality quadrats, designed to be strong, long-lasting and durable.

Q1 Quadrat
Made from heavy gauge steel wire with zinc plating, the Q1 Quadrat measures 0.5m x 0.5m and has no divisions.


Q2 Quadrat
The Q2 Quadrat is made from heavy gauge steel wire with a plastic protective coating. The 0.5m x 0.5m frame is subdivided into 25 squares for sampling dense vegetation or species-poor habitats.


Q3 Quadrat
The Q3 Quadrat is made from heavy gauge steel wire with plastic coating. The 0.5m x 0.5m frame is subdivided into 100 squares for calculating percentage cover or making presence/absence recordings.


Q4 Quadrat
The Q4 Quadrat is a strong collapsible quadrat made from four pieces of heavy gauge steel wire with zinc plating. A single Q4 frame will make a 0.5m x 0.5m open frame without divisions, suitable for general vegetation surveys. Additional units can be used together to make a variety of quadrats, e.g.. 1m x 1m or 1m x 0.5m. Being collapsible means it is also ideal for travel.

Photo credits:
(a) U.S. Fish and Wildlife Service Headquarters via Flickr (CC BY 2.0)
(b) USFWS Pacific Southwest Region via Flickr (CC BY 2.0)

The NHBS Guide to UK Hoverflies: Part 1

With approximately 7,000 species, the Diptera (true flies) are one of the biggest insect orders in Britain and Ireland, second only to Hymenoptera (the bees, wasps and ants). Of these species, over 280 belong to the family Syrphidae, the hoverflies. Known as ‘flower flies’ in other parts of the world, hoverflies are frequent visitors to flowering plants and are a familiar sight in our gardens and woodlands, and a wide range of other habitats. You would be forgiven for mistaking a hoverfly for a bee or wasp, as some species are amazing mimics in terms of both their appearance and behaviour, although some are more convincing than others.

Hoverflies are important, and often overlooked, pollinators, and their larval stages are incredibly diverse. Some larvae are predatory, feeding on aphids or eating grubs within the nests of ants, social bees or wasps, while others feed on the roots, stems or leaves of plants, or on dead and decaying organic matter, such as rotting wood or material collected in rot holes in trees.

Although many hoverflies are brightly coloured or distinctively patterned, there are plenty of inconspicuous species that resemble flies in other families. The first step is therefore to determine that a fly is in fact a hoverfly. In general hoverflies lack the strong bristles we see in other flies, such as the house fly, but the key characteristic is their wing venation. Unlike other flies, hoverflies have a ‘false vein’ on their wing, and although this is a difficult feature to get an eye for initially, it can be obvious in good photos and becomes easier to spot with practice. Another clue is in the name; hoverflies are remarkable fliers and many species are able to hold their position in flight for an incredible length of time.

Hoverfly identification can be difficult, and in some cases it is necessary to inspect a specimen under a microscope for a positive ID. There are many garden visitors that are more straightforward, however, and with a good field guide, a hand lens and a camera to take clear photos with, you can easily get started in learning more about this attractive group of insects. There are fantastic resources online too, such as the UK Hoverflies group on Facebook, which provides help with identification and allows members to share their observations.

This is the first of two hoverfly identification guides, and in both of these blogs we will be covering the more common species that you are likely to encounter in your garden or local patch.

Eristalis tenax

Distribution: Widespread throughout Britain and Ireland. E. tenax is thought to be the most widespread hoverfly species in the world.
Habitat: A wide range of habitats including gardens, woodlands and meadows.
What to look for: A convincing honey-bee mimic that can be easily told from other species of Eristalis by three obvious characteristics: a thickened, curved hind tibia; a broad, dark facial stripe; and vertical stripes of dark hairs on the eyes.
Months active:
Present throughout the year, but most frequently recorded between February and April, and June and November.
Did you know:
Females hibernate over the winter, and males are increasingly being recorded hibernating during warmer winters in southern England. The aquatic larvae, or ‘rat-tailed maggots’, live in wet, decaying vegetation

Eristalis tenax by gailhampshire via Flickr

The Eristalis genus includes a number of common species that are likely to be encountered in gardens, such as E. pertinax and E. arbustorum. The May issue of British Wildlife magazine includes an article by Roger Morris and Stuart Ball that provides an introduction to the Eristalis genus, and includes an identification key to the ten Eristalis species that occur in the UK.

Myathropa florea

Distribution: Widespread throughout Britain and Ireland.
Habitat: A variety of habitats, but found in woodlands especially.
What to look for: Similar to some Eristalis species, Myathropea florea is a distinctive black-and-yellow species with a bat-like pattern on its thorax, although this can vary and cause confusion in less clearly marked individuals.

Months active: April to October.
Did you know: Like other species in the Eristalini tribe, M. florea larvae are known as ‘rat-tailed maggots’ and are found in wet hollows containing decaying vegetation, although they have been reported making use of any containers holding water and dead vegetation, such as buckets or water butts.

Myathropa florea by Alastair Rae via Flickr
Syrphus ribesii

Distribution: Widespread throughout Britain and Ireland.
Habitat: A number of habitats including woodlands, gardens and hedgerows.
What to look for: Females can be easily identified by their completely yellow hind femora, although males are harder to distinguish from two other common Syrphus species, S. torvus and S. vitripennis. Male S. ribesii can be separated from S. torvus by their bare eyes, but a microscope is needed to reliably separate males of S. ribesii and S. vitripennis

Months active: From March to November, with peaks in May–June and July–September. 
Did you know: Male S. ribesii will emit a noticeable humming noise from tree canopies, caused by vibrating their wings at a high frequency when resting. 

Syrphus ribesii (Female) by Martin Cooper via Flickr
Merodon equestris

Distribution: Widespread in Britain and Ireland, but less abundant in parts of Scotland.
Habitat: Often recorded in gardens and urban areas.
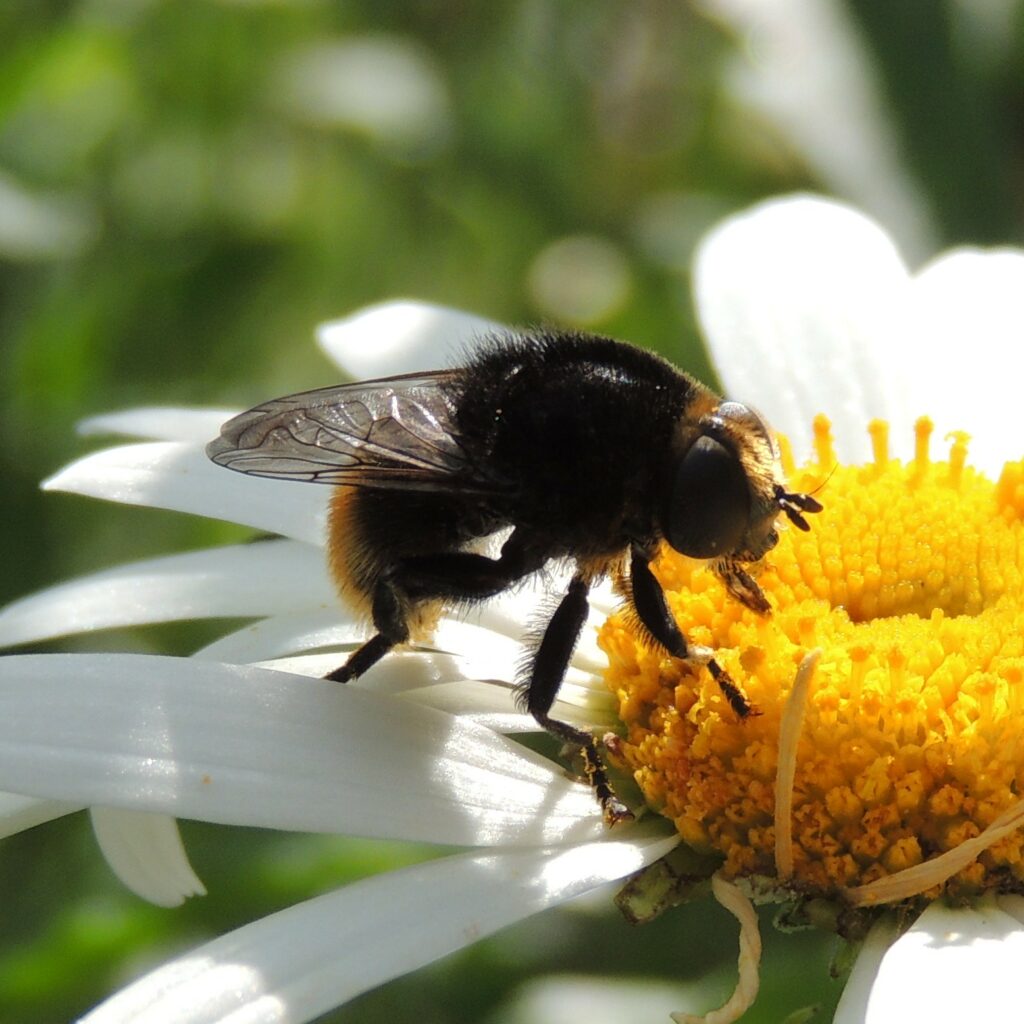
What to look for: A hairy bumblebee mimic that has swollen hind femora with triangular projections – a characteristic unique among bumblebee mimics. M. equestris can occur in a range of colour forms to mimic different bumblebee species. 
Months active: Between April and September, with a peak in late May and early June.
Did you know: The larvae develop in the bulbs of many different bulb-forming plants, but they are especially associated with daffodils and can be a pest in some cases. They are thought to have been introduced to Britain in the 19th century in daffodil bulbs. 

Merodon equestris by Orangeaurochs via Flickr
Platycheirus albimanus

Distribution: Widespread throughout Britain and Ireland.
Habitat: Woodland edges and hedgerows, and often seen in gardens.
What to look for: Females are easier to recognise due to their yellow legs and silver spots on their black abdomen. Males tend to have bronze-coloured spots, a front tibia that is significantly broader at the end, and front femora that have distinctive clumps of long hairs. It is possible to confuse males with similar species such as P. aurolateralis, P. scutatus, and P. splendidus, and so close examination of the legs is required. 
Months active: Between March and November, with peaks between May and June, and July and August.
Did you know: A common garden visitor, particularly in spring, P. albimanus is often found in low vegetation such as nettles or brambles.

Platycheirus albimanus (female) by S. Rae via Flickr
Platycheirus albimanus (male) by Martin Cooper via Flickr
Eupeodes corollae

Distribution: Widespread in Britain, although less abundant in northern Scotland.
Habitat: Recorded in almost any habitat, from gardens to mountain tops.
What to look for: Males and females are quite different in appearance, but both have broad yellow markings that reach the edges of the abdomen. The males also have an obvious genital capsule. 
Months active: March to November, with a peak between July and August.
Did you know: E. corollae is found in a wide variety of habitats. An influx of migrants or a mass emergence of individuals results in a peak in numbers in midsummer.

Eupeodes corollae (male) by S. Rae via Flickr
Eupeodes corollae (female) by gailhampshire via Flickr
Melanostoma mellinum

Distribution: Widespread throughout Britain and Ireland.
Habitat: Grasslands. 
What to look for: It is easy to confuse this species with M. scalare, and so close examination is required. In females, the top of the head is a shining black with very narrow dust spots by the eyes, while the abdomen has distinctive yellow markings. Males have a relatively short abdomen and the second and third segments are as wide as they are long. 
Months active: April to October, with peaks in May–June and July–August. 
Did you know: This is one of the most common hoverfly species in the UK and is often recorded from grasslands, although it can also be found in high numbers in the uplands such as on moorland or mountainsides. 

Melanostoma mellinum by Martin Cooper via Flickr
Chrysogaster solstitialis

Distribution: Widespread in Britain and Ireland, but rare in parts of northern Scotland.
Habitat: Woodlands, road verges and hedgerows.
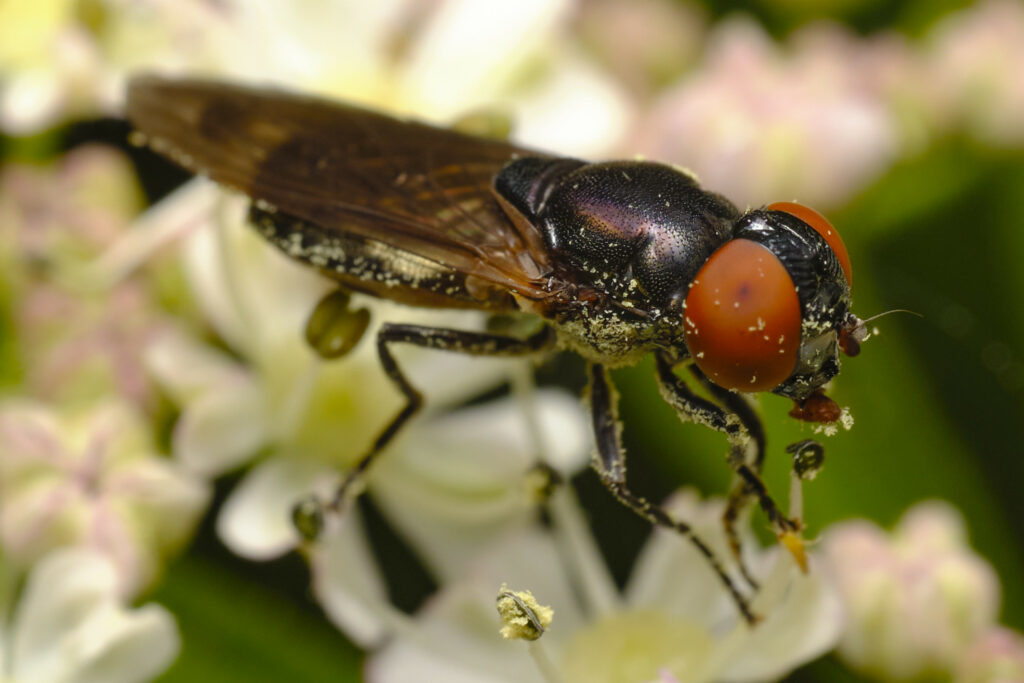
What to look for: A small, dark hoverfly (even the wings are dark) with bright red eyes. Confusion can occur with other Chrysogaster species, or even small house flies.
Months active: May to October, with a peak in July and August.
Did you know: A common woodland species, particularly in damp and shady locations. C. solstitialis is often seen in concentrated numbers on umbellifers such as Hogweed and Angelica. 

Chrysogaster solstitialis by Lukas Large via Flickr
Rhingia campestris

Distribution: Widespread throughout Britain and Ireland.
Habitat: Woodlands and field edges, but found in a variety of habitats.
What to look for: The long snout and orange abdomen make this an unmistakable species. The only potential for confusion is with the UK’s other Rhingia species, R. rostrata, but the dark edges of the abdomen and overall darker colouration of R. campestris are distinctive.
Months active: April to October, with peaks between May and June, and August to September. 
Did you know: The long snout allows R. campestris to feed on plants with deep tubes, such as bluebells, which other hoverflies cannot use. The larvae breed in cow dung, although other breeding habitats are also thought to be used as adults can occur in high numbers where there are few or no cattle. 

Rhingia campestris (male) by S. Rae via Flickr
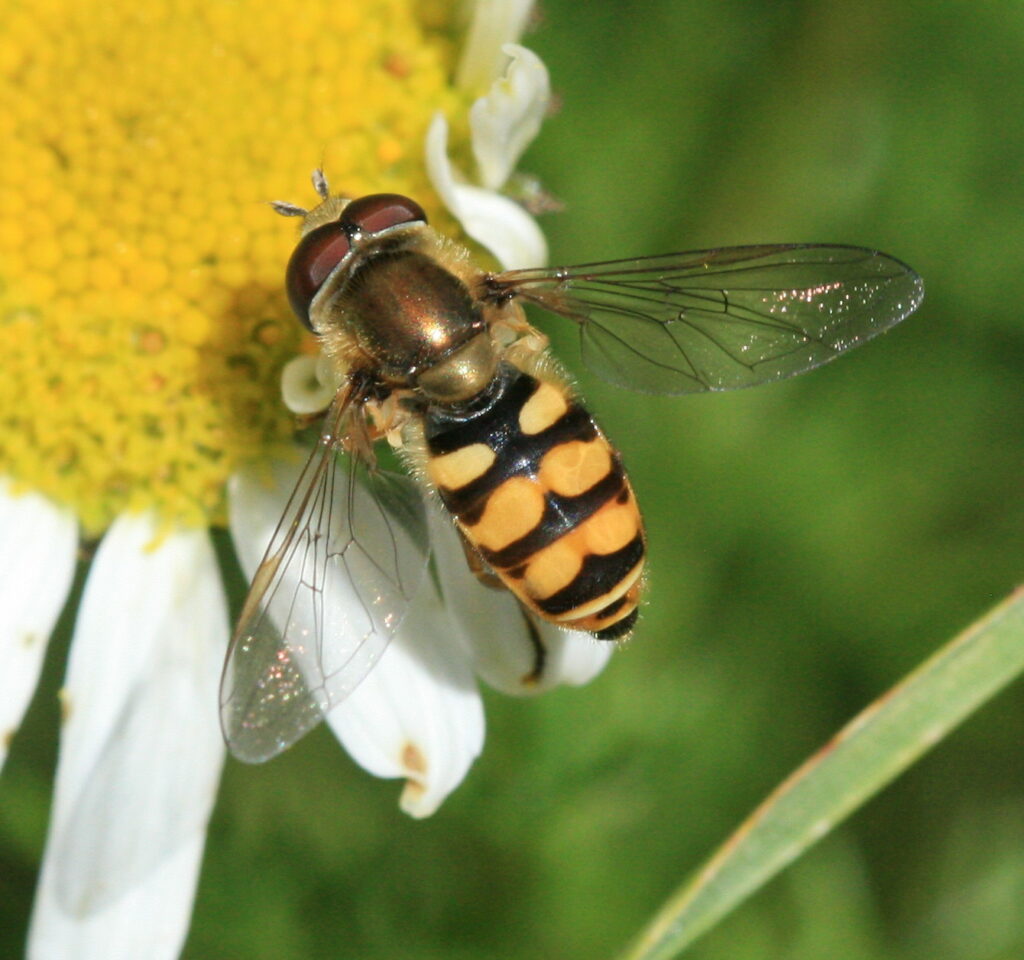
Sericomyia silentis

Distribution: Widespread in Britain and Ireland, although absent from central England and scarce in south-east England.
Habitat: Acidic, boggy habitats, such as wetlands and heathlands.
What to look for: A large wasp mimic with distinctive black-and-yellow banding – it is very unlikely that this species would be confused with any other hoverfly. 
Months active: May to November, with a peak in July.
Did you know: This is a very mobile species, which is often found far from breeding sites. It visits a range of plants, but seems to have a preference for red or purple flowers, such as Devil’s-bit Scabious. 

Sericomyia silentis by Frank Vassen via Flickr
Ferdinandea cuprea

Distribution: Widespread in Ireland, Wales and southern England, but rarely occurs in high numbers.
Habitat: Woodland.
What to look for: Easily recognisable, F. cuprea has a metallic, brassy abdomen with grey longitudinal stripes on the thorax. The thorax also has strong bristles on its side, which is quite uncommon for a hoverfly.
Months active: March to November, with a peak in June.
Did you know: F. cuprea is rarely seen visiting flowers, and is more likely to be seen basking on tree trunks, wooden posts or even telegraph poles.

Ferdinandea cuprea by Frank Vassen via Flickr


Suggested reading and equipment:

Britain’s Hoverflies: A Field Guide

£24.99


British Hoverflies: An Illustrated Identification Guide

£37.50 


60ml Collecting Pots

£0.35


Opticron Hand Lens 23mm 10x Magnification

£12.95 £14.95


Sweep Net

£31.99


All prices correct at the time of this article’s publication.

The NHBS Guide to UK Shieldbug Identification

Shieldbugs are insects in the superfamily Pentatomoidea. They are characterised by their well-developed scutellum, the hardened extension of the thorax over the abdomen. Many shieldbug species are triangular, with a broad pronotum and pointed end to the abdomen. They also produce a foul-smelling liquid from their prothoracic glands, which inspired the American name “stink bug”, although this name is specific to the family Pentatomidae.

Some shieldbugs are considered pest species due to the damage they can cause to crops. The recent arrival of the brown marmorated stink bug (Halyomorpha halys) to the UK is considered a serious threat to fruit and vegetable crops. They damage the salability of produce and can even contaminate the taste of juice or wine, causing waste and a loss in income.

Identifying shieldbugs is usually based on structural characteristics, body length (from the head to the end of the abdomen, ignoring the antennae and legs), and species range. Colouration and pattern can be useful but there is often variation between individuals of the same species. Using a hand lens, sweep net or beating tray can help when surveying for shieldbugs. A field guide that includes juvenile stages would also be useful as nymphs can often have different colour patterns to adults.

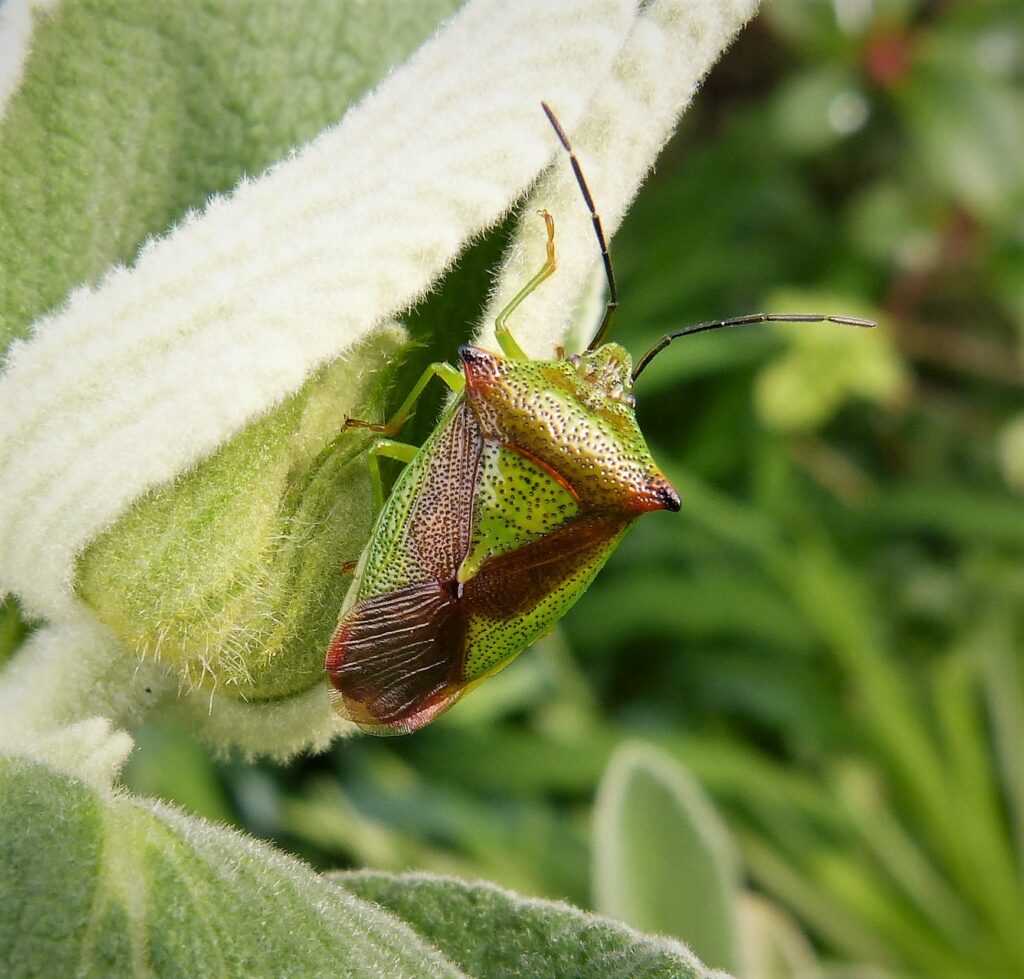
Hawthorn Shieldbug (Acanthosoma haemorrhoidale)

Distribution: Widespread across the UK.
What to look for: The most common shield bug in the UK, the hawthorn shieldbug is also UK’s largest. Its scutellum and pronotum are green, framed with red sides. The ‘shoulders’ of its pronotum are pointed with red and black tips, and its corium, the thickened basal portion of the forewing, is red. Its wing membrane can vary in colour but is usually red.
Similar species: The birch shieldbug (Elasmostethus interstinctus) but this species does not have a green scutellum. The juniper shieldbug (Cyphostethus tristriatus) is also similar but this species does not have a red wing membrane.

Hawthorn shieldbug by gailhampshire via Flickr
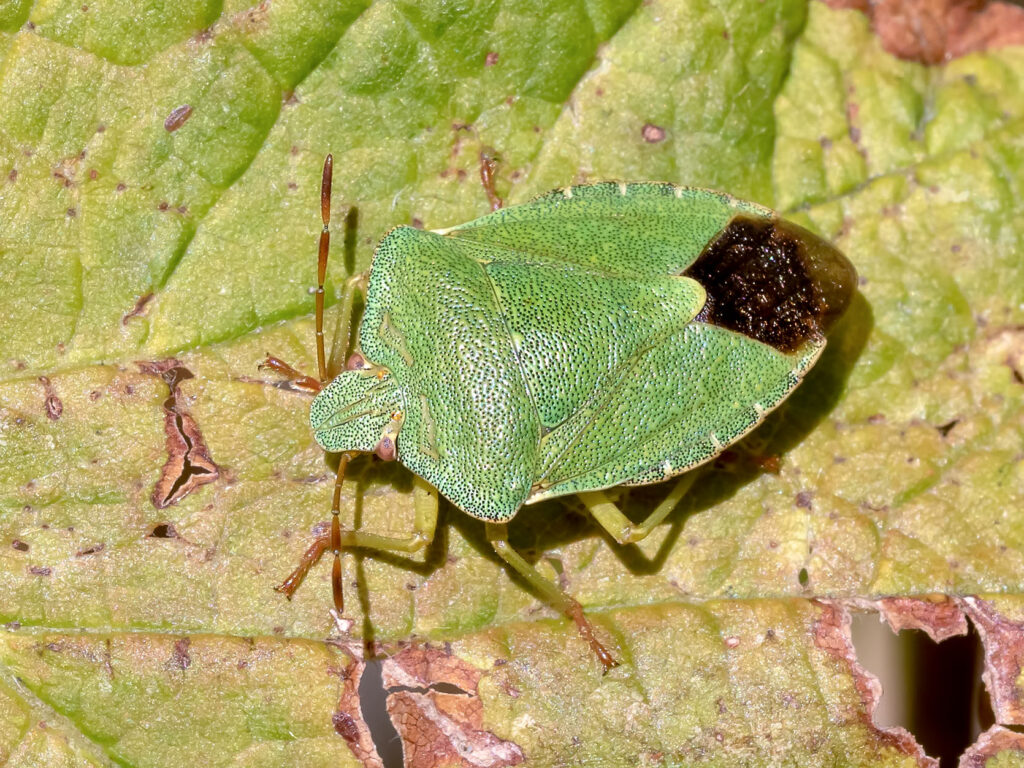
Common Green Shieldbug (Palomena prasina)

Distribution: Widespread in England, Wales, and parts of Northern Ireland.
What to look for: This is a larger species, with a dark wing membrane and a bright green body during summer. The adults become a bronze-brown colour in the autumn before hibernating throughout winter.
Similar species: The southern green shieldbug (Nezara viridula), a non-native species. However, this species has paler wings than the common green shieldbug.

Common Green Shieldbug by Charlie Jackson via Flickr
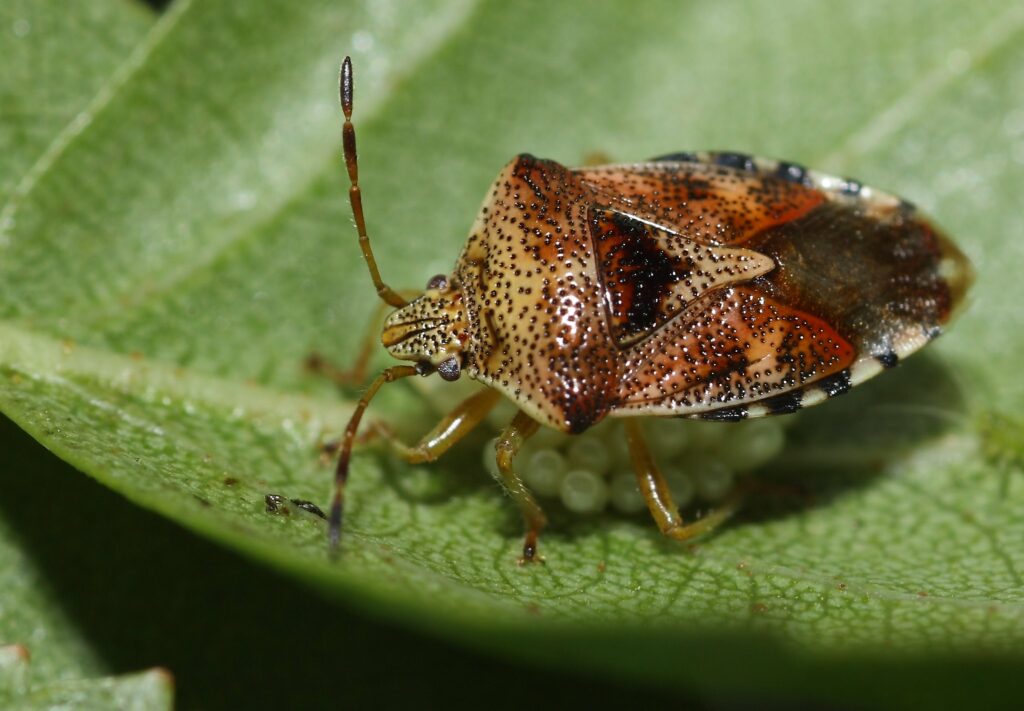
Parent Bug (Elasmucha grisea)

Distribution: Occurs across the UK but most commonly in south-east and central England.
What to look for: This is a medium-sized species with red and beige colouration. Most individuals have a black patch on the scutellum. This species also has a black and white connexivum, the flattened lateral border of the abdomen.

Parent Bug by Dean Morley via Flickr
Pied Shieldbug (Tritomegas bicolor)

Distribution: Widespread across the south-east and central England.
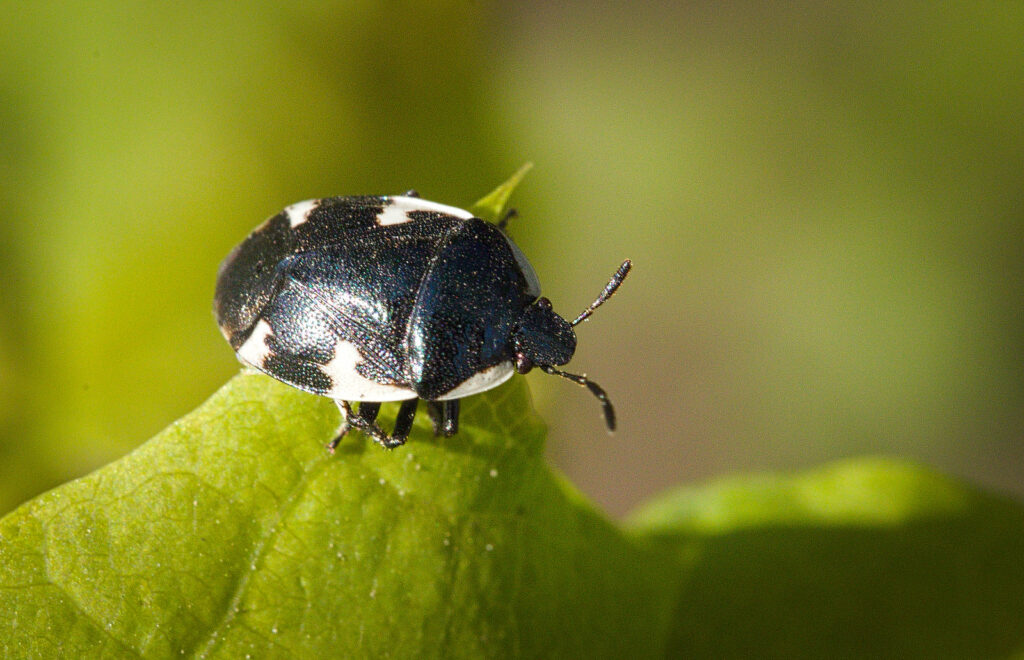
What to look for: This species does not have the characteristic triangular shape and could be confused for a ladybird. It has a black and white piebald pattern, with a grey or translucent wing membrane. Its pronotum is black with a white spot on each ‘shoulder’.
Similar species: Rambur’s pied shieldbug (Tritomegas sexmaculatus), although this species has a black wing membrane.

Pied Shieldbug by hedera.baltica via Flickr
Juniper Shieldbug (Cyphostethus tristriatus)

Distribution: Common in southern and central England, with an expanding range.
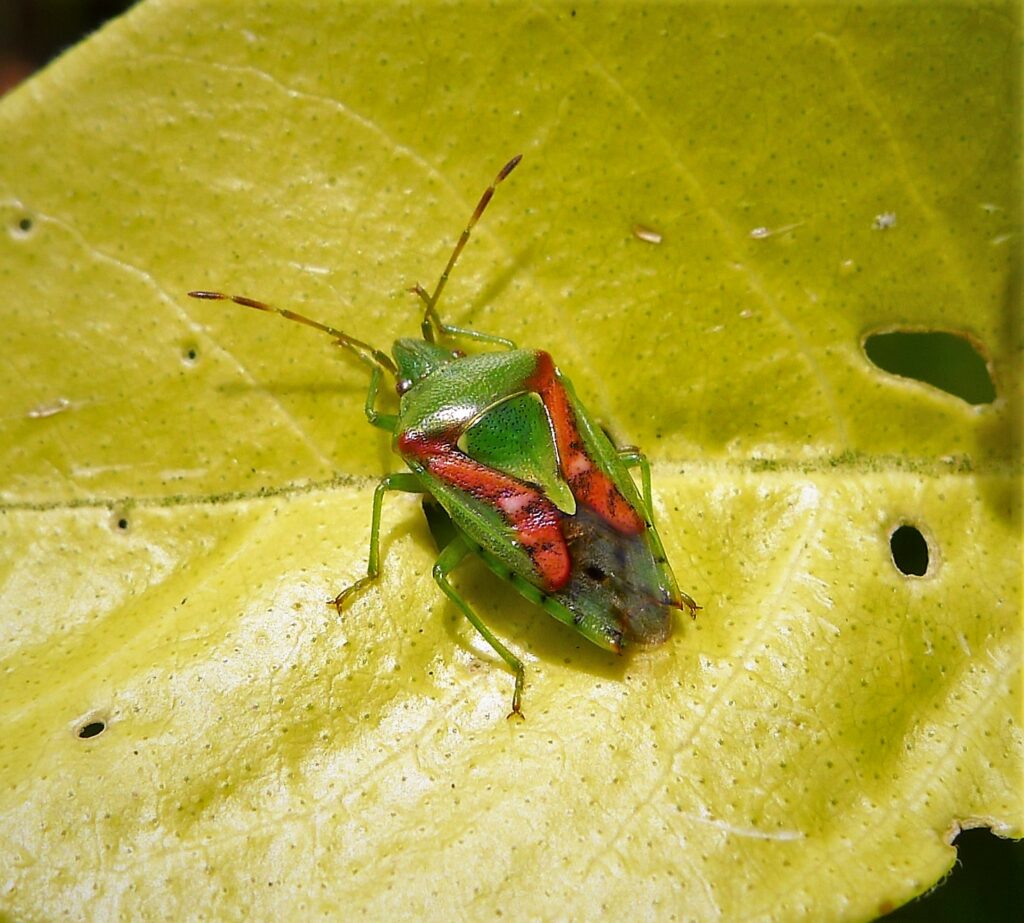
What to look for: This is a bright green species, with a green pronotum, head and scutellum. They have pinkish-red markings on their corium. Their wing membrane is green with a black X-shaped mark.
Similar species: The birch and hawthorn shield bugs are visually similar but neither species has the black X-shaped mark on their wing membrane.

Juniper Shieldbug by gailhampshire via Flickr
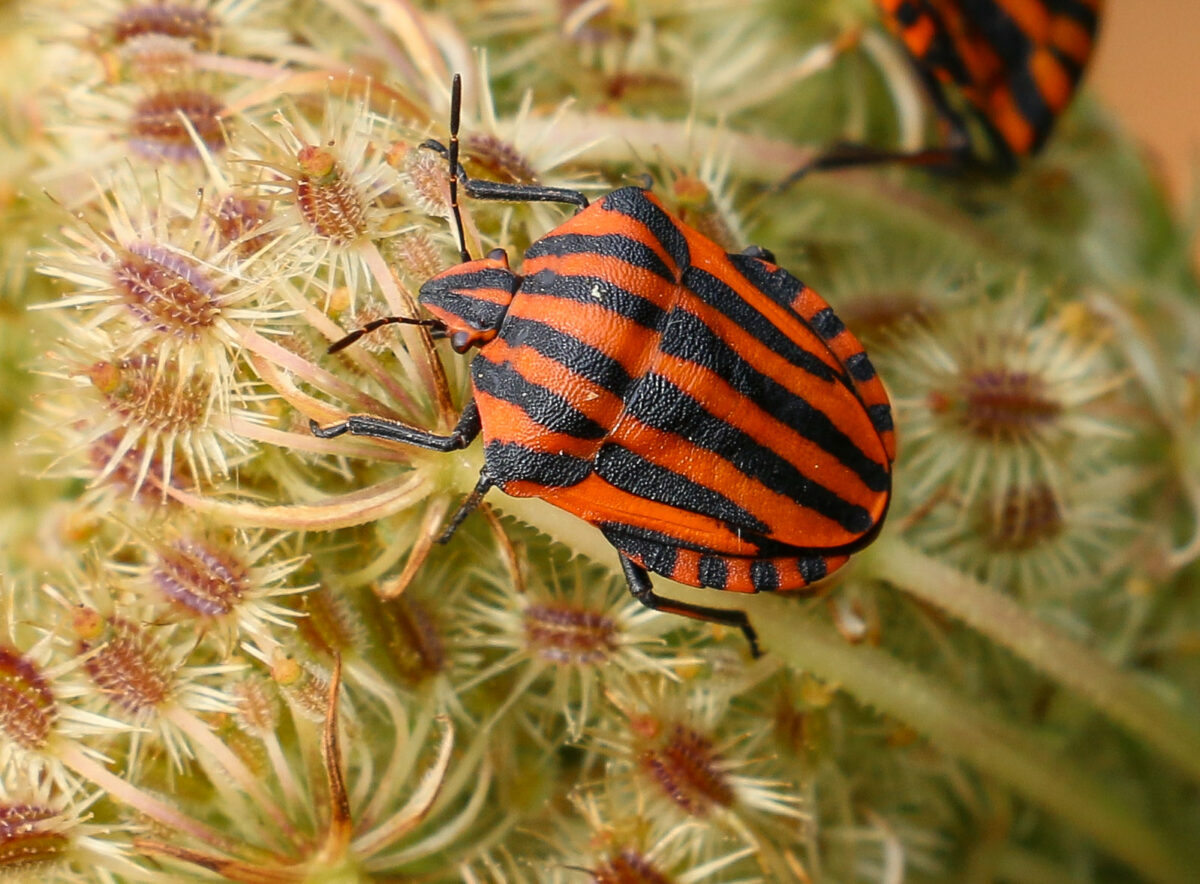
Striped Shieldbug (Graphosoma italicum)

Distribution: First recorded in the UK in 2020, only found in two sites in London.
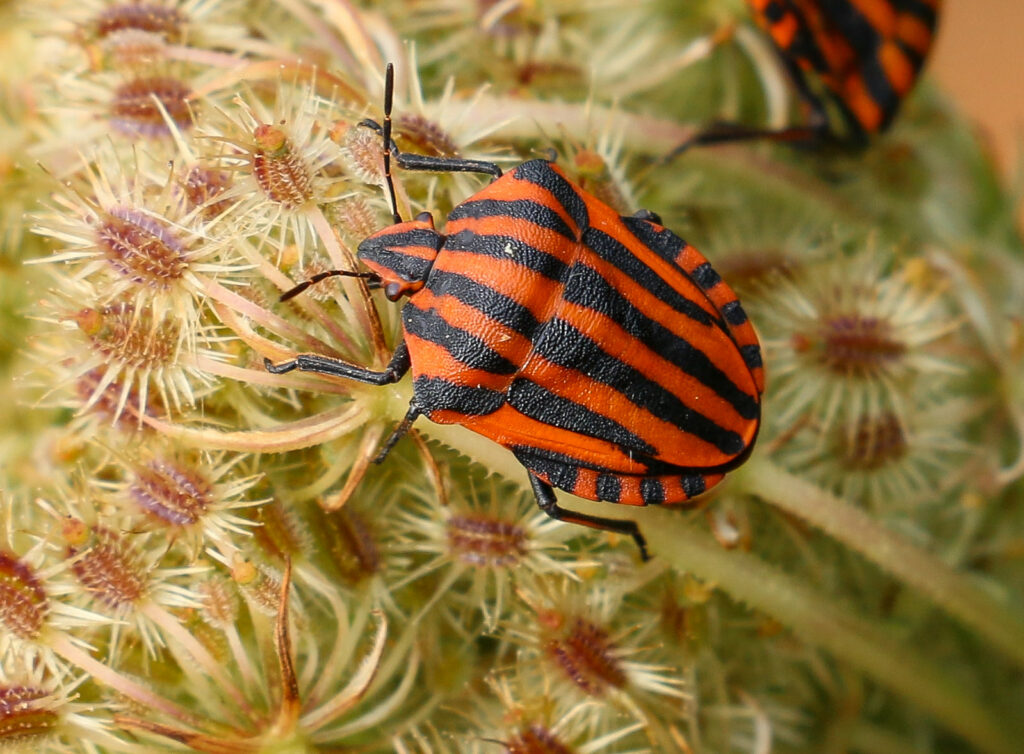
What to look for: Also known as the Italian striped bug and the minstrel bug, their body is rounded with bold red and black longitudinal stripes. Their connexium is black with several black, square-shaped spots.
Similar species: There are several similar species, such as Graphosoma lineatum, but none are found in the UK.

Striped Shieldbug by Chris Parker via Flickr
Ornate Shieldbug (Eurydema ornata)

Distribution: Coastal areas between Devon and Sussex, scattered in other parts of southern England.
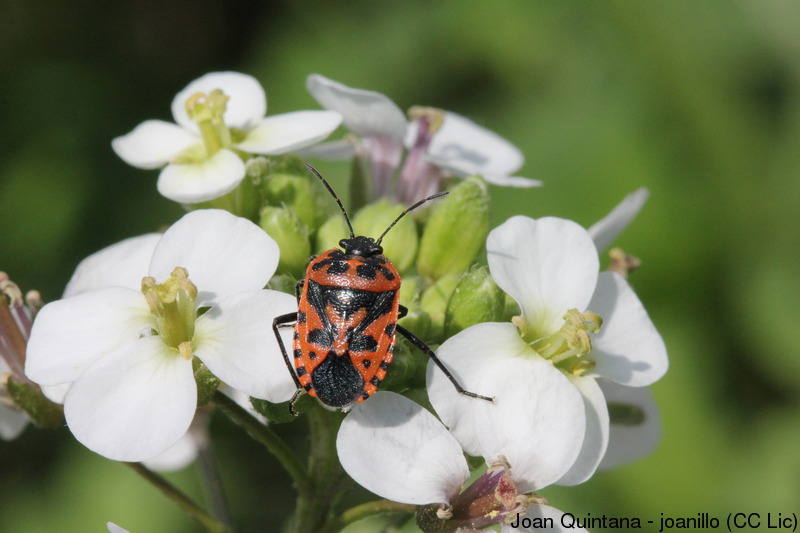
What to look for: They have a distinctive red and black pattern across their pronotum and abdomen. There are other colour morphs, however, and they can have a white and yellow background with the same black markings. They have a black head with a red, white or yellow ‘mouth’ shape and a black wing membrane.
Similar species: The scarlet shieldbug (Eurydema dominulus). They can be distinguished by the pattern on their corium. The ornate shieldbug has a thin black line, two spots and a washed-out area, compared to the thicker line, one or no spots and no washed-out area on the scarlet shieldbug.

Ornate Shieldbug by Joan Quintana via Flickr
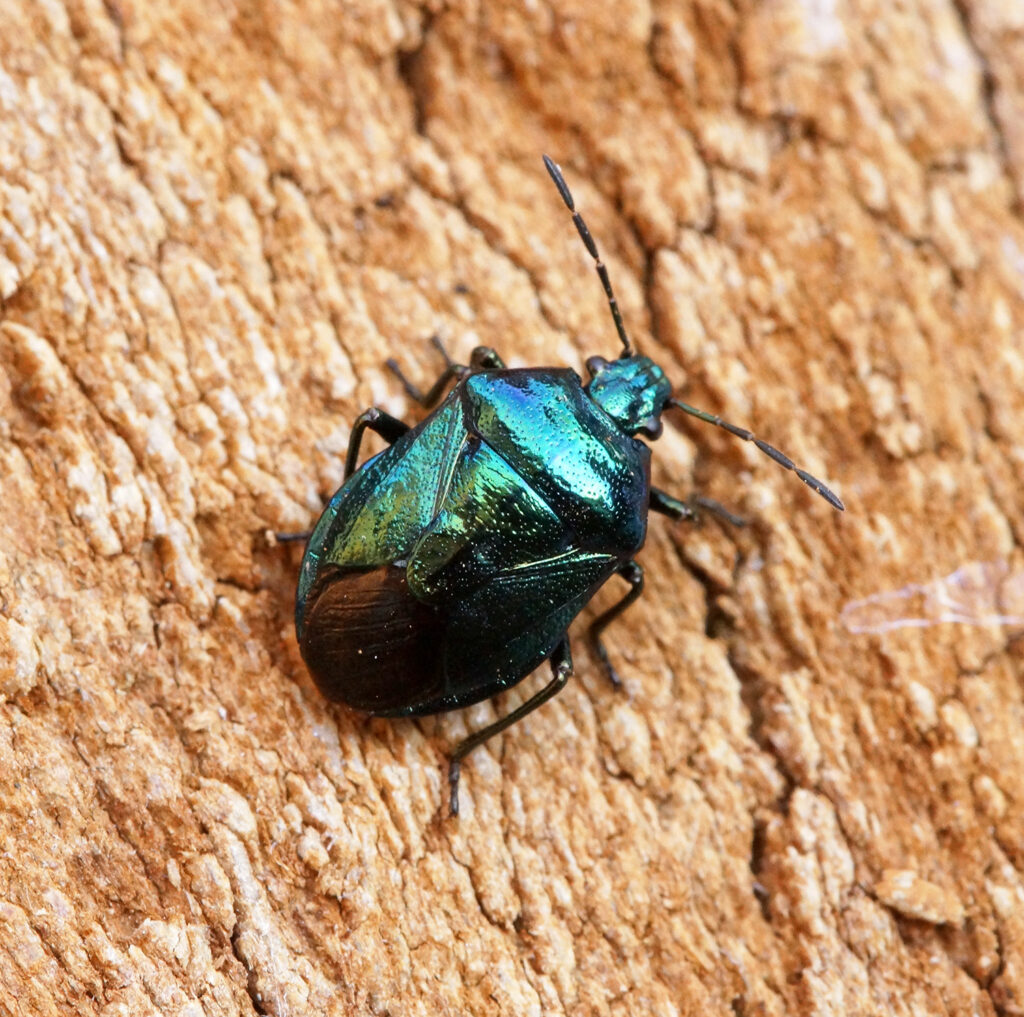
Blue Shieldbug (Zicrona caerulea)

Distribution: Widespread across Britain, particularly in the north, and absent from Ireland.
What to look for: The blue shieldbug has a deep blue-green metallic sheen, with a dark wing membrane. They resemble leaf beetles, species in the Altica genus, whose larvae they predate upon. This is called aggressive mimicry, where a predator resembles its prey to avoid detection.

Blue Shieldbug by Ben Sale via Flickr
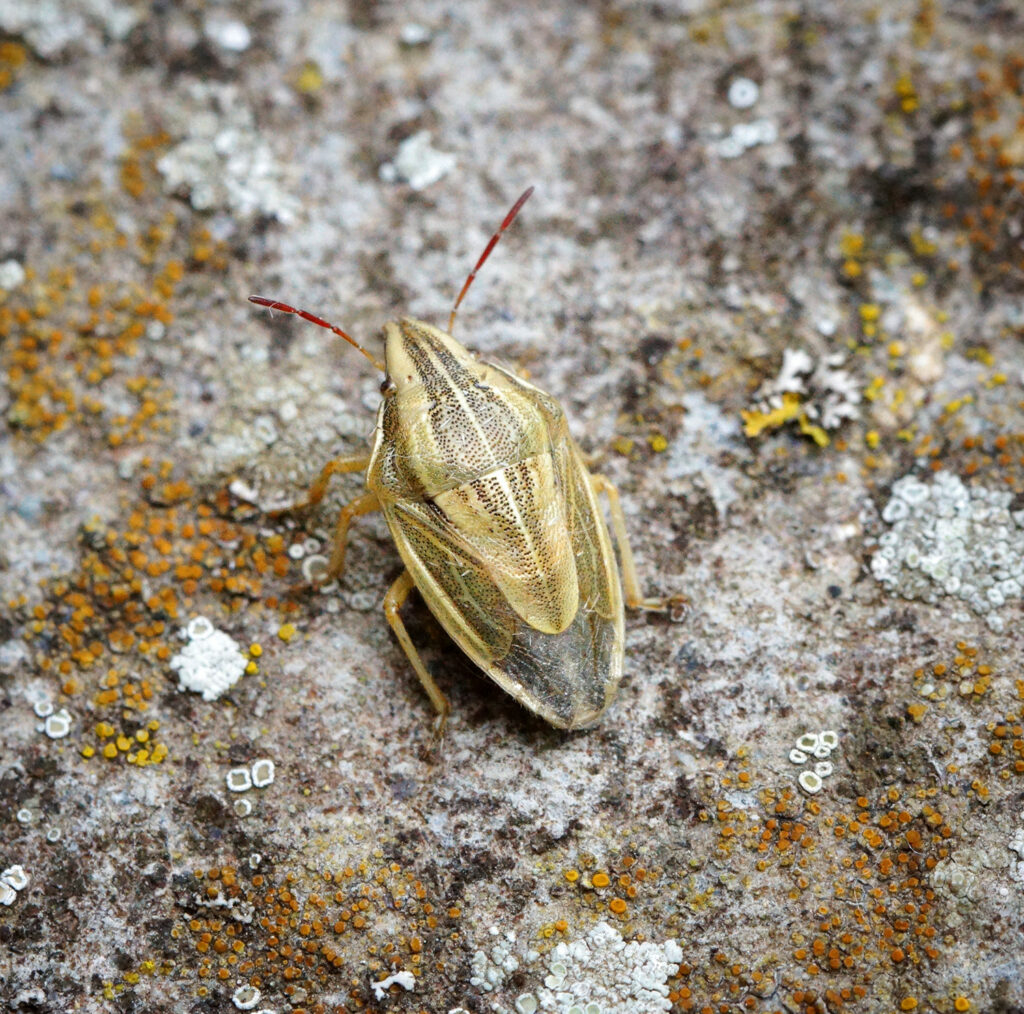
Bishop’s Mitre Shieldbug (Aelia acuminata)

Distribution: Widespread across southern Britain.
What to look for: This is a straw-coloured species, with brown longitudinal stripes, a distinctive pointed head and a ridged pronotum.
Similar species: Mecidea lindbergi is another elongated shield bug but it is a thinner species without brown stripes.

Bishop’s Mitre Shieldbug by Ben Sale via Flickr

Suggested reading and equipment:

Guide to Shieldbugs of the British Isles

£3.75


A Pocket Guide to the Shieldbugs and Leatherbugs of Britain and Ireland

£12.99 


Standard Sweep Net

£29.95 


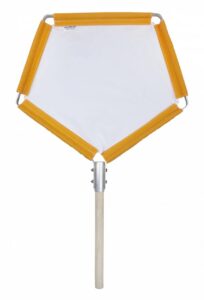
Beating Tray

£49.96


Invicta Pooter

£3.95


60ml Collecting Pot

From £0.35


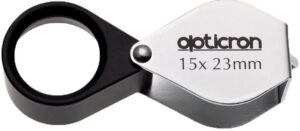
Opticron Hand Lens 23mm 15x Magnification

£14.50 £16.50


All prices correct at the time of this article’s publication.

The NHBS Guide to Swifts, Swallows and Martins Identification

Swifts, swallows and martins are migratory birds, spending the winters in Africa before flying around 3,400 miles to spend summer in the UK. While they are here they spend their days soaring high and feasting on the abundance of flying insects. Their arrival, for many of us, marks the end of winter and announces the arrival of spring and summer.

Although swifts, swallows and martins share some characteristics, they are, upon closer inspection, markedly different. They are roughly similar in size and shape, which can make them difficult to discern between, especially when flying high in the sky. However, as you begin to look closely at their appearance, flight, nesting behaviour and other key characteristics, it is relatively easy to distinguish between them. 

Below we share our top tips for identifying swifts, swallows and martins. In this article we have focused on the below species as they are all common and widespread in the UK: 

  • Common swift (Apus apus)
  • Barn swallow (Hirundo rustica)
  • Common house martin (Delichon urbicum)
  • Sand martin (Riparia riparia)

How to identify swifts

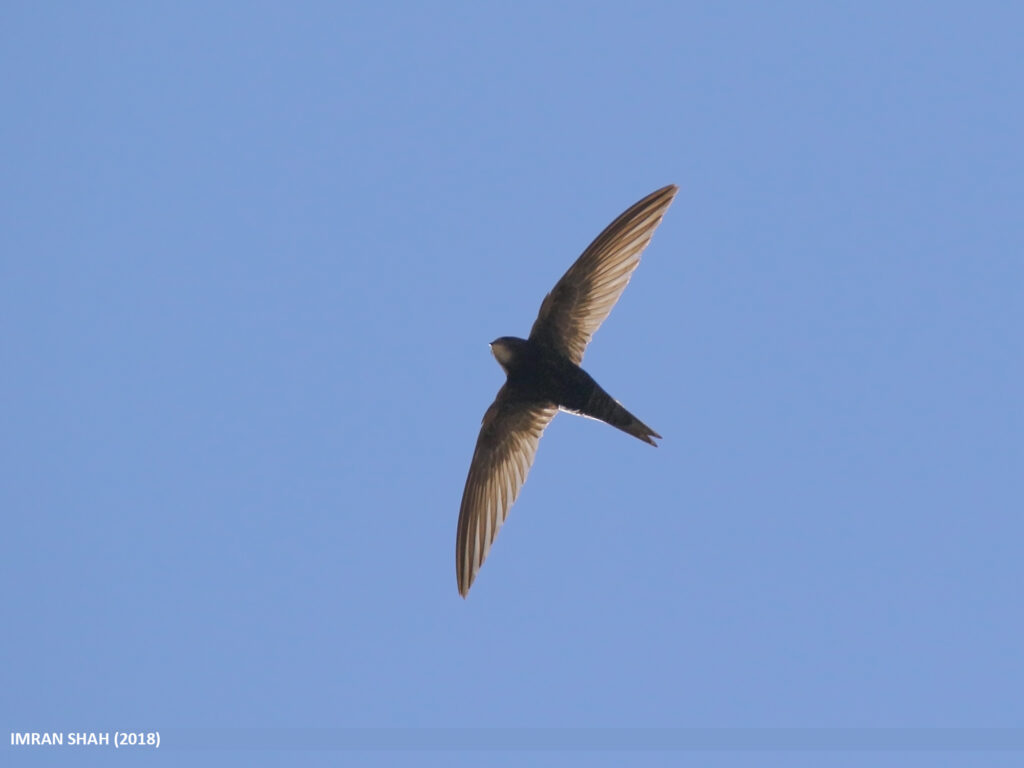
Image by Imran Shah via Flickr

Swifts are amazing birds – they are the longest continually-flying species, spending up to 10 months in the air without landing. They eat, drink, sleep, and mate while flying, only landing to breed. They are almost never seen perching. 

Key identification features:

  • Crescent-shaped, long, curving wings
  • Forked tail which is much shorter and stouter than the tail of a swallow
  • Dark brown all over with a small pale patch on their throat, but often appear black against the sky
  • Screaming piercing call

When to spot them in the UK: April to September 

How to identify swallows

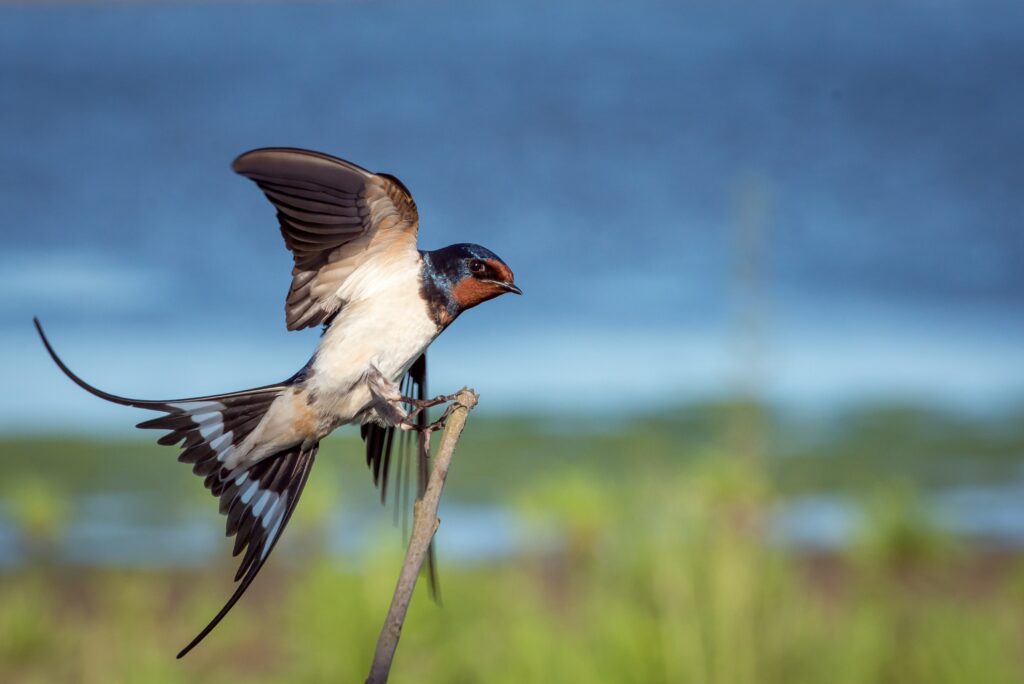
Image by Vincent van Zalinge via Unsplash

Swallows are small colourful birds. They are known for their agility as they feed on insects while on the wing. They can often be found flying low to the ground over farmland and open pastures, particularly near water where there are lots of insects. In late summer they can be spotted perching together on telephone wires and power lines, readying themselves to migrate to Africa for the winter. 

Key identification features: 

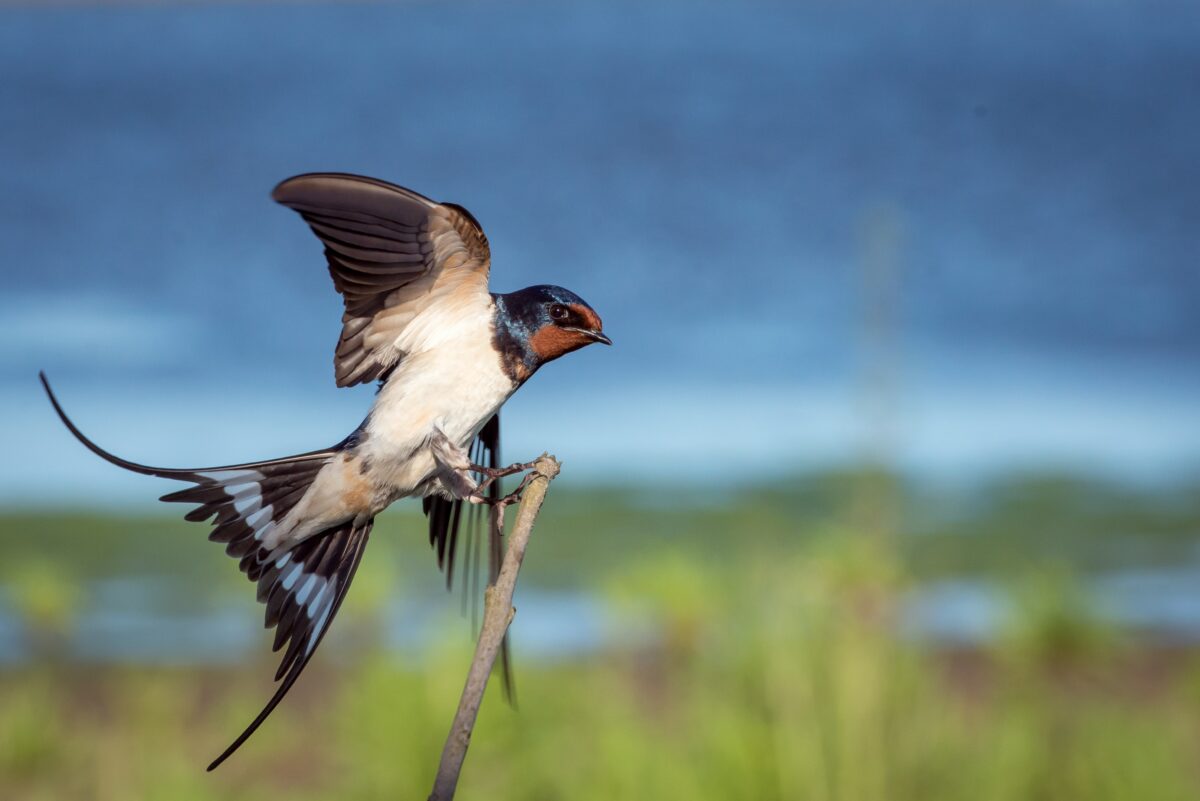
  • Glossy blue upper parts, creamy-white under parts
  • Red throat and dark red forehead, but from a distance their whole head may appear dark
  • Long forked tail
  • They tend to nest in barns, lean-tos and other outbuildings, where they build cup-shaped nests of mud
  • Chattering call
  • Can be seen perching on telephone wires or wire fencing

When to spot them in the UK: March to October

How to identify house martins

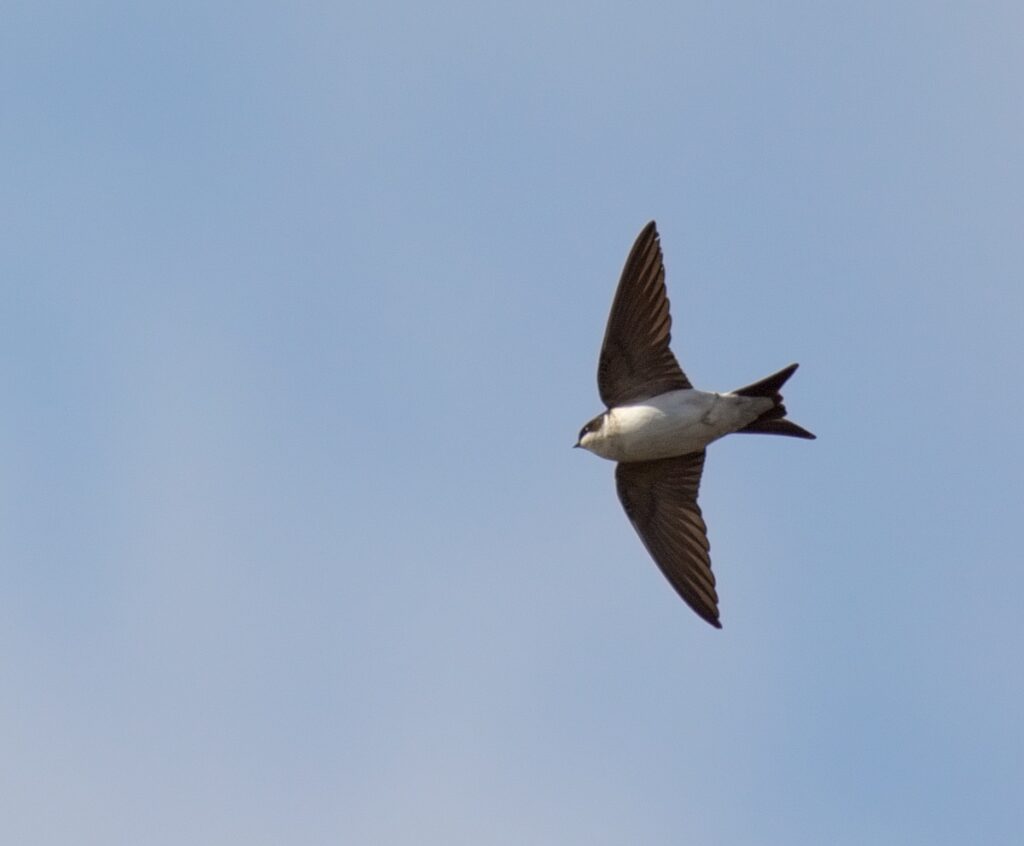
Image by Stefan Berndtsson via Flickr

House martins are commonly found in towns and villages, as well as in agricultural areas. They are one of the last of our summer migrants to depart in the autumn. They only eat while on the wing, catching insects as they fly. Their mud cup nests are usually spotted below the eaves of buildings. 

Key identification features:

  • Small birds with glossy blue-black upper parts and pure white under parts
  • Distinctive white rump, short forked tail and white feathers covering its legs and toes
  • Shorter wings than swifts or swallows

When to spot them in the UK: April to October

How to identify sand martins

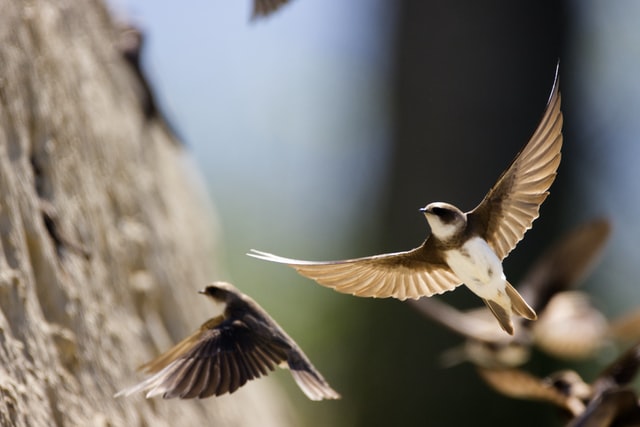
Image by Julian via Unsplash

Sand martins are the smallest of all the European hirundines and one of the first spring migrants to appear. They are agile fliers, feeding mainly over water. They breed in colonies of up to 1000 pairs. Unique to sand martins, these birds burrow holes into sandy, dry vertical banks in sand pits, gravel pits, riverbanks, lakes, streams, railway cuttings, and even in drainpipes in walls and holes in brickwork.

Key identification features:

  • Dark brown upper parts, with pale tipped feathers. Upper wings, tails and flight feathers are dark brown
  • Under parts are white with a distinctive brown band across the breast separating the white throat from the white belly
  • Breast band on young sand martins is less visible and their necks and chins are a reddish brown
  • Short legs and feet which are dark brown or black
  • Short forked tail
  • Tend to swirl and flap rather than glide, and can be found mainly over water

When to spot them in the UK: March to October


Recommended reading:


One Midsummer’s Day: Swifts and the Story of Life on Earth
Hardback | June 2023


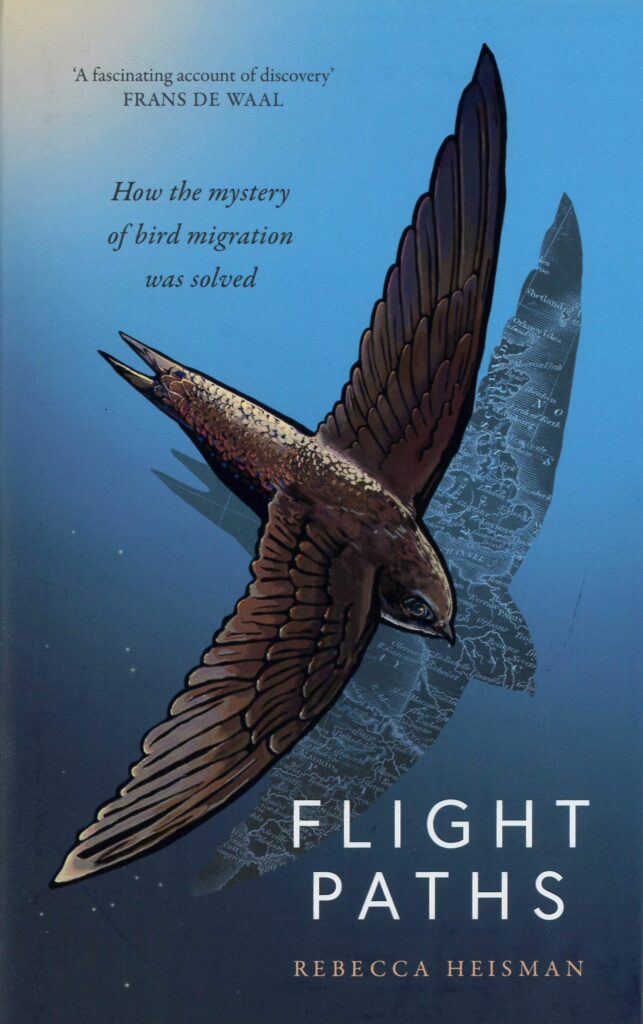
Flight Paths: How the Mystery of Bird Migration Was Solved
Hardback | April 2023


Swifts and Us 
Paperback | April 2022


RSPB Spotlight: Swifts and Swallows
Paperback | June 2018


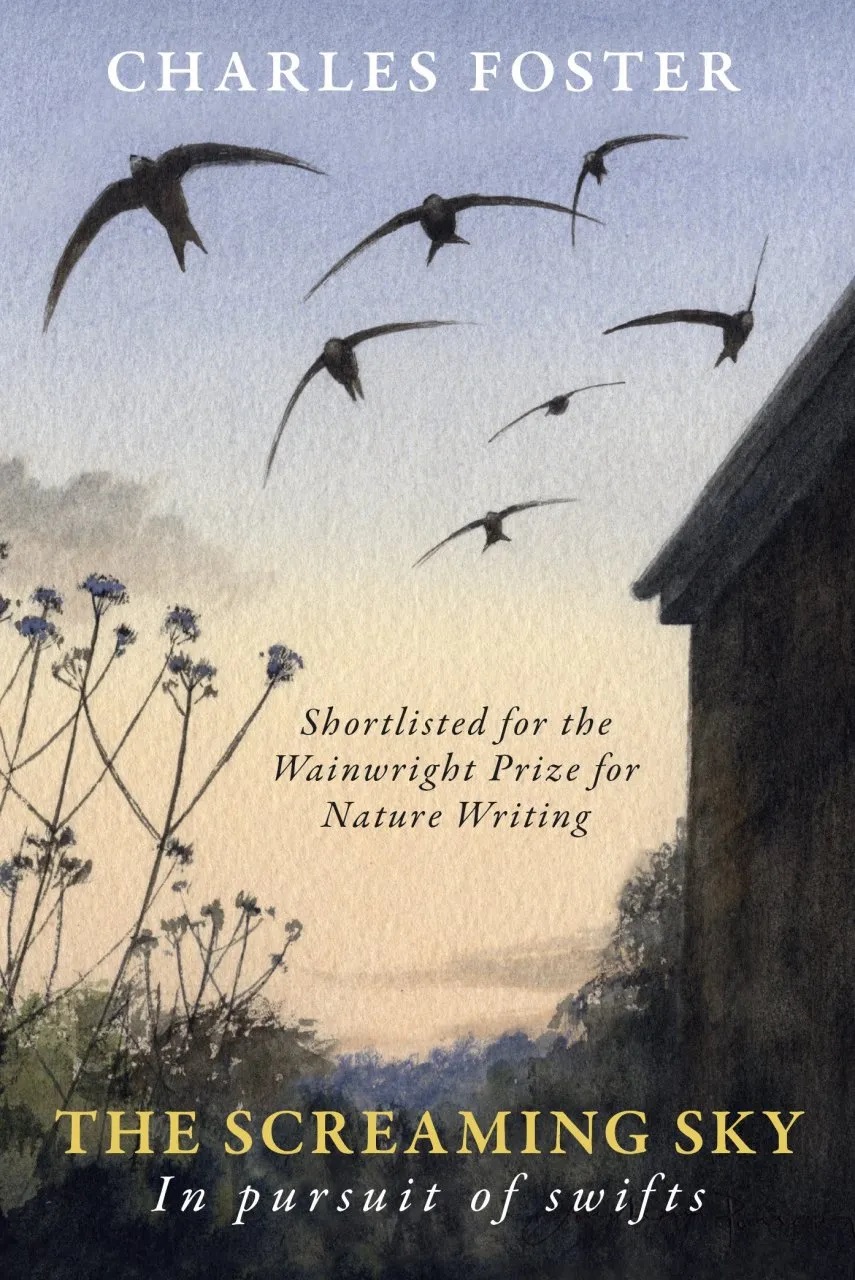
The Screaming Sky: In Pursuits of Swifts
Paperback | April 2022


Collins Bird Guide: The Most Complete Guide to the Birds of Britain and Europe
Paperback | May 2023


Britain’s Birds: An Identification Guide to the Birds of Great Britain and Ireland
Paperback | May 2020


Trail Camera Tips and Troubleshooting: Part 2

Whether you enjoy watching and learning about the wildlife that visits your garden, capturing footage of secretive wildlife on a holiday, or undertaking research on a rare species, there is no substitute for investing in a trail camera.

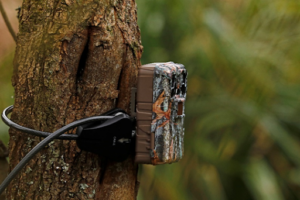
Browning Spec Ops Elite HP4

How and where you set up your trail camera has a significant impact on how successful your results will be. In this blog, we cover some key tips on how to best position your camera, choosing the ideal location, and which settings to use in different circumstances. If you are experiencing issues with your camera, check out part one of this series where we discuss the initial steps we advise you to take to help resolve or identify the problem.

Camera Settings

As a rule, it’s always best to become familiar with your camera and its different settings and capabilities by testing it at home before using it out in the field. Familiarising yourself particularly with the detection range, detection angle, the focal distance and the IR flash distance is the best way to help you gauge how far to place the camera from where you hope to see wildlife.

On most modern trail cameras there is the option to adjust the passive infrared sensors (PIR) which, along with motion detection, causes the camera to trigger. For most circumstances, having the sensor sensitivity set to high and the motion detection set to long-range will be the best option to avoid any disappointment from captures of only part of an animal, or missing something altogether.

Browning Spec Ops Elite HP4

If you are focusing on birds or fast-moving mammals, such as mustelids or rodents, then the highest sensitivity setting and the fastest trigger speed (if adjustable), is very important. For larger and often slow-moving mammals, such as deer and ungulates, sometimes a slower trigger speed and reduced sensitivity can be better as the camera will then only trigger once the animal is more centrally positioned in the detection zone.
Some species have quite insulated bodies (hedgehogs for instance, due to their spikes), creating more of a challenge for the camera’s sensors, so again the highest sensor setting would be best for such species.

With high sensor sensitivity comes the increased chance of false triggers as well as high battery and memory usage, which can be exacerbated in windy conditions as moving trees, grass and falling leaves can all trigger the sensors. It is therefore worth choosing locations for your camera with minimal, light vegetation to avoid potential false triggers.

With many trail cameras, there is now the option to set the camera to only trigger during certain times of day. This is particularly helpful if you are targeting certain wildlife that you know to be strictly nocturnal or diurnal. In most other situations though, we would recommend keeping the camera set to trigger on 24 hours, so you don’t miss anything unexpected.

Location

When choosing where to leave your camera, the first consideration will be around security, and ideally, you want to ensure that the location chosen is not visible to the public.

Then, there are two main factors to consider when deciding on a specific location. Firstly, is there a particular species you have in mind, or do you wish to survey or monitor the general wildlife of a site.

Image by Ian Watson-Loyd

If you hope to capture a particular species, then consider its habits and where it is most likely to be spending time within the landscape.

Many mammals have large home ranges but also have routines they regularly follow, even if that means only passing through a certain spot very infrequently, so some patience is usually necessary.

To increase your chances, think about how that species might move through the habitat and which areas they will be most drawn to, for example where there are reliable food resources, sources of water, good resting and denning sites, and existing pathways through vegetation.

It is also worth looking for any evidence that the target species is already present, such as tracks, droppings or feeding signs. These signs may reveal an animal’s movements and highlight an area they are currently frequenting where the camera could be left.

If you are investigating what species are present on a site, focusing on areas with high levels of activity is key. Most mammals will leave signs of their presence in prominent areas that tend to be used by other species too. The scent of one species will often attract the attention of another, particularly if it is a competitor.

Many terrestrial mammals move through the landscape in a similar way to people; they will often follow linear features and use paths of least resistance to avoid travelling through very dense undergrowth or steep terrain. In forests, most mammals also prefer to use trails and pathways already made by other species or people. This helps to avoid constantly brushing through vegetation, particularly after recent rainfall, when the understory foliage will be wet.

Image by Ian Watson-Loyd

Natural woodland clearings and rides, habitat edges and watercourses are all key areas to focus on, particularly for larger mammals. For smaller species that prefer to keep close to cover, consider old walls, hedges, boulder fields and scree, and fallen trees.

Within these habitats, it is worth looking out for particularly prominent features to set your camera up. Features to look for include natural bridges over water, shallow spots for drinking and bathing, or a conspicuous large tree or boulder that carnivores might use for leaving their scent or droppings when marking their territory.

Therefore, if you find a location with lots of activity, it can be worthwhile continuing to monitor it for a long period, as some species with large territories, such as apex predators and some mesopredators (medium-sized), may only pass by very occasionally.

It can sometimes be a challenge to find something suitable to attach your camera to once you have found a suitable location. A Python Mini Cable Lock is the best all-rounder for both security and flexibility when attaching the camera to a tree, post or even rocks. However, there are times when a tripod or tree bracket can be more suitable. Sometimes adding a wedge of wood between the camera and a branch can be a good solution to ensuring the camera is angled straight if all the suitable trees and branches around are tilted.

Lastly, it is best to try to conceal your scent as much as possible during the deployment of your trail camera, as too much human smell could deter some wildlife from the area, so give the camera a clean before and during deployment and consider wearing gloves as you set it up.

Positioning

It is best to avoid facing your camera directly east or west, as this can overexpose images as the sun rises and sets. Sometimes extreme brightness can also cause false triggers as the light and shadows move.

Most trail cameras will have a standard focal distance of around 1.5 to 2 metres, so it is important to allow this much distance between the camera and the area you hope to record activity. For small mammals, a close focus lens can be attached over the front of the camera lens to allow you to take sharp images at a closer range. This works best if you are specifically targeting small mammals such as rodents or shrews within an enclosed space, for example a hole in a wall, log pile or small clearing in dense vegetation where all the activity will be at close range.

Also consider how far away an animal might pass the camera too, particularly when thinking about nocturnal activity and the distance the flash comfortably covers. Although many cameras have impressive detection and flash ranges, the resulting images and videos can still be frustrating if the animal passing is too far away to identify. Factors such as a dense overhead forest canopy, moonlight and cloud cover can also all impact a flash’s results. Ideally, opt for a position where animals will most likely pass around 3–10 metres away. 

The detection angle of most trail cameras is around 45° degrees, so it is best that the spot you think most activity will occur should be central within your cameras’ field of view.

It is important to also angle the camera at the correct height for your intended wildlife. If the camera is angled too high or too low, it will miss some species or result in unsatisfactory images of only part of an animal.

A good guideline for many situations is to angle your camera at around adult human knee height to capture small to medium-sized animals at their height rather than looking down on them. Sometimes trail cameras do need to be positioned higher in various circumstances, but try to avoid human head height as this will draw more attention to the camera.

Most high-quality trail cameras now have large screens that allow you to check in real-time what the camera can see as you position it. This is an invaluable tool to ensure your positioning, distance, height and view are just right.

Aquatic Wildlife

Image by Ian Watson-Loyd

For species that use watercourses, successful camera trapping can be even more challenging. One of the considerations is how to safely and securely position a camera close to or above water. Generally, the best option to avoid any risk to the camera and potential false triggers is to focus on prominent banks, sandbars, culverts, beaches or shallow water edges. With these locations it should be easier to position the camera at a safe distance back from the water while overlooking a spot where aquatic mammals and birds are also more likely to investigate, feed, drink or leave their scent or droppings.

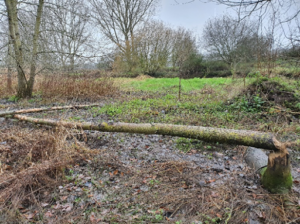
With rivers particularly, it is important to ensure the camera is a little higher off the ground in case of unexpected water level rises, and so sometimes a downward-facing angle is more suitable. For otters, large rocks or fallen trees can be popular spots for scent marking, while a small clearing or mound within dense vegetation or reeds is often favoured by water voles. For beavers, an exposed bank and beach close to a favoured food source is often a good option.

Image by Ian Watson-Loyd

Summary

When thinking about setting up your trail camera, for best results we recommend taking the following into consideration:

  • The target species, their behaviour and habitat usage
  • Settings to reflect the above (and testing at home before deploying in the field)
  • The angle of the camera, taking into account flora, angles of the sun and where the animals are likely to be within the camera’s viewing area
  • Aiming for your focal species to pass the camera at a distance of 3-10m 
  • Generally positioning the camera at human knee height works well

If you have any questions about our range or would like some advice on the use of your trail camera, please feel free to get in touch with our Wildlife Equipment Specialist team via email at customer.services@nhbs.com.


Trail Camera Tips and Troubleshooting: Part 1

Trail cameras are a widely popular solution to monitoring elusive or nocturnal wildlife for both professionals and wildlife enthusiasts alike.

Modern trail cameras tend to be very reliable and are designed to be highly user-friendly. However, there are a few things we would suggest to ensure your camera performs to the best of its ability. These are the initial steps we advise to take if you are experiencing issues with your camera, and these can often resolve or at least identify the problem. For tips on how and where to set up your trail camera, check out part 2 of this series.

Batteries

Try a set of new batteries

Most minor troubles with trail cameras are due to the batteries not providing enough power. This can be down to the type of batteries being used or simply that they are getting low and need replacing. If you are experiencing black night-time images, short night-time videos, or no night-time captures are being taken at all then the first thing to check should be your batteries.

Battery meters on trail cameras are not always accurate, so we suggest checking your batteries with a tester/voltage meter prior to use if possible. This is particularly important for professional usage.

Choose Lithium batteries if at all possible 

We, and many trail camera manufacturers, highly recommend Lithium batteries as the best option for performance. The Energizer Ultimate Lithium are particularly well thought of, and as such are included in our Starter Bundles (see individual product pages).

Lithium batteries have a significantly longer lifespan than most other types e.g. alkaline and rechargeable NiMH, while also performing more reliably for a number of reasons that are explained below.

Trail cameras generally require 1.5 volts (V) from each AA battery to perform at their full potential. When the voltage begins to drop you may start experiencing issues such as those mentioned above. One of the main benefits of Lithium batteries is that they maintain their voltage until the end of their usable lifespan when it then rapidly drops off. In contrast, Alkaline batteries experience a pretty consistent voltage loss throughout their lifespan, meaning they can drop below 1.5V rather quickly after deployment.

Unfortunately, we do not recommend rechargeable AA batteries (NiMH). At only 1.2V, rechargeable batteries are unlikely to power the camera reliably or for long. If rechargeable batteries are still the preferred option, it is important that the batteries offer at least 2500mAh. Some camera models have been designed to work more effectively with rechargeable batteries, for example the Recon Force Elite HP4, however the performance is still unlikely to be comparable to use with Lithium batteries.

Be prepared for batteries to die more quickly in cold weather

During colder winter months, you should expect your batteries to discharge more rapidly and the battery life to therefore be reduced. At lower temperatures the chemical reactions accruing in the battery are slowed down, diminishing its power.

Alkaline batteries are particularly troublesome in this regard as they contain a water-based electrolyte, which means they seriously struggle as temperatures approach freezing. Again, Lithium batteries are the superior choice and can withstand significantly colder conditions while still performing fantastically, albeit slightly diminished in comparison to use in more mild conditions.

SD cards

SD (Secure Digital) cards are available in a wide variety of sizes and speeds. Generally speaking, we find a 32GB, class 10 SD card a very suitable choice, and this is what is included in our trail camera Starter Bundles. It is worth reading the manual of your chosen trail camera to check for any compatibility requirements or maximum size capacities.

Format your SD card 

Formatting your SD card is an important step when starting with a new camera, or if experiencing SD error alerts on your camera. It is important to be aware that formatting your card will erase all data, so any important videos or images should be transferred elsewhere beforehand.

There are two options for formatting your SD card: using a computer with an SD card reader or via the trail camera itself. When using a computer, simply look for the SD card in your file explorer/file finder, right-click and select ‘Format’. The majority of trail cameras also provide an in-built option to format your SD card via the settings menu. For the brands we offer, the menu options are likely to appear under the following titles (or similar):

Browning –  ‘Delete all’

Bushnell and Spypoint – ‘Format’

Check your SD card is not locked

A common error message seen with trail cameras is ‘missing SD card’. If an SD card is inserted in the camera but the error message is showing nonetheless, it is worth checking if the card is ‘locked’.

Modern SD cards include a small plastic lock switch (seen on the left side of the image) that allows the user to prevent any data being written or images deleted from the card. Simply slide the switch into the unlock position and check if the error message disappears when you re-insert the card.

Settings

Return the camera to the default settings 

When a trail camera is not behaving as it should or how the user would like, we would recommend resetting the camera to the original factory settings. This can be easily done through the menu on the trail camera and is likely to be named ‘default settings’, ‘default’, or similar.

For further advice on settings and placement of your camera, please see Part 2 of our Trail Camera Tips and Troubleshooting series.

Summary

We recommend taking the following steps prior to using your camera for the first time, or if you experience any unexpected problems:

  • Use a brand new set of Lithium batteries
  • Reformat your SD card (and check it is not locked!)
  • Reset your camera to its default settings

If you have any questions about our range or would like some advice on the use of your trail camera, please feel free to get in touch with our Wildlife Equipment Specialist team via email at customer.services@nhbs.com.


The NHBS Guide to UK Heron, Egret and Bittern Identification

Herons are freshwater and coastal birds in the family Ardeidae. We have several resident and migrant heron species in the UK, including bitterns, which are a part of the subfamily Botaurinae, and egrets, which, despite being named differently, are not a biologically distinct group from herons. There are also several similar bird species outside of this family that might make identification difficult, particularly from a distance, such as cranes, ibises and spoonbills. One of the distinctions between these birds and the herons that resemble them is seen in flight; herons fly with their neck retracted, while cranes, ibises and spoonbills fly with them extended.

Many heron species have faced persecution during the 19th and early 20th centuries due to hunting for their plumes, which were used for hat decorations. They’re present on all continents except Antarctica and inhabit a wide variety of habitats, feeding on the margins of water bodies such as lakes, rivers, and the sea.

Herons are medium to large-sized birds that have long necks and legs. To identify individual heron species, look for key features such as size, foot and bill colour, plumage colouration and distribution. However, many species can have different colour morphs and some features of breeding individuals can also change colour. Using equipment such as a scope or a pair of binoculars, as well as a guide covering all colour morphs, can be helpful.

Grey Heron (Ardea cinerea)

Distribution: Widespread
Wingspan: 155–195cm
Bird of Conservation Concern 4 (BoCC4) status: Green
What to look for: This is a tall bird, with grey and black wings, a yellow bill and long, pale legs. They’re a grey-backed species, with a long, white or pale grey long neck and a white head with black eyestripes that extend to long crest feathers.  They have dappled black and white plumage on the front of their neck. Grey herons can usually be seen standing very still, either stretched out tall or with their neck retracted, at the edges of water bodies.

Grey heron by Tim Spouge via Flickr
Little Egret (Egretta garzetta)

Distribution: Common in the south and east coasts of England and Wales, with their range increasing northwards.
Wingspan:
 88–106cm
BoCC4 status:
Green
What to look for:
The little egret is a white bird with long crest feathers at the back of their head during the breeding season. They have a black bill and legs, and one of their most defining features is their bright yellow feet. Apart from the feet, they are similar to the great white egret but little egrets are more common and smaller, about half the size of the grey heron. They also have featherless ‘lores’, the region between the eye and the bill, which can be pale yellow or greenish. This helps to distinguish them from the much rarer migrant, the snowy egret (Egretta thula), which have bright yellow lores that meet across the top of their beak. Snowy egrets also have yellow along the backs of their legs.

Little Egret by ianpreston via Flickr
Great White Egret (Ardea alba)

Distribution: Widespread, most common in south-east England and East Anglia.
Wingspan: 131–170cm
BoCC4 status: Not assessed
What to look for: This is a tall bird of similar size to the grey heron, with an all-white plumage. Because of this colouration, they can be confused with the little egret but this species is much larger and lacks the bright yellow feet. They also have a yellow bill, but this becomes mostly black during the breeding season. They have long black legs with paler upperparts that can turn red in breeding birds.

Great Egret by ksblack99 via Flickr
Eurasian Bittern (Botaurus stellaris)

Distribution: Restricted to mainly Norfolk, Suffolk and Lancashire
Wingspan: 100–130cm
BoCC4 status: Amber
What to look for: This bird has a buff-brown coloured plumage with dark bars and streaks. The crown of their head is black, with a buff line above their eye and a dark brown moustache stripe that extends onto the neck. Their bill is yellow and brown, and their legs and feet are a pale green. The males are significantly larger than the females and tend to have more markings, although there is a large variation between individuals.

Eurasian bittern by Michele Lamberti via Flickr
Little Bittern (Ixobrychus minutus)

Distribution: Regular visitors but only two confirmed successful breeding records in Somerset and Yorkshire.
Wingspan: 52–58cm
BoCC4 status: Not assessed
What to look for: The little bittern has a black-green crown, back and tail, with a pale buff underside and wing patches. The sides of their neck are grey and yellow, and they have pale green legs and lores. Their throat is striated with darker brown and paler cream plumage. Their bill can vary from yellow to yellow-green with a brown upper edge.

Little bittern by Mick Sway via Flickr
Cattle Egret (Bubulcus ibis)

Distribution: Becoming more numerous in southern Britain and Ireland.
Wingspan: 88–96cm
BoCC4 status: Not assessed
What to look for: The cattle egret is a white bird that, in the breeding season, has yellowish-buff plumes on its cheeks, throat, back, breast and crown. They have a yellow bill and pale legs, both of which can turn red during the breeding season. Some individuals have also been recorded with grey, melanistic plumages. As their name suggests, they’re often seen with grazing livestock, as they consume ticks and flies from cattle.

Cattle Egret by Bird Team via Flickr
Great Blue Heron (Ardea herodias)

Distribution: Very rare, confirmed sightings in the Isles of Scilly.
Wingspan: 167–201cm
BoCC4 status: Not assessed
What to look for: This species is quite similar to the grey heron, although they can be distinguished by the great blue heron’s long, shaggy chest feathers, browner colouration and slightly larger size. There are thought to be two or three forms of this species, although there is a debate as to whether the white coloured population represents a white morph, a subspecies or a separate species. The white morph has a white plumage, orange bill and orange legs. The dark morph is grey with red-brown upper legs and red-brown plumage along the leading edge of their wings, seen best in flight. They have a reddish-grey neck with a pale head and dark crown. They also have a dull grey bill and legs, which both become orange during the start of the breeding season. The third is Würdemann’s heron, an intermediate morph, thought to be the result of a pairing of white and dark morphs. They are paler than the dark morph, with a white crown and crest feathers, but still maintaining the darker patternation on the wings.
Did you know? There are five accepted subspecies of great blue heron: A. h. herodias, A. h. fanini, A. h. wardi, A h. cognata and A. h. Occidentalis (known as the ‘great white heron’), which can all be distinguished by traits such as wing and bill size, overall size and plumage shade.

Great Blue Heron Morphs by Andy Morffew via Flickr
Purple Heron (Ardea purpurea)

Distribution: Rare migrant, with around 20 recorded sightings per year across the UK.
Wingspan: 120–152cm
BoCC4 status: Not assessed
What to look for: This species has a dark grey back, wings and tail. They have a reddish neck with buff-coloured patches and dark longitudinal stripes from their head down to their chest. Their bill is long, with a darker top section. The purple heron also has a black crown that extends in a stipe down the back of their neck and their legs are orange with black stripes. The covert feathers on the bend and underside of their wings are purple, and they also have long, pale feathers hanging down either side of their chest.

Purple heron by Damiano Pappadà via Flickr
Suggested reading and equipment:

Europe’s Birds: An Identification Guide

£19.99


Collins Bird Guide: The Most Complete Guide to the Birds of Britain and Europe

£13.99 £19.99


Guide to Winter Coastal Birds

£3.75


Hawke Optics Frontier HD X: 8 x 42

£299.00

See our full range of binoculars


All prices correct at the time of this article’s publication.