21st March marks the 12th annual International Day of Forests. On this day, the UN encourages countries around the world to celebrate and raise awareness of the importance of forests, through events, activities and campaigns large and small.
The theme of this year’s International Day of Forests is ‘Forests and Health‘. This topic aims to bring attention to the myriad of ways in which forests are linked with human health – through provision of foods and medicines, by improving our physical and mental health, and by helping to keep global warming in check.
Key messages of International Day of Forests 2023
Forests are a vital source of food and nutrition Nearly one billion people globally depend on harvesting wild food such as herbs, fruits, nuts, meat and insects for nutritious diets. In some remote tropical areas, the consumption of wild meat is estimated to cover between 60 – 80 percent of daily protein needs.
Forests are natural pharmacies
Around 50 000 plant species – many of which grow in forests – have medicinal value. Local communities use forest-derived medicines for a wide array of ailments and many common pharmaceutical medicines are derived from forest plants, including cancer-treating drugs from the Madagascar periwinkle and malaria medication quinine from cinchona trees.
Healthy forests protect us from diseases
Forests have traditionally served as a natural barrier to disease transmission between animals and humans, but as deforestation continues, the risk of diseases spilling over from animals to people is rising. More than 30 percent of new diseases reported since 1960 are attributed to land-use change, including deforestation.
Forests boost our mental and physical health
Spending time in forests increases positive emotions and decreases stress, blood pressure, depression, fatigue, anxiety and tension. Trees in cities also absorb pollutant gases from traffic and industry and filter fine particulates such as dust, dirt and smoke, which help shield urban populations from respiratory diseases.
Forests play a central role in combating the biggest health threat facing humanity: climate change
Healthy forests help keep global warming in check: forests contain 662 billion tonnes of carbon, which is more than half the global carbon stock in soils and vegetation. Forests and trees also help buffer exposure to heat and extreme weather events caused by climate change, which pose a major global health challenge. For example, trees properly placed around buildings cool the air and can cut air conditioning needs by up to 30 percent, also saving energy.
Forests are under threat and need our help
Ten million hectares – roughly the equivalent of 14 million football pitches – of forest were lost per year to deforestation between 2015 and 2020. Forest insects damage around 35 million hectares of forest annually. Fire affected approximately 98 million hectares of forest globally in 2015. Through forest-friendly policies and increased investment in forests and trees we can protect our planet and our health.
How to get involved
• Organise or join an existing event to celebrate and promote the role of forests in maintaining human health. Great ideas include forest walks, tree planting gatherings, forest-related art exhibitions and public talks or debates.
• Let the UN know about what you’ve been up to by emailing IDF@fao.org. If you send them your photos, they can also add them to this year’s gallery.
• Download the logo, banner or poster and share these to help get the word out about the 2023 International Day of Forests.
• Share your experiences on social media using the hashtag #IntlForestDay
Associated UN publications
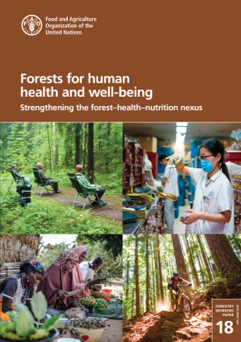
Forests for human health and well-being: Strengthening the forest-health-nutrition nexus
This publication examines the many linkages of forests and human health and offers recommendations for creating an enabling environment in which people can benefit from them. Designed for practitioners and policy-makers in a range of fields.
Further reading on forests
Finding the Mother Tree: Uncovering the Wisdom and Intelligence of the Forest
No one has done more to transform our understanding of trees than the world-renowned scientist Suzanne Simard. Now she shares the secrets of a lifetime spent uncovering startling truths about trees: their cooperation, healing capacity, memory, wisdom and sentience.
The World Atlas of Trees and Forests
The earth’s forests are havens of nature supporting a diversity of life. Shaped by climate and geography, these vast and dynamic wooded spaces offer unique ecosystems that shelter interdependent webs of organisms. This book offers a beautiful introduction to what forests are.

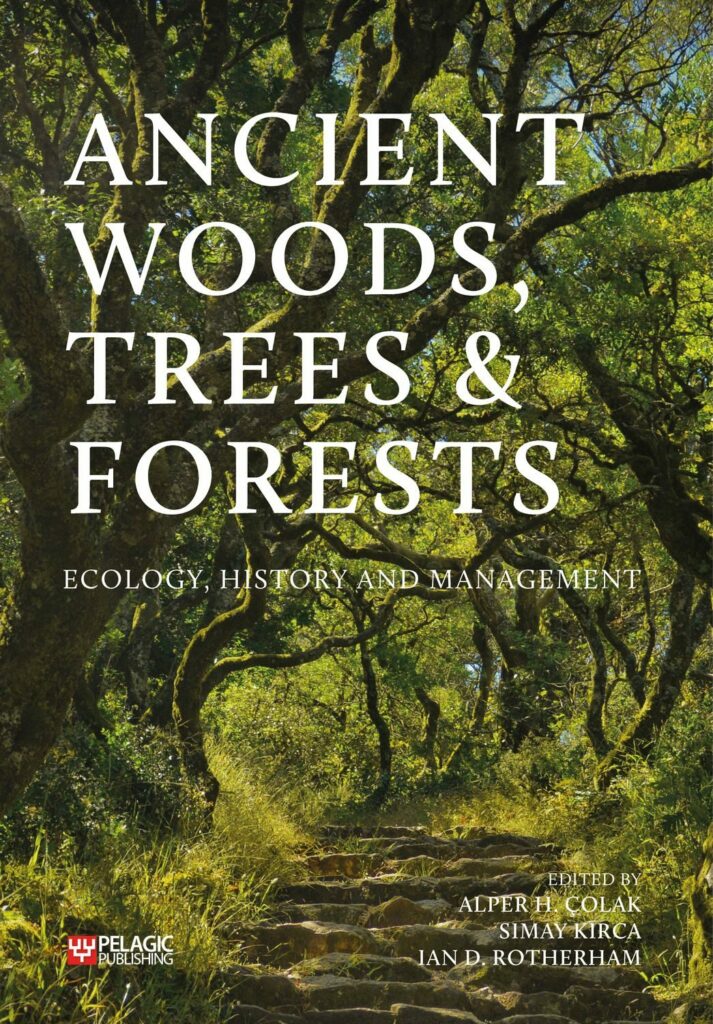
Ancient Woods, Trees & Forests: Ecology, History and Management
From ancient times until today, trees and woods have inspired artists, writers and scientists. This inspiring book helps us to understand the web of connections relating to ancient trees and woodlands, and to offer techniques to ensure effective conservation and sustainability of this precious resource.
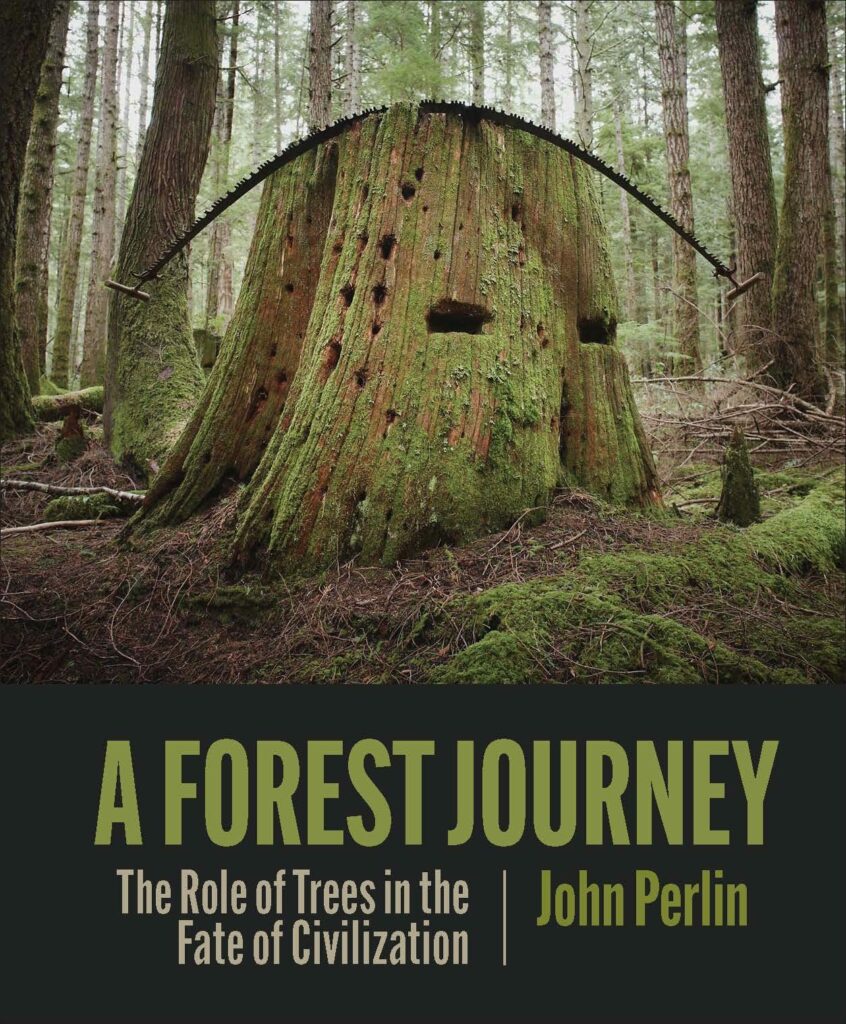
A Forest Journey: The Role of Trees in the Fate of Civilization
Now in its third edition, this classic book provides comprehensive coverage of the major role forests have played in human life – told with grace, fluency, imagination, and humour. It has been named one of Harvard’s “One Hundred Great Books”.
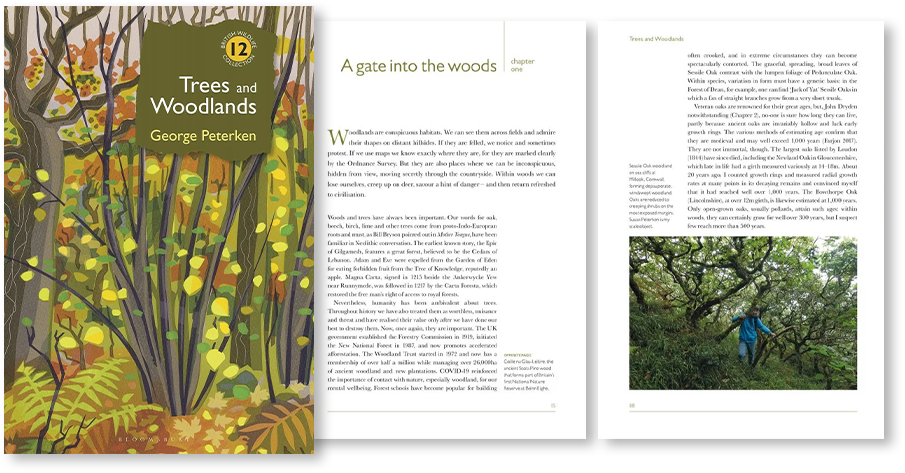
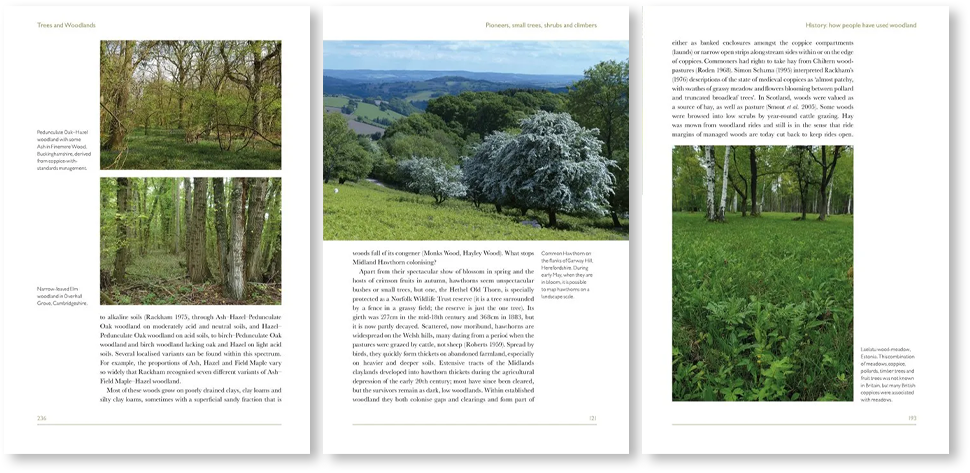
Written by one of the UK’s most highly regarded forest ecologists, Trees and Woodlands weaves together personal stories and scientific research in a thorough exploration of our woodlands, their ecology and how we as humans have interacted with them over the course of history. The 12th installment in the popular British Wildlife Collection, Trees and Woodlands will appeal to anyone who is fascinated by the stories told by our native woodlands and who is invested in their future.
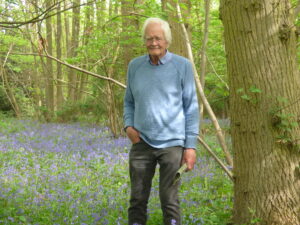
George Peterken worked with the Nature Conservancy to start the ancient woodland inventory and later worked as nature conservation adviser at the Forestry Commission. His research interests, which have centred on nature conservation, natural woodland and long-term and large-scale aspects of woodland ecology, benefited from a Bullard Fellowship at Harvard University. He is the author of a large number of books on both woodlands and meadows and was awarded an OBE for services to forestry in 1994.
In this Q&A we chatted with George about the book, about his life and career as a woodland ecologist and about his hopes for the future of woodlands in the UK.
Firstly, can you tell us a bit about yourself? How did you get into working with and researching woodlands?
All my childhood holidays were visits to my Mother’s family on the edge of the New Forest and the woods at Ruislip and the Chilterns were my targets as a teenage cyclist, but woods became fully imprinted with 6th form natural history camps at Beaulieu Road in the New Forest, led by my charismatic teacher, Barry Goater. I gained an entry to woodlands research when Palmer Newbould at University College, London, accepted me as a PhD student to study New Forest woodlands on a Nature Conservancy grant. Then I had the luck to be offered my ideal job as a woodland ecologist at the Nature Conservancy’s Monks Wood Experimental Station. This was a madly exciting and committed place to work where, as you will see from the book’s dedication, we thrived on the freedom we were allowed. Thereafter it was necessary to ride out the constant reorganisations thrust upon us by our paymasters, the Government.
Trees & Woodlands is a wonderfully wide-ranging book. I particularly enjoyed the frequent stories and anecdotes from your own life and career, as well as the well-researched snippets of history, culture and language. Does the human-landscape interaction interest you?
Certainly. Its much more entertaining to explain what I find in a wood in terms of human actions and unforeseen consequences than in terms of soils, climate or some other natural factor. It was Colin Tubbs who taught me this when I was a research student and he was the Nature Conservancy’s warden-naturalist for the New Forest. We would notice some feature of the vegetation distribution or woodland structure and find, more often than not, that we could understand it best as, say, an abandoned extension of agriculture or an unexpected consequence of an Act of Parliament regarding deer. Then at Monks Wood, I found that Max Hooper and John Sheail in particular were just as keen as myself to study ecology in a county record office as we were in the fields and woods. Then, of course, we all came across Oliver Rackham who had seized on the same links between history and habitats. He more than anyone has demonstrated that it’s the human element that generates most interest in the natural world. This interest also had direct benefits for my main work in woodland nature conservation: it was much easier to negotiate management that benefited nature with a woodland owner who had a keen interest in the history of his/her wood.
Your book in large part looks at the interaction between humans and woodlands over the course of history, both ancient and recent, and you state that we would have to go a long way back in time to find a woodland which was not modified by the presence of man. Where in the UK would you say is closest to a ‘natural’ or ‘unmodified’ woodland, ie one that has been affected the least by humans?
This is the subject of one of the chapters. Spending my career working with semi-natural woodlands, I spent a lot of time wondering what natural woodland looked like, then, as you can read in my contribution to Arboreal (Little Toller, 2016), came to the conclusion that natural woodland takes many different forms, but that no woodland existing since the last Ice Age could be entirely unaffected by people. We can witness approximations by allowing an ancient, semi-natural woodland to grow without direct management intervention – which is what we have studied at Lady Park Wood – or by ‘shutting the field gate’ and watching what happens as shrubs and trees invade. Whether the results look like pre-Neolithic woodland, which harboured large herbivores, is a subject that has animated woodland ecologists in recent years: some would say that the New Forest is natural in that sense, even though it has been used and managed for centuries. ‘Natural woodland’ to the general public means ‘woodland of native trees not obviously managed’ and I think ecologists should get close to that.
Extreme weather events such as storms and flooding are likely to occur at an increased frequency due to the effects of climate change. Coupled with the anthropogenic impacts of deforestation, land use change and overgrazing, this might seem to paint a dim picture for the woodlands of the future. Moving forwards, what do you think are going to be the main challenges in the UK when it comes to preserving and improving our native woodlands?
The immediate threats come from novel diseases and pests, uncontrolled deer populations and our limited ability to sustain low intensity management, which leads to neglected woods becoming less stable and losing some elements of their biodiversity. Pervasive eutrophication via rain seems to reinforce the biodiversity losses from unmanaged woods.
Deforestation is not really a problem here; storms would have less impact if woods were managed and thus stand ages were younger; trees and woods are part of the solution to flooding; and the main immediate danger from climate change may be a form of self-fulfilling prophesy when, say, beech stands are felled and replaced by introduced species that we think will better withstand future climates. Ancient woods seem reasonably well protected by public opinion, the Woodland Trust and official organisations, but we could easily drop our guard if we again believe – as we did around 1970 – that all these new woodlands will form an adequate replacement.
In terms of woodland management and the policies which govern this, what changes would you like to see in the UK over the coming years?
I’m now way out of the loop of forestry politics, but I can answer in more general terms. Throughout my career foresters have been itching to bring the now neglected former coppices back into management. Most of these are ancient woods and therefore important for nature conservation, so I took the view through the 1970s that they should be left alone, or coppiced, since their likely fate under forest management would have been planted conifers. But from 1982, when what became the Broadleaves Policy was under discussion, I advocated management based on site-native tree species, and I have not changed since. We must find or generate markets for native tree timber and wood, like Coed Cymru did and does, that would benefit wildlife and give more people a stake in the future of ancient woodlands. I like the idea of more community involvement, but in practice this usually comes down to one or two individuals. I am all in favour of leaving a representative selection of woods to grow naturally – limited intervention, or none – partly because they will act as a constant reminder of the benefits of management.
Since you began working in and researching woodlands, have there been any major technological advances that have had a signification impact on the type and quality of research that you do?
Linking my name with technological advances will elicit hollow laughter in some quarters. For years, my fieldwork has involved pencil, paper, girthing tape and metal plot markers. I have tried GPS to mark plots, but in the woods I’ve studied the errors are too large to find small plots. I do use a spreadsheet to analyse the records, though. My research started when statistical analyses were undertaken long-hand on an electric machine that whirred and juddered for ever while it did long divisions, so the arrival of computers, the internet and digital cameras is obviously the key technical advance. This has enabled astonishingly intricate analyses of huge volumes of fieldwork data, but it has also led to papers in, say, the Journal of Ecology becoming unreadable. The need now is to present and explain research results and their implications to as wide an audience as one can summon in a form that can be appreciated by a general readership. Technical advances are important and often amazing, though nothing like as important as developing the skills to write clear, accurate, non-technical, substantial and readable text. I like to think that British Wildlife magazine and the derivative Collection of books have shown the way.
Finally, what’s next for you? Do you have plans for further books?
I’m reaching the age when plans are futile, but I still like to have an on-going project. On books, I am helping Stefan Buczacki write about Churchyard Natural History. One of the most rewarding of recent projects was my collaboration with a group of professional artists, The Arborealists, in Lady Park Wood (Art meets Ecology, Sansom, 2020) and we have plans for a sequel in Staverton Park, a Suffolk wood-pasture I knew well in the late 1960s. For several years I gave up woodlands and took a close interest in meadows, which led to an earlier book in the British Wildlife Collection and gave me an enthusiasm for wood-meadows, so I’m doing what I can from a distance to help the Woodmeadow Trust.
Trees and Woodlands by George Peterken was published in February 2023. It is published by Bloomsbury Publishing and available from nhbs.com.
Lichens are composites of two or more different organisms, an alga or cyanobacteria living among the filaments of a fungus species. It is a symbiotic relationship where the fungal partner, also termed the mycobiont, makes up the body or ‘thallus’, and the algae or cyanobacteria is the photosynthetic partner, or photobiont, providing nourishment. There is debate as to whether this symbiotic relationship is mutualistic, where both parties benefit and neither is harmed through this interaction, or a type of controlled parasitism, where the mycobiont is ‘farming’ the photobiont for the sugars produced by photosynthesis.
There are over 1,800 species recorded in the UK, and 17,000 species worldwide. There are three main categories of lichen body types: crustose, fruticose and foliose. Crustose lichen are species that form thin, crust-like coverings that are tightly bound to the surface they’re on. Fruticose lichen form coral-like bushy or shrubby structures with a holdfast, a root-like structure that anchors it to trees, rocks or other surfaces. Foliose lichen are species that have a flattened, leaf-like thallus with an upper and lower cortex, the surface layer or ‘skin’ of the lichen, and attach to surfaces by hyphae with root-like structures called rhizines. There are other growth forms, such as leprose (a powder-like or granular appearance), squamulose (scaly), filamentose (stringy) and byssoid (wispy). These can also be divided into numerous subtypes.
Lichens are an important food source for many species, such as deer and goats, and are used as building material for birds nests. They occur from sea level to high elevations, tolerating many different environmental conditions. They grow on a wide variety of surfaces, from tree bark, leaves, mosses, rocks, gravestones, roofs, soil, bones and rubber. The general guidance for identifying lichens is to look at growth form, colour, habitat and substrate type and distribution. You should also look for the presence or absence of certain structures such as rhizines, soredia (scale-like reproductive structures), isidia (column-like outgrowths of the thallus) and apothecia (a cup-shaped structure containing asci, spore-bearing cells). A hand lens and a guide that covers other lichen species will be useful for identifying these.
Spot tests can be performed, which involve placing a drop of a chemical, such as potassium hydroxide or sodium hypochlorite, on different parts of the lichen. Any colour change, or lack thereof, can be used for identification when following dichotomous keys for lichen species. Care should be taken when using chemicals, however, particularly in the natural environment, due to the damage they can cause.
Some species are harder to identify in the field and require microscopic examination or further chemical testing. Additionally, there may be variations in appearance due to weather conditions or the condition of the lichen. Its colour can change when the lichen is wet or in poor condition, for example, or the growth form can appear different if the lichen has begun to disintegrate.
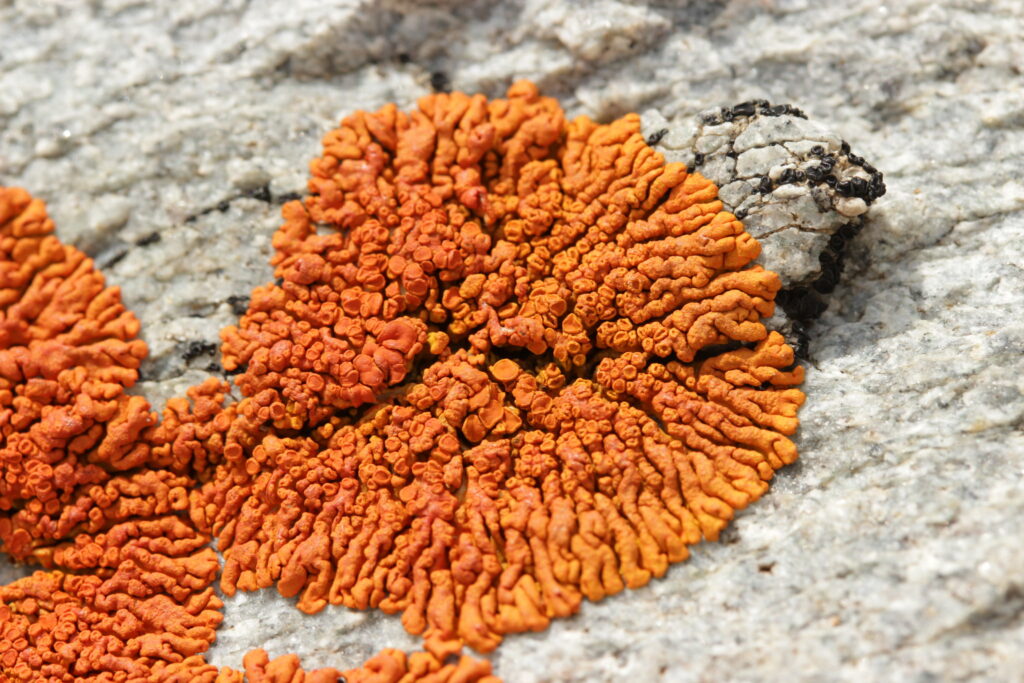
Elegant Sunburst Lichen (Xanthoria elegans)
Distribution: Widespread, but most frequently found in upland areas. Growth type: Foliose What to look for: This is a small lichen, typically no more than 5cm wide with lobes that are less than 2mm broad and closely pressed against a surface. Their upper surface is orange, with a white lower surface, a cortex (skin), and attached with short, sparse hapters (peg-like structures on the lower surface of lichen). Soredia and isidia are absent but apothecia structures are common.
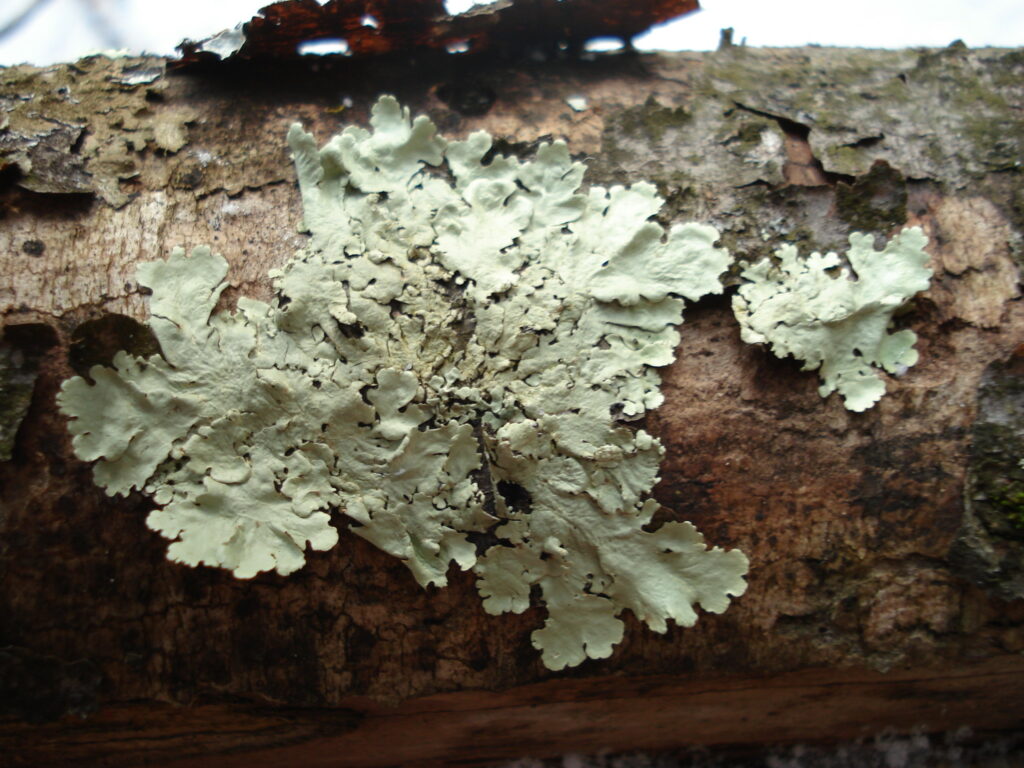
Common Greenshield Lichen (Flavoparmelia caperata)
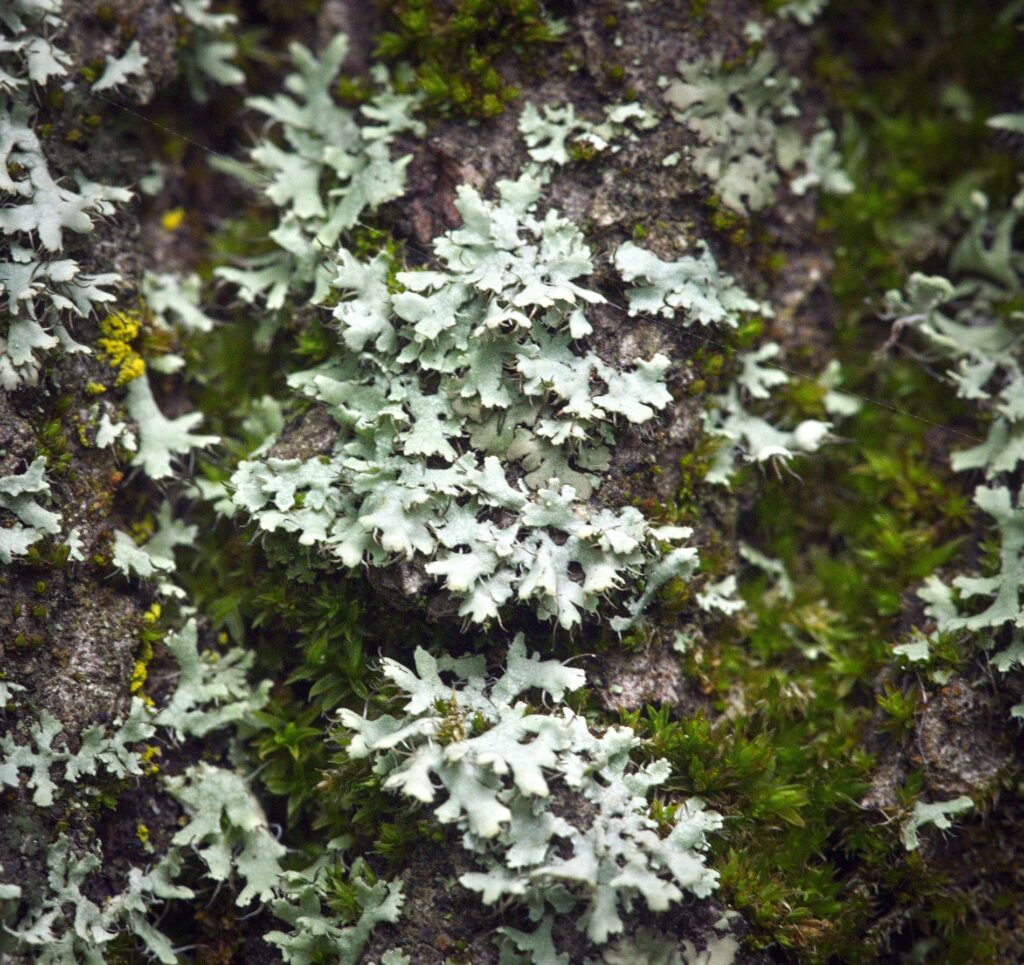
Distribution: Widespread, more common in the western and southern parts of England, scarce in northern and central Scotland. Growth type: Foliose What to look for: This is a pale grey species that turns yellowish-green when wet. The lower surface is black with a brown margin and black, unbranched rhizoids that attach it to the substrate. Its lobes are rounded, around 3–8mm wide, with patches of soredia. The lobes are often wrinkled in appearance, particularly in older specimens.
Hooded Rosette Lichen (Physcia adscendens)
Distribution: Widespread Growth type: Foliose What to look for: Hooded rosette lichen is a pale grey species, with lobes up to 2mm wide that are curled into a hood shape. They have cilia, thin projections from the margin of the lichen, which progress from pale to black at the ends. Soralia are usually abundant and disc-shaped apothecia can also be present. The lower surface is white to greyish. They are attached to surfaces by rhizines, which can be white to black.
Hoary Rosette Lichen (Physcia aipolia)
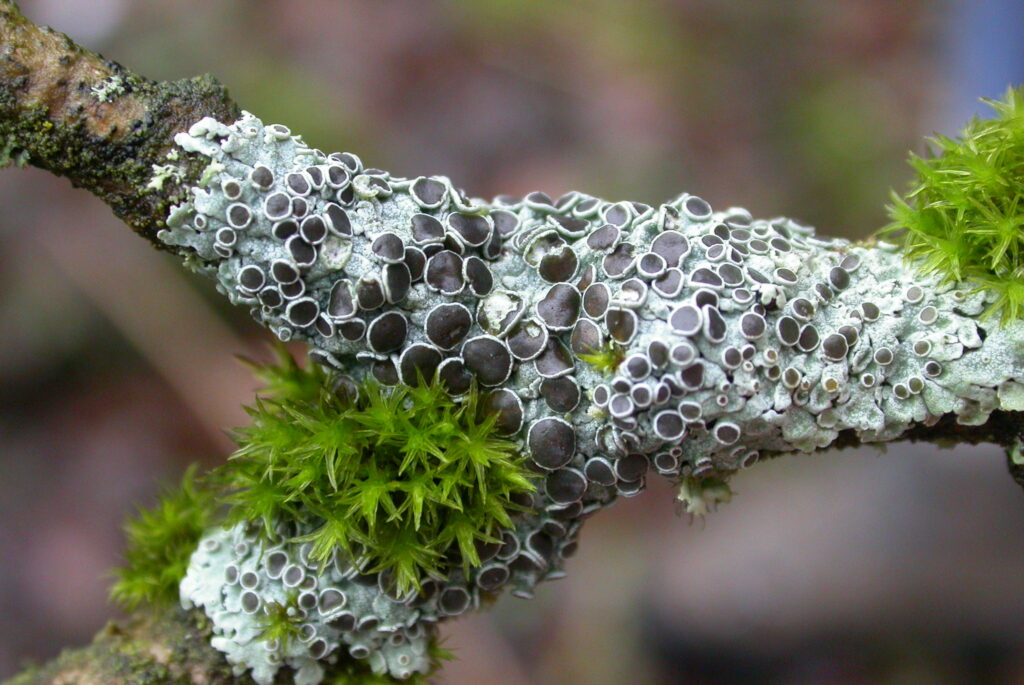
Distribution: Fairly widespread Growth type: Foliose What to look for: This species is pale, from white to bluish-grey. It has white-rimmed apothecia that have black centres. Soralia and marginal cilia are absent. The lobes also have distinct flecks of white called pseudocyphellae. It grows in well-lit habitats, usually on fences or trees, often in the nodes of branches.
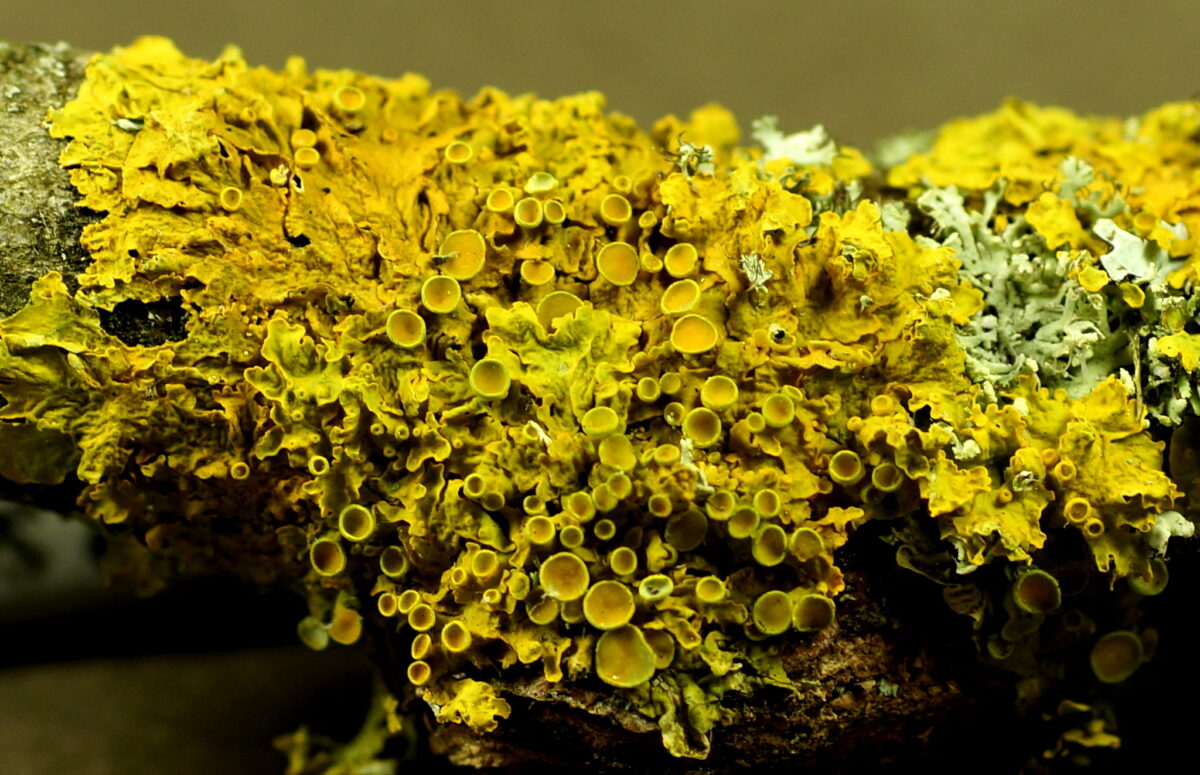
Common Orange Lichen / Yellow Scale (Xanthoria parietina)
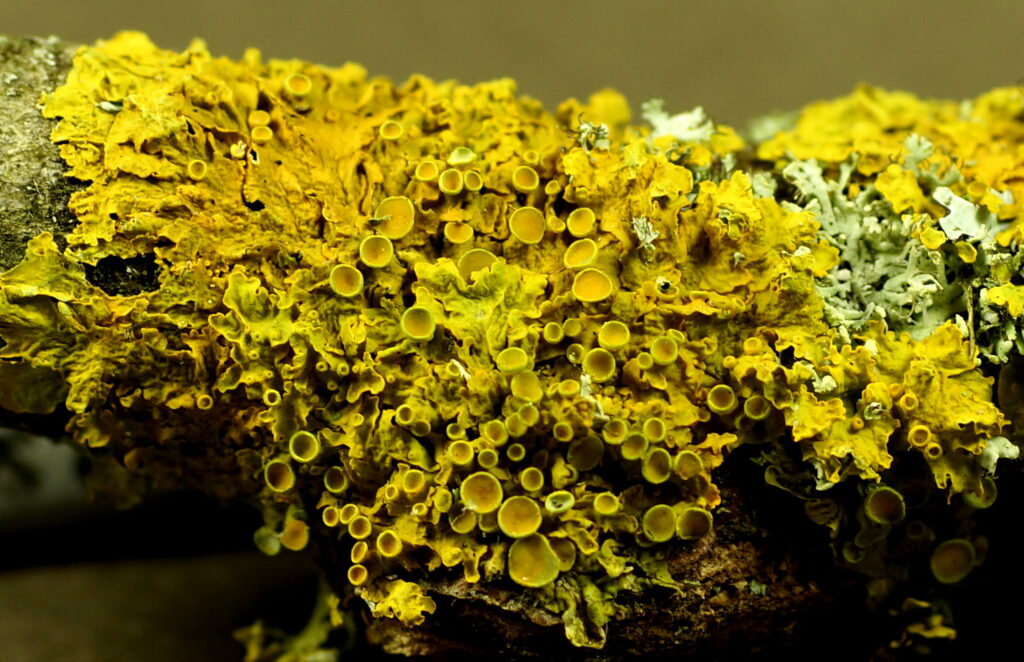
Distribution: Widespread Growth type: Foliose What to look for: This species is a yellow-orange coloured lichen that can appear greener when wet. It is a leafy lichen with flattened lobes that are between 1–4mm in diameter. Its lower surface is white and has pale rhizines or hapters. Similarly to X. elegans, soredia and isidia are absent but yellow or orange apothecia are usually present. There is a cortex that is made of tightly packed fungal hyphae, which can be thicker in more exposed locations and is thought to protect the lichen from evaporation and exposure.
Monk’s Hood Lichen (Hypogymnia physodes)
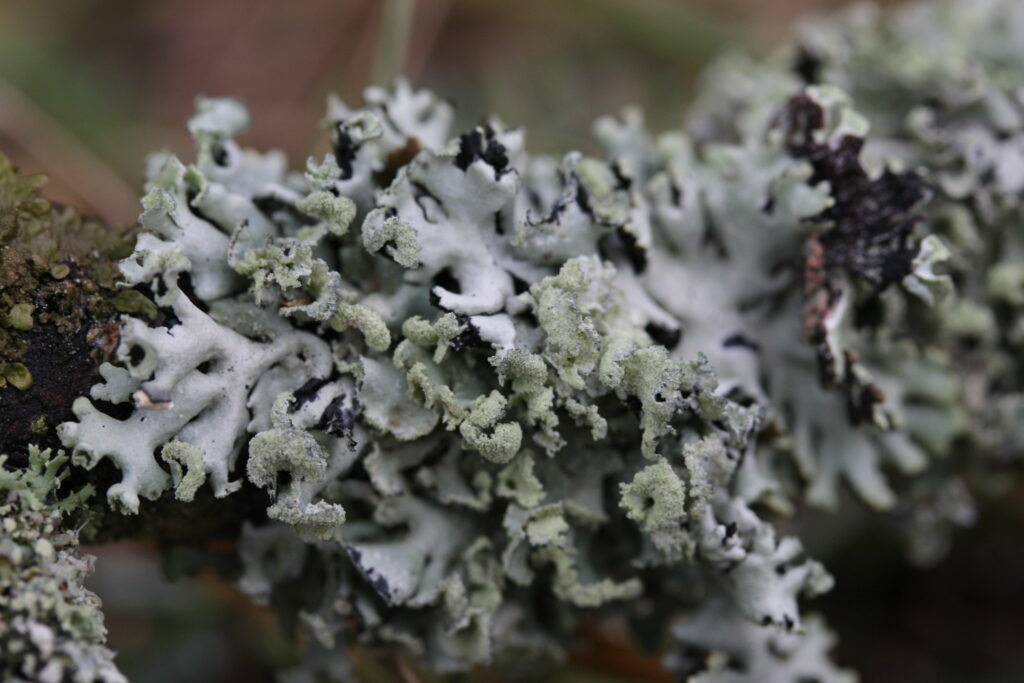
Distribution: Widespread Growth type: Foliose What to look for: The thallus is grey to greenish-grey, with inflated lobes that lift at the tips. These inflations can burst open, displaying the floury soredia inside. They may have black dots, called pycnidia, near the lobe tips. Rhizines are absent and the lower surface is wrinkled with a light brown margin, darkening towards a black centre. They may have apothecia, which occur on short stalks and have a red-brown disc.
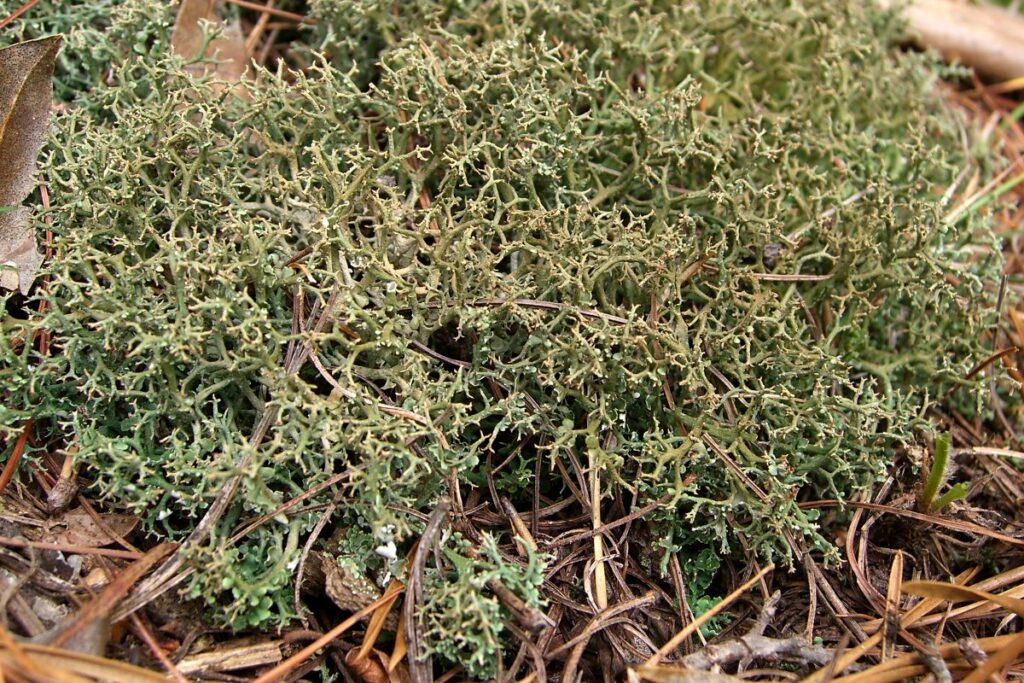
Many-forked Cladonia (Cladonia furcata)
Distribution: Widespread, particularly in heathland, healthy turf and on dunes. Growth type: Fruticose What to look for: This species has an upright secondary thallus, called the podetium, which can vary from grey-green to brown. This forms loose mats, and the finer branches are erect and sharply pointed. Soredia are absent, with few to no squamules (scales). They may have small, green areolar patches set into or raised on the cortex surface. The podetia become darker brown and glossy with age. Pycnidia, the asexual fruiting bodies, are small, brown and are found on the branch tips. This species has apothecia, which are brown and occur in extended clusters at the ends of podetia.
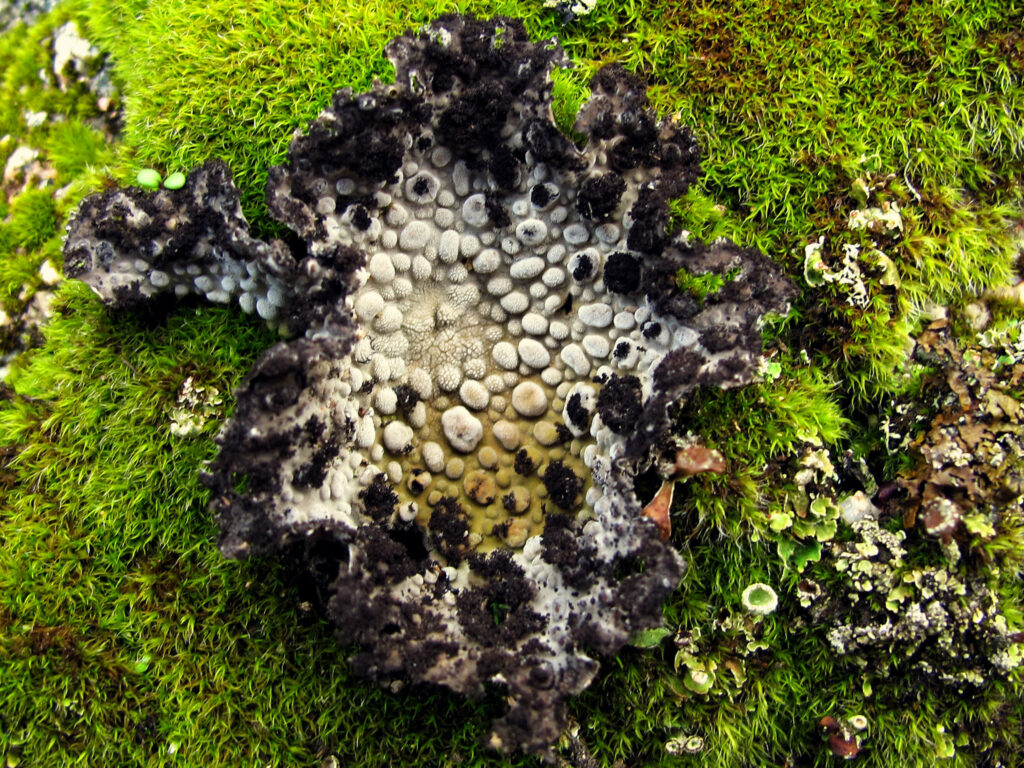
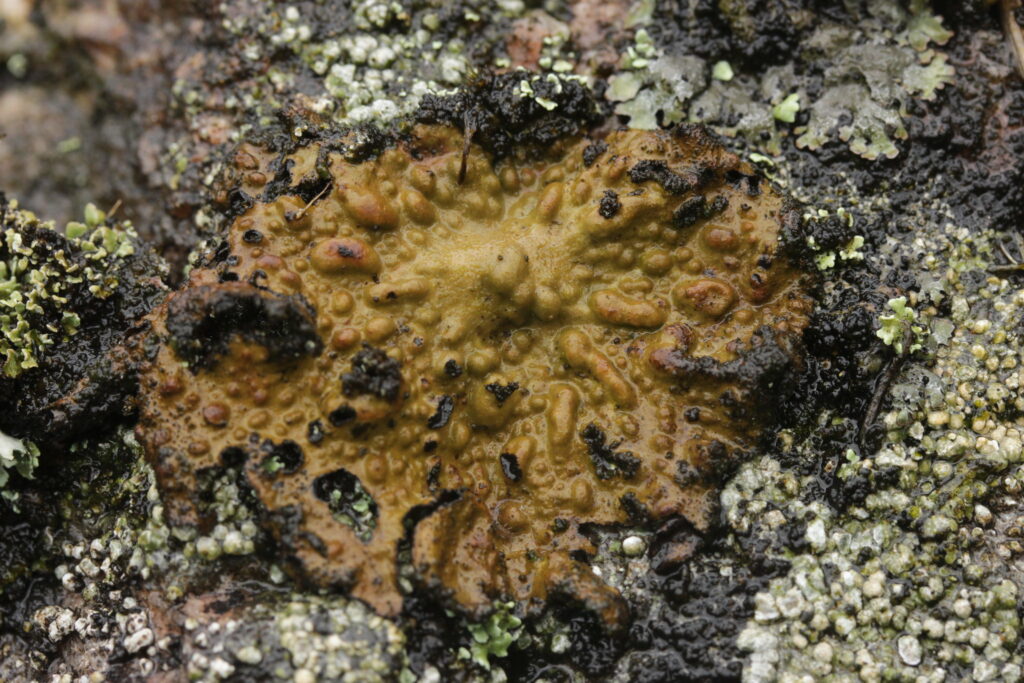
Lasallia pustulata
Distribution: Scattered distribution, mainly in parts of Wales, south- and north-west England and scattered areas of Scotland. Growth type: Foliose What to look for: The thallus of this species is a pale grey or brown when dry but becomes brownish or yellowish-green when wet. It has convex pustules across its upper surface which often appear darker in colour and are covered in a powder towards the centre. The margins of this species are often ragged and can be darkened by the presence of black isidia. The lower surface can be grey, brown or black, and have corresponding depressions to the pustules on the upper surface. Rhizines are absent and this species is attached to substrate by a stalk.
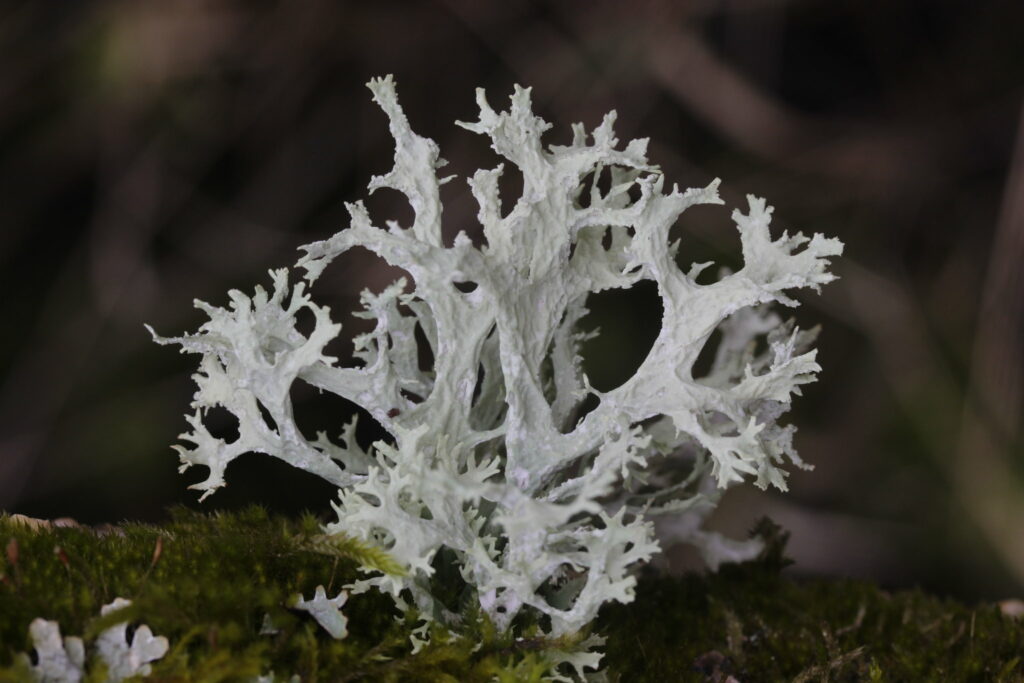
Oakmoss (Evernia prunastri)
Distribution: Widespread Growth type: Fruticose What to look for: They primarily grow on oak trees but can be found on the trunk and branches of other deciduous trees and conifers. This species is flat and strap-like, highly branched (forked) and bushy, forming large clumps when growing together. When dry the thallus is rough and the colour can vary from green to a pale greenish-white. When wet, they appear dark olive-green to yellow-green and are rubbery in texture.
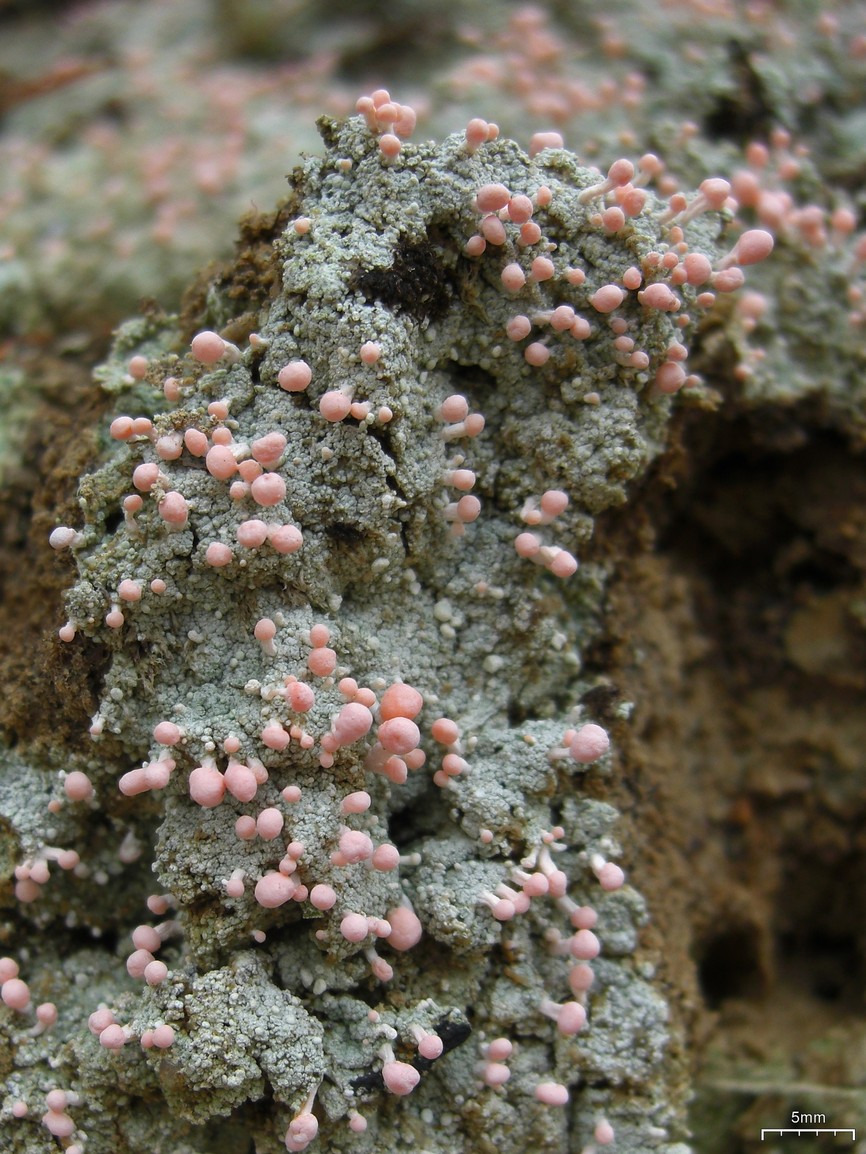
Pink Earth Lichen (Dibaeis baeomyces)
Distribution: Widespread in Scotland and Wales, scattered throughout England, more common in the north and west. Growth type: Fruticose What to look for: Pink earth lichen have bulbous pink apothecia that are around 1–4mm in diameter, set on stalks up to 6mm tall, although these are not always present. The thallus can vary in colour between grey or white, occasionally with a pink tinge, and can appear greenish-grey when wet. They are coarsely granular and are sometimes covered in small, white balls up to 1mm in width, with small powdery areas.
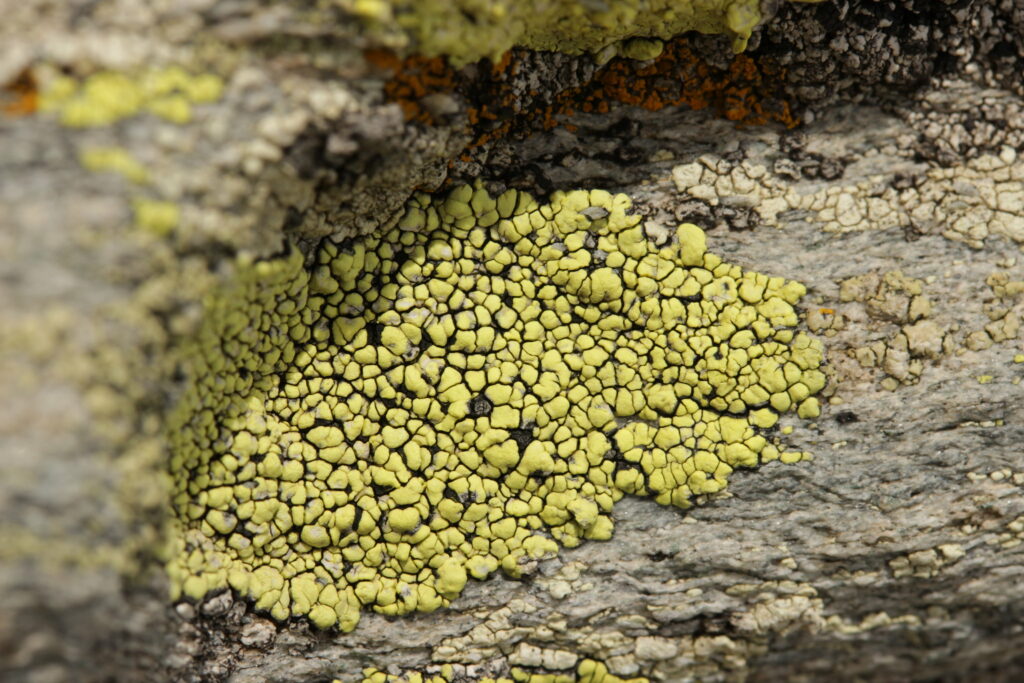
Yellow Map Lichen (Rhizocarpon geographicum)
Distribution: Widespread in Scotland and north-west England, and the upland areas of England, Wales and Ireland. Less common in the East Midlands, East of England and the South East. Growth type: Crustose What to look for: This is a bright yellow to yellow-green species, with a cracked thallus, flat, black apothecia and bordered by a black line of fungal hyphae. This lichen grows in patches adjacent to each other, giving the appearance of a map.
The result of several years of investigation carried out on several different continents, this remarkable book offers an original, radical and, like its subject matter, symbiotic reflection on this common but mostly invisible form of life, blending cultures and disciplines, drawing on biology, ecology, philosophy, literature, poetry, and even graphic art.
This book provides an invaluable guide to identifying the British and Irish species both for the amateur naturalist just starting to study lichens and the more advanced lichenologist. It offers the environmentalist and ecologist a concise work of reference, compact enough to be used in the field.
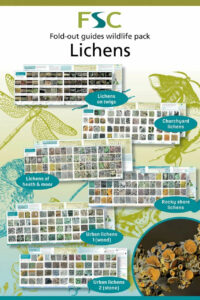
These colourful and widespread organisms can be seen all year round. Featuring six of the FSC’s popular fold-out charts: lichens on twigs, churchyard lichens, urban lichens 1 and 2, rocky shore lichens and lichens of heaths and moors
Each pack includes a card-sized magnifier, so you can get in even closer to the details.
Observe the finer details of your specimen with this high-quality 23mm doublet lens, the most commonly recommended magnifier for all types of fieldwork.
All prices are correct at the time of posting, but may change at any time. Please see nhbs.com for up to date pricing and availability.
Mosses belong to a group of plants called bryophytes. Comprising the mosses, liverworts and hornworts, there are over 1000 species of bryophyte in Britain and Ireland, which is around 58% of the species found in the whole of Europe.
Although often overlooked, mosses are fascinating to study and are structurally both complex and elegant. When seen through a hand lens or microscope they have details that easily compare in beauty with those of their larger plant cousins.
In this article we’ll introduce you to a handful of some of the commonest and easiest to identify mosses that you will find in the UK. If you’re interested in learning more, we’ve also provided a list of excellent field guides and books at the bottom of the guide, along with some helpful links to other online resources.
Why are mosses important?
Mosses are one of the first plants to colonise bare ground. They provide important habitat for invertebrates, particularly those fond of a damp environment such as slugs and woodlice. A healthy mossy environment will also be attractive to larger animals who feed on these invertebrates, such as frogs and toads, and will provide shelter to a diverse range of microscopic organisms, including nemotodes, rotifers and tardigrades.
Mosses can hold a huge amount of water and so play a crucial role in mitigating flooding during periods of intense rainfall. Sphagnum moss in particular can absorb up to 20 times its weight in water, and is instrumental in slowing the flow of rainwater from the hills and moors and reducing the risk of flooding in downstream towns and cities.
Did you know?
Mosses have stems and leaves but no true roots or advanced vascular systems. This is why we only have small mosses and not ones that are the size of trees!
There are around 20,000 species of moss worldwide and they are found everywhere except for in the sea – even in Antarctica!
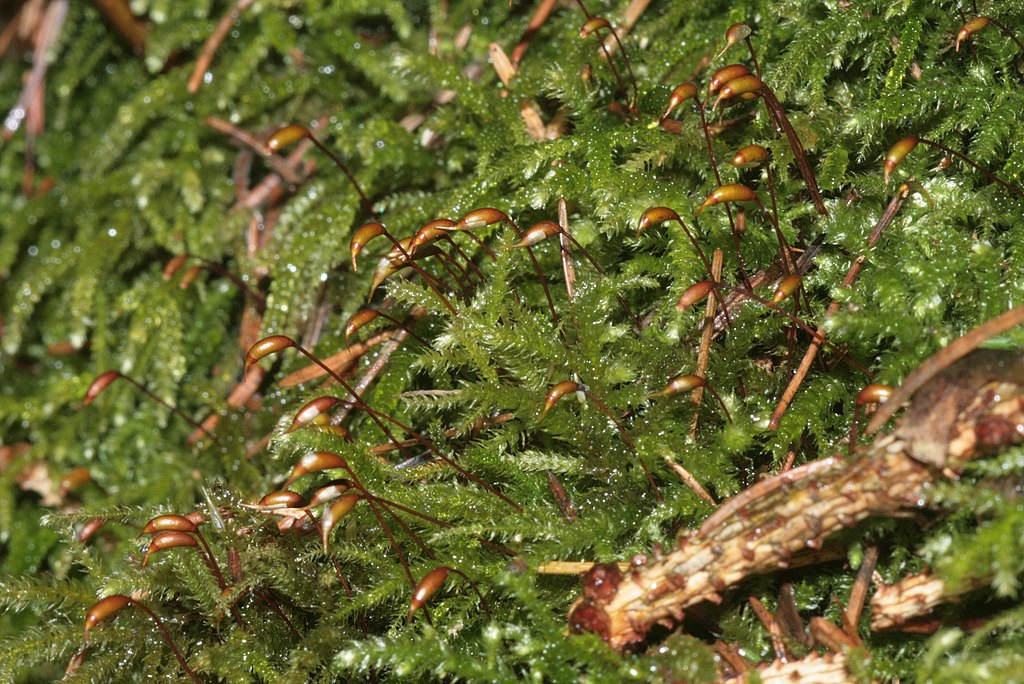
Unlike flowering plants, mosses produce spores rather than seeds and flowers. Spores are produced in a small capsule which grows on a long stem called a seta.
Mosses require damp conditions for reproduction – this is because the male cells require a film of water in order to reach the female cells and fertilise them.
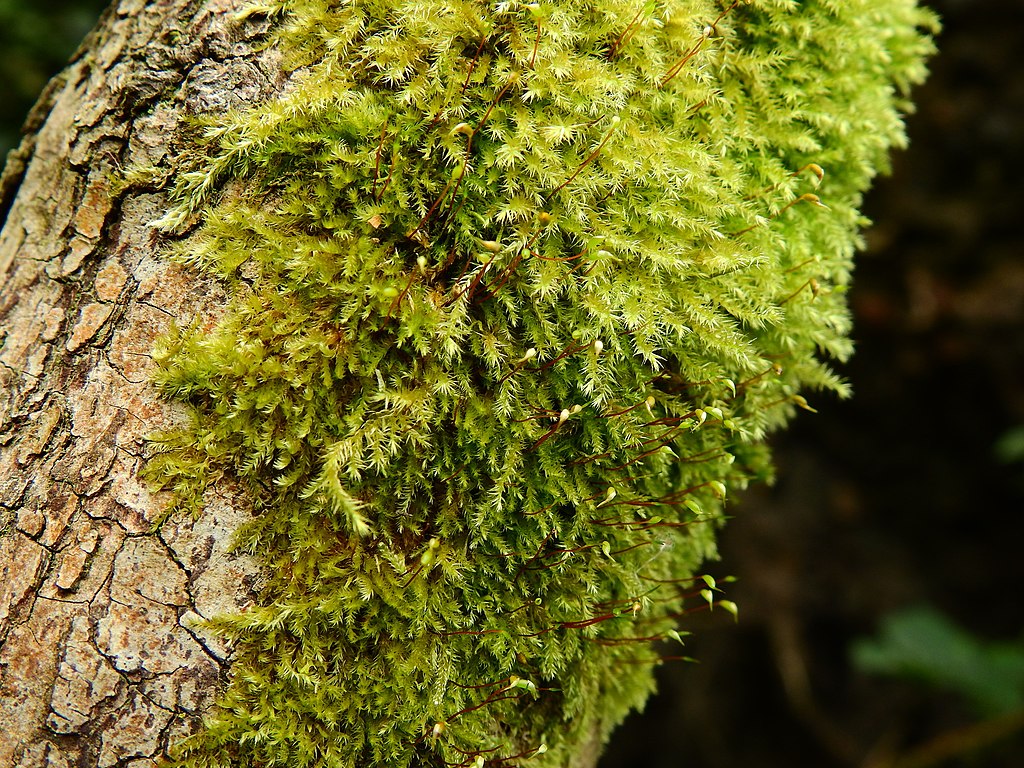
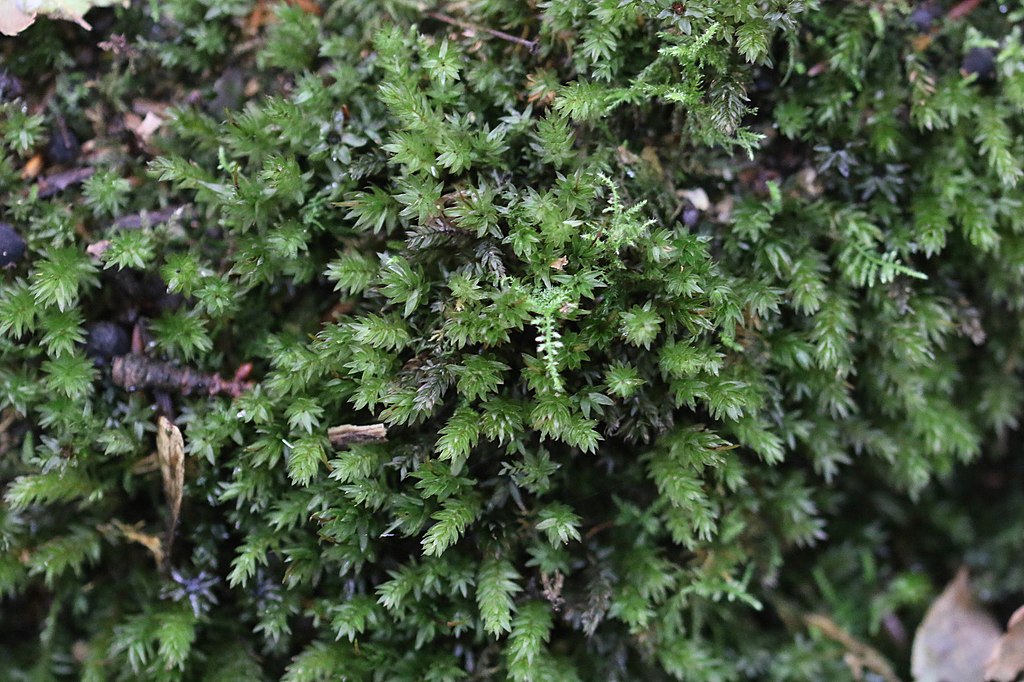
Also known as ‘ordinary moss’, rough-stalked feather moss is one of our most common moss species, and can be found growing widely in woodlands, lawns and at the base of hedges. It is yellow-green in colour and has branching stems with pointed oval leaves. Shoot tips are generally pale and glossy. Curved, egg-shaped capsules are frequently produced.
Common haircap (Polytrichum commune)
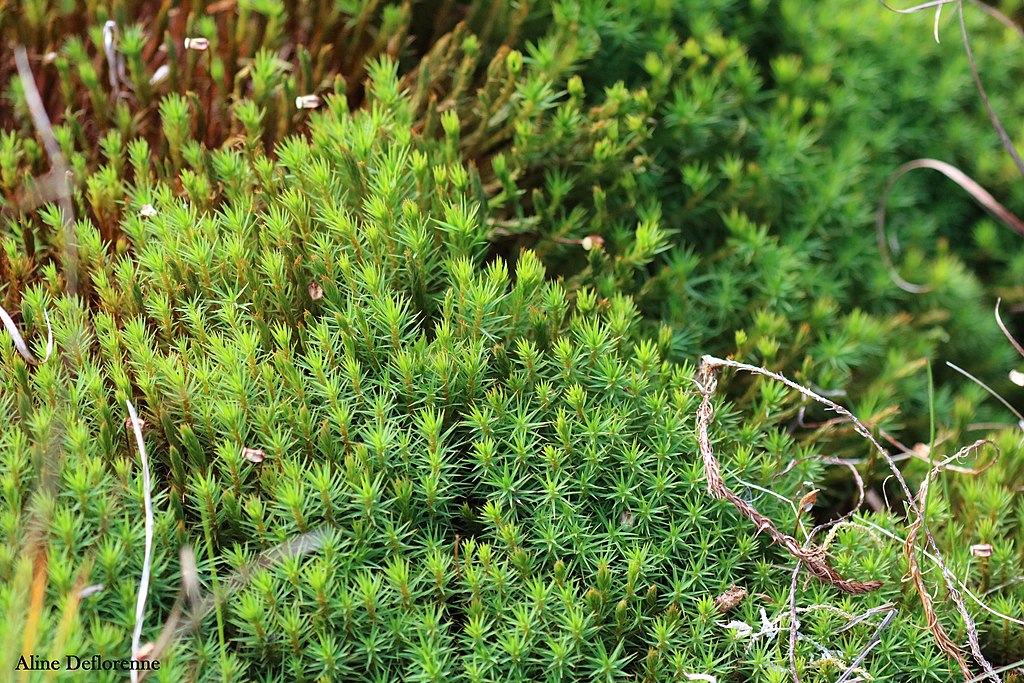
Also known as marsh hair moss, common haircap is one of our tallest species of moss and can form clumps up to 40cm in height. Found in damp, acidic areas such as heaths, bogs and moorland, it can also be found near to streams and rivers within woodland. Plants are bright green, fading to brown with age, and often grow in compact clumps. The stems are tough and wiry, and its leaves are narrow and spear-shaped. When viewed from above, each individual stem looks star-like. In the summer it produces brown, box-shaped capsules.
Swan’s-neck thyme-moss (Mnium hornum)
Swan’s-neck thyme-moss is abundant in acidic woodland on logs, rocks and soil. It has upright stems which are 2–4cm tall, and leaves which are approximately 4mm in length with a toothed border. Frequently produces capsules on the end of 2.5–5cm long stalks. Capsules have a pointed tip.
Common tamarisk moss (Thuidium tamariscinum)
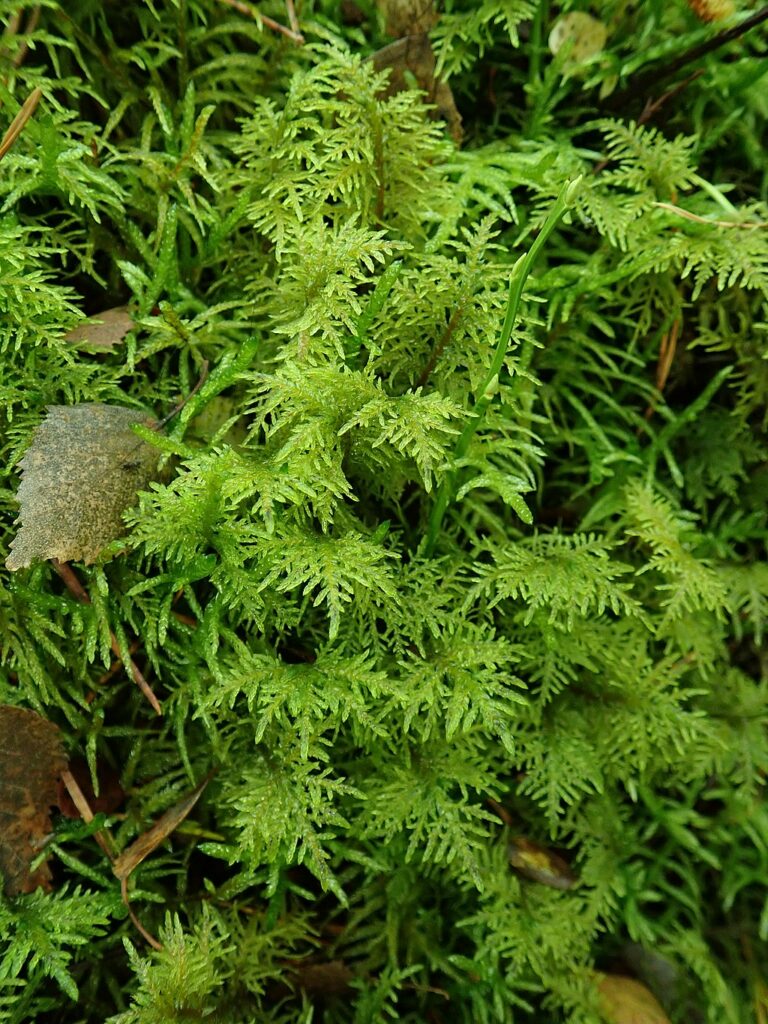
Common tamarisk moss is very distinctive and forms loose mats of fern-like shoots which range from yellow-green to dark green. Individual leaves are triangular or heart shaped, and the stems can be green or red-brown. It forms capsules only occasionally in the autumn and winter. It commonly grows on neutral soil in woodland, hedges and damp grass.
Sphagnum moss (Sphagnum spp.)
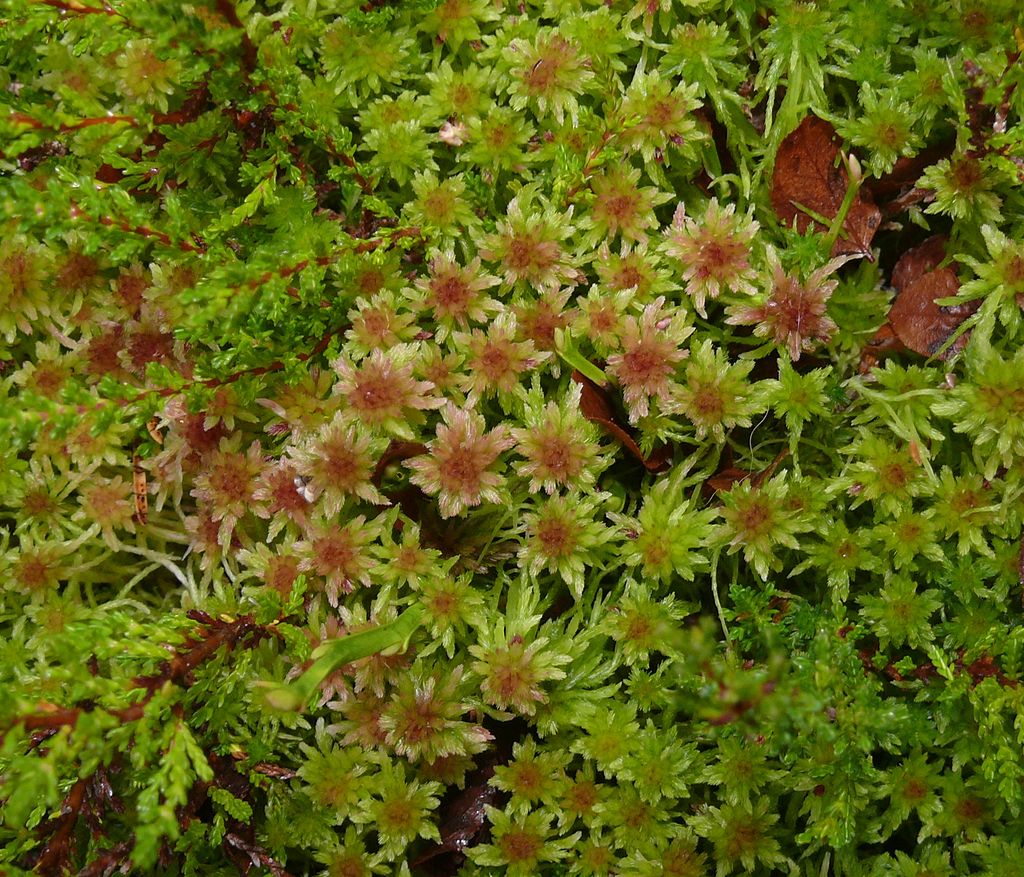
There are more than 30 species of sphagnum moss in the UK and they can be very difficult to tell apart. Although each plant is small, they often grow together in dense mats to form large areas of spongy carpet. Sometimes referred to as ‘bog-mosses’, they can be beautifully multi-coloured and thrive on peat bogs, marshland, heath and moorland. They also have an important role in the formation of peat bogs.
Common striated feather-moss (Eurhynchium striatum)
Common striated feather-moss is common in lowland woodland, particularly those with a high clay soil. It often forms cushions or mats that can cover large areas. Leaves are triangular or heart-shaped with finely toothed margins and have wrinkles that run down the length of the leaf (you may need a hand lens to observe this identifying feature). Spore capsules are only occasionally present, but have a beak-shaped tip.
Recommended reading
A Field Guide to Bryophytes
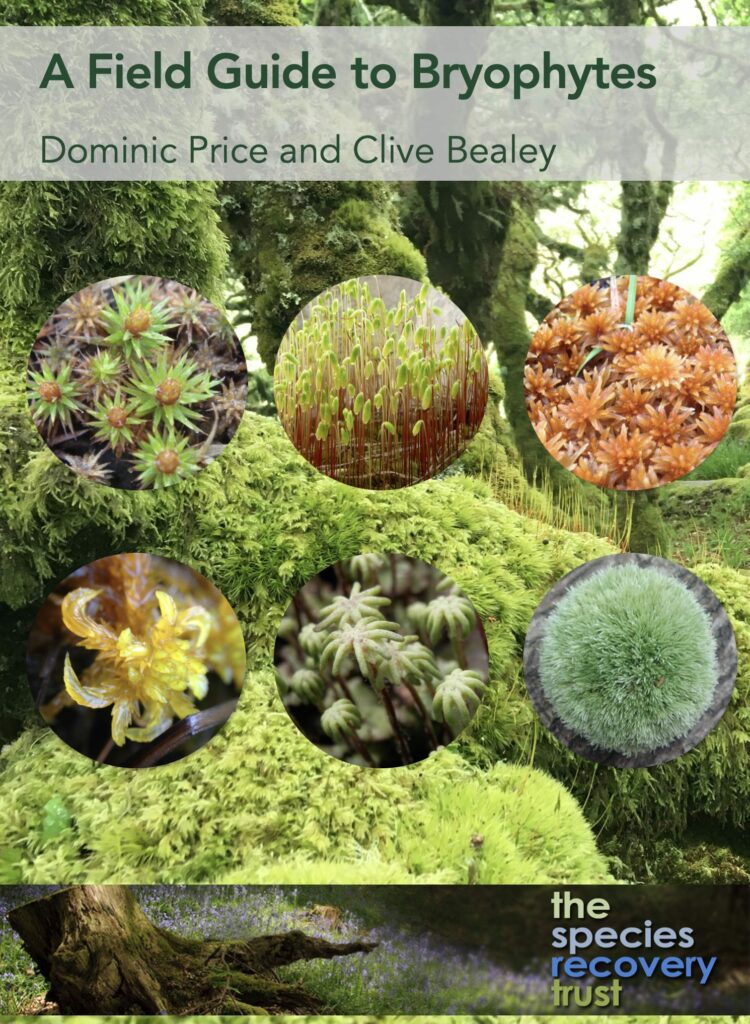
This field guide covers 133 species of moss and liverwort encountered in most UK habitats, using non-specialist terms to help identify them on over 100 full-colour pages. Twelve flow-charts help identify species by the habitat they occur in. All proceeds from the sale of this book go directly to the conservation program of The Species Recovery Trust.
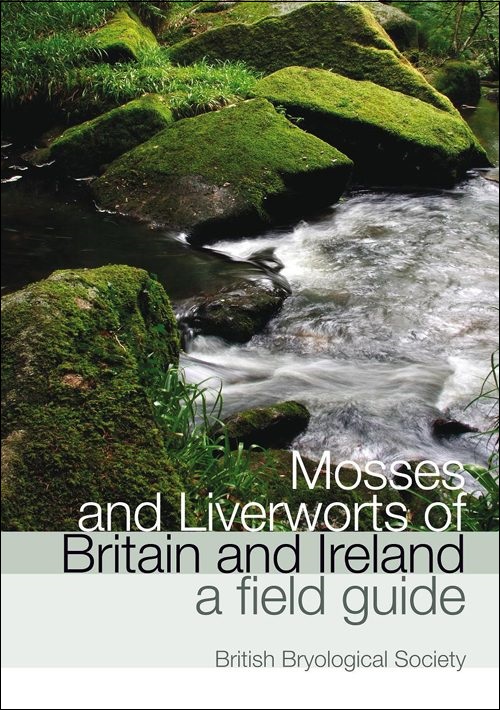
Mosses and Liverworts of Britain and Ireland: A Field Guide
This invaluable guide features hundreds of colour photographs and black and white drawings, both of whole plants and with distinguishing features magnified. It also includes notes on how to identify and distinguish plants from similar species, alongside distribution maps and habitat notes.
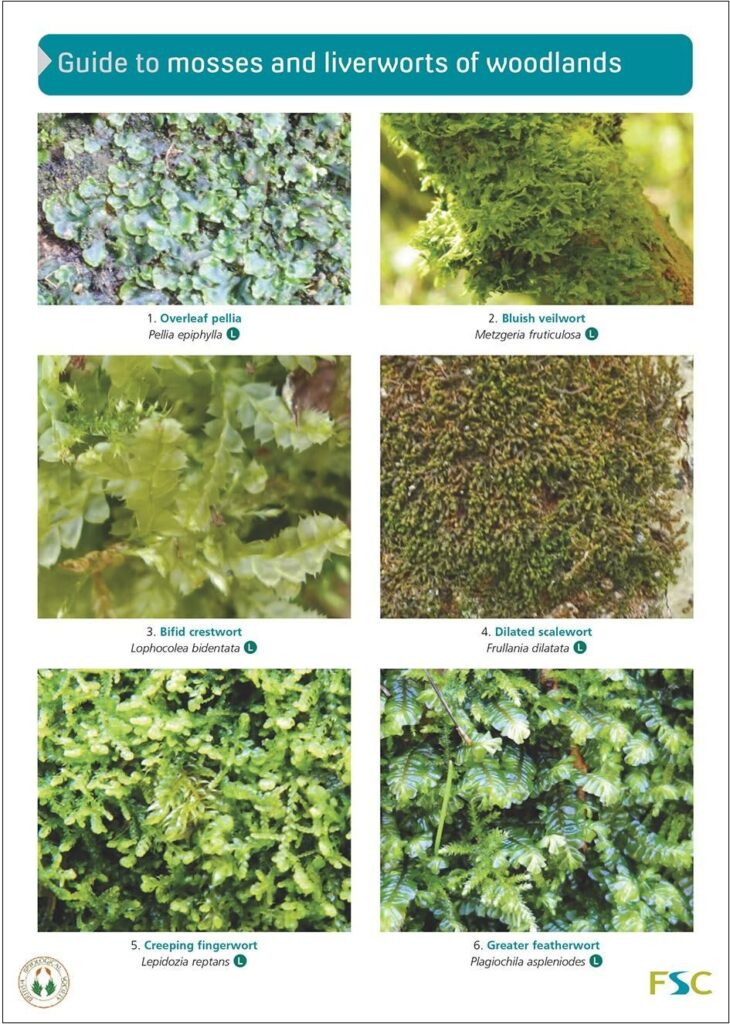
Guide to Mosses and Liverworts of Woodlands
Mosses and liverworts can form quite an extensive part of the woodland flora, carpeting the ground and covering tree trunks and branches. This guide covers seven liverworts and 16 mosses commonly found in woodlands. Photographs of plants in the wild and brief identification notes are provided to aid identification.
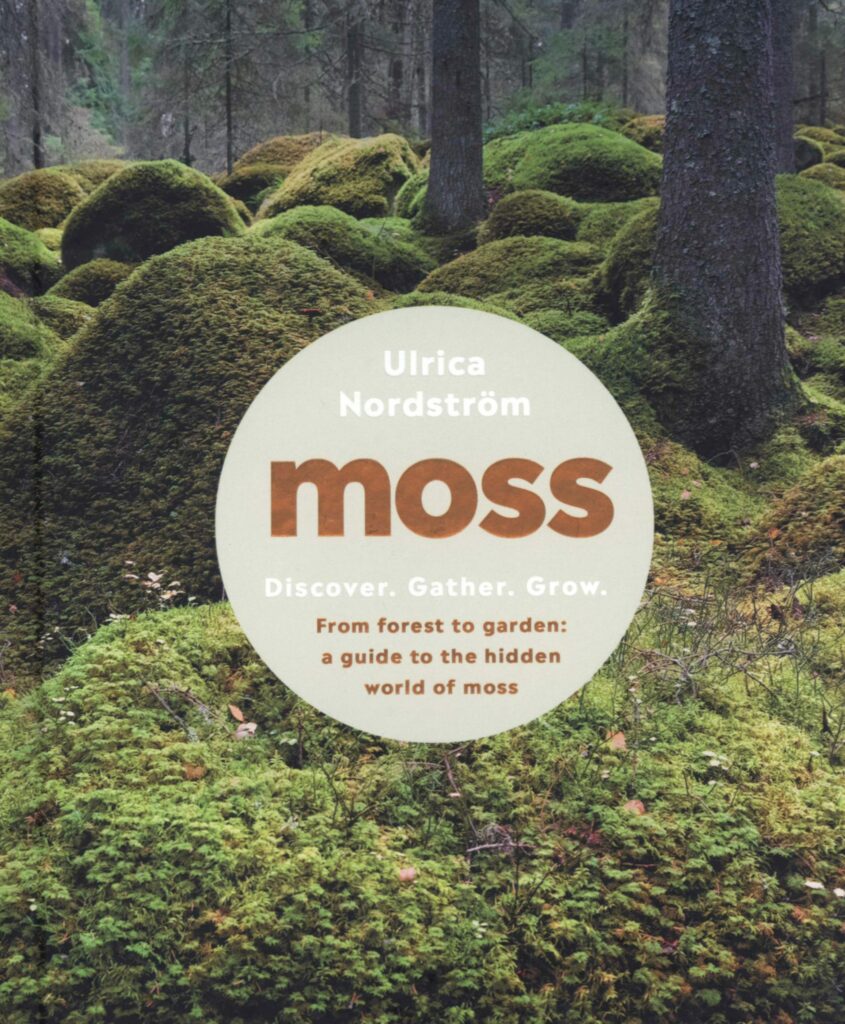
Moss: From Forest to Garden: A Guide to the Hidden World of Moss
In Moss you’ll discover the key moss varieties and where they can be found, as well as the cultural history of moss both as a garden plant and its uses in traditional handicrafts. Take a tour of the best moss gardens in Japan, the UK and the US, and meet people who share their passion for these plants.
Useful links
British Bryological Society (BBS) – The BBS supports anyone interested in the study and conservation of mosses, from the absolute beginner to the experienced researcher. They host field meetings, organise recording and research projects, and publish an academic journal as well as a popular membership magazine.
Late autumn and winter are the ideal time for planting trees and hedgerows. In this article we provide lots of tips for the first time tree-planter and point you in the direction of heaps of helpful information to ensure that your trees and shrubs get off to the best start this year.
Why is winter the best time to plant trees?
During the winter, trees are mostly dormant. This means that their aerial parts are not actively growing. However, below the ground is a different story. Trees use this period of dormancy to create an expansive root network which will work hard throughout the year to provide the plant with plenty of water and nutrients. Planting the tree during the late autumn and winter gives it plenty of time to build up a strong root structure in time for spring. Soil also tends to be softer and moister during the colder months, which helps the tree to expand and grow its roots. Plus, there is much less competition from weeds and grass, so your sapling has a better chance of establishing successfully.
Which species should I plant?
The species of tree you wish to plant will depend largely on where you want to put it. Is it going to be part of a hedgerow or will it stand on its own? How much space do you have, and how big is the tree likely to grow? For example, if you are planting in a small garden, you don’t want a tree that will grow too large or where it will end up shadowing your own or someone elses land or house. Don’t forget that a tree’s root system can grow much larger than its canopy, so planting near to buildings can become a problem later down the line.
A good rule of thumb is to take note of the trees that are growing and thriving locally, as these will be species that are suited to the local conditions. Choosing native varieties is also important, as these will help to support lots of wildlife such as birds, bees and butterflies. There are more than 60 species of native tree and shrub in the UK, so there’s plenty to choose from!
Where do I get my tree(s) from?
Trees and hedgerow plants are widely available from garden centres and tree nurseries. Make sure to check that trees have been grown in the UK, as trees imported from overseas are at risk of being contaminated with exotic pests and diseases. Trees of different ages will be available and your choice will depend largely on your budget and means of transportation. The main types are:
Transplants – Young seedlings that have been started in a tree nursery then dug up, ready to be transplanted in their final location. You may hear these referred to as a ‘whip’ – this is a transplant that doesn’t yet have any branches. (As the name suggests, this can look, rather unpromisingly, like a slim twig).
Standard – A larger tree which has a head of branches. Usually these trees will be over two metres in height, meaning that transportation can be more of an issue.
Heavy standard – Similar to the standard, these trees will also have a head of branches but will be older and larger; usually over three metres in height.
Semi-mature – These are well-established trees which are likely to be at least 10-15 years old. They tend to be four metres or more in height and so are generally more suited to commercial or larger-scale planting projects.
Transplants and whips are likely to be sold either in their own containers or with bare roots. Standards, heavy-standards and semi-mature trees, however, are usually ‘root-balled’ which means that their roots will be covered in soil and then wrapped in hessian for safe transportation.
Another option is to grow your own trees from seeds collected in the wild. As well as being hugely satisfying, this option has the benefit of being free! The Conservation Volunteers website has lots of information on collecting, extracting, sowing and growing your tree seeds, including a comprehensive handbook that is free to download.
How do I plant my tree?
Trees should be transplanted as soon as possible after purchase. For small trees you can simply use a spade to cut a T-shape in the soil, pressing in the spade to the same depth as you wish the roots to go. By peeling back the turf at the central point of the T, you can insert your transplant or whip and then press the turf back into place, making sure that the soil is well packed around the roots. Hedge plants can be planted using the same technique, either in a single or double row. Plants should be placed around 30cm apart in a single row or 50cm apart in a staggered double row. Applying a thick layer of mulch around the base of the tree will help to conserve moisture and prevent weed growth – but don’t let the mulch touch the tree itself, as this can encourage mould and decay. You may also need to fit a tree guard if you are planting young trees in an area where animals such as deer or rabbits could be a problem.
For larger trees, you will need to dig a hole that is large enough for the roots to spread out. If the soil is poor you may wish to dig a larger hole and then add some good quality compost before planting the tree. Tease out the roots if they are compacted or wound up and then place the tree gently in the hole. Once you have back-filled the hole with soil, it is important to ‘tread-in’ the plant so that the soil is firm around the base and roots. Apply a layer of mulch in a 1m diameter around the tree after removing any grass or weeds if necessary.
All newly planted trees should be watered immediately.
What now? Do I need to look after my tree?
Although the hard work is now done, it is important to check on your tree at least once a year to make sure that it is growing and thriving. Particularly with young trees, it may be necessary to water regularly in the summer or during any particularly dry periods. During the first three years it is also worth weeding by hand around the base of the tree to minimise competition for water and nutrients. Applying a thick mulch will also help to control weeds – leaf litter, lawn clippings or composted bark are great organic options.
Further information
• National Tree Week – In 2022 National Tree Week takes place on 26th November to the 4th December. Take the opportunity to get involved by planting your own tree, or get in touch with your local Tree Warden Network to see if there are any organised tree plantings happening where you live.
• Autumn Seed Harvest Handbook – This great handbook from The Conservation Volunteers provides all the information you need to collect, process and plant a tree from seeds found in your own neighbourhood.
• Twigged! – This great booklet from the Woodland Trust provides lots and lots of information on our native trees and how to recognise them throughout the year.
• Royal Horticultural Society website – The RHS website has a wealth of information on tree species that will help you to choose the right kind for your garden or planting project.
Recommended reading
Collins Tree Guide
The Collins Tree Guide is a definitive, fully illustrated guide to the trees of Britain and non-Mediterranean Europe, containing some of the finest original tree illustrations ever produced. Within each tree family there is a list of key species and a guide to the most important features to look for.
The Field Key to Winter Twigs
The Field Key to Winter Twigs offers a striking new approach to the identification of over 400 wild or planted trees, shrubs and woody climbers in the British Isles. It allows any diligent enthusiast to reliably name a woody plant, normally within three turns of pages and often within a minute of study.
The Tree Name Trail
Produced with the support of the Forestry Commission, this 12-page laminated fold-out chart contains a full-colour illustrated key to the leaves, twigs, fruits and seeds of the commonest broadleaved and coniferous trees of Britain and Ireland.
Tree-Spotting: A Simple Guide to Britain’s Trees
A beautiful and captivating insight into the wonderful world of trees, Tree-Spotting burrows down into the history and hidden secrets of each species. It explores how our relationship with trees can be very personal, and hopes to bring you closer to the natural world around you.
Ash dieback is a fungus called Hymenoscyphus fraxineus (known previously as Chalara fraxineus, hence the disease commonly being referred to as ‘Chalara’). The fungus originated in Asia where it is largely harmless to native ash trees; this is because they have developed resistance to it during their long existence side-by-side. It was introduced to Europe around 30 years ago via infected ash saplings, and was first discovered in 2012 in the UK in south-east England. This area remains the most severely affected, although it is systematically spreading throughout the rest of the country.
The fungus overwinters in the leaf litter surrounding the ash tree, and during the summer and autumn it produces fruiting bodies which in turn release huge numbers of spores that land on the leaves of the surrounding trees. They are also carried over large distances by the wind. The spores enter the tree via the leaves and continue to penetrate the plant’s cells, where they eventually block the system responsible for water transport. Young, fragile trees can die very quickly, whereas older, stronger trees may fight back for a while before repeated infections over several years finally kill them.
Why is it a problem and how concerned should we be?
Ash trees play a huge role in woodland diversity and, when present in hedgerows and gardens, are key in connecting fragmented habitats. They are home to a variety of invertebrates, birds and lichens and, as with all trees, contribute to purifying the air and absorbing CO2. As wood from the ash tree is highly valued both for timber and firewood, there is also an economic cost to their loss. This is compounded further by the cost incurred in dealing with the dead trees.
It is expected that, in time, Britain will lose in excess of 80% of its ash trees, incurring a total cost of £15 billion.
How can I recognise the signs of ash dieback?
Ash trees affected by ash dieback initially exhibit dark patches on their leaves which then wilt and go black, and are often shed early. Trees also show characteristic diamond shaped lesions where the branches meet the trunk. Epicormic growth is common as the infected tree becomes stressed – this is where previously dormant buds lower down the trunk begin to show new growth.
The Observatree website features several excellent ID guides, videos and posters designed to help non-specialists identify the presence of ash dieback.
What can be done to address the problem?
There is no known cure for ash dieback, although some fungicides have been found to be effective in suppressing the symptoms if they are reapplied every year. Due to the expense of this, they are only really viable for trees of special cultural or heritage value.
Otherwise, the best options moving forwards are to monitor the spread of the disease in the hopes that enough mature trees will show resistance to the fungi that populations can be re-established from their offspring. For this reason, young ash trees should be carefully protected from grazing. Woodlands and parks, particularly those that have lost ash trees, should be replanted with a variety of native and locally grown species to help to protect and improve biodiversity.
In managed parks and gardens, burning the leaf litter around the trees in autumn and winter may be effective in minimising the spread of spores. Similarly, encouraging the public to wash shoes, bikes, buggies and vehicles between visits to different woodlands may also be of some use.
What can I do to help?
There are several things you can do to help:
• Support the Woodland Trust by donating to their Tree Disease Fighting Fund. All donations will go towards efforts to monitor the spread of ash dieback, replanting healthy trees and improving biosecurity measures.
• Practice good woodland hygiene – this includes cleaning shoes, car and bike wheels after visits to woodlands, as well as refraining from taking cuttings or other plant material.
• If you spot an ash tree showing symptoms of ash dieback, you can report it on the TreeAlert website in Britain, or the TreeCheck website in Northern Ireland.
Further reading/resources
Ash | Edward Parker Ash charts the evolution of this magnificent tree, and its 43 species across the northern hemisphere for the past 44 million years. From its significance in ancient Indo-European cultures, to its remarkable properties in treating Alzheimer’s, Parker looks at the botany, cultural history and medicinal uses of the ash tree.
Oak and Ash and Thorn | Peter Fiennes
Immersing himself in the beauty of Britain’s woodlands and the art and writing they have inspired, Peter Fiennes explores our long relationship with the woods and the sad, violent story of how so many have been lost. Just as we need them, our woods need us too. But who, if anyone, is looking out for them?
The Ash Tree | Oliver Rackham
Oliver Rackham delves into the history and ecology of the ash tree, exploring its place in human culture, explaining ash disease, and arguing that globalisation is now the single greatest threat to the world’s trees and forests. There is no more urgent message for our times. We cannot go on treating trees like commodities to be bought and sold.
Ash | Archie Miles Ash looks at every aspect of the tree: its many visual manifestations; the uses of the timber for so many different purposes; its cultural significance in place names, folklore, myth and superstition; its inspirational importance for artists, poets and writers; and, of course, the issues arising from the inevitable spread of ash dieback.
Throughout May 2022 Plantlife have once again made their impassioned annual plea for garden owners across the UK to resist the urge to mow lawns and tidy up their gardens and to join in with #NoMowMay. It’s a simple enough premise to leave grassy areas alone for a month, and it has huge benefits for biodiversity at this time of year to do so, giving a wide variety of flowering plants a chance to bloom early in appeal to our rich network of vital pollinators.
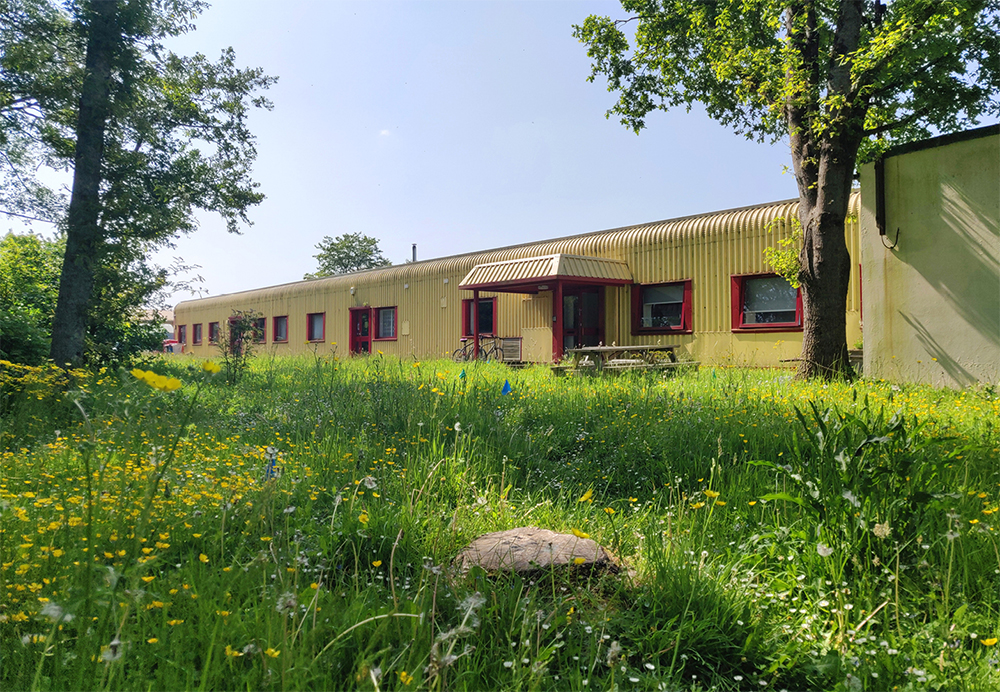
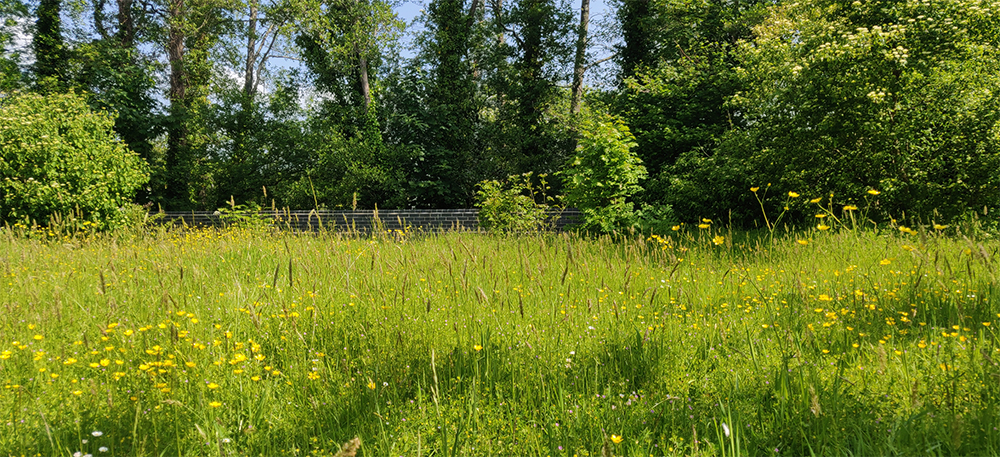
As in 2021, we here at NHBS have participated this year by letting the grassy areas on our premises flower and the results were quickly quite astounding. Within days there was a carpet of daisies and dandelions, Germander Speedwell and Black and Spotted Medic, and, as the month progressed and we explored further, the picture grew more and more complex. Tangles of Common Vetch, Creeping Buttercup and Common Mouse-ear proliferated, and tall fronds of Beaked Hawk’s Beard, Ribwort Plantain and Prickly Sow-thistle appeared. Hidden deep within a mixed mat of grasses the miniscule flowers of Cut-leaved Crane’s-bill, Thyme-leaved Speedwell and Scarlet Pimpernel flourished and, at the lawn edges, tall stands of Garlic Mustard and Cleavers towered over the last of the seasons Bluebell flowers.
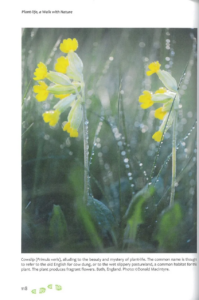
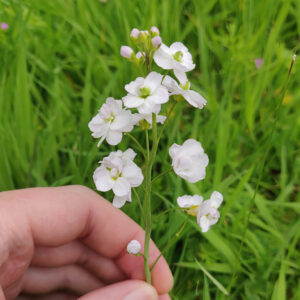
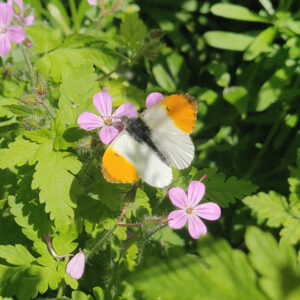
It can still feel strangely radical to let an area of public space, or even a private garden, to grow wild. Perhaps it can feel like going against the flow to sit back and not mow or trim the grass, and to embrace a modicum of wild chaos. Much of our wildlife relies on the flowering plants that we suppress with our tidiness and our control of lawns. Multitudes of beetles, bees, ants, moths and butterflies have evolved alongside plants that, given half a chance, can still thrive in our green spaces. No Mow May offers us a glimpse into this rich relationship, this conversation in time, and it provides a lifeline. One flower that showed up in our lawn here, by way of an example, is the Cuckoo flower or Lady’s Smock, a light and elegant pink flower of grasslands that is almost exclusively selected by the Orange-tip (and Green-veined White) butterfly in spring to lay their eggs on, as it feeds the caterpillars when they hatch. Growing up to 50cm in height its reach is well within the mowing range.
In addition to the No Mow May initiative, Plantlife have also introduced Every Flower Counts, a citizen science survey that asks participants to count, record and report back the flowers found in a single metre squared patch of lawn . This will enable them to gather important data on the impact that leaving areas to grow can have on abundance and biodiversity.
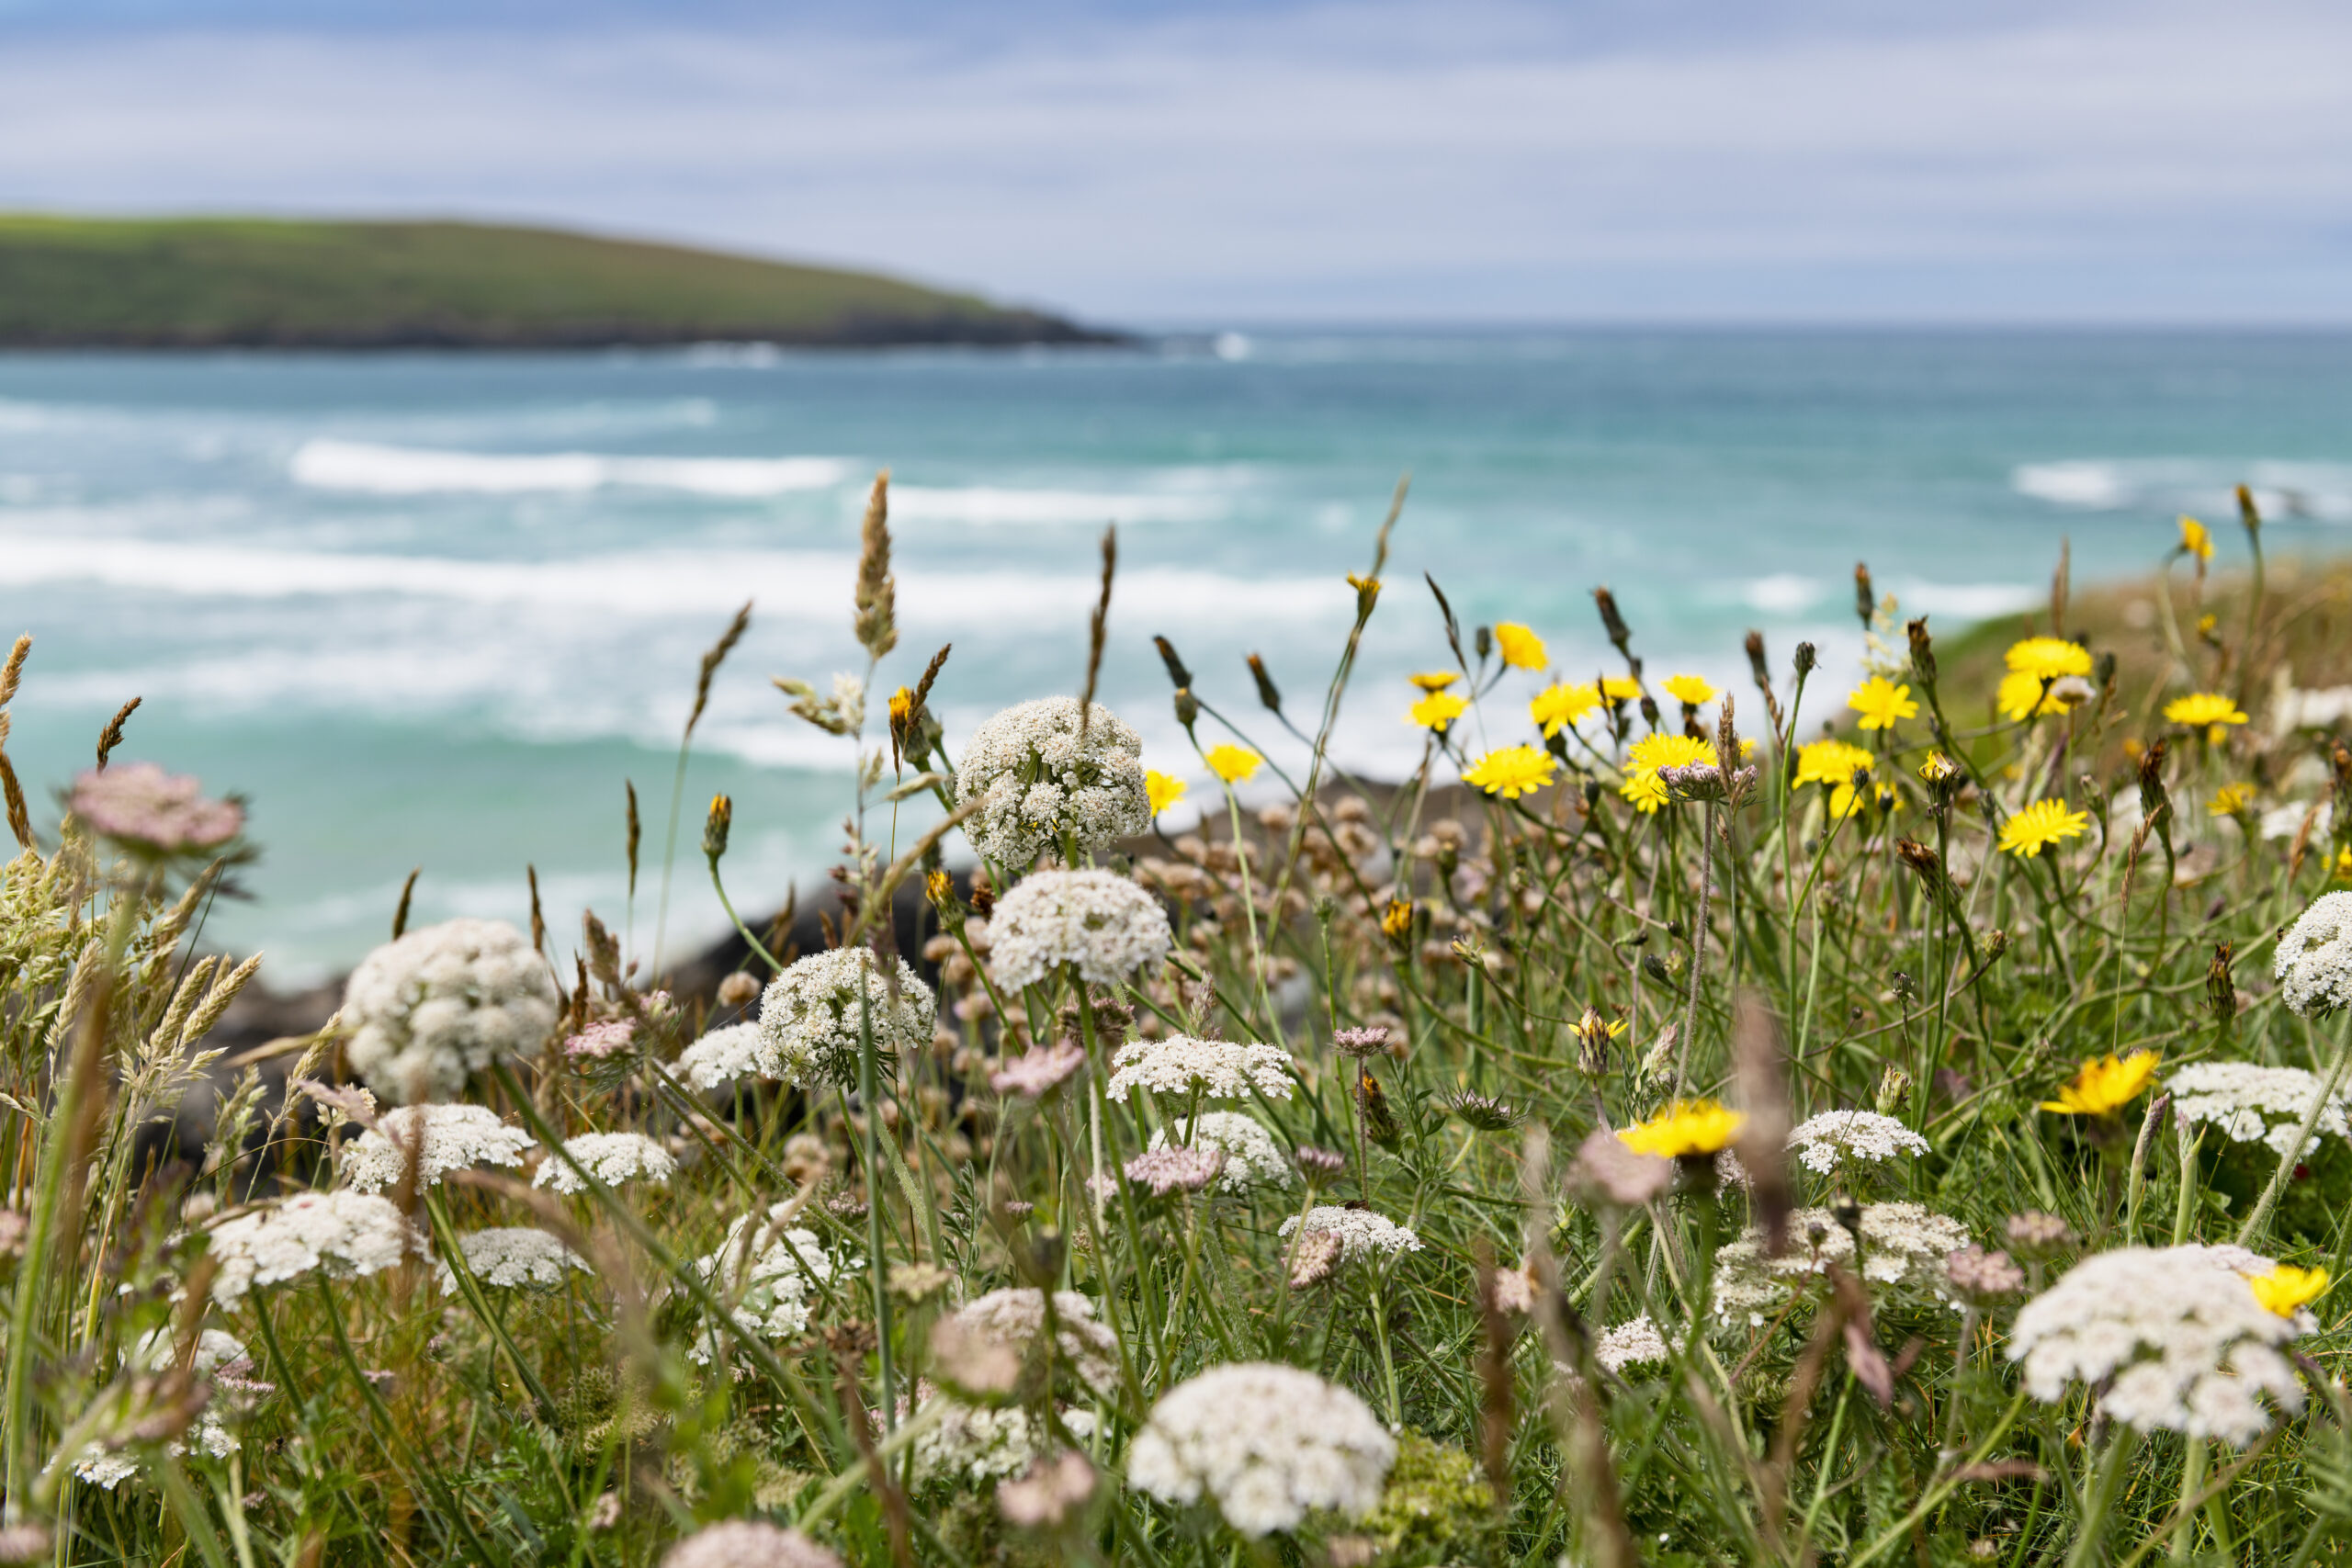
As May winds to a close, species are still beginning to emerge in our lawn ready to flower in June: Spear Thistle, Oxeye Daisy, members of the Carrot family and, with a final flourish of the month, a Bee Orchid slowly opens its blooms right by the footway, surprisingly cryptic until you meet it at ground level.
We hope that we can leave our grass uncut for a little longer so we can see who’s still there to flower, and that those of you who have participated in No Mow May may feel inspired to do the same.
Below is a list (in no particular order) of the flowering plants we discovered on our premises during No Mow May this year and a small selection of guides for wildflowers and grasses, plus some suggested reads for those who have inspired to take wild gardening further.
A quadrat is a square frame, usually constructed from wire or plastic-coated wire, although they can be made from any sturdy material. Most commonly they measure 50cm x 50cm (i.e. 0.25m2), and may have further internal divisions to create either 25 squares each measuring 10cm x 10cm or 100 squares measuring 5cm x 5cm. Some frames are also collapsible which allows you to connect several pieces together to create larger sample areas.
What are quadrats used for?
Quadrats are used to survey plants or slow-moving/sedentary animals. They can be used either on land or underwater to gain an estimate of:
total number of an individual (or several) species.
species richness/diversity – the number of different species present in an area.
plant frequency/frequency index – the uniformity of a plant’s distribution within a surveyed area (not a measure of abundance).
percentage cover – useful in situations where it is difficult to identify and count individual plants, such as grasses or mosses.
By deploying several quadrats it is possible to compare any of these factors either spatially (for example in locations with different light or pH levels) or over time, such as at different points throughout the year.
How to use a quadrat
Most surveys require that quadrats are placed randomly within the survey site. One way to ensure that placements are truly random is to divide your survey area into quadrat-sized spaces and then use a random number generator to choose x and y coordinates. The quadrat can then be placed in the appropriate position. The number of samples you require will depend largely on the size of your survey site and the amount of time/manpower you have available. A minimum of ten samples should ideally be used.
In some situations, more specific placement of the quadrats is required. For example, when studying the changes in species presence/abundance on a shoreline, you may wish to take samples at regular intervals along a transect up the beach.
Creating a species list
One of the simplest ways of using a quadrat is to create a species list. To do this, the quadrat is placed randomly several times within the target area and the plants present within them are recorded. This will not provide any information on abundance or distribution, but will be a useful guide as to the species that are present at the time of sampling.
Estimating the total number of a species
For plants or animals that are easy to count, it is possible to estimate their total numbers for your survey area. To do this, simply count the number present in a series of quadrat samples then divide the total by the number of samples to get an average count per quadrat. If you know the dimensions of your entire survey site you can then multiply this up to get an estimate of the total number of a species present.
Estimating plant frequency/frequency index
To calculate plant frequency or frequency index, you simply need to note down whether the target species is present or absent within each quadrat sampled. The number of quadrats in which the species was present should be divided by the total number of samples taken and then multiplied by 100 to get the frequency as a percentage. For example, in a survey where 10 samples were taken, dandelions were found in 6 of these. This would give a frequency index of (6/10) x 100 = 60%.
Estimating percentage cover
For species in which it is difficult to count individual plants (e.g. grasses and mosses) it is easier to estimate percentage cover. For this purpose a quadrat with internal divisions is recommended – one with 100 5cm x 5cm squares is particularly useful. Results from several quadrats can then be averaged and scaled up to get an estimate for the entire survey area.
Important things to remember
• The number of samples you take (i.e. the number of times you deploy your quadrat during your survey) will affect the reliability of your results. Sample sizes which are too small are much more likely to be affected by anomalous counts (e.g. localised clusters of individual species). On the other hand, planning for too many samples can create an impractical workload.
• Bear in mind that there will always be observer bias. By their nature, flowering plants are easy to overestimate and low-growing species are more likely to be missed.
• Take care to make sure that your quadrats are randomly placed if your survey design requires this. It is easy to subconsciously place them where there are large numbers of flowers or easy to count species. Using a coordinate-based system will solve this problem.
Quadrats available from NHBS
At NHBS we sell a selection of high-quality quadrats, designed to be strong, long-lasting and durable.
Q1 Quadrat
Made from heavy gauge steel wire with zinc plating, the Q1 Quadrat measures 0.5m x 0.5m and has no divisions.
Q2 Quadrat
The Q2 Quadrat is made from heavy gauge steel wire with a plastic protective coating. The 0.5m x 0.5m frame is subdivided into 25 squares for sampling dense vegetation or species-poor habitats.
Q3 Quadrat
The Q3 Quadrat is made from heavy gauge steel wire with plastic coating. The 0.5m x 0.5m frame is subdivided into 100 squares for calculating percentage cover or making presence/absence recordings.
Q4 Quadrat
The Q4 Quadrat is a strong collapsible quadrat made from four pieces of heavy gauge steel wire with zinc plating. A single Q4 frame will make a 0.5m x 0.5m open frame without divisions, suitable for general vegetation surveys. Additional units can be used together to make a variety of quadrats, e.g.. 1m x 1m or 1m x 0.5m. Being collapsible means it is also ideal for travel.
Photo credits:
(a) U.S. Fish and Wildlife Service Headquarters via Flickr (CC BY 2.0)
(b) USFWS Pacific Southwest Region via Flickr (CC BY 2.0)
Ever Green: Saving Big Forests to Save the Planet is a deft introduction to the very complex topic of forest degeneration. Megaforests, forest ecosystems that are continental in scale and contain large undisturbed areas, are under threat. Only five megaforests exist today, New Guinea, the Congo, the Amazon, the North American boreal zone and the Taiga. These megaforests provide a vital service by preserving biodiversity, providing a stable climate and supporting thousands of cultures.
John W. Ried and Thomas E. Lovejoy explore how destructive human activities are impacting these remaining megaforests and their diminishing undisturbed zones. Blending evocative and accessible nature writing with fact-filled science, the authors explain why these untouched forests are so important for the survival of our global biodiversity and ourselves. Not only are these megaforests home to millions of species, but they also help to stabilise our climates by storing large amounts of carbon, to maintain watersheds, and provide much of the world’s drinkable water by releasing so much moisture-filled air that ‘flying rivers’ form.
In the prologue, ‘Anastasia’s Woods’, we are introduced to a young member of the Momo clan who have lived in the forests of western New Guinea for many generations. Through vivid descriptions of the habitats, flora and fauna of these great megaforests, Ried and Lovejoy advocate for the rights of Indigenous people as stewards of their forests. Combining this with enchanting photographs, new perspectives and rich accounts of people who are fighting to conserve these landscapes, the authors create a persuasive appeal for the protection of these lands, through methods such as improving indigenous rights, smarter road network planning and the expansion of protected areas.
In chapters 2 and 3, ‘The North Woods’ and ‘The Jungles’, Ever Green explores each megaforest separately, discussing the unique make-up of their ecosystems, and their historical and current relationships with humans. The authors discuss how human activities are tipping the balance against species within these ecosystems. For example, we have known for a while that fire is an integral part of forest life in certain areas, promoting biodiversity and plant reproduction. The forest comes alive with specially evolved species, such as pyrophilous insects like the black fire beetle, consuming the fire-damaged wood; animals such as the blackpoll warbler that prey on these insects; and herbivores like the snowshoe hare consume the tender shoots and leaves that grow just after these fire events. The increased rate of fires is disrupting this natural regenerative process, however, impacting species that rely on different stages of regeneration. Other anthropogenic activities such as mining and road-building are opening up previously ‘safe areas’ for prey to predators and hunters. All these new threats are endangering the stability of species populations beyond the point that forest ecosystems may be able to cope.
Chapter 7, ‘Forests and the Real Economy’, discusses the need for an economy that values the integrity of the natural systems of forests, which strives to support nature rather than disassembling it. Untouched forest areas, particularly megaforests, are continuously undervalued, as there is so much value in sellable products such as minerals, timber and game, as well as land for agriculture. With the perceived abundance of these products within large forests, it is often seen as reasonable to “chip these little pieces off the edges”, as the authors quote Meredith Trainor, head of the Southeast Alaska Conservation Council, without seeing the damage all these little pieces cause in the bigger picture. This destruction, the ‘inadvertent by-product of economic activity’, is unsustainable and has been wearing away the very foundations of much of our product-based economic systems.
To combat the current product-oriented view we have of forests, the authors discuss the idea of ‘forest-oriented metrics’, where environmental information such as climate costs and benefits are reported alongside existing indicators such as GDP and the employment rate.Ever Green argues that cost-benefit analysis cannot accurately price the whole value of forests, however, including their aesthetic and spiritual value, therefore these landscapes will always be undervalued while using this method. But the authors do believe that economics has a role in environmental policy, as it helps to inform on how to most effectively act to accomplish a goal that has been ‘fashioned from various streams of knowledge and ethics.’
While many of the solutions Ever Green puts forward are the work of major businesses and governments, the book ends with an invitation for everyone to visit these megaforests and to consider their own personal choices. Although it is easy to believe that our own good actions may be overshone by the negative actions of larger organisations, there are still a number of ways individuals can help save big forests. If you’re looking for an accessible and engaging introduction to deforestation, conservation-orientated solutions and nature-based economies, Ever Green: Saving Big Forests to Save the Planet is an ideal addition to your reading list.
When thinking of the varied toolkit of the enterprising naturalist, a microscope is perhaps not the first thing that springs to mind. Nevertheless, for many entomologists, botanists and comparative zoologists, the ever-reliable 10× hand lens eventually proves insufficient. Indeed, many species of insect, lichen and fungi (among many others) are difficult to identify past genus or even subfamily without the use of more powerful optics. Animal scat, small mammal dentition and hair fibres can be likewise difficult to evaluate without suitable magnification. But researching the best optical equipment for your purpose can be a disheartening task, especially for naturalists who are likely to come across a wide range of resources for the engineer and medical professional, but sparse pickings tailored to their own specific needs.
For most naturalists, the 3D image and relatively low magnification of the stereo microscope (also called the low-powered dissection microscope) fits the bill nicely. However, with several big-name brands, a wide range of price points and numerous specifications available for uses across a plethora of fields, it’s useful to be armed with some background knowledge when choosing your own microscope.
Stereo Microscopes
Stereo microscopes are made up of several parts: most include a base with or without illumination, a pillar with an adjustable bracket for the head and a head comprising of two eyepieces and one or two objective lenses, depending on whether the microscope uses the Greenough or Common Mains Objective design (discussed below). Some also include a third eyepiece or ‘photo tube’.
Specifics regarding the different parts of the microscope will be discussed later, but for now, it is important to understand how magnification is calculated. The optics of a stereo microscope consist of two eyepiece lenses and one or two objective lenses with which they are paired. Each provides its own zoom – typically 10× for a standard eyepiece and 2× or 4× for the objective (although many objectives provide a range of magnifications between 2× and 4×, see below). The overall magnification is calculated by multiplying the objective and eyepiece lenses together, for example a system with 10× eyepieces and a 2× objective will provide a zoom of 20×. Some objectives have a dynamic zoom lens, as we’ll discuss later.
Optical Systems: Greenough vs Common Mains Objective
Stereo microscopes are grouped by the optical system that they use – Greenough or Common Mains Objective (CMO). Both systems have distinct advantages and disadvantages, so knowing the difference is vital.
A staple since its original conception in the 1890s, the Greenough Optical System works by angling two objective lenses towards each other to create a 3D image. The objectives have wide apertures for good light-gathering potential, providing a crisp, clear image. It is also cheap to produce, meaning that most entry- to mid-level stereo microscopes utilise this design. However, as the lenses are slightly tilted, the focus is not constant across the image – the outer left and right portions of the view are always slightly over-focused while the centre is clear. This is known as the ‘keystone effect’, and while it is often unconsciously corrected for by the human eye, it does cause the viewer to experience eye fatigue more rapidly than the alternative.
Introduced in the middle of the 20th century, the Common Mains Objective (CMO) system uses one objective lens that is shared by both eye pieces, allowing for exceptional light-gathering potential, and eliminating the keystone effect. However, the single objective leads to a problem known as ‘perspective distortion’, in which the centre of the image appears to be elevated like a fish-eye lens. Models that correct this can cost thousands of pounds, so for many naturalists, a high-end Greenough system is likely to be a better investment than a low-end CMO microscope.
Magnification
Once you’ve decided which system you would like to go for, consider the magnification. Most microscopes under £1,000 fall into the 20-40/45× range. Occasionally 60× models are offered in this bracket, but it’s definitely worth testing these before purchase as the extra range can come at the cost of features such as lens quality. Remember too that as zoom increases, the aperture of the lens decreases, making the image worse. For most insects above 2mm, a 20×-40× microscope should do the job. Groups that rely on minuscule features or genitalia dissections may require higher magnifications, but this often requires a better-quality microscope that uses high-quality parts to maintain a clear, bright image.
The cheapest stereo microscopes use a ‘fixed’ zoom system, with a single pair of objective lenses that provide one magnification, normally 20×. The objective (and sometimes the eyepieces) can be removed and replaced manually with a higher magnification alternative.
Models above the £150 mark generally use a rotating ‘turret’ system shared with compound microscopes. Two pairs of objective lenses are included and can be rotated into place, generally 2× and 4× allowing for 20× and 40× magnification. For the serious amateur naturalist looking to invest in a ‘workhorse’ style system, this is often the design to choose, and many professional entomologists and botanists spend years learning with such an optic.
Finally, stereo microscopes above around £300 generally use a dynamic zoom system. This allows the magnification to be altered across a range (normally 20-40×). The default 10× eyepiece can be swapped for a greater magnification if desired. Many also include a ‘click stop’ system for easy reading of the magnification without having to look up. The flexibility of these microscopes makes them the most popular choice among many naturalists.
The Head: Binocular vs Trinocular
This is simple but important to consider. While the binocular head is generally considered to be the default for stereo microscopes, the trinocular variant is extremely popular among researchers and anyone who seeks to document their microscopy: the addition of the third eyepiece (phototube) allows for a camera to be attached and images or video to be captured while the user is viewing the image. Many microscope cameras are designed to be used specifically with a phototube and will not function when used with a binocular head. Some, like the Moticam X3, can be used with either.
The Stand: Base, Stage Plate and Illumination
When choosing an illumination system, it is important to consider what you’ll be using your microscope for. You’ll often see plain (no illumination), halogen, or LED bases offered, with the plain option being the cheapest and LED the most expensive. Most illuminated bases offer both transmitted and reflected illumination, referring to the way in which light reaches the eye. The reflected system utilizes a light that shines straight down on the subject, reflecting the light off of the subject and into the user’s eye. This is the most commonly used design among naturalists, as the examination of opaque objects such as insects, plant material and mammal hairs requires the user to observe the sample’s upper surface.
Transmitted illumination utilizes a bulb beneath the sample, projecting light directly to the user’s eye, similar to a compound microscope. This is used in the examination of translucent samples such as aquatic invertebrates and some macroalgae.
This is also where stage plates come in. Sitting below the subject as the ‘background’ of the image, most microscopes come with opaque black and white options for use with the reflected illumination setting and a frosted glass option that light will shine through for use with transmitted illumination.
Don’t immediately discount a plain base. Many naturalists prefer not to use built-in illumination that sits directly above the subject, as specimens that require the examination of fine details on the sample’s surface, such as many beetle species, can be difficult to ID under such a light. The best solution is to purchase a dedicated microscope illumination unit, a handy tool that usually includes two swan neck LEDs that can illuminate the subject from whichever angle is most auspicious. These aren’t cheap, but the cost of one is often covered by the money saved in purchasing a base without a built-in light.
Finally, consider the difference between halogen and LED illumination. For many purposes, such as the examination of bones, animal hair or water samples, this is irrelevant and largely comes down to a matter of taste. However, some materials are prone to desiccation under the heat of a halogen lamp. Therefore, particularly for entomological work and work involving live samples, LED illumination is often preferred.
More Information
The array of options that go alongside buying your first microscope can be daunting, but with a little consideration, you should be well set to explore the wonderful world of the tiny. Keep in mind your budget, and the microscope’s intended function, and you won’t go wrong. The information in this blog should be a strong starting point, but if you should want any more advice, feel free to get in touch with our friendly team of Wildlife Equipment Specialists via customer.services@nhbs.com or phone on 01803 865913. Our full range of stereo microscopes can be found here.