
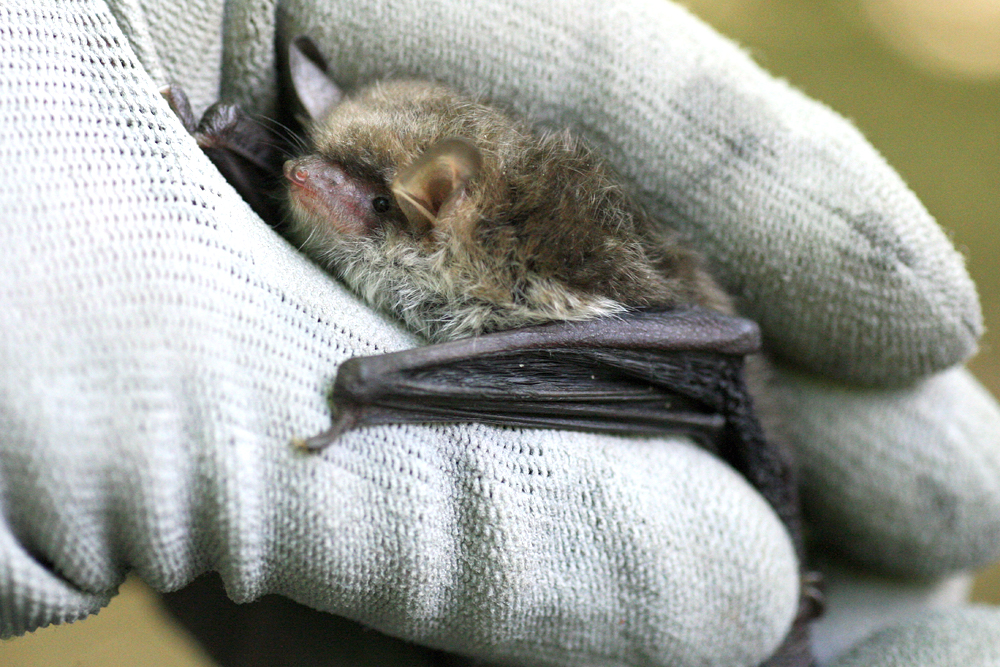
This blog provides a step-by-step guide on to how to set up and disassemble the latest model of the NHBS manufactured Harp Trap.
Please note that the NHBS Harp Trap is a made-to-order item, contact us at customer.services@nhbs.com for enquiries and we will be happy to advise on the current lead time.
Handling your trap
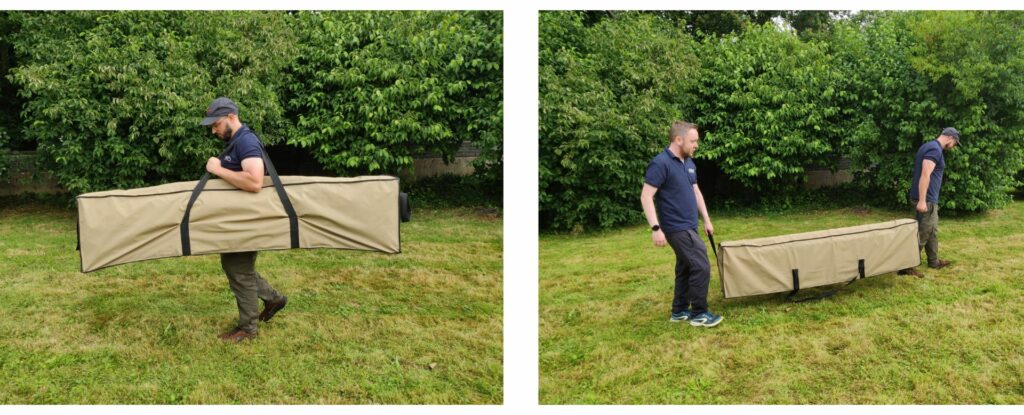
The trap carry bag has been designed to allow handling/carrying by either one or two people.
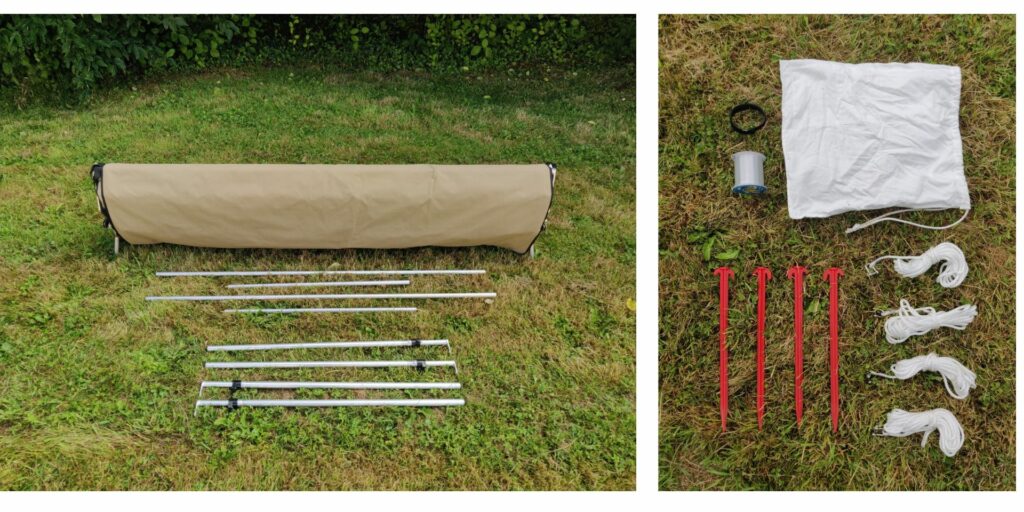
What’s in the bag?
1 × Harp Trap, 4 × legs, 2 × support poles (in two parts), 1 × accessories pack (including instructions, 4 × pegs, 4 × guy ropes and spare line)
Please follow these instructions for correct assembly and disassembly. We recommend that this is carried out by two people.
Setting Up
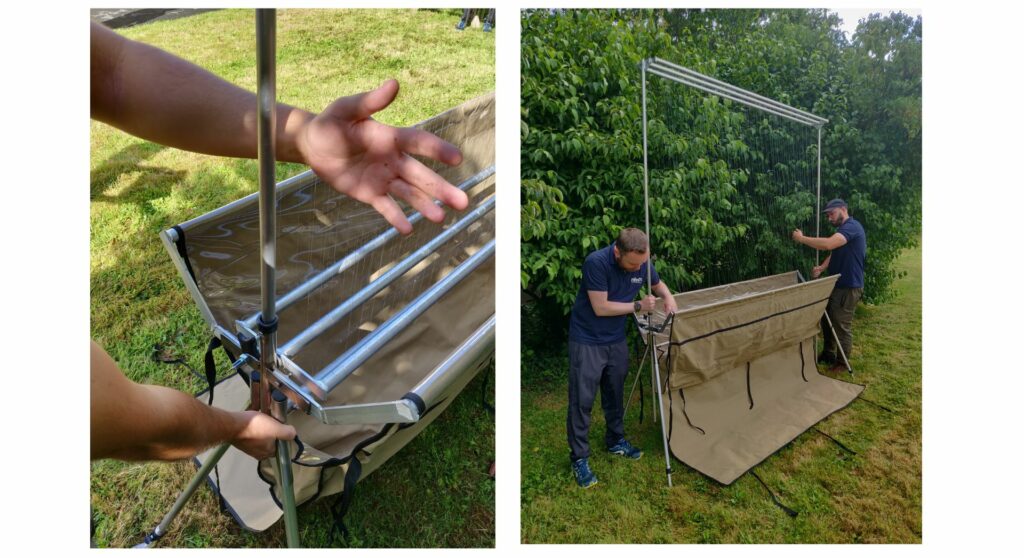
1 . Carefully remove the harp trap from its carry bag and place the frame upright on the floor.
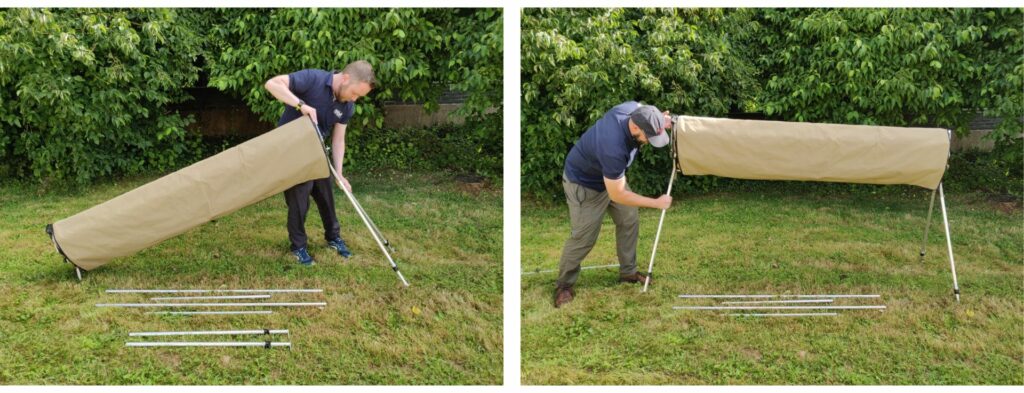
2 . Take the legs out of the carry bag and insert them into the holes on the underside of the frame – it is easiest to do this one end at a time. When required, all legs can be individually adjusted to raise the trap or to level out when setting up on uneven ground.
3 . Undo the straps and allow the collecting bag to settle by opening the arms of the frame out fully. If using guy ropes, attach them to the upper carriage now.
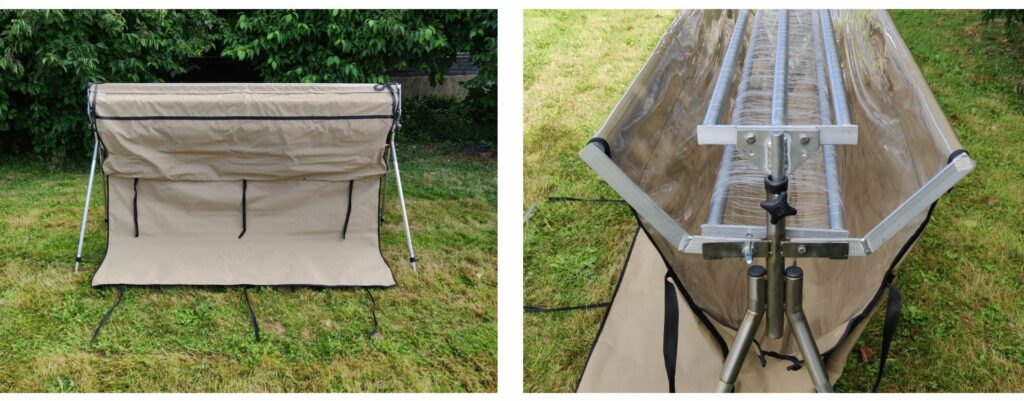
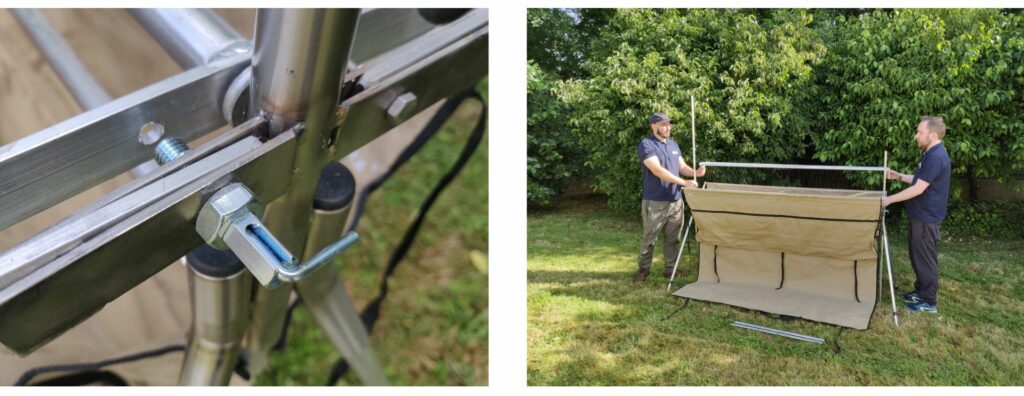
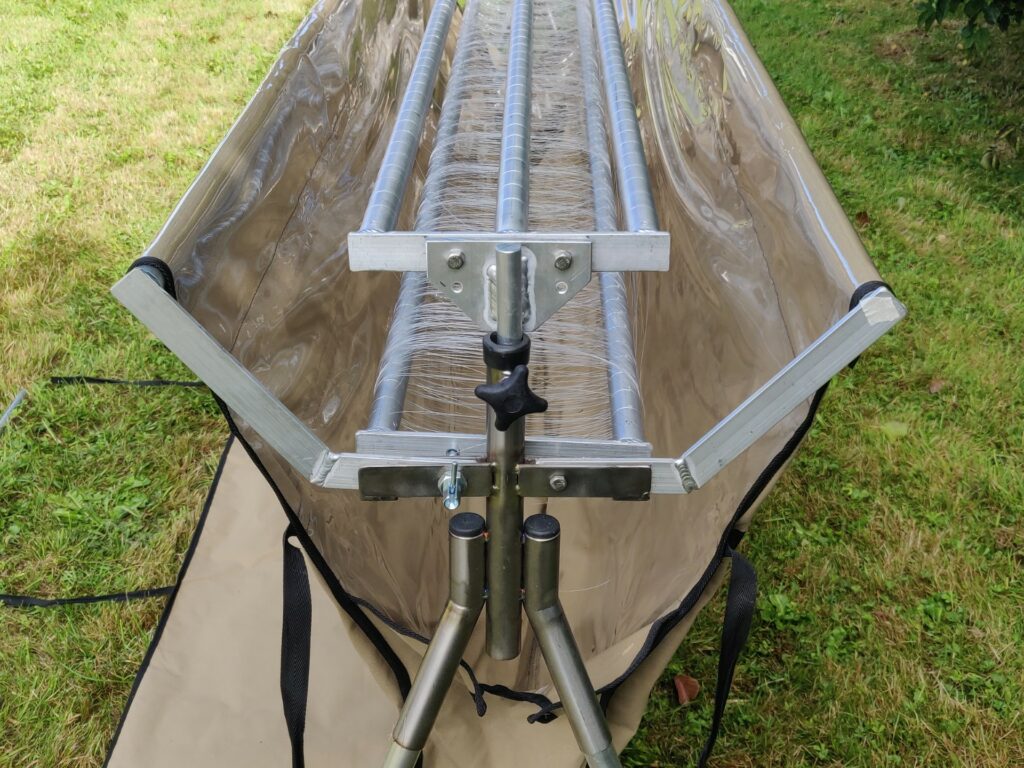
4 . Release the spring locking pins at both ends of the trap by pulling the lever out and rotating 90° to lock in the open position. Grab the longer piece of the support poles and hold upright with the connector facing down. Now, loosen the star handled screw and carefully lift the top carriage, raising it away from the main frame. Insert the support pole through the hole, where you removed the upper carriage from, and allow the poles to sit on the floor. Then insert the top carriage locating pins into the open end of the support poles.
5 . If using guy ropes, untie and allow to hang.
6. Working at the same pace, slowly raise the support pole so that the bottom of the pole is just below the lower part of the main frame, watching closely to ensure no strings get tangled. Once you reach this height, tighten the star handled screw to secure the support pole in position.
7 . Take the shorter parts of the support poles and attach them to the bottom of the longer parts by screwing together.
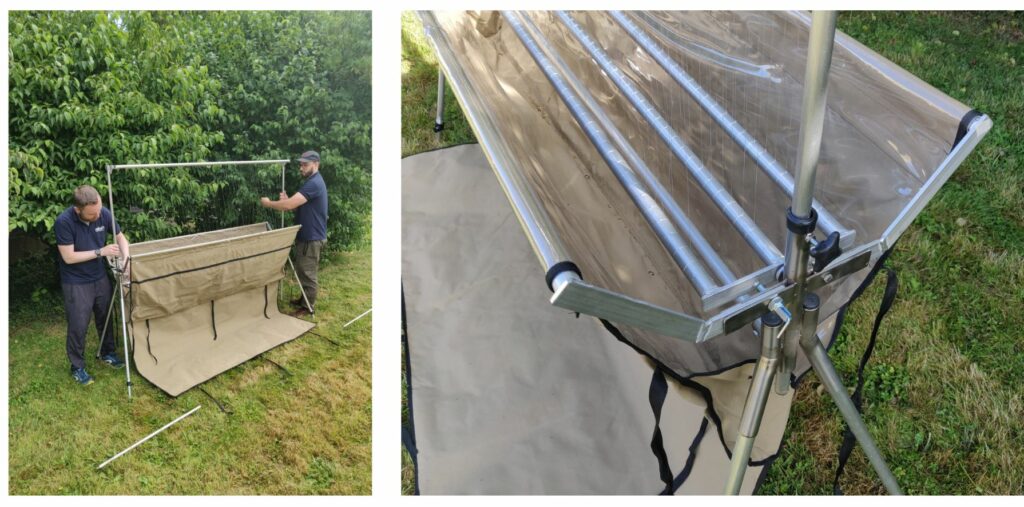
8 . With the support poles now at their full length, while holding on to them, loosen the star handled screw and continue to raise them, still working together and checking for any string snagging. Raise until the bottom of the pole is level (or as near as possible) with the bottom of the frame and tighten star handled screws.
9 . Engage both spring locking pins to secure the lower carriage.
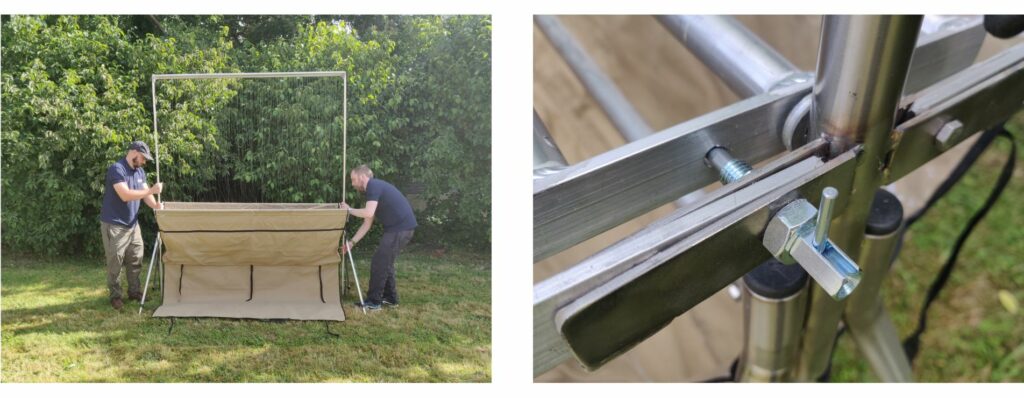
10 . If you are using them for stability, you can now peg out the guy ropes and your trap is ready for use.
Disassembly
1 . If used, pull out the pegs and store them carefully.
2 . Release the spring locking pins from both ends of the trap. Hold the support poles (one person at each end) and loosen the star handled screws to lower the poles.
3 . Continue to slowly lower the poles and as you do so, carefully start winding the bottom line carrier, taking great care to ensure no lines get tangled. Guiding the lines with your hand/arm is key. Keep lowering the support poles slowly and evenly while winding the line carrier until the support poles rest on the floor.
4 . With the support poles resting on the ground, tighten the star handled screw to hold the pole in position, unscrew the lower/short part of the support pole and safely place to one side.
5 . Hold onto the support pole, loosen the thumb screw, and continue to lower until the pole sits on the ground. If used, gather up the guy ropes, tie them up, detach from the frame and place safely to one side.
6 . Now lift the top carriage off from the top of the support pole, slide the pole out from the frame and place to one side. Continue to lower the top carriage, whilst winding the bottom carriage, until the top carriage sits on the main frame.
7 . Once the top carriage has been lowered fully, engage the spring locking pins and tighten the star handled screw to secure it in place, fold the arms of the catch bag assembly inwards until they meet, wrap the bag around the trap and tie the straps to secure.
8 . Remove the legs from the frame, working on one end of the frame at a time is easiest. If you have extended the legs, to aid storage, reduce them to their shortest length.

9 . Place the guy ropes and pegs back in the accessories bag. Put the legs and the support poles in the bottom of the carry bag and finally, carefully place the trap and accessories bag back into the carry bag, safe and sound, ready for next time.