Trail Camera Tips and Troubleshooting: Part 2

Whether you enjoy watching and learning about the wildlife that visits your garden, capturing footage of secretive wildlife on a holiday, or undertaking research on a rare species, there is no substitute for investing in a trail camera.

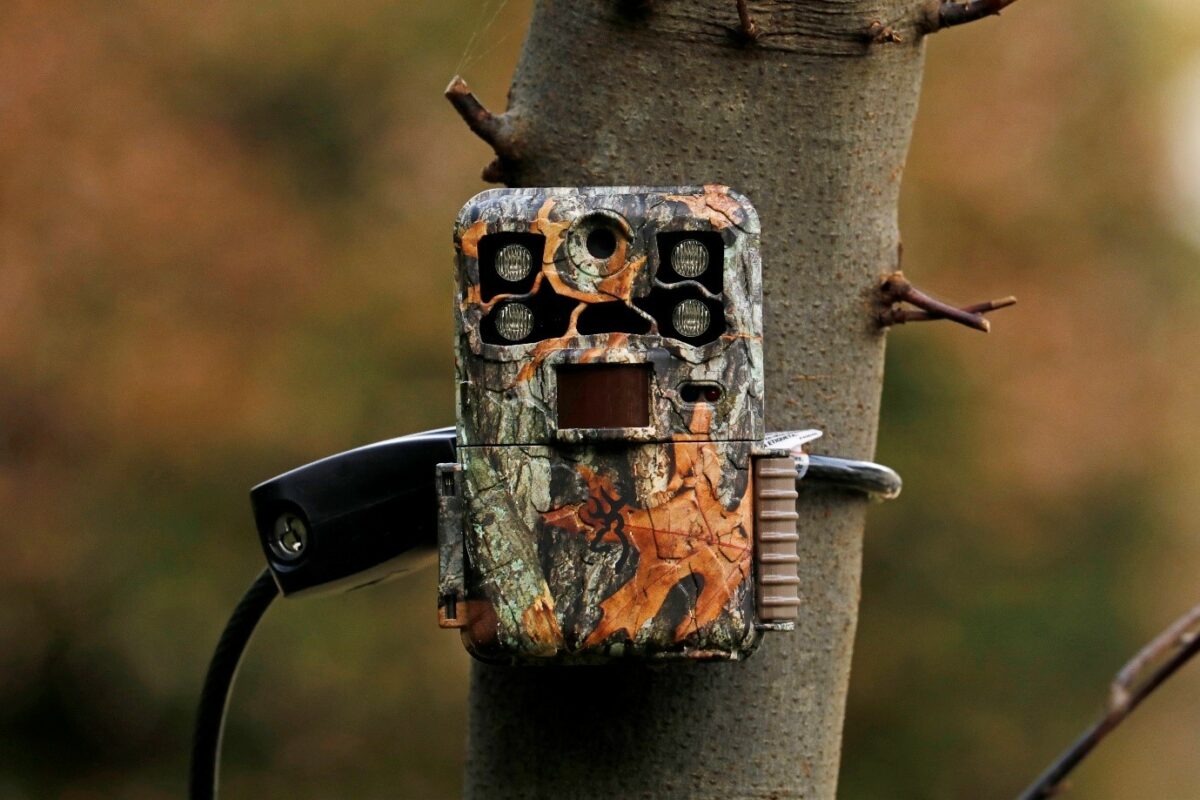
Browning Spec Ops Elite HP4

How and where you set up your trail camera has a significant impact on how successful your results will be. In this blog, we cover some key tips on how to best position your camera, choosing the ideal location, and which settings to use in different circumstances. If you are experiencing issues with your camera, check out part one of this series where we discuss the initial steps we advise you to take to help resolve or identify the problem.

Camera Settings

As a rule, it’s always best to become familiar with your camera and its different settings and capabilities by testing it at home before using it out in the field. Familiarising yourself particularly with the detection range, detection angle, the focal distance and the IR flash distance is the best way to help you gauge how far to place the camera from where you hope to see wildlife.

On most modern trail cameras there is the option to adjust the passive infrared sensors (PIR) which, along with motion detection, causes the camera to trigger. For most circumstances, having the sensor sensitivity set to high and the motion detection set to long-range will be the best option to avoid any disappointment from captures of only part of an animal, or missing something altogether.
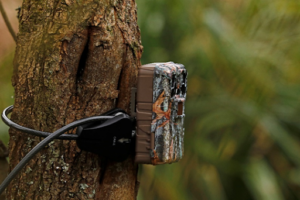
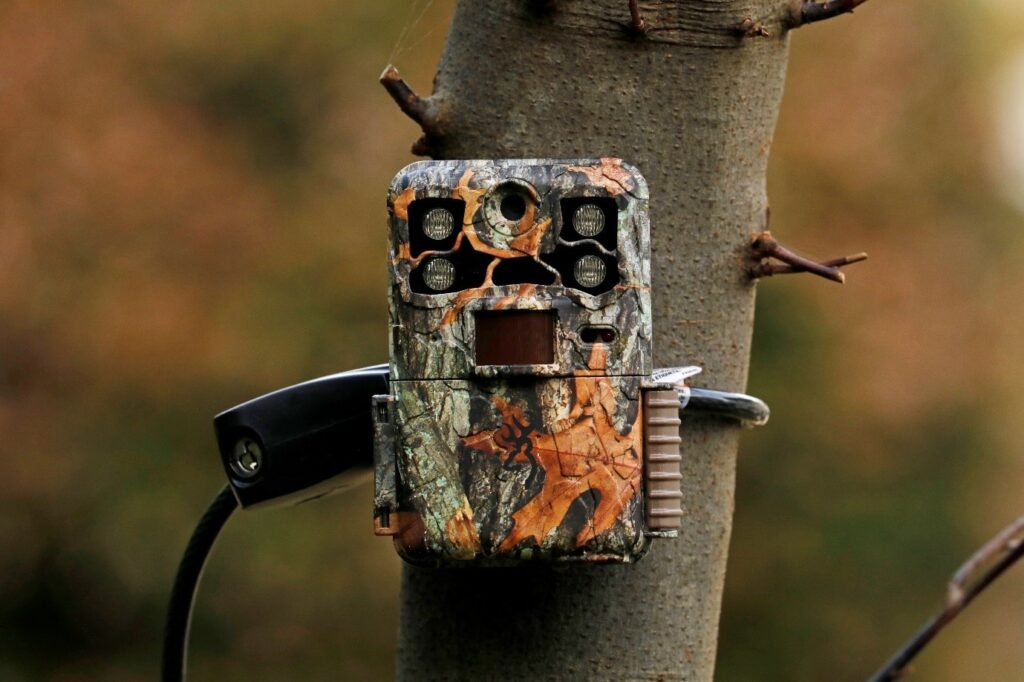
Browning Spec Ops Elite HP4

If you are focusing on birds or fast-moving mammals, such as mustelids or rodents, then the highest sensitivity setting and the fastest trigger speed (if adjustable), is very important. For larger and often slow-moving mammals, such as deer and ungulates, sometimes a slower trigger speed and reduced sensitivity can be better as the camera will then only trigger once the animal is more centrally positioned in the detection zone.
Some species have quite insulated bodies (hedgehogs for instance, due to their spikes), creating more of a challenge for the camera’s sensors, so again the highest sensor setting would be best for such species.

With high sensor sensitivity comes the increased chance of false triggers as well as high battery and memory usage, which can be exacerbated in windy conditions as moving trees, grass and falling leaves can all trigger the sensors. It is therefore worth choosing locations for your camera with minimal, light vegetation to avoid potential false triggers.

With many trail cameras, there is now the option to set the camera to only trigger during certain times of day. This is particularly helpful if you are targeting certain wildlife that you know to be strictly nocturnal or diurnal. In most other situations though, we would recommend keeping the camera set to trigger on 24 hours, so you don’t miss anything unexpected.

Location

When choosing where to leave your camera, the first consideration will be around security, and ideally, you want to ensure that the location chosen is not visible to the public.

Then, there are two main factors to consider when deciding on a specific location. Firstly, is there a particular species you have in mind, or do you wish to survey or monitor the general wildlife of a site.
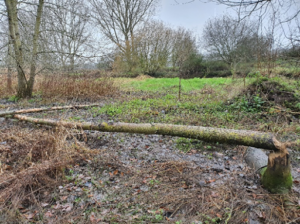
Image by Ian Watson-Loyd

If you hope to capture a particular species, then consider its habits and where it is most likely to be spending time within the landscape.

Many mammals have large home ranges but also have routines they regularly follow, even if that means only passing through a certain spot very infrequently, so some patience is usually necessary.

To increase your chances, think about how that species might move through the habitat and which areas they will be most drawn to, for example where there are reliable food resources, sources of water, good resting and denning sites, and existing pathways through vegetation.

It is also worth looking for any evidence that the target species is already present, such as tracks, droppings or feeding signs. These signs may reveal an animal’s movements and highlight an area they are currently frequenting where the camera could be left.

If you are investigating what species are present on a site, focusing on areas with high levels of activity is key. Most mammals will leave signs of their presence in prominent areas that tend to be used by other species too. The scent of one species will often attract the attention of another, particularly if it is a competitor.

Many terrestrial mammals move through the landscape in a similar way to people; they will often follow linear features and use paths of least resistance to avoid travelling through very dense undergrowth or steep terrain. In forests, most mammals also prefer to use trails and pathways already made by other species or people. This helps to avoid constantly brushing through vegetation, particularly after recent rainfall, when the understory foliage will be wet.

Image by Ian Watson-Loyd

Natural woodland clearings and rides, habitat edges and watercourses are all key areas to focus on, particularly for larger mammals. For smaller species that prefer to keep close to cover, consider old walls, hedges, boulder fields and scree, and fallen trees.

Within these habitats, it is worth looking out for particularly prominent features to set your camera up. Features to look for include natural bridges over water, shallow spots for drinking and bathing, or a conspicuous large tree or boulder that carnivores might use for leaving their scent or droppings when marking their territory.

Therefore, if you find a location with lots of activity, it can be worthwhile continuing to monitor it for a long period, as some species with large territories, such as apex predators and some mesopredators (medium-sized), may only pass by very occasionally.

It can sometimes be a challenge to find something suitable to attach your camera to once you have found a suitable location. A Python Mini Cable Lock is the best all-rounder for both security and flexibility when attaching the camera to a tree, post or even rocks. However, there are times when a tripod or tree bracket can be more suitable. Sometimes adding a wedge of wood between the camera and a branch can be a good solution to ensuring the camera is angled straight if all the suitable trees and branches around are tilted.

Lastly, it is best to try to conceal your scent as much as possible during the deployment of your trail camera, as too much human smell could deter some wildlife from the area, so give the camera a clean before and during deployment and consider wearing gloves as you set it up.

Positioning

It is best to avoid facing your camera directly east or west, as this can overexpose images as the sun rises and sets. Sometimes extreme brightness can also cause false triggers as the light and shadows move.

Most trail cameras will have a standard focal distance of around 1.5 to 2 metres, so it is important to allow this much distance between the camera and the area you hope to record activity. For small mammals, a close focus lens can be attached over the front of the camera lens to allow you to take sharp images at a closer range. This works best if you are specifically targeting small mammals such as rodents or shrews within an enclosed space, for example a hole in a wall, log pile or small clearing in dense vegetation where all the activity will be at close range.

Also consider how far away an animal might pass the camera too, particularly when thinking about nocturnal activity and the distance the flash comfortably covers. Although many cameras have impressive detection and flash ranges, the resulting images and videos can still be frustrating if the animal passing is too far away to identify. Factors such as a dense overhead forest canopy, moonlight and cloud cover can also all impact a flash’s results. Ideally, opt for a position where animals will most likely pass around 3–10 metres away. 

The detection angle of most trail cameras is around 45° degrees, so it is best that the spot you think most activity will occur should be central within your cameras’ field of view.

It is important to also angle the camera at the correct height for your intended wildlife. If the camera is angled too high or too low, it will miss some species or result in unsatisfactory images of only part of an animal.

A good guideline for many situations is to angle your camera at around adult human knee height to capture small to medium-sized animals at their height rather than looking down on them. Sometimes trail cameras do need to be positioned higher in various circumstances, but try to avoid human head height as this will draw more attention to the camera.

Most high-quality trail cameras now have large screens that allow you to check in real-time what the camera can see as you position it. This is an invaluable tool to ensure your positioning, distance, height and view are just right.

Aquatic Wildlife

Image by Ian Watson-Loyd

For species that use watercourses, successful camera trapping can be even more challenging. One of the considerations is how to safely and securely position a camera close to or above water. Generally, the best option to avoid any risk to the camera and potential false triggers is to focus on prominent banks, sandbars, culverts, beaches or shallow water edges. With these locations it should be easier to position the camera at a safe distance back from the water while overlooking a spot where aquatic mammals and birds are also more likely to investigate, feed, drink or leave their scent or droppings.

With rivers particularly, it is important to ensure the camera is a little higher off the ground in case of unexpected water level rises, and so sometimes a downward-facing angle is more suitable. For otters, large rocks or fallen trees can be popular spots for scent marking, while a small clearing or mound within dense vegetation or reeds is often favoured by water voles. For beavers, an exposed bank and beach close to a favoured food source is often a good option.

Image by Ian Watson-Loyd

Summary

When thinking about setting up your trail camera, for best results we recommend taking the following into consideration:

  • The target species, their behaviour and habitat usage
  • Settings to reflect the above (and testing at home before deploying in the field)
  • The angle of the camera, taking into account flora, angles of the sun and where the animals are likely to be within the camera’s viewing area
  • Aiming for your focal species to pass the camera at a distance of 3-10m 
  • Generally positioning the camera at human knee height works well

If you have any questions about our range or would like some advice on the use of your trail camera, please feel free to get in touch with our Wildlife Equipment Specialist team via email at customer.services@nhbs.com.

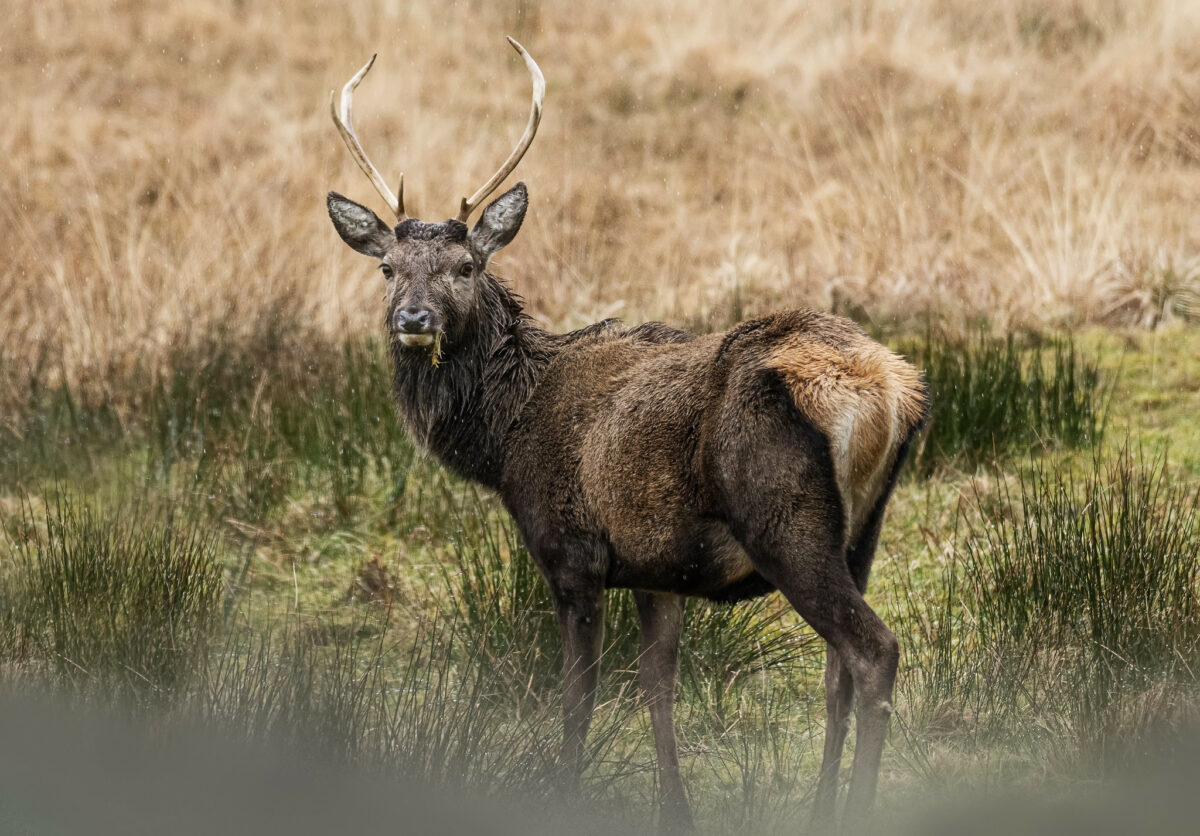
 

The NHBS Guide to UK Deer Identification

Deer are among the UK’s most elegant and familiar mammals and sightings of them in their natural habitat are always special moments, however these encounters can often be fleeting, and our views obscured.

This ID guide covers all of the native and non-native deer species that are found in the UK, and describes the key features to look out for to aid in their identification.

Deer are hoofed ruminants that comprise the family Cervidae. They are naturally found across Europe, Asia and the Americas and can be divided into two subfamilies, differentiated mostly by their bone structures. Most familiar in the UK are the Cervinae or old world deer subfamily, which includes the red, sika, fallow, Chinese water and Reeves’ muntjac. The Capreolinae (new world) sub family includes the roe deer as well as elk, reindeer and all the species found across the Americas.  

Of the six species found in the UK, only the red and roe deer are truly native, although fallow deer were thought to have been first introduced to Britain in the 11th Century from the Mediterranean region, so are long established. Three other species, the sika deer, Chinese water deer and Reeves’ muntjac are all more recently naturalised within the UK.

Identification of deer can be straightforward in some situations, but some species are similar and, when not seen well, identification can be a challenge. Two of the best features to focus on for identification are the rump and the antlers, if they are visible. Except for reindeer (caribou), in which both sexes grow antlers, and the Chinese water deer and musk deer, which lack any antlers, all male (stags) deer usually grow antlers, which they use in battles to access females (hinds) during the rut. Antlers are unique to deer and a great tool to look at to identify different species. However, they are shed every year after the rut, so although a striking feature, the rump pattern of deer is perhaps the most reliable feature to use for identification.

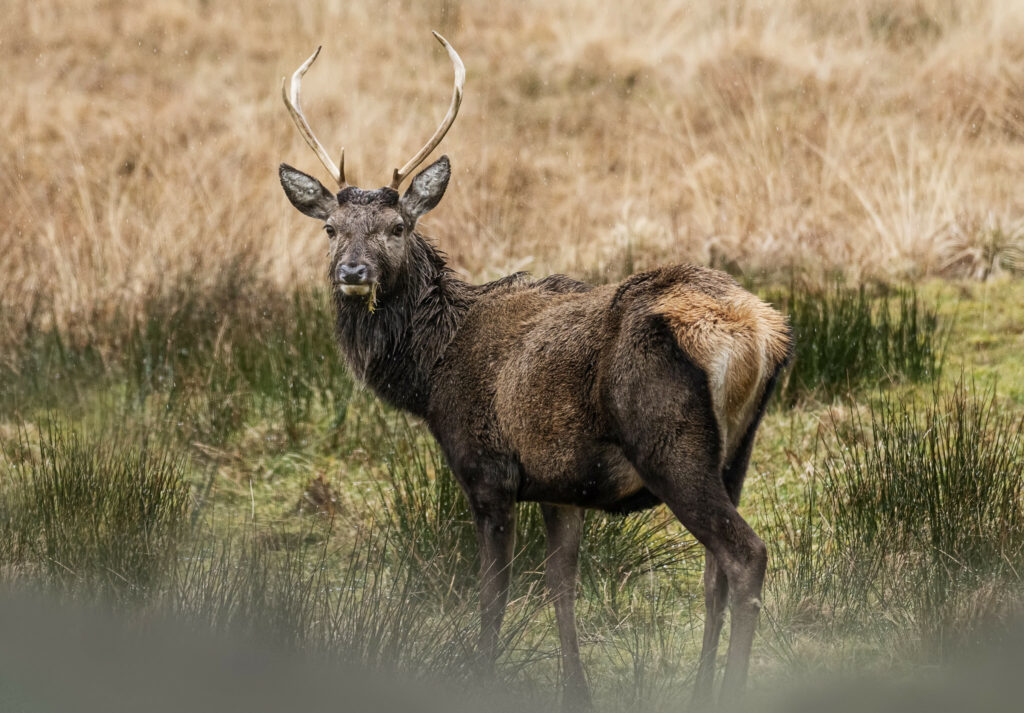
Red Deer (Cervus elaphus)
Red deer by caroline legg via Flickr

Distribution: Widespread in Scotland and abundant in the Highlands and Islands. Elsewhere populations occur in Cumbria, Lancashire, the Peak District and Pennines, Exmoor and the Quantock Hills, the New Forest, and East Anglia. There are also small populations in Wales and Ireland.

Head and body length: 1.6–2.6 metres for a male and 1.7–2.1 metres for females

Height at shoulder: 1.14–1.22 metres.

What to look for: Both our largest species of deer and land mammal, the magnificent stags can weigh in at around 200kg making them an impressive and noticeably large species. Look for their reddish-brown coat that lacks any spots or delineation of colour. Only their rumps and tails feature a paler buff cream colour. Another characteristic of red deer are their elongated faces and large ears.

Their favoured habitat is woodland, although in Scotland they have adapted to live year-round in more open treeless landscapes. Grasses make up the bulk of their diet throughout the year, but they will also browse on a wide range of shrubs, young trees and bark, brambles, bracken and heathers. Sika deer are the most similar looking and the two species have hybridised in several regions. Sika have white spots in summer and darker brown coats in winter with shorter faces. Hybrid red and sika deer tend to resemble smaller darker red deer than they do sika.

Antlers: The antlers of mature stags are wide and branching with usually 8 sets of points per antler that curve upwards and sometimes in on themselves. Younger males have short unbranched, straighter pointed antlers.

Rump: A soft creamy colour with a very short russet-brown tail.

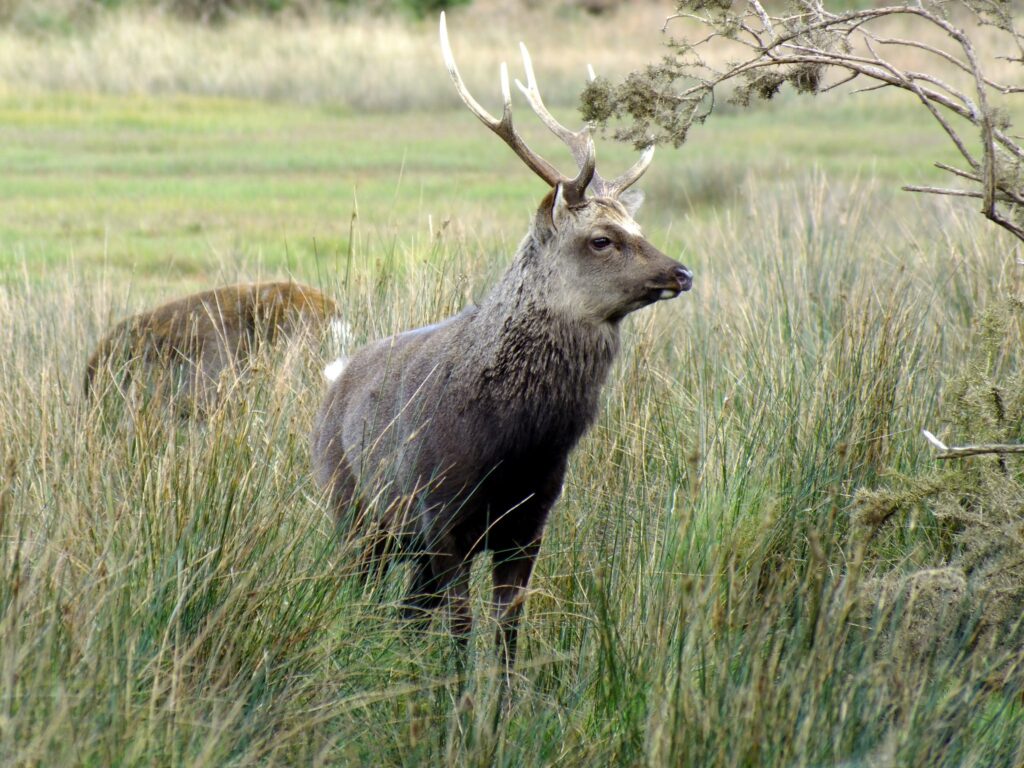
Sika Deer (Cervus nippon)
Sika dear by Chris Parker via Flickr

Distribution: Sika deer are native to Japan, Korea, Taiwan and far eastern Asia, but escaped into Britain from collections in 1860. Since their initial introduction in 1860, they have naturalised and spread to many regions. Population strongholds include Dorset and the New Forest, Lancashire and Cumbria Northern England, the Scottish borders and the Highlands.

Due to their genetic similarities to red deer, sika deer are thought to have hybridised with the native red deer in several regions, particularly in the Scottish Highlands. Sika prefer to keep to woodland cover more than red deer which have adapted to feeding in more open habitats. 

Head and body length: 1.2–1.9 metres for a male and 1.1–1.6 metres for female.

Height at shoulder: 1.07–1.22 metres.

What to look for: Sika are very similar in appearance to red deer and the two species do interbreed in many regions. They are noticeably smaller than red deer and in summer they have white spots on their coats, but thick and often dark (sometimes almost black) coats in winter.

Their diet and feeding habits are very similar to red deer, with grasses and heather making up the bulk of their diet, but they will also browse on both deciduous and coniferous trees, gorse, holly bark and acorns. They are however generally less social than red deer and outside of the breeding season, both males and females can be solitary with females forming only small herds with young.

Antlers: Similar to those of red deer, but thinner, lighter coloured and less complex with usually only 4 points per antler.

Rump: A conspicuous white rump patch with a dark edge and a short white tail with a single thin dark dorsal stripe along its length.

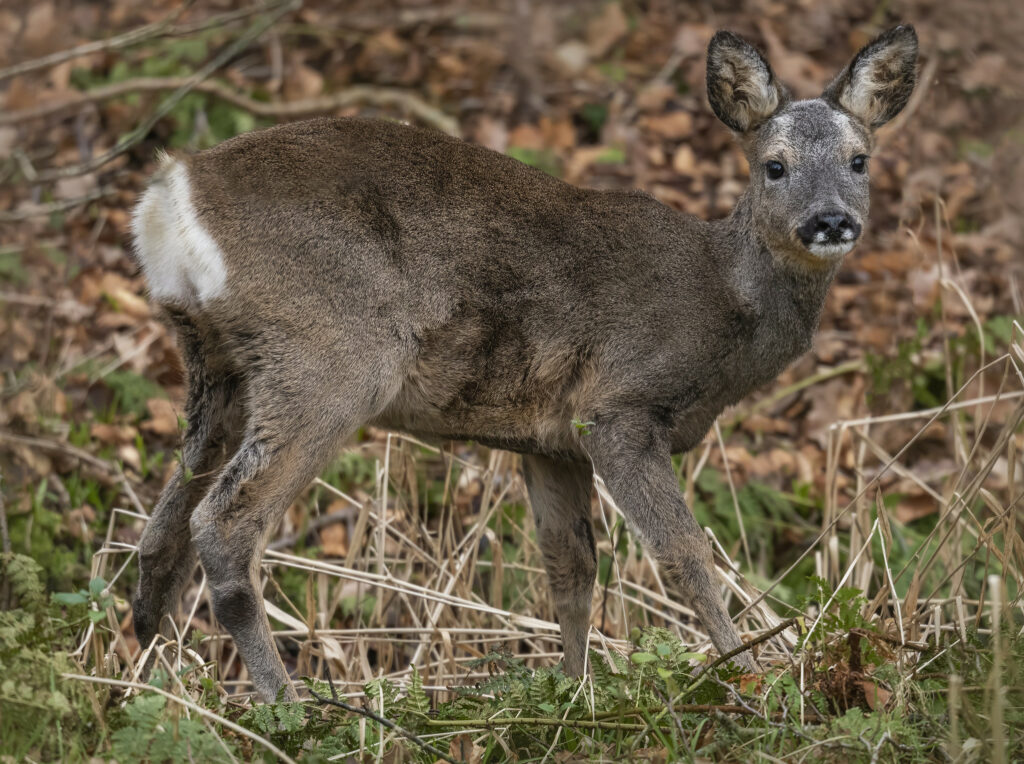
Roe deer (Capreolus capreolus)
Roe deer by caroline legg via Flickr

Distribution: A woodland specialist that’s rarely found far from some woodland cover, although they are increasingly using hedgerows and scrub as cover within more agricultural and urban landscapes. They are widely distributed throughout the UK but absent from Ireland, with the greatest population densities found in Scotland.

Head and body length: 0.95–1.25 metres

Height at shoulder: 0.6–0.75 metres

What to look for: A medium sized lightweight deer with a long neck and uniform brown coat. Other features that distinguish them from the larger deer include shorter muzzles and a clean white rump patch. In summer their coats turn a rich reddish brown and appear sleeker, while in winter, the coat turns a thicker and dark more peanut brown. 

They are mostly solitary but sometimes form small family groups with young, particularly during the winter. They browse a wide variety of trees, shrubs and herbs including bramble, heather, and rosebay willowherb but during the autumn will also feed on the ground on fruits, acorns and occasionally fungi.

Antlers: Short and mostly vertical, they are rarely much taller than the head, with only 2 or three points per antler. With a close view, the antlers can often appear particularly velvety or crusty at the base, depending on the season and growth stage.

Rump: The patch varies between the sexes, but both have a clean white patch and no visible tail. Males have a kidney shaped white patch, whereas females have more of a round shape.

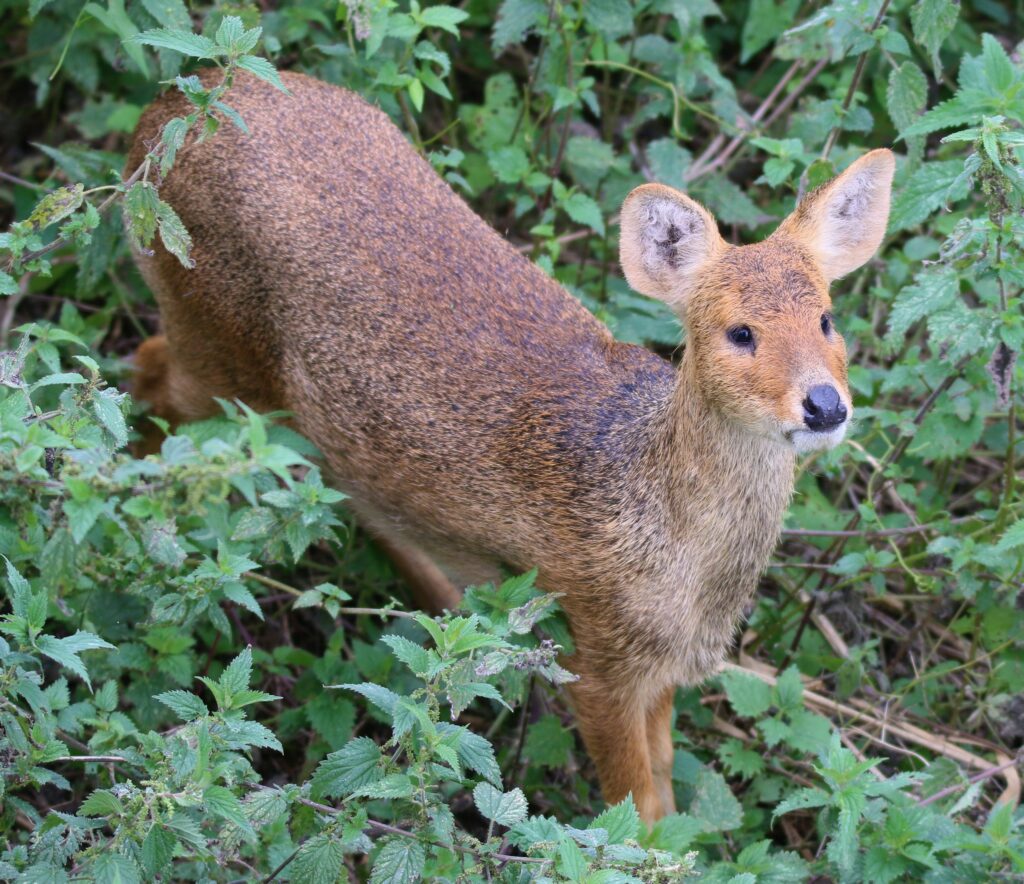
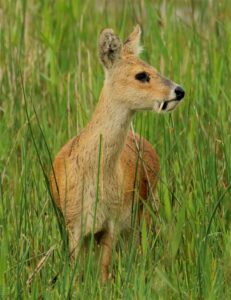
Chinese water deer (Hydropotes inermis)
Chinese water deer by Nick Goodrum via Flickr

Distribution: The Chinese water deer is a native of eastern China and Korea but has formed a naturalised population in England after escaping from Woburn Park in Bedfordshire towards the end of the 19th Century.  They’re found throughout most of East Anglia and a more scattered population in the southeast-England where there is suitable habitat. The strongholds include the Norfolk broads and Cambridgeshire fens. The population trend is increasing, with over 1500 individuals and their distribution is also expanding. Interestingly, it is thought that due to population decline in their native range, the British population may now represent a significant part of their world population, despite not being a native species. 

Head and body length: 1 metre

Height at shoulder: 0.7–0.95 metres.

What to look for: A small and uniformly light brown (sometimes greyish) coloured deer with large, rounded ears and a distinctive black nose. They are strongly associated with freshwater marshland habitats where they feed on coarse grasses, reeds, herbs and aquatic vegetation. Chinese water deer are solitary and secretive, preferring to keep close to cover and use both woodland close to wetlands and reedbeds. They will occasionally forage in farmland but prefer to keep close to cover.

Chinese water deer by Nick Goodrum via Flickr

Males have impressive and prominent downward pointing tusks instead of canine teeth that can be seen with a close-up view. These tusks are used during the rut, mostly for display purposes between rival males and to impress females. They are quite a distinctive looking deer with a more unusual almost bear-like face, although their secretive nature means that obtaining good views can be difficult.

Antlers: This species lacks any antlers.

Rump: Their rear and short tail is the same pale brown colour as the rest of their coat. 

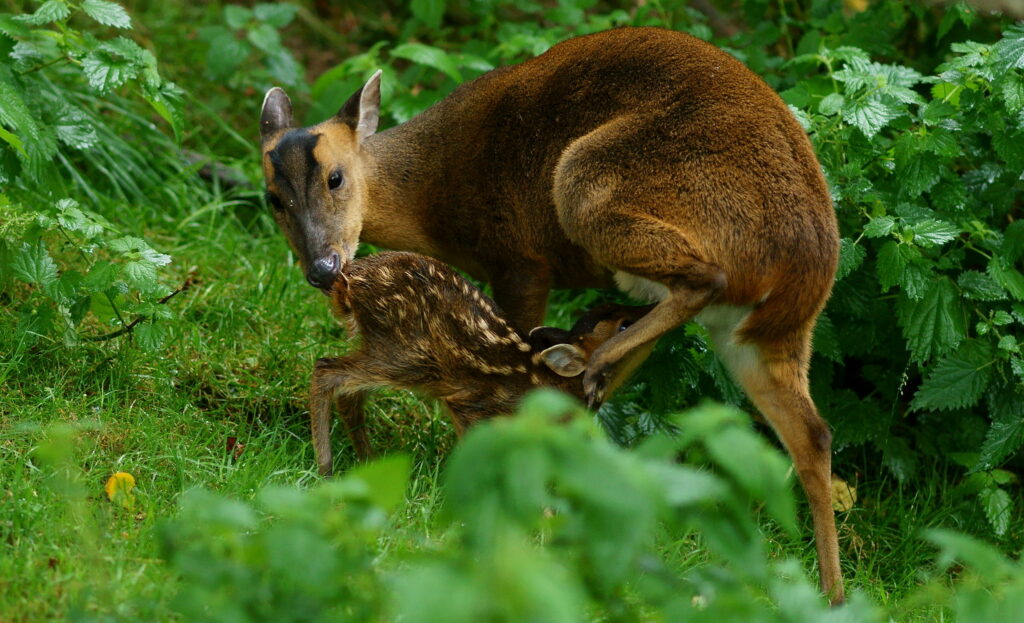
Reeves’ muntjac (Muntiacus reevesi)
Reeves’ muntjac by Peter Trimming via Flickr

Distribution: The Reeves’ muntjac is also native to China and again its UK population derives from escaped individuals from Woburn Park in Bedfordshire from 1901. They are now abundant and found throughout southern, eastern and central England spreading rapidly into southwest-England, Wales and southern Scotland. Since 2000, a population has become established in Ireland and Northern Ireland.

Head and body length: 0.9–1 metres

Height at shoulder: 0.45–0.52 metres

What to look for: A very small, robust and stocky deer that often appears to have a hunched-over appearance due to its short neck, arched back and tendency to walk with its head facing down to the ground. The coat varies from a deep russet brown in summer to a greyer and paler brown in the winter. The face is short and squat with a characteristic set of black stripes creating a V shape on the top of the head. Male muntjac also have slightly protruding tusks but they are much shorter than those of Chinese water deer and rarely visible without a close view.

Muntjac favour dense undergrowth within both deciduous and coniferous woodland but will also thrive within urban environments with suitable cover. They browse woodland leaves and flowers during the spring and summer including some scarce woodland ground flora species. During the autumn and winter their diet switches to nuts, fungi and grasses.

Antlers: A single very short point that curves back.

Rump: The rear patch and tail are the same reddish-brown colour as the back. The tail is short but when alarmed it will often raise the tail revealing the white underside.

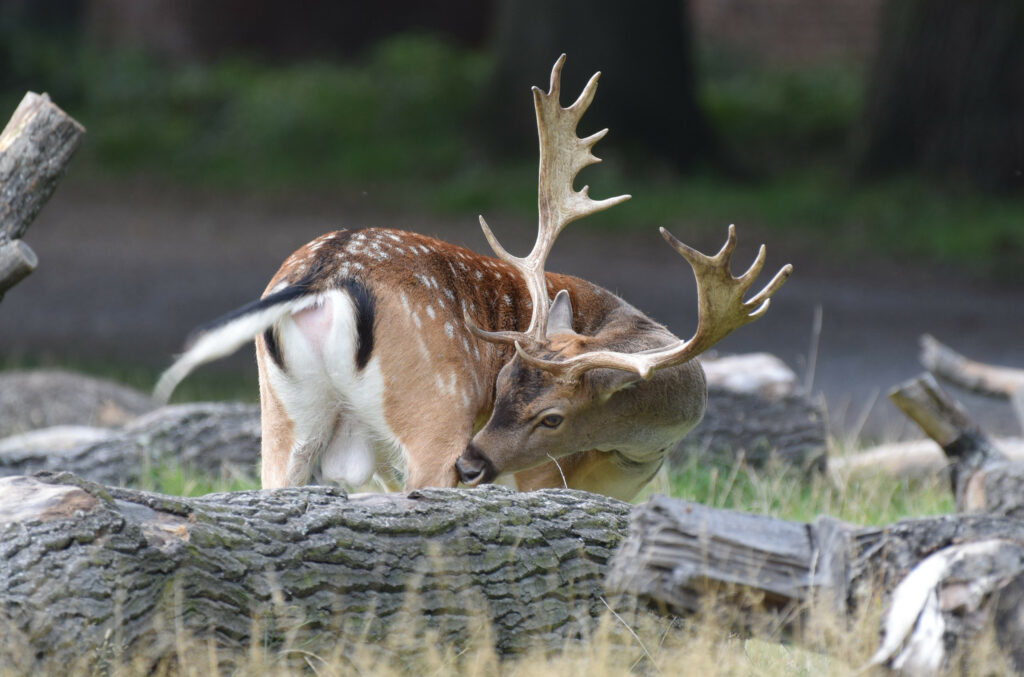
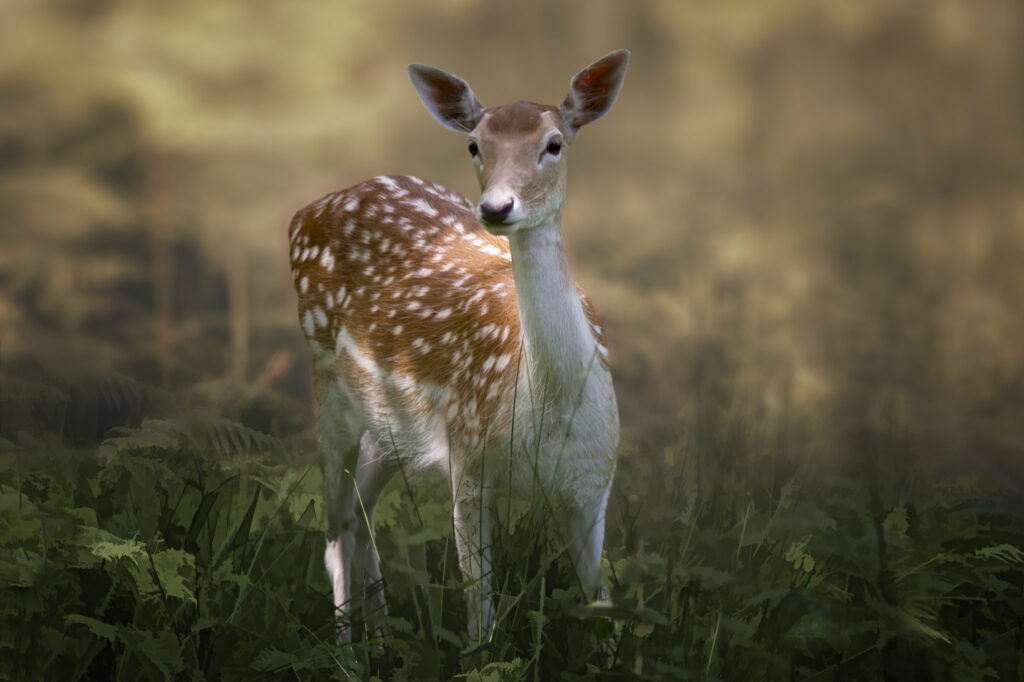
Fallow Deer (Dama dama)
Fallow deer by Heather Smithers via Flickr
Female fallow deer by Steve Slater via Flickr

Distribution: Introduced to Britain for hunting in the 11th Century and to Ireland in the 13th Century from the Eastern Mediterranean, the species is now found throughout England, with more scattered populations in Wales and Scotland.

Head and body length: 1.45–1.55 metres for a male and 1.30–1.45 metres for a female.

Height at shoulder: 0.7–0.95 metres

What to look for: Fallow deer are quite variable in their appearance due to their wide range of pelage (hair). Typically, most individuals have some conspicuous white spots on pale brown, fawn or gingery coats in the summer and then dark brown coats with only faint or no spots in the winter. There is a great range of variation within this species though with some individuals and populations remaining very dark or very pale throughout the year, some of which can be melanistic. Fallow are medium sized deer that are very social, often forming large herds that remain together throughout the year.  Due to their numbers, they also leave conspicuous signs of their presence such as runs and tracks in frequented areas.

Their preferred habitat is open deciduous woodland but will also use farmland and woodland edge habits if there is cover close by. Fallow deer are grazers with grass forming most of their diet, although they will also eat nuts and browse on heather, holly and some deciduous trees to a lesser extent.

Antlers: Very large, broad and palmate shaped with numerous spikes.

Rump: A clean white rump with a dark outside edge. The tail is long and appears mostly black because of a long black stripe that runs down the course of its length, but the underside is clean white.

Further Reading:

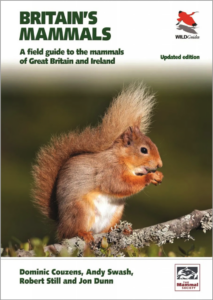
Britain’s Mammals: A Field Guide to the Mammals of Great Britain and Ireland

£17.99


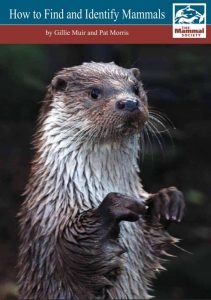
How to Find and Identify Mammals [Revised Edition]

£11.99


Mammals of the British Isles: Handbook, 4th edition jacket image

Mammals of the British Isles: Handbook

£34.99


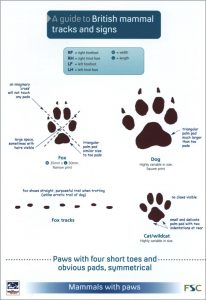
A Guide to British Mammal Tracks and Signs

£3.75


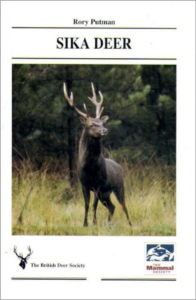
Sika Deer

£4.99


Chinese Water Deer

£4.99


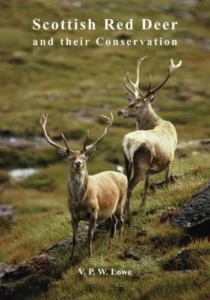
Scottish Red Deer and Their Conservation

£27.99


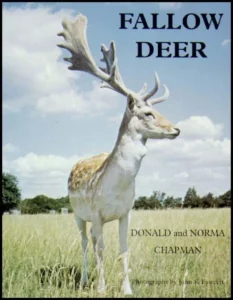
Fallow Deer

£22.95


Muntjac and Water Deer: Natural History, Environmental Impact and Management

£34.99 

All prices correct at the time of this article’s publication.

NHBS In the Field – Browning Recon Force Elite HP4

Fast becoming one of our most popular trail cameras, the Recon Force Elite HP4 delivers outstanding quality video, super-fast responses and some great new features, all for excellent value.

The model joined the ever-growing suite of highly regarded trail cameras offered by Browning at the start of 2021. What sets the Recon Force HP4 apart is that, while introducing some useful new settings and providing generously rich image and video resolution, it doesn’t stretch the budget too much, the way some of the higher-end trail cameras currently do.

With the HP4, Browning has successfully found a way to keep the cost of a top specification camera reasonable without compromising on any of the quality they are renowned for. After some time experimenting with this camera, we feel sure that it is set to become one of our most desirable models, fulfilling every need you would have for a trail camera.

As is the case for most of the high-spec Browning trail cameras, the HP4 includes a front-facing colour screen, but at a bumper 5cm in size, this screen really is ideal for reviewing footage while in the field, particularly if you are capturing smaller wildlife. It also can’t be stressed enough just what a great aid this large screen is when setting the camera up, as it is so much easier to check that the camera’s positioning, angle and height are all set as desired before deployment.

Despite increasing the screen size, Browning has still managed to reduce the overall size of the camera itself, which is handy when it comes to transportation, discreetness and ease of attachment to trees. The back of the camera features a sturdy metal bracket for threading a strap or cable lock through, as well as the usual tripod screw on the underside, giving you plenty of options for mounting the camera.

Some of the more notable features of the HP4 include its smart IR video, which continues capturing video as long as an animal continues to be active in view of the camera, with recordings lasting up to a maximum of 2 minutes in daylight and 20 seconds at night. Its SD card management function is another useful addition, providing the option to overwrite older images on the card if the memory gets full.

Using its top-quality specifications, the Recon Force HP4 reliably and beautifully documents the wildlife you wouldn’t normally see and is both versatile and affordable enough that it should be suitable for most circumstances.

How we tested

For an insight into the camera’s performance and its suitability for different circumstances, we used the camera in a variety of habitats where the behaviour of different wildlife could test the camera’s range of functions. After setting the camera up with a full set of AA batteries and a 32GB SD, we first focused on smaller mammals by using the camera in a low canopy broadleaved woodland setting. We used a Python Mini Lock to secure the camera to a suitable tree and positioned the camera overlooking a small woodland clearing where a few peanuts were scattered. We left the camera out here for two days and nights under the following settings:

Mode: Trail Cam; Photo Quality: Ultra; Photo Delay: 1 Secs; Multi Shot Mode: Off; Image Data Strip: On; Motion Detection: Long Range; Trigger Speed: Fast; IR Flash Power: Long Range.

The camera was then moved to a more open garden setting, where we focused on video. We set the video length to 10 seconds, but also turned on the smart IR video function.

Motion tests were performed before leaving the camera running, which is a very convenient feature to ensure that the triggers are operating as expected before deployment. This simply works by checking that a red low glow is emitted when waving your hand in front of the camera.

We also tried out the programmable stop/start timer, which informs the camera to only trigger during specified timeframes. This is another very useful feature, especially if, for example, you are targeting only nocturnal or diurnal wildlife or baiting a site and wanting to avoid excess triggers from unintended species that may be attracted to a bait during the day/night.

What we found

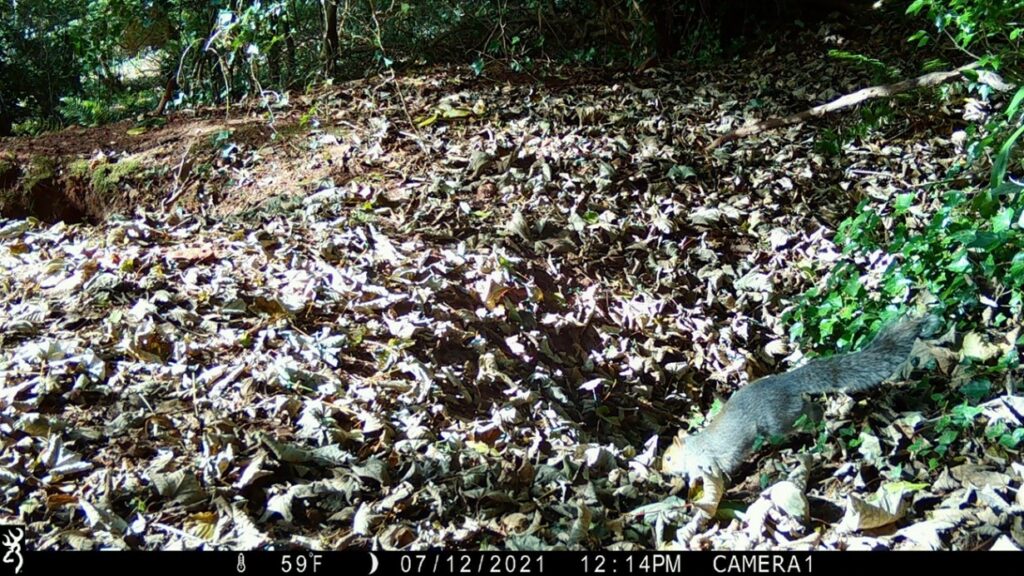
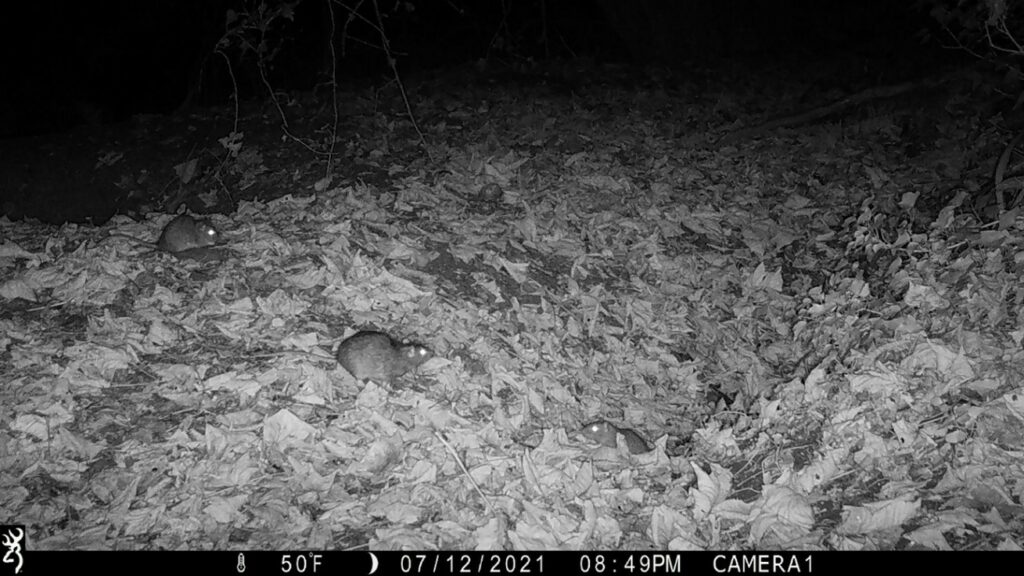
Under these settings, the camera captured significant activity from brown rats at night and grey squirrels during the day. In terms of still images, which are captured at 22MP, we felt that the quality, colour contrast and detail recorded is fantastic and the black and white IR images were not too grainy.

It was interesting to see that with the 1-second photo delay, whole sequences of squirrels finding and then burying peanuts in front of the camera were nicely captured, just like a broken-down video, showing the camera wasn’t missing any action in front of it.

Even when a fast-moving squirrel was leaping in and out of frame, most of the images captured were sharp, showing the value of the impressive fastest trigger speed setting of 0.2 seconds (s). It is worth noting, however, that this fast trigger speed did result in many captures of animals just as they were entering the field of view, rather than more in the centre.

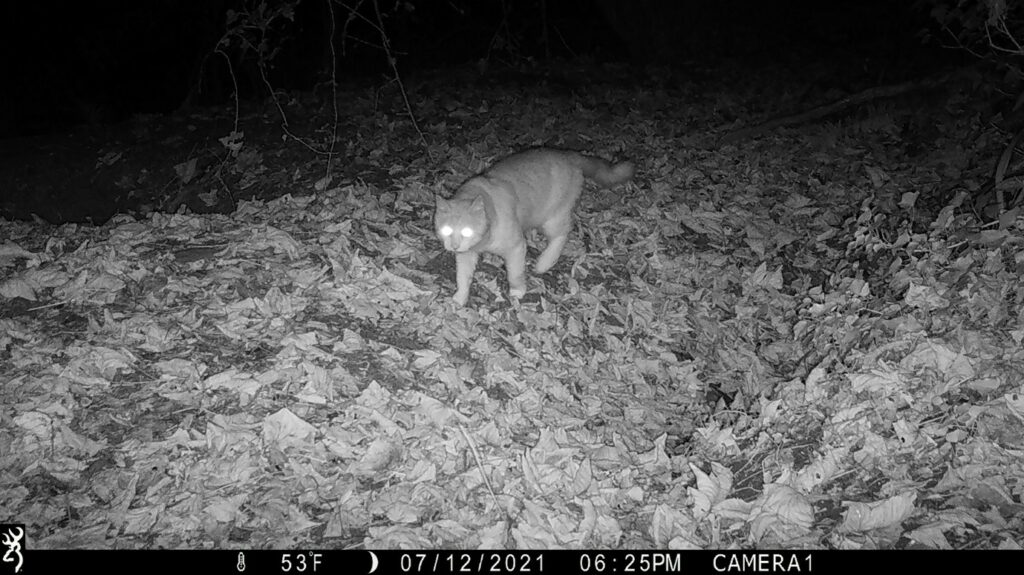
In response to this, we adjusted the trigger speed to the slower 0.7s to see how this affected the captures going forward. This resulted in some captures of rats further into the centre of the image. Also, when a slow-moving domestic cat approached the area, the first capture was made once the cat had made its way into a fairly central point of the frame, resulting in a more useful image. This demonstrates the value in having an adjustable trigger speed, which allows the user to customise the set-up to the particular circumstances or the habits of target wildlife.

The Recon Force HP4 boasts a great infrared sensor with a detection range of 34 meters and utilises new long-range LEDs, so it was very encouraging to see the camera triggering when a rat was passed by at approximately 5 meters away, outside the main detection zone and partially obscured by leaf litter. Although we have not yet had a chance to put the full detection distance to test, we already feel from these captures that the detection and trigger speeds can be relied upon.

It is worth noting though that for small mammals and birds, they can often be a challenge to identify unless they are triggered very close to the camera and within the core detection zone.

When testing in the garden setting, we hoped to capture foxes but instead recorded several domestic cats alongside garden birds. Here we decided to also test the smart IR video which worked well and resulted in 20-second night videos of cats sniffing around while they remained in view.

This setting proved particularly helpful when the camera was later returned to the woodland and was triggered by a passing badger. The recording did not end until the badger had fully left the frame. Using this function therefore greatly reduces the risk of interesting behaviour being missed just because a video has been timed out by default.

After reviewing the video footage, we were first struck by just how sharp and smooth the quality was at 1920 x 1080 taken at 60 frames per second, revealing plenty of detail both during the day and at night. The level of detail produces attractive footage that could perhaps help with the identification of individual animals.

It was also a pleasing result that we found no false triggers under both the long and normal detection range and the fast and normal trigger speeds, even under some windy conditions.

Our opinion

We would have no hesitations in recommending the Recon Force HP4 for both serious naturalists, researchers and even a first-time user looking to capture reliable and quality footage in their garden or local area.

Certainly, one of the most practical features is the large 5cm colour screen which really does make a difference to set up, alongside the no-nonsense menu navigation and instruction manual. Even those that are not so technically minded should have little problem using and enjoying this camera. Large front-facing screens are by no means unique to this model, but most others are usually significantly higher priced.

The super fast picture trigger and recovery speed of 0.01s and 0.6s respectively and video trigger and recovery speed of 0.38s and 0.7s, shouldn’t fail to capture anything, but the trigger speed is adjustable which is great for flexibility. Depending on the circumstances of your detection zone and what wildlife you are targeting, switching to the slower trigger speed could be more convenient, for instance for recording slow-moving large mammals, so this function covers you for all options.

One aspect to consider is that it lacks a hybrid mode that would enable both video and still images to be captured simultaneously, which can be useful in many circumstances. It is also worth being aware that the HP4 is a red ‘low glow’ camera, and the discreet red light emitted during night-time triggers did appear to draw occasional minor attention from some wildlife on occasions. But as is often reported, most wildlife is not spooked or adversely affected by this, so the most important reason to opt for a No Glow camera instead would be if using the camera in public areas.

The field of view is 40.2°, just slightly narrower than that of a similar model, the Browning Strike Force HD Pro X. Based on our findings however, it is hard to see that this minor difference will have any significant impact on your success rates.

We found that the images and videos captured during the depths of night were particularly impressive and significantly less grainy than many older models. The sharpness and colour contrast is very aesthetic and allows for details such as fur texture to be visible on even the smaller animals.

Other highlights we found included the relatively wide range on the adjustable trigger speed, and the smart IR video which made the most of the behaviour being captured.

To conclude the HP4 is an outstanding trail camera that builds on Browning’s long-standing reputation for durable, easy-to-use and high-performance trail cameras. Even if you are considering a more entry-level trail camera, after seeing the quality of videos this camera produces it would be hard to resist not treating yourself to this camera as an upgrade, given its price.


The Browning Recon Force HP4 can be found here. Our full range of trail cameras can be found here.

If you have any questions about our range or would like some advice on the right product for you then please contact us via email at customer.services@nhbs.com or phone on 01803 865913.


NHBS In the Field – EasyLog USB Temperature and Humidity Logger with LCD Screen

The Easylog USB Temperature and Humidity Logger with LCD Screen (EL-USB-2-LCD) from Lascar electronics is a great addition to any field kit bag. This is one of the most popular models in the EasyLog range, offering a very high degree of accuracy for its recordings, measuring a range from -35°C to + 80°C, plus a humidity range from 0 to 100% RH.

What’s in the box

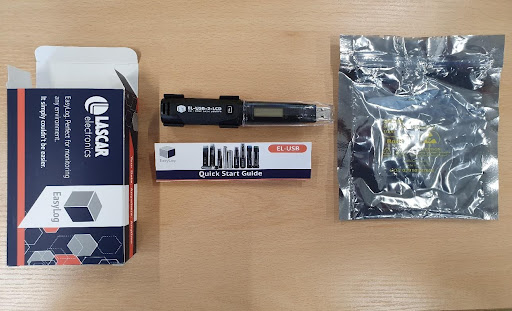
The EL-USB-2-LCD is packaged inside a static shielding bag and comes with a translucent plastic cover to protect the USB stick. A quick start guide is included with clear step-by-step instructions on set up, replacing the battery and a mini-guide to the different LED flash alarms.

Setting up

The first step in preparing to use your EL-USB logger is to download the EasyLogUSB software from the website here.

The software is free to download and is compatible with 32 bit and 64-bit versions of Windows 7, 8 and 10. Please note that the software is not compatible with Apple or other devices not specified.

Once installed you will need to insert the logger into a USB port and click the Setup and Start USB data logger which will take you through a series of steps to calibrate and personalise your logger, ready for use. This will give you the opportunity to set the parameters of the logger to your requirements.

Some of the features of the logger that can be customised include:

  • Logger name
  •  °C / °F
  • Logging rate (10s, 1m, 5m, 30m, 1hr, 6hr, 12hr)
  • High and low alarms
  • Immediate, delayed, and push-to-start logging
  • Display off, on for 30 seconds after button press, or permanently on
  • Data rollover (allows unlimited logger by overwriting the oldest data when memory is full)

Once the setup is complete, you will receive a confirmation message and the logger should then be removed from the USB port, to preserve its battery life and cool down before use. It is now ready to go.

Use in the field

We tested the logger on the banks of the River Dart in south Devon in early August 2021. We set the logger to record every 10 seconds and monitored the site from mid-morning to early afternoon.

When using the logger, always keep the clear plastic cap on to protect it from the elements. When ready, start the recordings using the single button.

This button can be used to navigate between settings, although we found it rather stiff, requiring a firm push for activation. The LCD screen then displays the live temperature or humidity reading (you can switch between the two) and previous maximum and minimum readings for both too. The little LED for both will also flash to indicate when recording is in progress and will alert you to any temperature or humidity alarms, if reached, too.

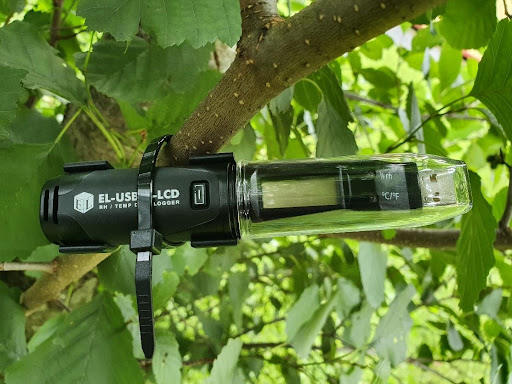
In many circumstances, where the logger is being used to record temperature or humidity at a static field site, it can be attached to a tree, cane or post via a cable tie or tape, or placed in a secure location. Alternatively, it can be simply carried or clipped onto a belt/lanyard if needing to accompany a surveyor along a route.

We found the accuracy of the readings superb and far more sensitive than those that might be produced by, for example, a phone. The device is small, lightweight, and easy to navigate, so is ideal for taking out into remote or inaccessible locations. It can be equally as helpful for constant monitoring, for instance when checking incubators, animal habitats and enclosures, or even a room or fridge. With an impressive battery life lasting up to two years and the capacity to store 16,000 temperature and humidity readings, it’s a particularly versatile logger, suitable for many circumstances.

The EL-USB-2-LCD is also one of the EasyLog’s most robust models with a sturdy casing that has been tested to IP67 standards. And so, when the protective cap is correctly fitted, it has excellent protection against water and dust.

Software

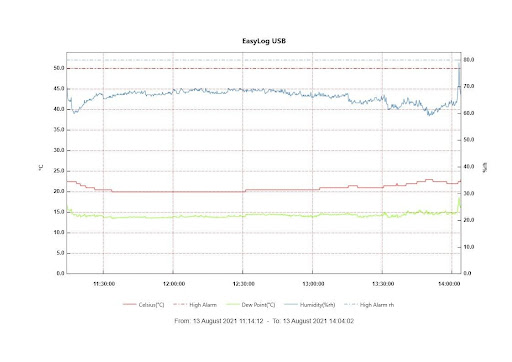
Once you have collected your readings, insert the logger back into a USB port and click the Stop USB Data Logger and Download Data. The data will then be transferred to your computer and can then be viewed. The display will first default to show your temperature, humidity, and dew point readings all in an axis graph.

Here is an example we produced from our readings:

Below is a key to the graph information.

  1. Vertical axis, including scale and unit
  2. Horizontal axis, including time-related information
  3. Data logger name
  4. Low alarm trigger level, a horizontal dashed line
  5. High alarm trigger level, a horizontal dashed line
  6. Plotted data line
  7. Marker line that follows the mouse pointer
  8. Marker line data for the current marker line position, or the logging period if no marker line is shown

Within the top toolbar, there is the option to save, export, zoom in and out, and switch from a graph to a data view. Under the view tab, you can also sort and organise your data under very useful different parameters that include data range, gridlines, mark samples, statistics, and data view.

Each of these tools can help further filter or analyse your results. Then using the Export function, you can easily produce and extract professional reports saved as either CSV data files, JPEG images, a PDF document of the data, a graph summary, or an Excel spreadsheet.

We found that extracting specific information from the data was quick and straightforward with these functions. The toolbar is kept simple so that the display does not appear cluttered with too many options and functions. Overall, the software is very intuitive to navigate.

Summary

Although there is now a wide range of temperature and humidity loggers available to choose from, the outstanding accuracy of this model, alongside its customisable features and tough weather-proofing makes the EL-USB-2-LCD a standout choice.

The EasyLog range starts with the entry-level EasyLog Mini USB, which is limited to only recording temperature and at 30-minute intervals. At the top end of the range is the EasyLog Professional Data Logger which covers the greatest temperature ranges, offers the longest battery life (3 years), recording capacity (32,000) and the most flexible parameter settings, including the option to record every second.

We find the EL-USB-2-LCD to be the best ‘all-rounder’ within the range, covering both humidity and dew, as well as a wide range of temperature recordings, all at an affordable price. We also feel it has an advantage over the similar EasyLog USB Temperature and Humidity Logger. For a relatively small increase in price, we found the LCD screen a particularly useful addition when out in the field, as we could check the live temperature or humidity before starting a survey or prolonged recording session. This screen also reassures you that your logger is working correctly, which is valuable if taking the logger out to a remote location, for example.

Users can rest assured knowing that their readings will be highly accurate and that their data can be also quickly converted into effective reports through the excellent software.

Overall, we found the EL-USB-2-LCD superb and would recommend this model for its versatility, accuracy and fantastic settings that should cover most needs and circumstances.


The EL-USB-2-LCD can be found here. Our full range of EasyLog products can be found here.

If you have any questions about our range or would like some advice on the right product for you then please contact us via email at customer.services@nhbs.com or phone on 01803 865913.


NHBS In the Field – The Anabat Scout product review

Here we review the Anabat Scout from Titley Scientific. The Scout is an easy to use active bat detector that offers excellent quality live audio and recording, plus many handy surveying features and durability that sets it apart from other detectors. It uses heterodyne, auto-heterodyne and frequency division audio that can be recorded in either full spectrum or zero crossing files.
Designed with professional surveyors as well as the more serious bat enthusiast in mind, the Scout is an ideal detector to take on bat emergence and transect surveys. This is thanks to great features such as a bat counter and GPS tracking transect mode.

How we tested

In early July 2021, we tested the Scout outside an old barn in South Devon to monitor the dusk emergence of several bat species. The building was known to host many common pipistrelles, brown long-eared, lesser horseshoes and some myotis species. We wanted to see how easy the detector was to use in the setting of a busy emergence and get a feel for its recording quality and its special features. The audio was set to auto-heterodyne to see how good this feature would be with multiple bats close by. Under the trigger settings is the option to adjust the sensitivity, which we set to high as there was unlikely to be too much undesired noise in this setting.

What we found

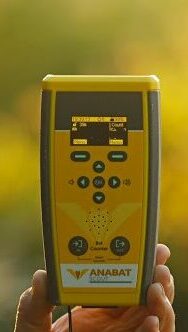
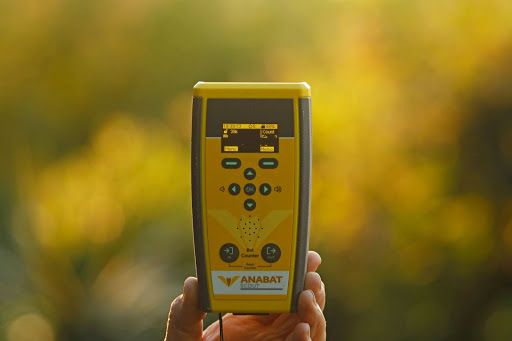
Firstly, it is worth noting just how lightweight (at 160 grams without batteries) and easy to hold the Scout is with its handy wrist lanyard and comfortable fit within your hand. These features are particularly important when undertaking long surveys and holding other equipment such as a clipboard for instance.

The OLED display screen is small, but bright, so key information such as peak frequency and time is easy to note in the dark. With just key information visible, the screen does not become too “busy” unlike some detectors, which in some circumstances is a real advantage as it avoids too much distraction. The buttons all glow in the dark, which we found very useful once it had become completely dark, as it kept navigation simple, without having to use a torch.

One of the Scout’s most handy features are the in/out bat counter buttons which enable you to easily tally the number of bats recorded coming out and back into a roost, without the need to look away to make notes and perhaps miss bats. The counter also time and date stamps and geotags each count (CSV file output), so saves you having to manually note this data.

The Scout has a transect mode which notes a GPS coordinate every second so maps out your route as you walk it. It also logs another GPS coordinate for every bat recording made which produces detailed transect maps.

We found that the adjustable volume control was very good and loud enough when needing to compensate for background noises such as a passing lorry.

Also noteworthy was the Scout’s ability to record voice notes. Once it has become fully dark or if you are surveying and need to keep your eyes fixed on bat watching, then the ease of just speaking into the device to add survey notes or further information is very helpful.

The Scout was very productive at picking up all the bats we encountered during the evening (although sometimes a brown long-eared emerged without calling and was missed). The auto-heterodyne tuning to the peak frequency was superb and saved much time. On a few occasions, we switched to manual heterodyne which enables you to adjust the frequency by moving the up and down arrows. This setting would be useful when first teaching beginners. The Scout’s range is also excellent, which was demonstrated when a high flying noctule was picked up probably over 30 – 40 meters away.

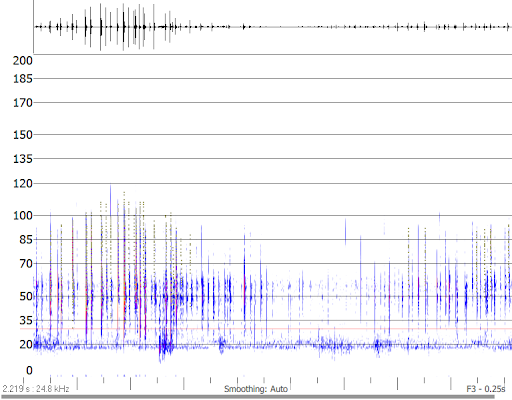
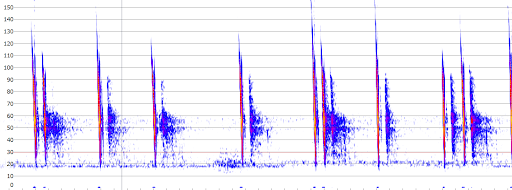
Two recordings taken on the Anabat Scout and visualised through the Anabat Insight Software.

The recordings were always clear through the built-in speaker, although there is also the option to attach a 3.5mm headphone jack. All recordings come with GPX track files attached. This gives accurate GPS data, that when viewed on the free software: Anabat Insight, a .KML (Keyhole Markup Language) file can be generated using Google Earth which will show your route with location tags for each bat recording.

All recordings were stored on an SD Card (recommended min: 32GB and max 512GB) and then output via WAV (Full spectrum) and Anabat sequence files (Zero Crossing).

Battery life lasted roughly 10 hours on 2 x AA (NiMh, Alkaline or Lithium) batteries with the remaining memory space and battery life displayed on screen, so we could keep a check during the evening.

Our Opinion

The Anabat Scout is certainly one of the easier to use, professional bat detectors available. It is highly accurate with its triggers and by being so lightweight and practical it makes for an ideal choice for both ecological surveyors and keen naturalists alike. The Scout has been designed with the needs of surveyors in mind and even those new to bat detecting, will find it simple to use and highly rewarding.

The main limitation found was that the Scout does not display full spectrograms like the Anabat Walkabout, therefore beginners particularly, may not find this detector so helpful for learning the differences in calls and identification in the field.

Overall, we feel the Scout offers very good value as an active detector that will fulfill the needs of most ecological surveyors. Its advantage of being incredibly easy to use and get to know, makes it fantastic for beginners, subcontractors and educational purposes also.


The Anabat Scout can be found here. Our full range of active bat detectors can be found here.

If you have any questions about our range or would like some advice on the right product for you then please contact us via email at customer.services@nhbs.com or phone on 01803 865913.