Five ecology questions you can answer with a Nikon Forestry Pro Rangefinder

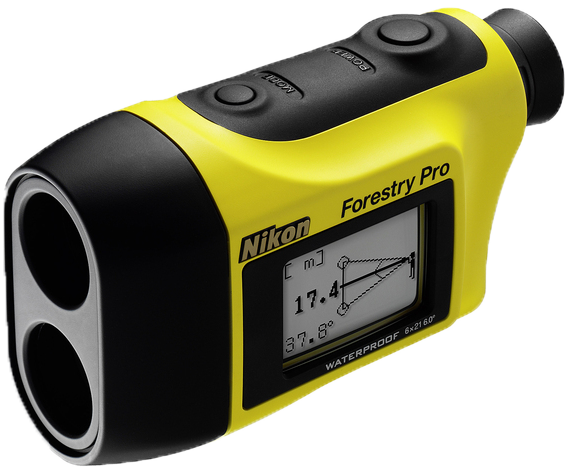
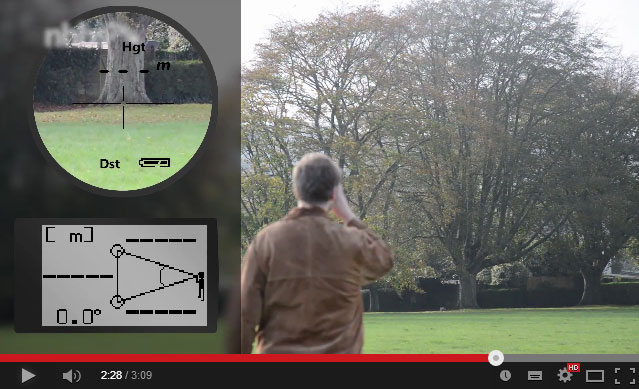
The Nikon Forestry Pro Rangefinder is a hypsometer – a combination of clinometer and laser rangefinder (jump straight to our video explaining how to use it). They are incredibly useful for ecologists and field biologists – here are five commonly encountered survey measurements you can quickly and accurately use a Forestry Pro to answer:

Nikon Forestry Pro
The Nikon Forestry Pro Laser Rangefinder and Clinometer


1. How tall is that tree?

Foresters, or forest/woodland surveyors, commonly use a clinometer to measure the height of trees. This data can provide important information on tree growth rates, habitat structure, and timber volume.

2. How high is that bat roost entrance?

For bat workers and researchers, determining the location and height of roost entrances is a vital part of surveying the location of colonies, along with preferred habitat characteristics. The height of a bat box or artificial roost may also need to be measured, and the clinometer makes this possible without the need for a ladder and tape measure.

3. What is the slope of that hill?

You can use the clinometer function to determine the height and slope of an area of land such as a hill or mountain. They can also be useful for marine biologists and oceanographers for measuring changes in slope on beaches and dunes.

4. What’s the distance between these [two things]?

The laser rangefinder function can be used to measure distances between e.g. a hedge and windturbine or a house and a treeline. It is a particularly useful way of taking a measurement from Point A (where you are) to a Point B that you have a line of sight to but can’t directly access.

6. How tall is my colleague?

Ok, so maybe this isn’t something that you are likely to need (or want) to measure. But we wanted to see how the Forestry Pro managed with relatively modest heights and close distance (are the cows small or far away?). At its minimum operating distance of 10m it had no problem measuring a height of 150cm, demonstrating that this combined clinometer and laser rangefinder is suitable for measuring even small differences in height and inclination.

Why not take a look at the Forestry Pro in action?

Forestry Pro

Our ten favourite (and free) apps for wildlife lovers

Title Image

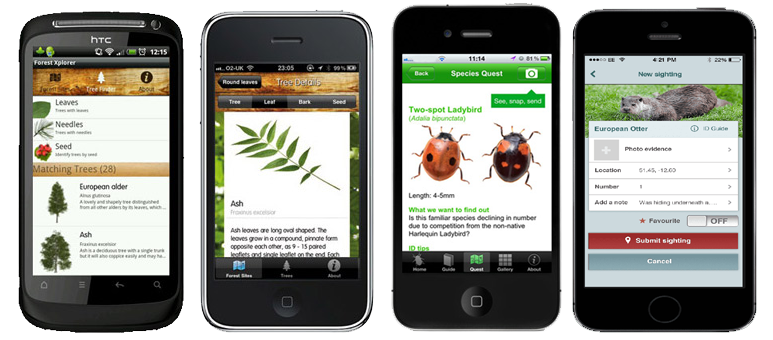
These days there’s an app for everything and everyone. For those of us with a passion for nature and the outdoors, they provide a fantastic way to improve our knowledge and identification skills, record and share our findings and even contribute to scientific research. We’ve compiled a list of our ten favourite (and free) apps for wildlife lovers. Most of these are designed for UK users, but if you’re based in other countries, have a dig around at the App Store or on Google Play; there’s bound to be something there to inspire you.

All of the apps listed are available for iPhone and Android and they’re all free. So if you’re needing some inspiration to get outside and start exploring, look no further.

Project Noah

Apps for Wildlife Lovers - Project Noah

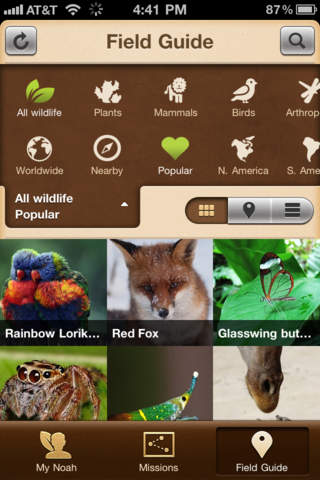
Explore and document wildlife wherever you are in the world with this educational app. Discover new organisms, record and share the specimens you find and help scientists collect important ecological data.

Birdtrack

Apps for Wildlife Lovers - Birdtrack

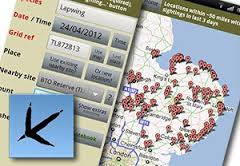
Produced by the British Trust for Ornithology, BirdTrack lets you create logs of your bird sightings and create year and life lists. View your local hotspots and see what species have been seen in your area.

BatLib

Apps for Wildlife Lovers - Batlib

The BatLib app contains ultrasonic calls of the most common European bat species, transformed to a sound that you can hear. Extremely useful to compare with the sounds heard using your heterodyne detector and a great tool for those new to bat detecting.

Nature Finder

Apps for Wildlife Lovers - Nature Finder

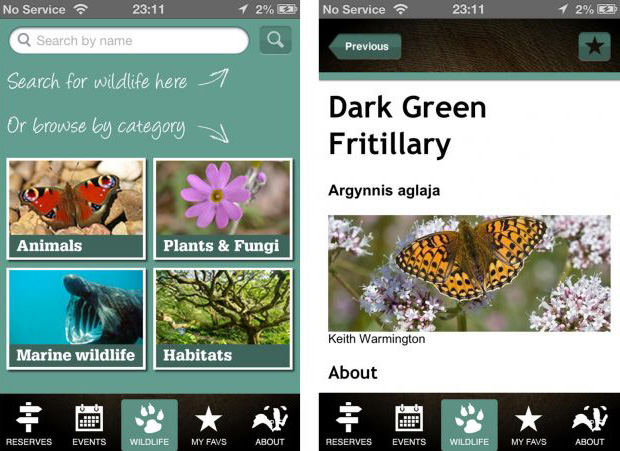
The Nature Finder app from The Wildlife Trusts is a brilliant way to plan your wildlife excursions and learn about the animals you see while you’re there. It includes a map of more than 2000 nature reserves, lists of events, information on UK wildlife species and a directory for all 47 Wildlife Trusts.

Mammal Tracker

Apps for Wildlife Lovers - Mammal Tracker

Identify and submit your records of mammals when you’re out and about with this mammal tracker app and contribute to the Mammal Society’s mammal population map of the British Isles. Submit a photograph if possible so that mammal experts can verify your sighting.

iGeology

Apps for Wildlife Lovers - iGeology

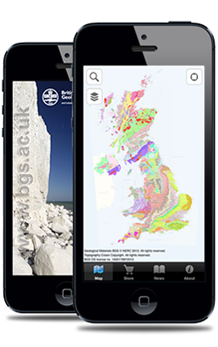
Discover exactly what’s beneath your feet and how the hidden geology affects the landscape you see with this app from the British Geological Society. Includes over 500 geological maps of Britain, available to view in 3D or from a birds-eye view.

ForestXplorer app

Apps for Wildlife Lovers - Forest Xplorer

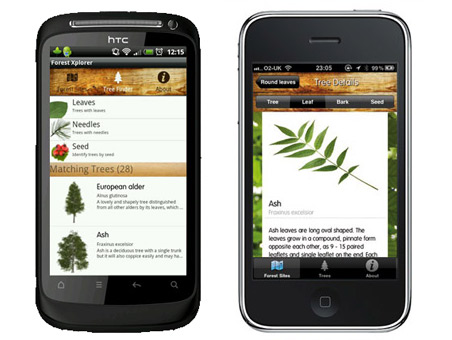
Find out more about the trees around you with this app from the Forestry Commission. As well as a picture gallery and tree identifier you can download trail maps, see events happening in your local woodland and share your findings with your friends via Facebook or Twitter.

PlantTracker app

Apps for Wildlife Lovers - Plant Tracker

Join forces with the Environment Agency, the University of Bristol and the Centre for Ecology and Hydrology to help map some of the UK’s most problematic invasive plants. Learn how to identify these species and submit geo-tagged photographs whenever you come across them.

OPAL Bugs Count

Apps for Wildlife Lovers - Opal Bugs Count

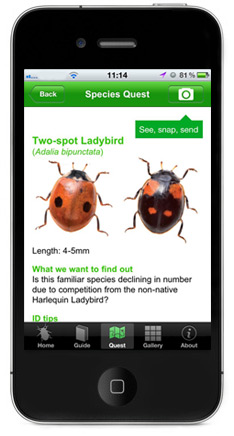
Be a part of the nationwide bug hunt with this Bugs Count app. Learn about common groups of bugs, contribute to scientific research by taking part in a Species Quest and view the beautiful gallery of bug images from the Natural History Museum.


How to photograph a grass snake with a Bushnell X-8 trail camera

This summer, NHBS customer Professor Graham Martin tested the functionality of his Bushnell X-8 trail camera, a great entry-level trail camera for anyone interested in capturing footage of their local wildlife. Trail cameras aren’t just for night snaps – they work night and day using either the trigger function (1 sec for the Bushnell X-8), where the movement of the animal activates the camera’s trigger, or with a time lapse function, where it takes photos at a defined interval (from 1 – 60 minutes).

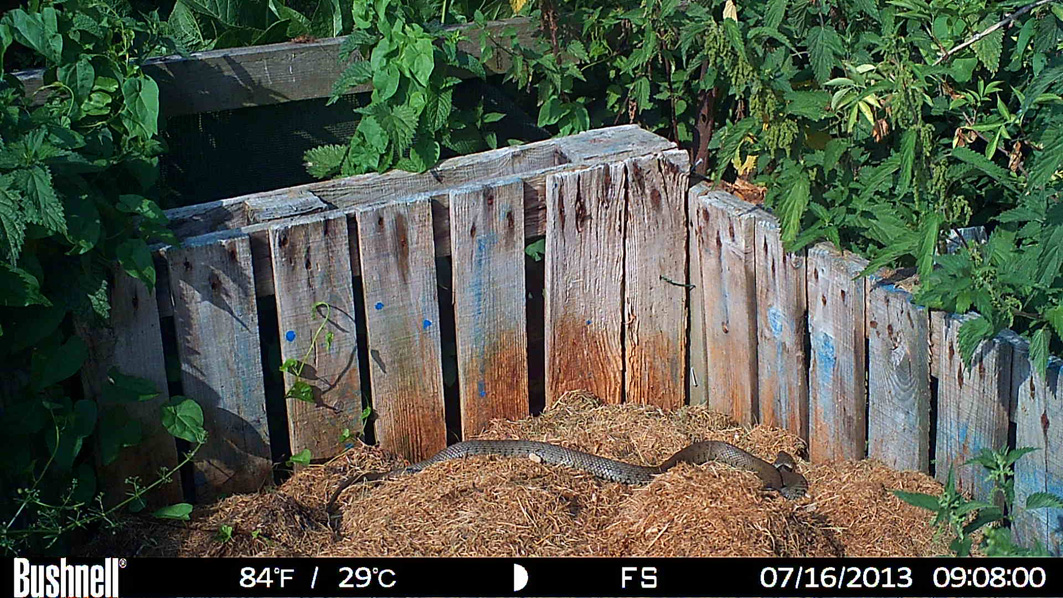
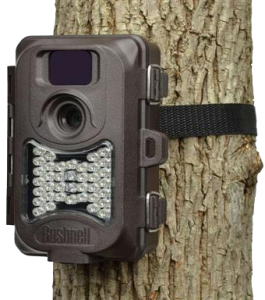
Bushnell X-8 Trail CameraGraham has a very warm compost heap which is where these two photos were taken, and he had spotted the grass snake basking – it was too quick for the trigger (0.7 seconds), but he managed to snap it using the time lapse.

The Bushnell X-8 can take video or still images, has a 36 LED 15m night vision flash, day/night autosensor and a temperature recorder, plus many more great features – the only thing missing is that it doesn’t record sound, so you can only make silent movies. If you want to hear what sort of noises your subjects make as they pass, audio record functionality exists on other cameras in the Bushnell range, like the Bushnell NatureView.

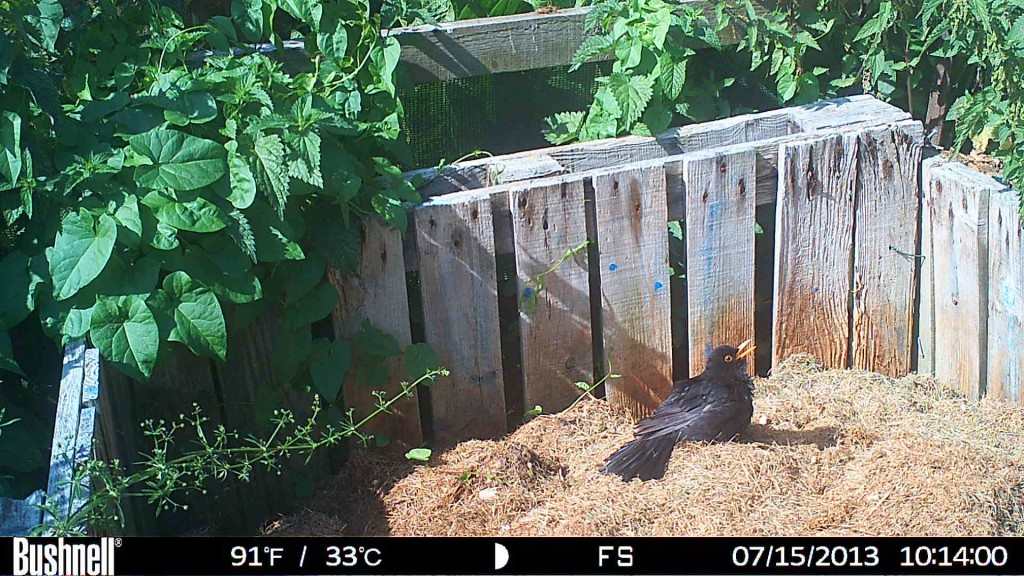
We were particularly impressed with these photos, they really show the diversity of wild animals you can photograph with an entry-level trail camera.

Blackbird - taken by Professor Graham Martin with a Bushnell X-8 trail camera


Check out NHBS’ range of Bushnell Trail Cameras


Mushroom Identification: Pro Tips from Top UK Mycologists

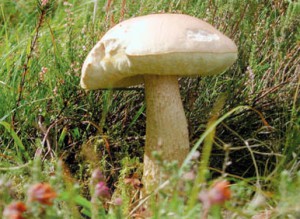
Photo: Leccinum holopus by Geoffrey Kibby, from British BoletesSeptember is upon us with morning mists and a slight chill in the air… it must be mushroom time! Around this time of year, books on mushroom identification and natural history appear with almost as much certainty as the fungi themselves. Two of our favourite mycologically-minded authors, Peter Marren and Geoffrey Kibby, give some useful and interesting tips for the keen mushroom hunter.

(Note: we cannot stress strongly enough the caution with which you should approach mushroom identification. Some mushrooms are edible, but some are deadly, and identification can be very difficult. As Geoffrey Kibby says below, if in doubt, throw it out!).

First up is Peter Marren, whose forthcoming book, Mushrooms, is the first in a new series of natural history publications, the British Wildlife Collection

Peter Marren’s tips on mushroom identification for the beginner

There are an awful lot of fungi – 2,400 species in the latest field guide and that’s just the larger ones. Fortunately, perhaps, most of them are rarely seen. There are only about a hundred really common ones, and they are the ones you need to know.

  • Forget about the ‘little brown fungi’ for now. Try getting to know an accessible group such as the waxcaps or the boletes, or the puffballs and their ‘relatives’. It will teach you a lot about the differences between species and the places to look for them.
  • Join a fungus foray organised by your local fungus group or wildlife trust, or, better still, attend a weekend course at a field centre. Direct contact is better than books.
  • Picking mushrooms does no harm. They are not plants but the fruit bodies of an organism living in the soil or in wood. Apples on the tree, as it were. And you will need to bring back specimens of fungi that are impossible to identify in the field.
  • Gathering and cooking wild fungi is great fun, especially as shared fungus feast. But never eat any that you cannot identify with confidence. There are a lot of poisonous fungi out there.
  • For fungi an x20 magnification hand lens is useful. At some point the dedicated forayer will need a microscope, but that, as they say, is a whole new ball park. Or playing field, as they are also known.

Peter Marren on recommended books for mushroom identification…

There are not many read-through books about fungi. I enjoyed Patrick Harding’s Mushroom Miscellany, a series of short chapters on all aspects of fungi, and the New Naturalist volume Fungi by Brian Spooner and Peter Roberts is all-embracing and thorough, but not for the faint-hearted. From Another Kingdom, published by the Royal Botanic Garden Edinburgh is an informal seminar on matters mycological, including ‘fungal monsters in science fiction’. The best field guide in my opinion is still Marcel Bon’s Mushrooms & Toadstools, first published back in 1987, although it needs updating. Paul Sterry and Barry Hughes’ Collins Complete Guide to British Mushrooms and Toadstools has the best colour photographs.

…and on his new book, Mushrooms

Mushrooms is my personal take on the world of fungi in Britain, about the pleasures of searching for mushrooms and toadstools, and why they matter. I have written it as a narrative, in current TV parlance as a ‘journey’, beginning with the extraordinary diversity of fungi and the ways in which they exploit the natural world to the history of the fungus foray and the controversy over gathering wild mushrooms for the pot. In the process I zoom in on the nature of names, both Latin and English, at the places which hold the greatest diversity of fungi, and our attempts to conserve rare and vanishing fungi. It is, I hope, a refreshing and amusing look at this ‘third world’ of life, written without jargon and in lively style. I hope it can be read with pleasure by anyone. It is full of lovely colour photographs.
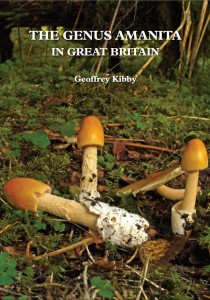
 

The Genus Amanita in Great BritainNext up, Geoffrey Kibby, whose new photographic identification guide to the Genus Amanita is the fourth in a series of full colour fungi identification monographs, and is out now. In the following article Kibby discusses the finer points of mushroom identification:

The joys and tribulations of fungus identification

Firstly, let’s be quite clear: there are an awful lot of fungi! Just including those generally referred to as the larger fungi – those just a few millimetres across all the way up to species that can reach a metre or more – there are around three thousand species recorded in Britain.

Whether we call them all mushrooms, as the Americans tend to do, or toadstools as we often do in Britain, they form a huge and amazing array of species. The terms mushroom and toadstool are of course very vague with no actual specific scientific meaning, encompassing both edible and poisonous species.  With such a large number of species to choose from, identification can be both difficult and frustrating, and if edibility is a factor then obviously getting a correct identification is even more important; a mistake can be, and sadly has often been, fatal.

General field guides are the usual starting point for most amateurs just starting out in mycology (the proper term for the study of fungi) but there is an obvious problem here: the number of species included. Many guides have just a few hundred species that may not cover enough of the species you will find. More comprehensive ones usually have about 1000 to 1500 species and are accordingly more useful. The largest guide yet produced (Collins Fungi Guide by Stefan Buczacki with beautiful watercolour paintings) has around 2,400 species, but that does not of course guarantee that you will produce a correct identification. Indeed too many choices might be as confusing as too few. Then there is the choice of whether to get one with photographs or paintings (both have their different advantages).

Many species can only be distinguished with certainty by using a microscope to examine their spores and other microscopic structures, or by the application of specific chemicals to produce colour reactions. More technical monographs are needed for these.

A field guide can only take you so far and show you a representative sample of a particular species. Fungi vary much more than most organisms and you will need to learn them in all their many and varied forms before you can confidently say you know a species well. The best way to learn is to get a good guide and then take it along on an organised fungal walk (or foray as they are usually called). Here you will usually be led by an experienced expert who can show you first hand the important features of each species as well as their particular ecology. The latter can be vital in fungus identification. Many fungi grow in association with specific trees or other plants and knowing this can help you to identify or even predict the species you may find.

By going on regular fungus walks, or perhaps joining a longer course over a weekend or a week you will gradually learn to recognise the commonest species which you will see on almost every walk and start to learn some of the more uncommon species also.  Almost every county has a mushroom group and there are also larger, country-wide mycological societies such as the British Mycological Society or the Association of British Fungus Groups. These organisations can put you in touch with your local group as well as organising forays and workshops of their own and producing useful publications. The journal Field Mycology, which I edit for the BMS, is aimed at the beginner all the way to the specialist and mainly deals with larger fungi.

Comparing the actual fungi you find with the photos or paintings in your field guide will soon show the value of owning more than one guide. Each guide may have a different list of species and some will have better illustrations of a particular species than another. Most mycologists soon build up a small library of picture books! Using a digital camera to photograph specimens or trying your hand at making paintings of them and building up your own catalogue of illustrations is highly recommended also. Once you are more confident of the commoner species then there are a number of more specialist works, usually dealing with a specific group of fungi and this is often the best way to really make progress, by concentrating on a particular group which you find especially attractive or interesting.
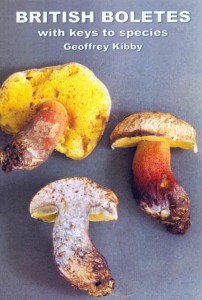
British Boletes: With Keys to Species - Geoffrey KibbyI would certainly recommend the boletes as an ideal group to begin with. They are often large, very brightly coloured and with good field characters and include a number of excellent edible species. Almost all the species can be identified in the field with a little experience and a good reference work. After 48 years of studying fungi the boletes remain among my favourites and many other mycologists will say the same. The book on boletes which I have produced, British Boletes, aims to provide easy to use keys based mainly on field characters and photographs of the vast majority of the British species. My books tend to focus on the most widely studied and popular groups of fungi. Hence I have titles covering Russula (The Genus Russula in Great Britain), Agaricus (The Genus Agaricus in Britain) and my most recent work The Genus Amanita in Great Britain. All are available from NHBS. Further titles will be forthcoming in the next few months, in particular one on the genus Lactarius, commonly called Milkcaps and further down the road an illustrated field guide to 1200 species of larger fungi.

Geoffrey Kibby’s top tips for safe mushroom identification

Many people come into mycology via a desire to try eating something a little more exotic than the shop bought mushroom. There are many edible species and they can have tastes and textures quite unlike the cultivated species. Hunting for edibles can be a wonderful experience but there are several rules to follow if your hunt is to have a happy outcome:

  • Make sure you are allowed to collect, many woodlands or parks have restrictions on picking.
  • Obey any local rules on how many you can pick and try to leave some for others to admire, don’t ‘vacuum’ the woods of everything you see.
  •  Collect only specimens in good condition; old or rotten specimens will not make a good meal and can cause serious stomach upsets.
  • MOST IMPORTANT OF ALL: you must be absolutely sure of your identification, some mushrooms are deadly and a mistake can quickly become fatal. If you are a beginner then always get the advice of an expert. Stick to a few, unmistakable species. IF IN DOUBT, THROW IT OUT.
  • Always keep aside a specimen of anything you collect to eat and if it is a species you have not eaten before then sample just a little—even good edibles can cause upsets in some people (many people can’t eat strawberries or nuts for example).

Mycology, or mushrooming, can appeal on many levels, from the simple pleasure of seeing strange and wonderful organisms to the intellectual challenge of trying to identify them and understand their intricate life cycles. But the starting point is, and always will be, a good book!

And finally… hand lenses to help with mushroom identification

Last week we published a blog post with advice on purchasing a hand lens, plus a useful comparison chart showing the various lenses you can buy from NHBS. 

Read The NHBS Guide to Buying a Hand Lens


New user info for the Echo Meter EM3 Bat Detector from Wildlife Acoustics

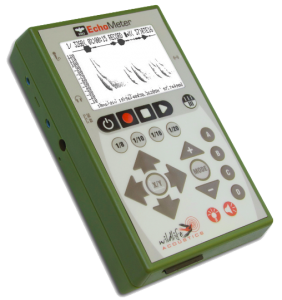
We recently received the following information from Wildlife Acoustics to help you get the most out of your Echo Meter EM3 Bat DetectorEcho Meter EM3


Dear EM3 User,

Congratulations on your purchase of the Wildlife Acoustics Echo Meter EM3 Bat Detector! We think the EM3 represents the most advanced technology available in a handheld detector and provides unparalleled functionality at a fraction of the price of other professional detectors. A piece of equipment with this much technology does, however, have a learning curve. To help you master the skills necessary to get the best performance from your new detector we would like to share some tips and best practices (and common mistakes) we have learned since its release. We think the following information will help you get the most out of your EM3.

Update your firmware!

We are constantly making improvements to all of our products via firmware updates. These improvements can include important bug fixes as well as new functionality or requested features. We provide these updates at no charge to add further value to our products. Please go to www.wildlifeacoustics.com/downloads to download the latest version of firmware and read the release notes on what has changed. The current firmware version loaded on your Echo Meter can be seen on the top left of the “splash screen” at start-up. At the time of this email we are on version 1.1.2.

Introducing a whole new approach to zero crossing

With this email we would like to introduce a free new software we have developed called Kaleidoscope and a whole new approach to zero crossing. Kaleidoscope converts WAV or WAC files into zero crossing files with incredible quality and speed. In fact the results are superior not only to any existing zero crossing conversion software but they are also superior to what would be possible with native zero crossing. Don’t just trust us, try it and let us know what you think!

The conversion is incredibly fast. It can convert several nights of data in just a few minutes. This represents a 30x improvement over our existing WAC2WAV software, which was on par or faster than any other conversion software.

Kaleidoscope can even convert zero crossing to WAV (yes you read that right). This is a great way to be able to convert your Zero Crossing files into audible WAV files. Kaleidoscope is available on the download page of our site (see the link above). It is currently in Beta and will ultimately replace our WAC2WAV conversion software.

What about native zero crossing?

As you know the EM3 also has the ability to record zero crossing files natively and you might be wondering how that compares to full spectrum files converted to zero crossing using Kaleidoscope. We feel the results from Kaleidoscope are superior to native zero crossing, whether it be on the EM3 or any other zero crossing recorder. The zero crossing results from Kaleidoscope are so good and the conversion is so fast that we are now recommending this as the best approach. Feel free to test this out if you need convincing. You can record simultaneously in WAV and zero crossing, convert the WAV files to zero crossing and compare the results.

If you do prefer to stick with the native zero crossing, here are a couple tips to get the best results. Always be sure to adjust the zero crossing sensitivity (just hold down the speaker button until you enter FDAdj made). The default setting is quite high and will not pick up many bats. Also, always adjust the setting using headphones. If you adjust using the speaker, the feedback from the speaker will result in a much higher than optimal setting. You want to set the level just to the point where you only hear a little noise rather than a constant din of noise. This should be three or four squares on the display.

We have found that the GPS attachment for the EM3 can introduce noise into the zero crossing circuit. This necessitates setting the sensitivity up a couple squares. For best zero crossing results with the GPS please consider our recommendation to use WAC and convert using Kaleidoscope. As an added bonus, when using the GPS in WAC mode, you will retain not only the location of every recording but the entire transect path. Kaleidoscope can output the recording locations and the path during the conversion process into a KML file compatible with Google Earth!

Try Real Time Expansion (RTE)!

We have included three monitoring modes in the EM3. Heterodyne and Frequency Division were included for those familiar and comfortable with those technologies. We also developed our own novel technique for monitoring called Real Time Expansion. This technique provides all of the frequency and timing information of the original call. It has superior tonality to Frequency Division and does not require tuning like Heterodyne. We consider it the best monitoring method on the market. If you have been using Heterodyne or Frequency Division, we strongly encourage you to try RTE.

Screen adjustments

Remember that you can adjust both the brightness and contrast of the screen to suit any lighting condition and preference. If you momentarily press and release the Display button, you can then adjust brightness using either the Plus and Minus buttons or Up and Down buttons. The contrast is adjusted using the Right and Left Arrow buttons. You can also switch between “black on white” and “white on black” display modes by holding down the Display button.

Getting back to the present

We have seen a common confusion where users are monitoring for bats while scrolling back through the spectrogram buffer to look at past calls. When you are viewing calls at or near the end of the buffer and a bat comes along the end of the buffer begins to disappear as new data is written to the front. This can give the illusion that you are viewing “the present bat” because the buffer begins to move making the spectrogram scroll. To get “back to the present” to see the new bat calls being written to the spectrogram, just double click the X/Y button.

Use headphones for best sound quality

The speaker on the EM3 was included for convenience and can provide an excellent monitoring experience, but for the very best quality, we encourage you to try monitoring with headphones. Headphones have better fidelity, greater volume and more bandwidth than the speaker so they really bring the bat playback to life.

Always use the EM3 with charged batteries

The EM3 monitors battery level and automatically shuts down when the battery is near depletion. This prevents the circuitry from getting into a state where it is not appropriately powered resulting in erratic behavior. But if you power up the unit with nearly depleted batteries, it will exhibit this erratic behavior before the detector gets the chance to determine that the batteries are nearly depleted. It will be stuck in bad state and you will not be able to power down without removing a battery. Batteries tend to regain voltage over short durations of no use. This means that if you do not charge the batteries after using them and then power up the detector after some time, the batteries will have regained just enough voltage to power up but not enough to supply proper power. Also be aware, that the EM3 is never truly off, but in a deep sleep state so as to be able to retain the spectrogram buffer and clock. After a few weeks the batteries will deplete even after no use.

If you get stuck, reset

If, while using the EM3, you find that you have made a bad setting or gotten into an unknown state you can always reset the unit back to factory defaults. You simply pop a battery from the battery tray and reinsert while holding down the left button. Continue holding the button until the splash screen appears. Sometimes an apparently broken unit can be something as simple as the brightness having been turned quite a low at night appearing as though it won’t power up in the morning! This procedure would reset the brightness setting to default, apparently bringing the unit back to life.

Happy detecting.

Wildlife Acoustics, Inc.

Available now from NHBS

NHBS Equipment Team:

+44 (0)1803 865913

customer.services@nhbs.co.uk

Bushnell XLT Trophy Cam Trail Camera: Nick Baker’s review and video footage

Nick BakerNick Baker, NHBS Ambassador, has been trying out the Bushnell XLT Trophy Cam Trail Camera. Here are his initial impressions:
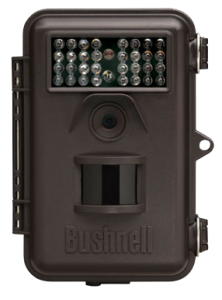
Bushnell XLT Trophy Cam Trail Camera

These Bushnell trail cameras are about as good as you can get for the money, and using them is rather addictive too!

The XLT (right)  was the model I tested – the camera comes as an all-in-one small weatherproof box, which is both lightweight and easy to carry around and position. I’ve used mine for professional survey work such as attempting to identify bird nest predators as part of an RSPB Ring Ouzel survey, identifying the occupancy of Badger setts as well as simply leaving it up in the garden to find out who has been defecating on my lawn and messing up my flower beds (in the process identifying which of my neighbours cats use my garden – all six, it turns out!).

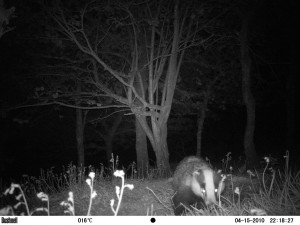
Badger - taken with Bushnell XLT Trophy Cam Trail Camera by Nick Baker, 2011The camera shoots both still pictures (eg. left) and moving images(eg. below) and has a screen which allows reviewing of the images in the unit. All the image data is stored on an SD card and the unit is powered by 4-8 AA batteries.
Sensitivity and trigger delay are the only issues: making the camera less sensitive stops it being triggered by small movements – moths, mice, wind-blown vegetation etc. – but if the camera is triggered by an animal walking past quite close, then the one second delay means that by the time the trigger kicks in you might just get the tail end of the moment! This is easily overcome if you are setting it along paths or trails by making sure the camera looks down the likely pathway rather than across it.

All in all this is a fantastic good value entry-level trail camera – if you want to increase the picture quality and eliminate the ‘glow’ of the LEDs (some animals seem to be aware of the red glow produced by the 32 red LEDs) at night then the HD colour version is worth considering.

Roe Buck captured on a Bushnell XLT Trophy Cam Trail Camera by Nick Baker, 2011

Click here to view other Nick’s other Bushnell videos on the NHBS Vimeo channel

Save £54 on the Bushnell XLT Trophy Cam until 31/12/11  

Buy now and save

Hibernation time – a quick guide to safe overwintering for your garden visitors

Beneficial Insect Box
Beneficial Insect Box - overwintering for ladybirds, lacewings etc.

As the days grow shorter and cooler, many animals are beginning to look for a safe place to spend the winter.

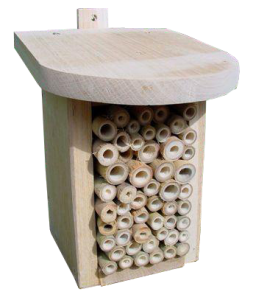
The best way to cater for most hibernating animals is simply not to tidy your garden too much – a pile of leaves at the back of a flower bed provides a great place for many insects as well as some larger animals (including hedgehogs) to bed down for the winter. However, if you would like to go a step further and provide the animals in your garden with tailor-made winter homes then NHBS can help. For insects, including many important pollinators, predators of garden pests, and species that are important food items for bats, frogs, and many small mammals, NHBS offers a range of nesting and overwintering boxes.

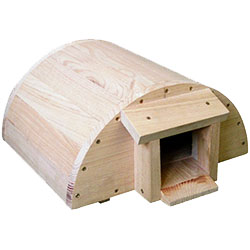
Hedgehog Hibernation Box

For popular garden visitors like hedgehogs, and amphibians such as frogs and toads please visit our amphibian and mammal nest box pages.

Bat populations have fallen dramatically in recent decades and one reason for this is the loss of suitable hibernation sites (or hibernacula). NHBS offers a wide range of tailor-made bat hibernation boxes including wooden boxes such as the Double Chamber Bat Box – and the new Triple Chamber Bat Box which we introduced last week here – as well as more durable woodcrete colony hibernation boxes such as the Schwegler 1FW.

Small Bird Nest Box
Small Bird Nest Box

Finally, spare a thought for those birds that do not migrate south to warmer areas. Although most of us only consider bird boxes as being useful during the summer in fact they are frequently used by roosting birds during the long cold winter nights. Putting bird boxes up in the autumn gives birds plenty of time to find them and increases the chances that your box will be used next spring.

Read our guide to choosing the right nest box for birds

A Field Guide to Monitoring Nests and The Norfolk Bird Atlas reviewed in Birdwatch Magazine

A Field Guide to Monitoring Nests


A Field Guide to Monitoring Nests jacket image“The best of the nest”

The introductory sections to this excellent guide cover current legislation, the BTO’s Nest Record Scheme and advice about finding and monitoring nests without affecting the outcome of the breeding attempt. Importantly, it also explains why there is a need to monitor nests. Along with survival rates, breeding success determines whether a species increases or decreases in population. Monitoring helps explain some declines and contributes towards the creation of conservation initiatives.

The bulk of the book is made up of species accounts in the traditional field-guide format, with one or two pages per species. A total of 146 breeding birds is included, with Schedule 1 species – rarer birds whose nesting sites cannot be approached without a licence – omitted. For each, there is a map, a summary of the dates when eggs and young can be found, colour pictures of the adult, eggs and newly hatched young, and details of breeding ecology and tips on the best methods for finding and monitoring nests.

The BTO hopes that this guide will encourage more birders to become involved in nest recording for conservation purposes. The numbers of nests being monitored has been dropping rapidly for some species, particularly open-nesting passerines, which could hinder efforts to understand why their populations are in decline. However, the comprehensive information covered in this guide will be of interest even if you do not want to take part in nest recording. It may even help to change your mind!

Ian Woodward

Birdwatch Magazine – September 2011

Available now from NHBS


The Norfolk Bird Atlas


The Norfolk Bird Atlas jacket image“Accounting for Norfolk’s Birds”

Arguably the premier birding county in the country, Norfolk already has a detailed and highly readable avifauna to its credit. The Birds of Norfolk team of co-authors incuded county stalwart Moss Taylor, who links up in this new volume with the British Trust for Ornithology’s John Marchant to present the results of eight years of summer and winter mapping undertaken by an army of fieldworkers.

Surveying for the last Norfolk Atlas ended in 1985, so there was clearly a need for an update – a lot can and has changed in two decades. Geoffrey Kelly’s The Norfolk Bird Atlas also only covered breeding species, so this latest work adds significantly to knowledge of the county’s birds, with current winter distributions also fully mapped.

The premise, planning and methods are set out in full in 18 introductory pages which precede the meat of the book, the species accounts. Some 270 species are covered: those present year-round typically have three maps to show summer and winter ranges and changes since the previous atlas, while summer visitors have range and change maps, and those present only in winter or recently added as breeding species get a single map accordingly. The historical and current status of all are described informatively in an accompanying narrative.

There is a wealth of information to be absorbed from the accounts and maps, and to set the scene the reader could do worse than turn to John Marchant’s overview of Norfolk’s birds at the back of the book. Here, we learn among many other things that the county was home to about 900,000 pairs of breeding birds of 135 regular species during the survey period; that there were some 3.1 million wintering birds in the county of 183 regular species; that Woodpigeon was both the most abundant breeding and wintering species; that the county holds more than 50 per cent of the country’s breeding Marsh and Montagu’s Harriers; and that Red-backed Shrike, Wood Warbler and Winchat have all been lost as breeding birds since the last atlas, but up to 14 more species probably or definitely nested for the fist time in the same period.

All of this fascinating information is presented in a well-designed package, with double-page species spreads enlivened particularly by an excellent selection of illustrations and colour photos, many of the latter by David Tipling. Branded ‘A BTO Bird Atlas’, the format is presumably a template for a series of reinvigorated county atlases by the Norfolk-based Trust, which 20 years ago moved its headquarters to Thetford.

As gathering of data from observers becomes faster and more efficient through online schemes such as the BTO’s BirdTrack project, as well as through dedicated grid-based surveys such as this, it may be that the relevance of mapped atlases like Norfolk’s new tome will overtake that of conventional county avifaunas.

Dominic Mitchell

Birdwatch Magazine – August 2011

Available now from NHBS


The NHBS Guide to choosing a bird nest box

Choosing a nest box for birds

Nest boxes are an increasingly important tool in helping to reverse the decline of many bird species. With such a broad range of nest boxes available, we’ve put together a table to help you to find the right nest box regardless of where you live and what species you’d like to help.

Check out the species-by-species table of nest boxes

Five FAQs About Attracting Birds To Your Nest Box

Guide to Mist Nets

Please note, the sale of mist nets is restricted to those with an appropriate licence or permit. Please provide a copy when ordering.

NHBS offers a range of mist nets to meet specific requirements when catching bats or birds.  All of our mist nets are manufactured to high standards and feature the following advantages;

  • Net design is based on more than 30 years experience.
  • All nets are made from the highest quality nylon and polyester netting.
  • All nets are black and UV sun-protected; the material and colours are durable and long-lasting.
  • The special knots used in all our nets help to prevent the loops and shelf strings from moving.
  • The construction with positioning strings prevents wind shift of the netting.
  • Each net comes with a cotton bag.

Mist NetsNew Loops

All designs of net have recently been upgraded with new loops.  Net loops are now marked with an indelible serial number to help track nets used illegally.  The serial number is placed on one of the colour loops and on the product label as well.  The new mist net loops are longer and stronger than previous designs.  Top loops are colour-coded and equipped with stoppers to make fast setting easier.  The new loops are also compatible with the telescopic mist net pole .

Understanding the Terminology

Net Dimensions

All net dimensions are given without loops and stretched to a standard tension.  Nets of 3m are ideal for paths and small clearings, whilst nets in excess of 15m in length require careful setting.  You should also ensure enough competent helpers are on hand to deal with large numbers of catches experienced by large nets.

Mesh Size

This is measured by one side of the square mesh, e.g. 16mm refers to a 16 x 16mm square mesh.  The mesh size should be ideally suited to your chosen target species.  If the mesh size is too small, the bat or bird may escape.  If the mesh size is too large, the bat or bird may become overly tangled in the net.  You also risk catching non-target species.  Target species for each net are provided in the product description.

Shelves

The number of shelves (given in the product description) refers to the number of rows of shelves on the net.  Nets of up to three shelves are tethered on a single shelf strand to prevent wind bunching the netting.  Nets with four or five shelves feature two tethered strands.

Denier and Ply

The denier and ply of a net provide an indication of the thickness, visibility and strength of the net.  Denier refers to the weight in grams of 9000 metres of thread.  Ply refers to the number of threads of a given denier wound round one another to make the fibre of the net.  The smaller the denier and ply, the lighter and thinner the net, e.g. a 70 denier/2 ply net is lighter, less visible, but normally less strong than a 210 denier/3 ply net.  However, differing materials can confound this relationship, e.g. polyester is heavier than nylon so the same denier net will be finer in polyester than in nylon.

Choosing a Mist Net

A mist net must be ideally suited to the target species, location and conditions of use.  To select the appropriate mist net, follow the stages below;

1. WHAT DO YOU INTEND TO CATCH?

Search the product pages to find all the nets suited to your chosen group.  Mist nets have been divided into four groups;

Mist Nets for Bats: includes all species of bats

Mist Nets for Small Birds: includes all small passerines

Mist Nets for Medium-sized Birds: includes medium-sized passerines, waders, small ducks, small to medium terns, small owls, small raptors

Mist Nets for Large Birds: includes medium to big waders, owls, medium to big raptors, medium to big ducks, geese and cormorants.

5-Hole Small Bird Ringing (Banding) Pliers2. CHOOSE BETWEEN NET TYPES

There are several net types to choose between, although not every net type will be found in every group of target individuals.


Ultra Thin Series M Mist Net

These nearly invisible ultra-thin monofilament nylon nets are perfect for catching the smallest birds (e.g. hummingbirds) and small bat species such as Pipstrellus sp.  They are available in two mesh sizes (14 and 20mm).

Series 700P (polyester) Mist Net

These polyester nets are recommended for catching small bats and birds.  They are barely visible and can be used in any habitat, including open areas.  The polyester fibre in UV resistant and does not absorb moisture.  In the morning or after rain, just shake the net to remove droplets.  A well-stretched net has only one layer (no pockets) and bats are less likely to echolocate it than a nylon net.  The polyester is also stronger and more durable than nylon.

Series 700 Mist Net

This classic design of net is deep black, UV stable and softer than polyester.  They can be used for catching birds and bats in all kinds of habitat, including open areas.  They are both popular and effective.

Series 1000 Mist Net

These nets are stronger and more durable than the Series 700 mist nets.  They are ideal for long term use; they remain as strong and as black as new after 500 days of continuous exposure in the field.  They are more visible than the Series 700 nets, so we recommend that they be set in front of trees or bushes to decrease visibility and to increase their effectiveness.  They are very safe for birds and effectively catch small to medium-sized species.

Series 2000 Mist Net

These nets are very strong and durable and are primarily designed to catch relatively big birds.  They are more visible than the Series 700 and 1000 nets so are most effective when used in shadow when the netting is less visible.  The 19mm mesh size nets are most suited to catching birds at night, such as when using recorded calls.

3. CHOOSING SPECIFIC NETS

Once you’ve settled on your chosen net type to catch your target species, you should then consider the dimensions of the net.  The mesh size should be ideally suited to the target species (see above).  The length of the net should suit its location (e.g. path, clearing, open habitat) and the size of catch required.  Make sure there are helpers to properly monitor the whole net.  Consider the height of the net and number of shelves, the type and height of the vegetation in your sample area, as well as light conditions.

4.  ERECTING THE NET

Mist Net Mounting SetFinally, ensure the net is erected properly on suitable poles, such as the telescopic mist net pole.  Nets may stretch over time so if left in place for prolonged periods, they must be tightened to keep the net taut.  Ensure the nets are protected from overstretching – using a Mounting Set with rubber rope can help prevent this.

If you require any further information then please contact us.  Mist nets are for use by trained ringers; you will need to supply a copy of your appropriate licence or permit when ordering.